

 Wilbur and Orville had an easy job of weather forecasting – a glimpse over the field and they could see all they needed to know. A few years later, Bleriot looked over the English Channel and could see the White Cliffs of Dover. A century into flight and now we can even invent the weather we want with programs like HiFi Sim’s Active Sky Advanced, not to mention set up real world weather conditions anywhere in the world as it is right now.
Over the past few weeks I have been flying my PC with this latest edition of what has probably been one of the single most influential programs in flight simulation over the past few years. Let’s take a look at how it performs.
INDEX
The potted version (skip to summary)
The full version (read on)
FIRST LOOK – PROGRAM INTERFACE
SECOND LOOK – INTERACTION WITH FS AND FEATURES
Various screenshots – for those with time
Introduction
What is the weather like right now, right this instant – as I write these words – in somewhere like Timbuktu? No, let’s forget Timbuktu, that’s in the middle of the desert and at this time of day I will hazard a guess at eight eighths sunshine. Let me spin my Google Earth globe and pick a random spot. Hmm, that’s interesting – I picked a small western Pacific island south of Japan – Okinawa Jima. Nearest Airport is Naha. Fire up FSX and take a pair of title pictures for this review. “We’ll take it, don’t bother to wrap it, we’ll fly it as it is.”


On the short hop between Naha (ROAH) and Futenma (ROTM) you can see that the weather isn’t startling. But then again, the first thing to remember about the weather is that most of the time it is just simply average. You can pick a spot on the globe at random and most of the time you’ll have light wind, light cloud… My random shot is no different. Now the beauty of ASA advanced over it’s predecessors is that you can actually go out and find that ghastly weather – to go there if you are of a masochistic persuasion or to avoid like the plague, if you are sensible. Let’s try for something really horrible… Rub the magic lantern… “O djinn of the lamp, show me some terrible claggy weather”
Well as it happens, it is rainy season on the Dark Continent. ASA has thrown up a rainy day in Livingstone – in Zambia I presume?

I wonder what the weather was on July 7th, 2007?

Well how about thirteen layers of cloud between the ground and FL 320? No problem, what do you want, Ice particles in the precipitation? Hail?
This reads like some sort of fantasy perhaps? Well if it helps, the idea behind Active Sky Advanced (ASA) is pretty fantastic. First and foremost, you can use it to select the current weather from anywhere in the world and apply it to FSX in real-time. “So what” I hear the jaded calls from FSX users, “FSX can do that too, and tailor the weather conditions”. True, but the FSX weather engine, whilst very good, is not as flexible as the ASA one.

Read on and we shall see.
Download and Install
The first caveat that needs to be stated is that Active Sky Advanced is also available as an upgrade to owners of the Active Sky X or Active Sky 6.5 versions, so before you buy, make sure you log on to the same shop as where you bought your original copies. The price depends on which version you already own.
But whether you buy this add-on from HiFi Sim’s own shop, or here on simMarket or anywhere else, you end up with a little over 80 MB of zipped data, which unpacks to an only slightly larger amount in its own folder on your hard drive. Download, unzip, install… simple enough procedure and no difficulties need to be expected, although as usual, I must remind the reader to take a look at the downloaded data before doing anything else.
What you get, when you have completed the download, is a zip file. This needs to be extracted to a safe place – and if you are careful, you can save it to a CD or DVD as well. In the newly unzipped folder you will see a “license.rtf” document, a setup.exe and a text file “HOW_TO_INSTALL.txt”. Whatever else you do, it is always advisable to read any text file that accompanies a download, just in case the authors have any last minute information or advice on installing the software.
What you will notice about the installation notes is that there is this statement right at the top of the page:
NOTE: You must have a valid key issued during your software purchase, which will be asked for when ASA runs for the first time. The key entered must be associated with a valid purchase record, and an automatic online activation as well as persistent online login verification will be performed in order to prevent piracy. DO NOT SHARE YOUR Key! Your key usage is logged and any use of ASA from another computer using the same key will de-activate your activation. You can move ASA to another computer up to 3 times.
I have deliberately highlighted that one phrase in red. You will note that Active Sky Advanced requires a connection to the Internet to work. Note that this is for two reasons: firstly you need an active connection to the Internet to get the weather reports and secondly it serves as a security measure. Every time you use ASA, your key is checked against the records on the Active Sky server. This is an effective anti-piracy measure, but you should note that the security check also checks your PC and will know if the software is being used on a different PC. So if you are a regular re-builder, you may find yourself having to write to HiFi Sim occasionally to let them know you have changed your PC.
…and of course – if you use ASA with a wrongfully acquired activation code, then HiFi Sim will know pretty soon and there may be a knock on the door one day.
Also in that text file, you will find a simple set of instructions that you will need to follow to install ASA correctly and to get it running. For instance: one requirement is that you need the dot net (.NET) framework installed for ASA to work. This must be at least version 2.0
If you are happy with the requirements and the security information, then you can install the software. This is simply now a matter of double clicking the setup.exe file and following the on-screen instructions. On completion of the installation you will have a quick launch icon on your desktop and a new program entry in your “Start | all programs” menu in a folder aptly named “HiFi”.

Take a look in this new folder and you will see that there are several entries including one called “XGauge Installation Wizard”. If you have never used Active Sky before, this is simply a small program which will add a “mini-weather-radar” to your instrument panel. Just as the FS standard key-press shift+3 brings up the GPS window, this XGauge weather radar can be called up in flight as well. The installer gives you the choice of using shift+5 as the standard keypress or automatically setting the last available number of sub-panels as the keypress or you may set your own shortcut.
The only other potentially “interesting” feature of the installation process and setting up XGauge will be the fact that on your next start, FS will open a warning window to ask if you will allow the XGauge to work in FSX. Other than that, there’s really nothing untoward about the whole install and setup process.
In fact it is getting hard to find any problems with any payware download these days. I have been buying and downloading payware for quite a few years now and so far – touch wood – I have yet to experience any problems other than my own finger troubles. There certainly do not appear to be any major complaints about the Active Sky installer around, nor do I have any feedback about major problems from the simMarket shop. The few questions that did come were easily resolved.
The whole buy, download, install process works well. Of course, for those who want to make doubly sure, you can still use the CD/DVD option in some shops. You just have to wait for the mail man to deliver.
As for customer support and in-use help, the HiFi Sim support is carried out on the Avsim Forums and can be accessed directly from the program interface via the built in browser. This will be expanded on in the next sections.
First Look – Program Interface
The first thing previous Active Sky users will notice will be the new interface. There is an icon bar across the top of the window with fifteen icon buttons. Below this is a status line telling you which version of the sim has been recognised, what the date and time is and a couple of radio buttons and check boxes for selecting either GMT or local time, or for forcing the program to real or sim time.
The main window now offers more window “real estate” for the browser link to HiFi Sim’s home page, which you can browse from here using the quick links.

Another very useful function is the fact that you can access the HiFi Sim help forum, hosted on Avsim, direct from a link on the user interface. This will open a new browser window and you can hit HiFi Sim with all your future problems in seconds. The support is prompt and commendable, although there are always times when the helpers are sleeping, eating or dealing with their own needs. So take a (small) dose of patience with you and you will get prompt and solid support.
As you move along the icon buttons along the top of the interface, you can see which option you have chosen by the greyed out button – and of course the content in the interface window. The button titles give a brief clue as to button function and “rollover” text on each button gives a slightly more detailed clue as to page content.
There are many features available in ASA which I could simply cut and paste here, but let me put it simply: you can either set-up real weather as it is “now”, or you can select the weather that was happening on a certain date in the past or you can “invent” your own weather. If you have used previous versions or even the FS native weather configuration tools, then you have a good idea what ASA can do – and it can do it a lot better too. For a run down of the features, take a look at the simMarket product page here … as you can see, it is a long list.
Second Look – Interaction with FS and Features
Of course, all good users are going to read the handbook first, aren’t they? But those icons are fairly self explanatory and a spot of common sense won’t hurt, will it?
For an “instant start” all you really need to concern yourself with is to set ASA to “Lock to closest” in the “Report” window and to click on the “Start FS” button. The only choice that may be needed after this will be for dual sim users who will have to choose whether to launch FSX or FS9.
Now some users will be coming from a previous version of Active Sky and will be looking for the button which said “Install X Graphics Textures” – that was where Active Sky would install graphical textures appropriate to the weather report. That would be anything from a “Red sky at night” to “Dramatic” cumulus clouds or wispy horse-tail cirrus.

If you look at the image here, you will see a gap between the two green buttons on the right hand side – I have already highlighted the space for you. And even then, this option is only open to FS9 users. Here is what it says in the handbook:
The “Install GE Pro Textures” button will be available only if GE Pro is installed. Press this button to have GE Pro and ASA use the weather shown in this screen to make weather-influenced decisions and automatically pick an appropriate set of textures for these conditions. This feature is also only available if the current FS Version selected is FS9.
So how do you get current weather to influence the graphics installed in Flight Simulator? This is one new feature of Active Sky Advanced that takes users of previous versions a moment to get used to. Here is what the handbook says in the next paragraph:
Press the “Install Graphics Snapshot” button to have ASA use the weather shown in this screen to make weather-influenced decisions and automatically pick an appropriate graphics snapshot for these conditions. This feature is available for both FSX and FS9. You must have already created at least one snapshot to use with this feature.
“Graphics Snapshot”? It took some reading to figure this new feature out, but it seems that for this version of Active Sky, the user has to set up a series of random “Graphics Snapshots” first, from which ASA then selects an appropriate scenario to match the weather report. This “Snapshots” feature is described in more detail later.
The next window after the “Report” one is “Met/Reps”. A new function for upgrading users, this screen lists all currently available sigmets/airmets and Pireps. There’s two ways of reading the information given in these tables: the first is to hover over a cell with your mouse pointer on the table and full details will be displayed in text form; the second is to double click on a cell and the weather map will be opened to display a graphical presentation of the WX information.

Pireps are a new and interesting addition to the interactivity of Active Sky. As a pilot, the user can file his own weather report to the ASA server. So if you are encountering different weather to what is in the forecast, you can submit your own Pirep and this will be displayed in the lower display portion of this screen for all other ASA users to see when they are online. The screenshot here shows the map display of a Pirep made by someone in the northwest of England.

The “Map” window displays a visual representation of the weather currently applicable, with the added functionality of being able to drag and drop previously used weather configurations from a weather “tree display” onto the map where you want it.
The “Briefing” screen is used for flight planning and either checking the real world weather en-route or for setting some interesting combinations of your own.
In the “Wx Config” window you can really go to town with ASA. Here you can conjure up any kind of weather for anywhere you want. If you want thunderstorms over the Sahara, you’ve got ’em. It does look like there are still some bugs in the ASA system here because adding conflicting information will cause ASA to crash to desktop. For instance adding temperatures to a wind layer that are impossible will confuse the program. E.g. plus 20 degrees C at 22000 feet when the layer below is at -17° C and the layer above is at -29° C. Looking at the Active Sky support forum, I see there is a fairly major update in progress and a beta fix is already available. I expect that such a future patch will allow the program to trap such errors and simply ignore them with a polite message to the user, rather than a CTD)

In this screen you can also create up to 20 different cloud layers to make your flight as realistic as you want. Or you could try to re-construct conditions you have experienced yourself. For instance… the next time you fly on holiday, have a pen and paper at the ready and write down what you see outside the window. Having travelled a lot myself, I have dozens of “climb out mets” that I have personally recorded out of places like Hamburg, Paris, Rome, Chicago, Denver… You can use your own records to re-create these days – and if you had a digital camera with you, even see how ASA compares by checking against historical reports. Of course, that could be pretty boring if all you do is commute between Vegas and Area 51…
The next interesting feature new to Active Sky is the “WX Finder” button on the toolbar. Now this new function is probably one of the most fun new features in the whole program. Say you are feeling a bit meteorologically challenged and want to fly in some extreme conditions. In this window you can literally “ask” ASA to find you the weather conditions you want. If you want low visibility thunderstorms, you select these in the search options and click the “Find Now” button. If there is a place on this planet experiencing those conditions, ASA will find it (or them) for you. That way you can get to see interesting places under interesting weather. Some of the “stormy” screenshots you can see in this review were taken in just that way. There were some pretty mean thunderstorms and blizzards over Archangel early this month…


The last really new section of ASA that I will deal with at any length is the “Graphics” screen. This feature is really new and looks exciting to this reviewer. Although I am happy with the “weather graphics” that I already have, users of all those other weather textures with strange “X” names – such as FEX, REX, HEX, GEX and whatever wonderful names they have – will certainly be in for a treat. Whatever environment graphics program you use for clouds, skies or water, with ASA you can set up “snapshots” of your favourite scenarios and whenever you start ASA you can choose these snapshots direct from the ASA interface, rather than having to set up a new situation each time.
Users of XGraphics or AS Graphics (both from the HiFi Sim label of course) will also find that ASA automatically locates these add-ons and will create any number of random scenarios called AutoSnapshots as well.
All these AutoSnapshots, whether from XGraphics or from other third-party scenarios are pre-configured weather texture configurations that you can call from the “Report” window by clicking on the “Install Graphics Snapshot”. ASA will choose one of your saved scenarios as most appropriate to the Wx report currently in use and install the textures into FS for you. Or you can, of course, choose a favourite of your own. You will recall earlier on in this review that users of previous versions of Active sky would look for an “Install X Graphics Textures” button. Well ASA uses these AutoSnapshots instead.
Another useful feature of the “Graphics” window is that you can take a screenshot of your saved “Snapshot” from FS and apply this picture to the AutoSnapshot to serve as a visual cue to help you select a particular scenario at a later date.

The “Options” button allows the user to configure ASA in more detail and to suit his tastes. I shan’t go into any depth describing the options settings here other to say that this is where you can tell ASA how you would like it configured… except for one interesting new feature which will interest the silent fliers and real aviators here – glider pilots. This really useful new feature of ASA is that it allows users to set “thermals and vertical air” in the “wind options” section of the options screen and also allows users to create their own thermals in a separate section.
Experimenting with these “D-i-Y” thermals can be quite “interesting” – especially if you care to try madness such as an 8000 fpm thermal. You can create one like this, but be prepared for very rough ride. Especially as you transit from normal air into such a thermal. Still, apart from that, if you use more realistic numbers, you can set thermals to your heart’s content. There is also an option to allow “Terrain-based Up and Downdraft Generation” – this should equate to ridge lift, very useful for slope soaring.

The remainder of the buttons and features of Active Sky Advanced are fairly straight forward and deal with saving, finding and loading Wx configurations, finding “help” and starting FS. In fact, these are so straight forward, that even the ASA handbook describes them in a few lines like this:
The remaining buttons at the top of the ASA interface are:
Save: Click this button to save the current weather to a wx file for later use.
Open: Click this button to load a previously saved weather file. This action will also disable automatic weather updates.
Refresh: Click this button to refresh the current weather data and Met/Reps.
Help: Click this button to open the Active Sky Advanced documentation
Start FS: Click this button to launch the currently selected version of Flight Simulator. This button will be disabled if ASA is used in a network environment and is installed on the client machine.
Let’s Go Flying
As already mentioned, using Active Sky Advanced is easy. “Lock to nearest” and “start FSX” is about the simplest method. No sooner have you started your flight, than you are in a real weather scenario. Over the past couple of weeks I have started from numerous locations depending on whether I am beta testing a new scenery, a new plane or simply just looking out of the window here at home and thinking “Today’s weather looks fun to fly in…”

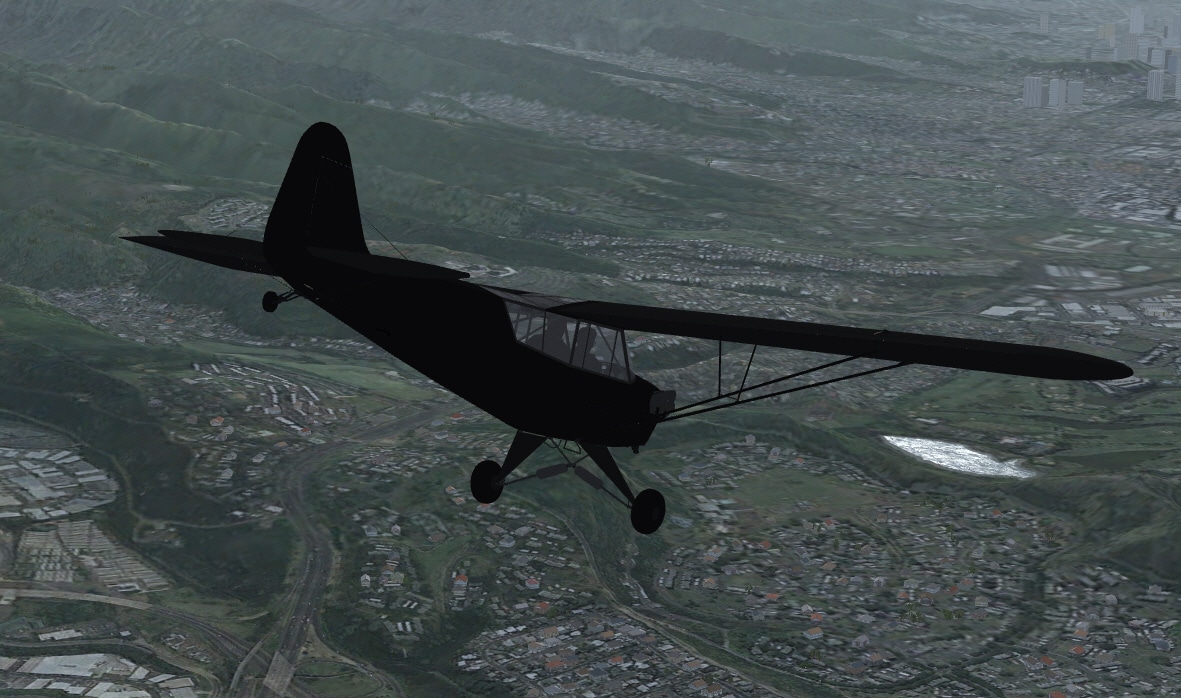
Amongst the many great visuals that you will encounter, probably one of the greatest improvements over previous Active Sky versions is the way low cloud, fog and haze are depicted. One of the more frequent grumbles in the past has been the way clouds had such sharp edges in valleys. HiFi Sim have advanced here by leaps and bounds, as you will see from the screenshots here.

The beauty of the system is that you can check just how good ASA works, because you can “prove” the simulated weather by looking out of the window.
So rather than waste the written word, I will follow the advice of that old adage that “A picture is worth a thousand words” and give you a few thousand words worth of pictures in the “Various Screenshots” section at the end of the review.
…and while you are flying, why not tune one of your com radios to 122.00? Yes… ASA will talk to you!
Handbook
Once you install ASA, a handbook link is added to the Windows start menu under the “HiFi” option.
The handbook is a 61 page pdf document formatted so that you can print it if you wish. This is always a pleasant option to have as many people do prefer to read from paper. The layout will print to all paper formats quite happily.
Before you get into the handbook proper, there is a “Welcome” page that briefly describes the features of this software. Then, before actually getting down to using ASA itself, the first pages describe how to configure FSX and FS9 for interaction with ASA. A few more paragraphs also deal with the need for FSUIPC and how to acquire and install this program – the payware (licensed) version of FSUIPC is not needed, but is needed for ASA to integrate with FS9
The layout of the rest of the handbook is in the same sequence as the buttons on the interface and each section is clearly described so that most problematic questions can be answered by the simple principle of RTFM.
All in all, 61 pages are not too many for such a versatile program.
Summary
In a word: “Must Have” (OK, two words…)
The FS (both 9 and X) built in weather tools are way outclassed by this unique add-on, and the “Feel” you get when flying in realistic weather is everything you could expect. Of course the use of ASA calls for an additional weather graphics software to be added and of course I would “plug” HiFi Sim’s own XGraphics here, but the real beauty is that ASA doesn’t care which weather graphics add-on you are using. It will make the best of even FSX default textures.
Another real kick is having turbulence active and watching the plane skip around the sky as shear winds and wake from other planes gets in your way. There is a lot more to be discovered in this program, and I would like to explore it more with you, but I want you to have that pleasure for yourselves.
You can have had a lot of enjoyment in flying a small GA plane over Africa during a rainy season thunderstorm. Even knowing you are in a simulation, sat in the safety of your own home, you will still have plenty of white-knuckle rides that will teach you to respect mother nature…
The Summary in brief
| What it can do | What it can’t do | Who will like it | Pro | Con |
| Simulate the weather “now” | Give you a weather forecast for a future time | Users who want great weather effects | Works with all other weather graphics add-ons | Still a few bugs being discussed on the support site |
| Find a weather scenario of your choice | Give you frostbite | Tornado hunters and hurricane watchers | Versatile weather creation and modification | |
| Create a weather scenario from the past | Time-travel back past January 1st, 2007 | People who re-fly their last holiday flights | Greatly improved fog and haze layers | |
| Allows you to invent weather | Bring that weather out in front of your PC |
Experimenters | Low cloud in valleys is more realistic | |
| Interact with all other “weather graphics” add-ons | Eye-candy fans | Works with FSX and FS9 | ||
| Create thermals | Make waves | Glider pilots | Thermal creation | |
| Great ground fog and low cloud in valleys | IFR flyers | Simple interface | ||
| Clear handbook |
Various Screenshots (for those with time)
All the screenshots you see in this review have been made using Active Sky Advanced and XGraphics. If you hover the mouse pointer over the image, the title will give you a clue.
Over the Caribbean


Wintery Weather


Mountain Weather


High In And Above Cloud


Local Flying in Local Weather
(Unfortunately photosceneries do not depict winter textures – these screenshots are taken over VFR Germany from Aerosoft)


More Mountain Cloud


The Test System
PC:
AMD FX62 based
Foxconn AM2 Motherboard
3GB Corsair RAM
nVidia GeForce 8800 GTS graphics, 512 MB VRAM
Realtek onboard 8:1 sound
three x 250 GB SATA2 Hard drives
OS:
Windows Vista Home Premium, 64 bit
About The Author
 Chris ‘Eagleskinner’ Brisland is an aircraft engineer with flight experience. He was knitted over half a century ago and at his current age has collected quite a few books, videos and T-shirts. A simmer since the very early days of “PC Flight”, he has a broad knowledge of flying around bedrooms, studies and home-offices. You will often find him at his desk thinking up new paint schemes for sim-planes — “finger painting without the mess”. Find him online at the simFlight Forums and many of the other places flightsimmers lurk.
He’s still not come unravelled by the way, so don’t pick at any loose ends you might find…
![Aerosoft – Frankfurt EDDF MSFS Preview [Video]](https://www.simflight.com/wp-content/uploads/2024/04/Aerosoft-Frankfurt-EDDF-MSFS-Preview-thumb.jpg)


0 Responses
Looks very, very good 😉
Definitely useful for “Flying School” – you can set up some real mean IMC for IFR.
I have been running it for a few weeks. I’ve compared it alot to actual weather where I live when coming through. Its GREAT
Dear Eiger Sanction
Great review but I would like to have seen similar screenshots with the default MS FSX weather engine coupled with a graphics program such as FEX.
Up to your usuall excellent standard.
pH
*laughs* (and you know why Peter)…
Unfortunately I suffer from laziness and didn’T get round to switching ASA off once it was on… It’s just too much fun. Besides – as I have XGraphics installed on the test rig, I’d have had to remove these textures too, and no one really likes eviscerating a well running system.
I bought it and it’s everything that Chris says it is. It’s an excellent program; I just need to get to grips with all of its features yet.
It’s really well-designed and fairly intuitive. The weather it displays is quite impressive and the WX radar gauge is a breeze to install, and once you start using it, you really don’t want to fly without it.
In my opinion it’s certainly a worth-while purchase, and so far, I haven’t noticed any slowdown on my system.
Puppy