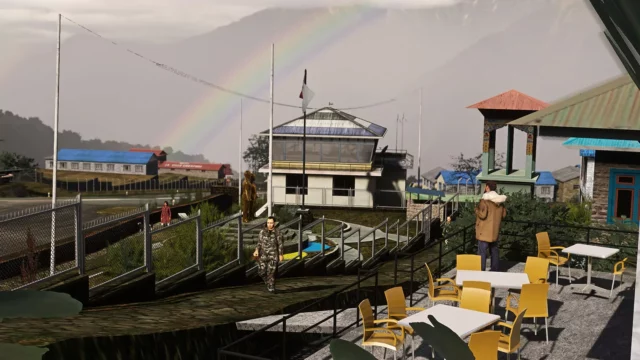
PMDG released a 747 v2 progress update earlier today with a vast amount of information. You can find the full press release including the awesome images below. Enjoy it! since it’ll probably be a while till we see another update.
Captains,
Good evening, and for those in the United States, Happy Thanksgiving!
Tonight I have a little update that should excite at least one or two of you. A bit of in depth viewing on the flight deck of our upcoming PMDG 747-400 Queen of the Skies II.
We have been very quietly at work building this simulation with a massive amount of technical accuracy. As we begin to openly discuss turning the product over to our beta team, I can tell you with confidence that this is the most accurate simulation of a 747-400 that you will find outside of a training center’s certified simulator. From a technical standpoint, this product has really captured not just the big picture of “what lights and messages make a 747” but it has also captured the true character of the airplane.
The way it works, the the way information is presented, the subtle nuance of redraw rates, the latent lag created by physical data bus networks- it is all here- and it all works.
As always- sound is a HUGE component, so we have taken the time to build our sound library using some very nice access to the airplane in it’s operating environs and the end result is starting to show. (I will admit to leaving the VC up on the dev machine just so I can hear the soothing background sound that is the flight deck in operation while I’m working on other tasks… yes… I am a 747 geek…but you knew that already!)
So without further ado, let’s take a look at some images that Vin put together for us this afternoon!
First, some background on these images: It would be fair to give Vin a week or so to create nice, well staged VC images to push out as promotional pieces- but that isn’t how I like to operate. Instead, I sent Vin an email at 3a and asked him to get me some images that show the character of the VC, and please have them ready for me to post this afternoon. Sure enough, Vin put some images together with some notes on what he thought might be interesting for you to see. These images are un-retouched and drawn directly from FSX without using any special lighting effects beyond the default simulator.
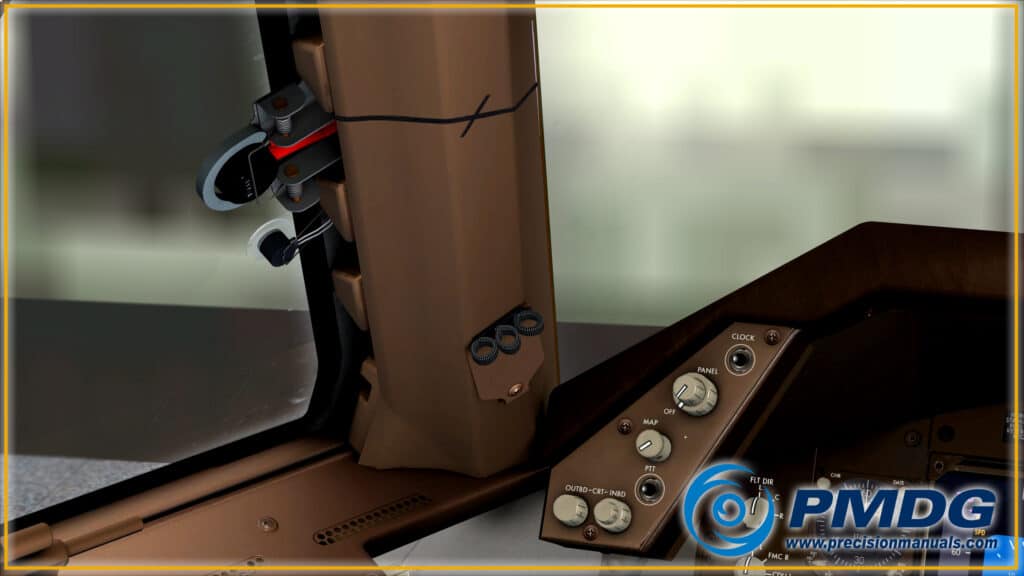
Okay- so let’s take a look at the side window corner post and window frame. This is a pretty dull area of the cockpit, unless you spend hundreds of hours modeling it to exquisite detail in order to “Get it Right.” You can see here details such as the subtle shading, vent structure, detail around buttons and knobs, chips/fading and abuse of various cockpit surfaces, changes in texture and surfaces, as well as the detail work around the window temperature sensing systems.
Also take a good look at the shading of corners and areas where light doesn’t naturally fall. This has taken a huge amount of work to coax the right level of lighting out of the older shading system we work with in FSX. (And OH! You should see this in Prepar3D!)
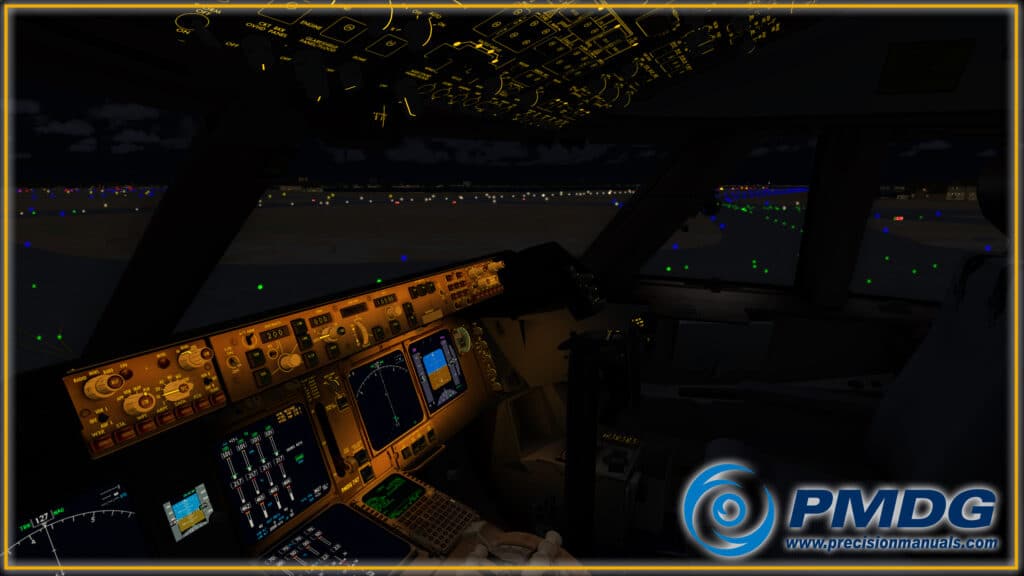
Next up we have a bit of night lighting. Using an updated version of the night lighting model created by Michael Frantzeskakis for use in the original MD-11, we have created an even better wash/cast/shadow model using embedded lighting around the cockpit. You can see in this image how the First Officer panel flood lighting has been turned up, but the Captain’s controller is dimmed, thus leaving a shading transition over the landing gear handle area of the panel.
We have spent some time expanding our lighting model to include reflection and ray casting. This is something that shows better in a dynamic video than it does in a still image, but you can see some of it if you look at the illumination ring around the First Officer’s clock, and how the lighting washes into the surface of the glass covering the clock. This is how the index marks gain their luminous quality. You can also see that the First Officer’s map light is on a very very dim setting and pointed at the window base.
As always we are giving you a tool to adjust the lighting color and hue for the backlighting and the flood lighting. We give this to you so that you can adjust them slightly to account for differences in presentation on your own screen- especially since so many screens have different illumination qualities.
Oh- and this is probably a good place to point out that we are still working with an alpha version of the simulation- don’t panic if you see anything that isn’t correct on the displays/panels… we are still tuning/tweaking and adjusting…
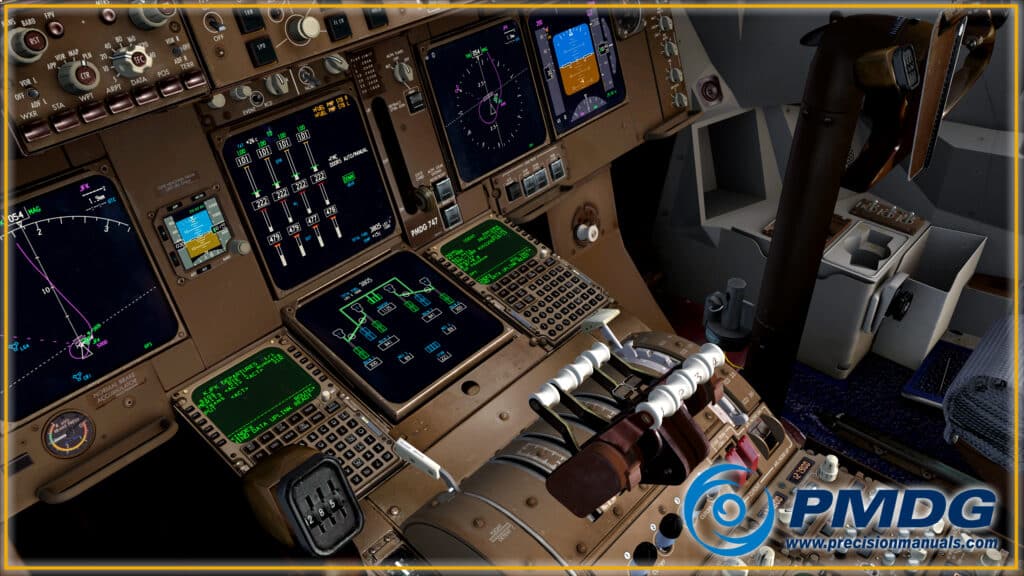
Next we have a “general overview” of the center pedestal working environment. Aside from having a cool view of the fuel system synoptic, you also get a good look at the realistic quality of the flight deck we are preparing for you. Notice the coffee stains around the first officer’s cup holder (he should be shot!), the dent in the aft side of the book holder, the dirt and grime on the lower portion of the checklist holder as you near the carpet on the floor. You can also see some left over adhesive “gunk” from maintenance deferral decals that have been applied to the center pedestal just below the lower display unit. Take a look at the screws and framework around the top of the elevator trim indicator… It looks like you could run your fingers across that surface it has so much definition! Again- the entire goal is to provide you with such a high degree of visual fidelity that you really get the sense of “Being There” on the flight deck of your own 747-400!
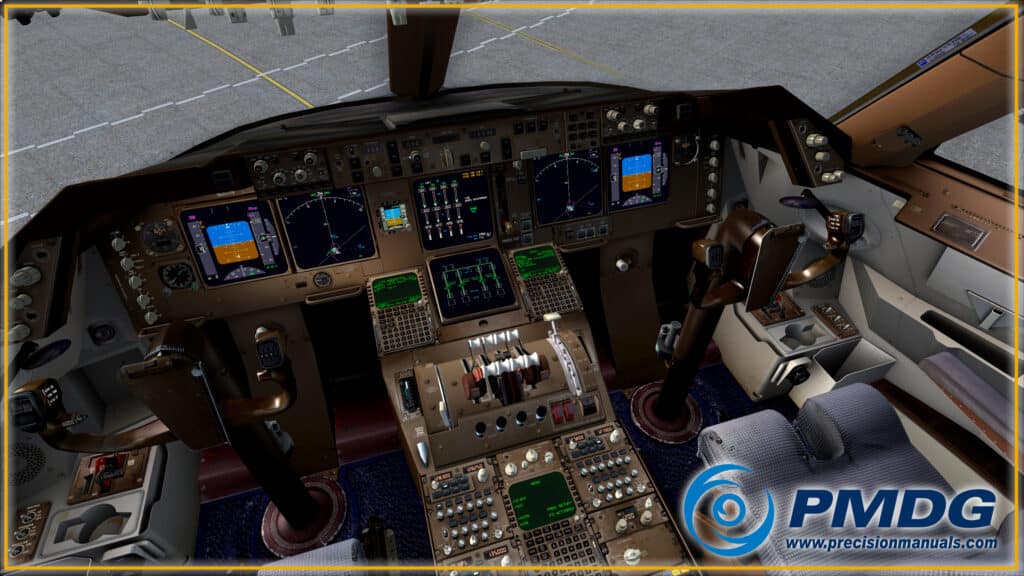
The cockpit of the 747-400 is a very complex shape, but in the manner in which it fits into the exterior shell of the airplane, and in terms of how all of the side-walls and panel edges fit together to create the environment in which the pilots work. A tremendous amount of effort has been put into making sure the cockpit accurately reflects all of these pieces and parts. We have a number of methods that we use to accomplish this task, and you can see the results of that effort here. This image again shows off some of the extraordinary detail in hidden spaces, tight corners and areas of the cockpit that do not receive much light. Shadows, shading and lighting all come into play to provide you with a true sense of depth and placement in the flight deck. The sharp eyed will notice that the captain’s panel flood lighting is turned up high in order to show how it changes the character of that side of the panel in daylight, too!
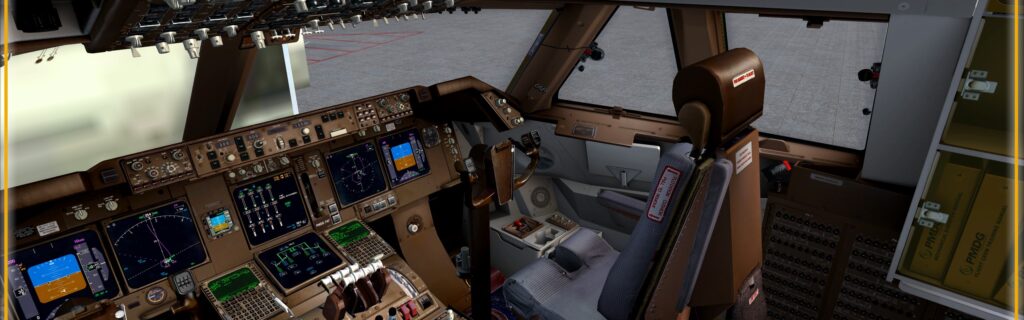
Lastly, we have a general overview image for you. This image gives you a wider aspect of the flight deck so that you can see all of the tiny little details that make up the space and how they tie together. From the document cupboard to the placards and labels, the headsets stored away, screws, fasteners, fabric textures and the general sense of wear that this airplane has experienced during the course of it’s operation. Perhaps I will ask Vin to recreate these images precisely in the 747-8 so that you can see how incredibly different these two cockpits turned out to be when Boeing was finished designing their newest Queen? Let me think about that a bit… we will be showing you a detail expose on that airplane in the coming weeks.
As I mentioned early in this post, we are beginning to discuss the process of moving toward beta testing- which is exciting news. Most of the major code work is done and we are going through the airplane and thousands upon thousands of pages of data to make sure we have this one done perfectly right. This also means that we are about to begin turning some attention to optimization and making the product ready for market- which almost always yields improvement in performance. With that in mind- how does it perform? This always seems to be a subject of some concern- so I thought I would create a quick “pre-cleanup-test” to give you an idea how it is running right now, as we prepare to starting prepping her for beta testing. It doesn’t do any of us much good if I just give you a number, since it doesn’t give you any way to determine if that number is good or bad. That being the case, I created a scenario in four airplanes- so that you can get a rough idea how the 747-400 and 747-8 compare to our existing mainline products. Note that I am giving you TWO different FPS numbers. The first number is “with the mouse cursor not visible on the FSX screen” and the second is “with the mouse cursor visible.” (I give these to you since FSX performance varies so much between those two conditions…)
Condition: Default FSX (retail, non-steam) runway 34L at KPAE using default FSX scenery, clear weather and no traffic.
Aircraft: with Mouse / without Mouse
PMDG 737NGX: 39 / 53
PMDG 777-200LR 32 / 50
PMDG 747-400 II 36 / 55
PMDG 747-8 37 / 55
I will rebuild this metric for you a few times as we get closer to release- but given our current status, I am quite pleased with the fact that this airplane operates about 12.5% better than the 777! Okay- this is all I have for you tonight! Thank you for your patience as we wrap up this, the most detailed 747 simulation you will be able to place your hands on. For all of you in the United States, I’d also like to wish you a happy Thanksgiving holiday- and I hope you enjoy a nice holiday surrounded with family and friends! I am off to tune the gear door animations a bit more!
It may be a long press release, although its very informative with what’s going on at the moment and what you can expect from the upcoming 747 project.