

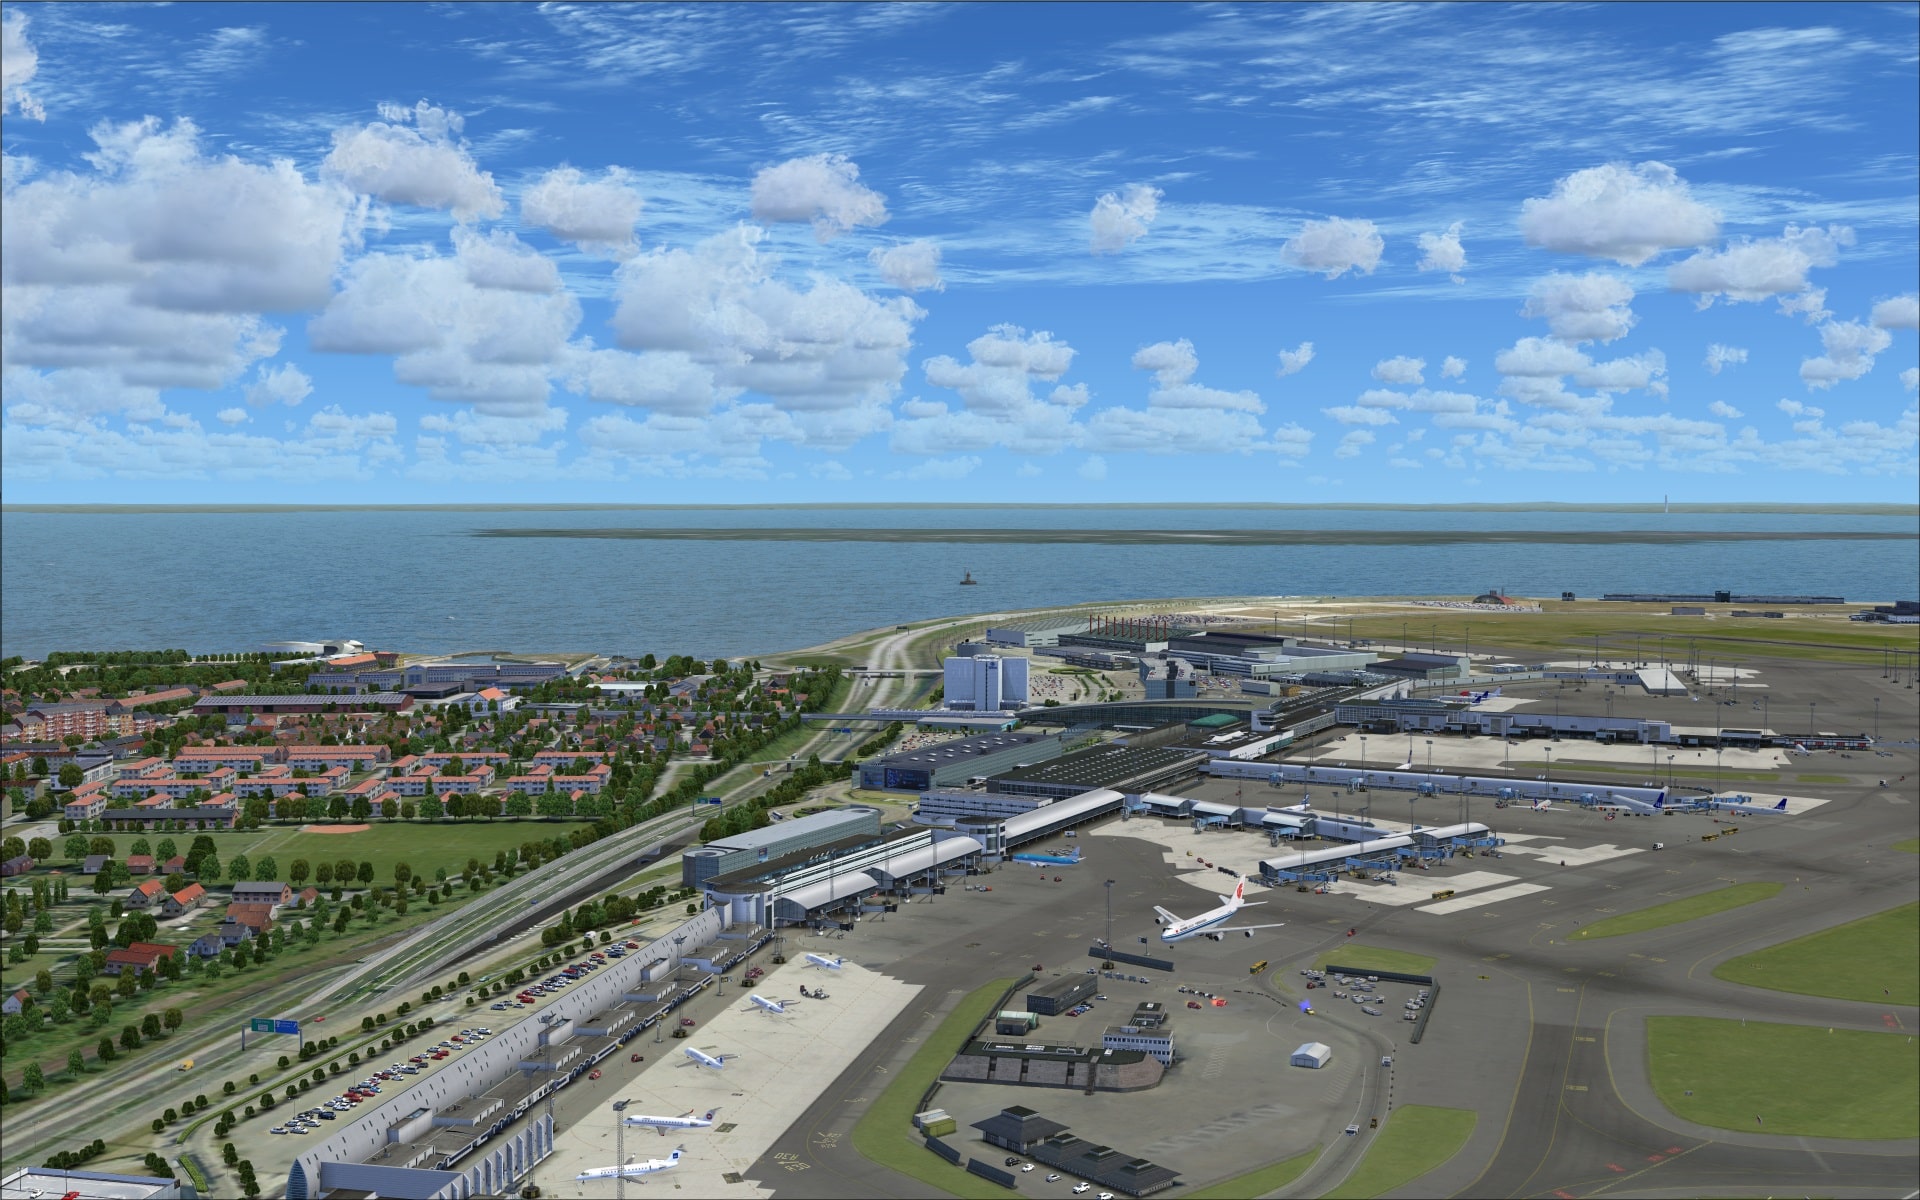
 The latest release by FlyTampa is Copenhagen Airport, IACO: EKCH. The airport also known as Kastrup, is located in Kastrup, Denmark which is a suburb of Copenhagen. It is the main international airport serving Copenhagen, the entire Zealand and Øresund Regions as well as a large part of southern Sweden. It is the largest airport in the Nordic countries. It is also one of the oldest international airports in Europe having opened in 1920 as one of the first private airports. At the time it had a single grass strip. It has come a very long way since then seeing approximately 24.1 million passengers using the airport’s facilities in 2013 with plans to increase its capacity to be able to handle up to 40 million passengers per year. It currently has 3 runways: 04L/22R @ 11,811ft, 04R/22L @ 10,827ft and 12/30 @ 9,186ft.
Installation
Let me first state that the scenery installer is compatible with FSX and P3DV2.
The scenery comes in two files, one an exe file and the other a dat file. The download is quite large at 1.48Gbs. Before beginning the installation process you must ensure that both these files are in the same directory and that you have an active internet connection. Installation is simple but does require you to input your purchase info and also to make some choices as you progress through the installation.
Overall the installation seemed very familiar, not unlike previous FlyTampa releases but with a few new twists. You will be asked to install the configurator and scenery library files plus Vistamare. For Vistamare, it does check to see if it is already installed and if so it allows you to forego installing the program again.
 Configuration
The FlyTampa scenery configurator is the easy to use interface where you will choose to enable or disable a number of different scenery options. I won’t get into listing them as they are self-explanatory. For each one they include a short description and based on your selection, they give you some indication as to the impact you might expect to see on performance. I’ve included a screenshot of what the configurator screen looks like.

Documentation
Included with the airport addon is a seven page PDF manual. It is brief but still packed with lots of good information. They begin with a short description of the city of Copenhagen and the airport including technical details such as runway lengths, direction and ILS frequencies.
Next up they get into the type of information that the average flight simmer who buys the product will likely be most interested in. There is a page that deals with their recommended FSX settings, then it’s on to seasonal texture settings in the FlyTampa Scenery Configurator, F.A.Q.s and finally they provide several links to their website. Reading the manual is time well spent.
Scenery
Ground Textures
Ground textures were a mixed bag when it came to quality. Depending on the location they used either photo image textures or graphic textures. For the hard surfaces they used high resolution graphic textures which showed off lots of details including crisp clear markings and signs of aircraft ground traffic. I thought that they were very good.
All other ground textures both within the confines of the airport and the surrounding areas typically consisted of photo imagery textures. They offered a realistic and accurate base on which to place buildings and other objects. Most of these looked quite good however there was one area that I felt could have been better. More specifically, the roadside area along the front of the main terminal. The textures lacked definition and detail plus some of them seemed to be misplaced or incorrect. I was a little surprised as this type of deficiency is quite rare with their products.
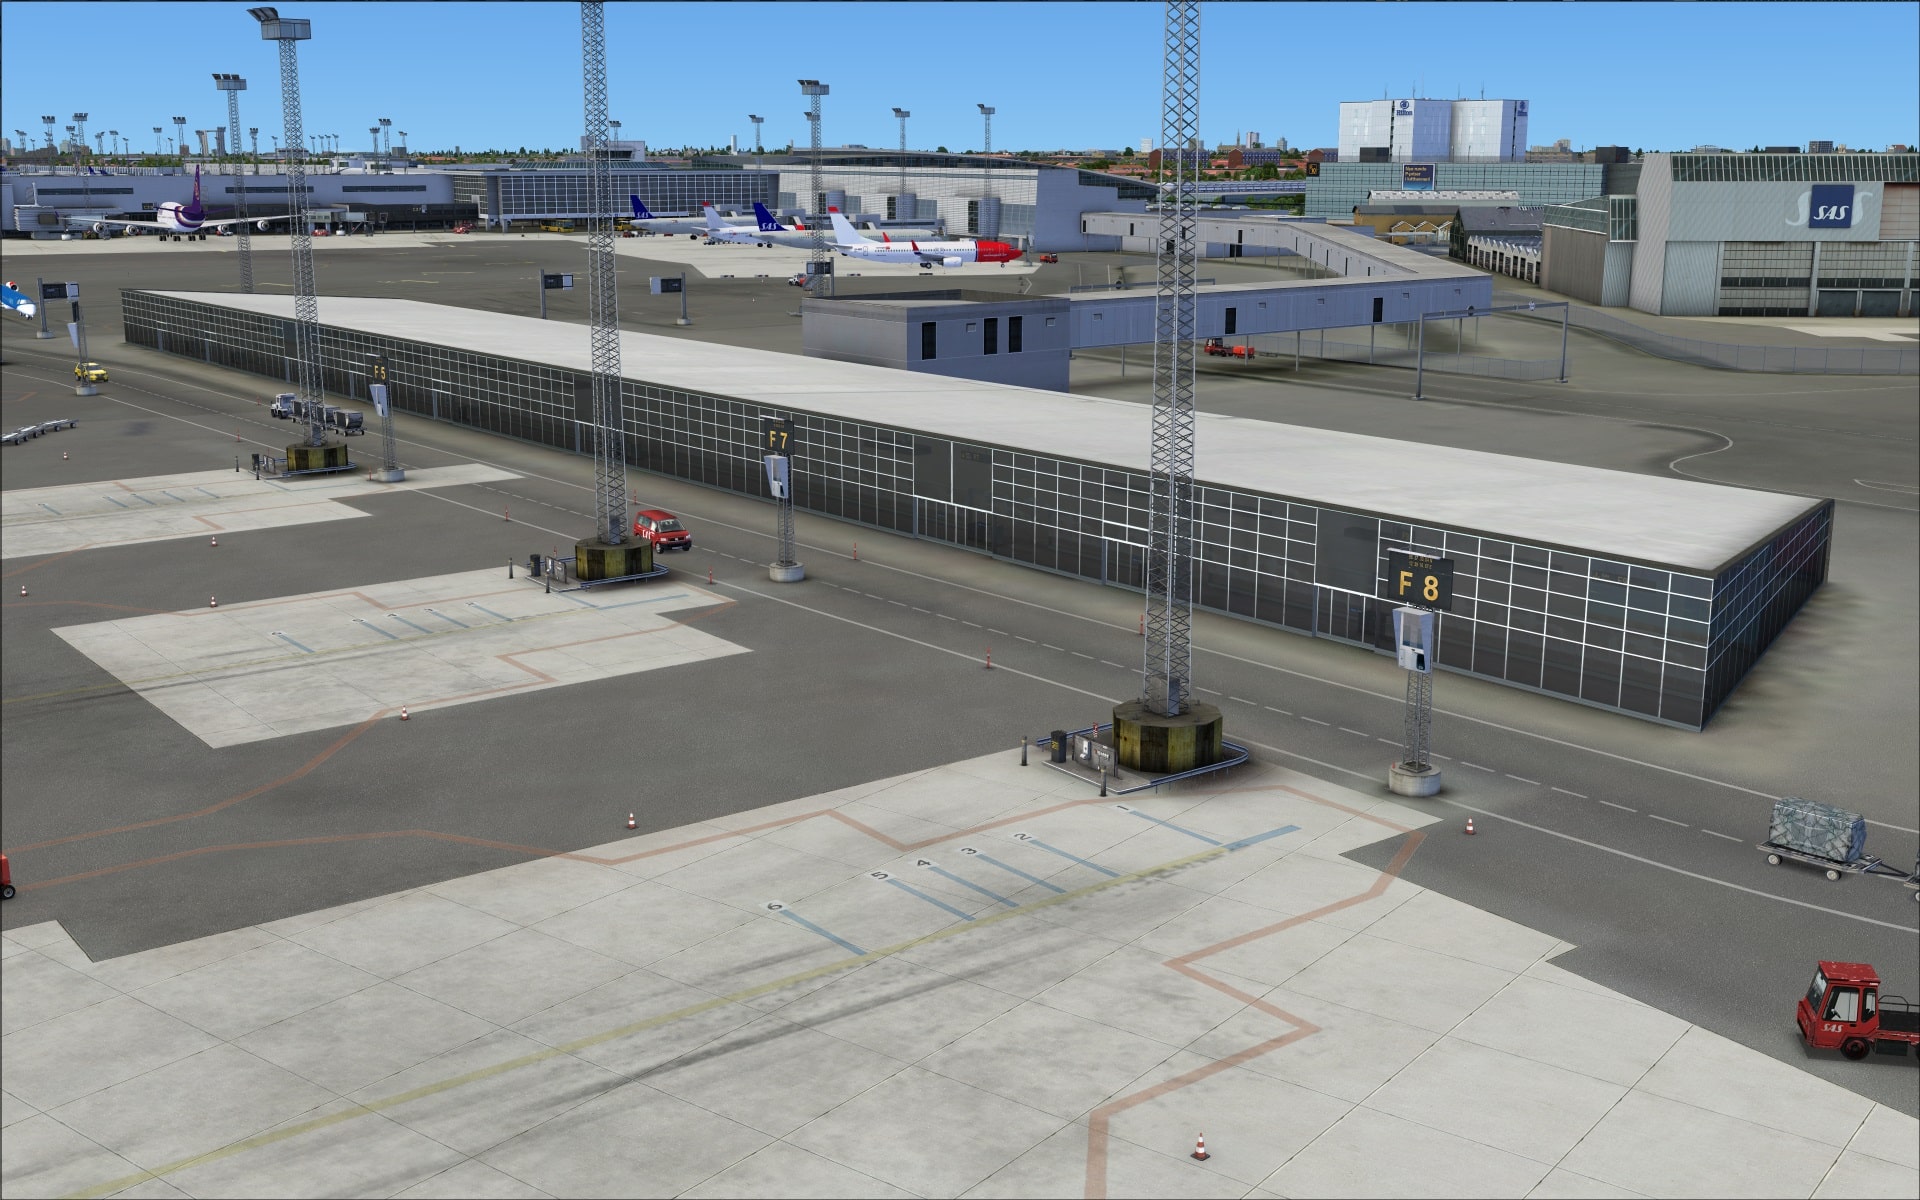
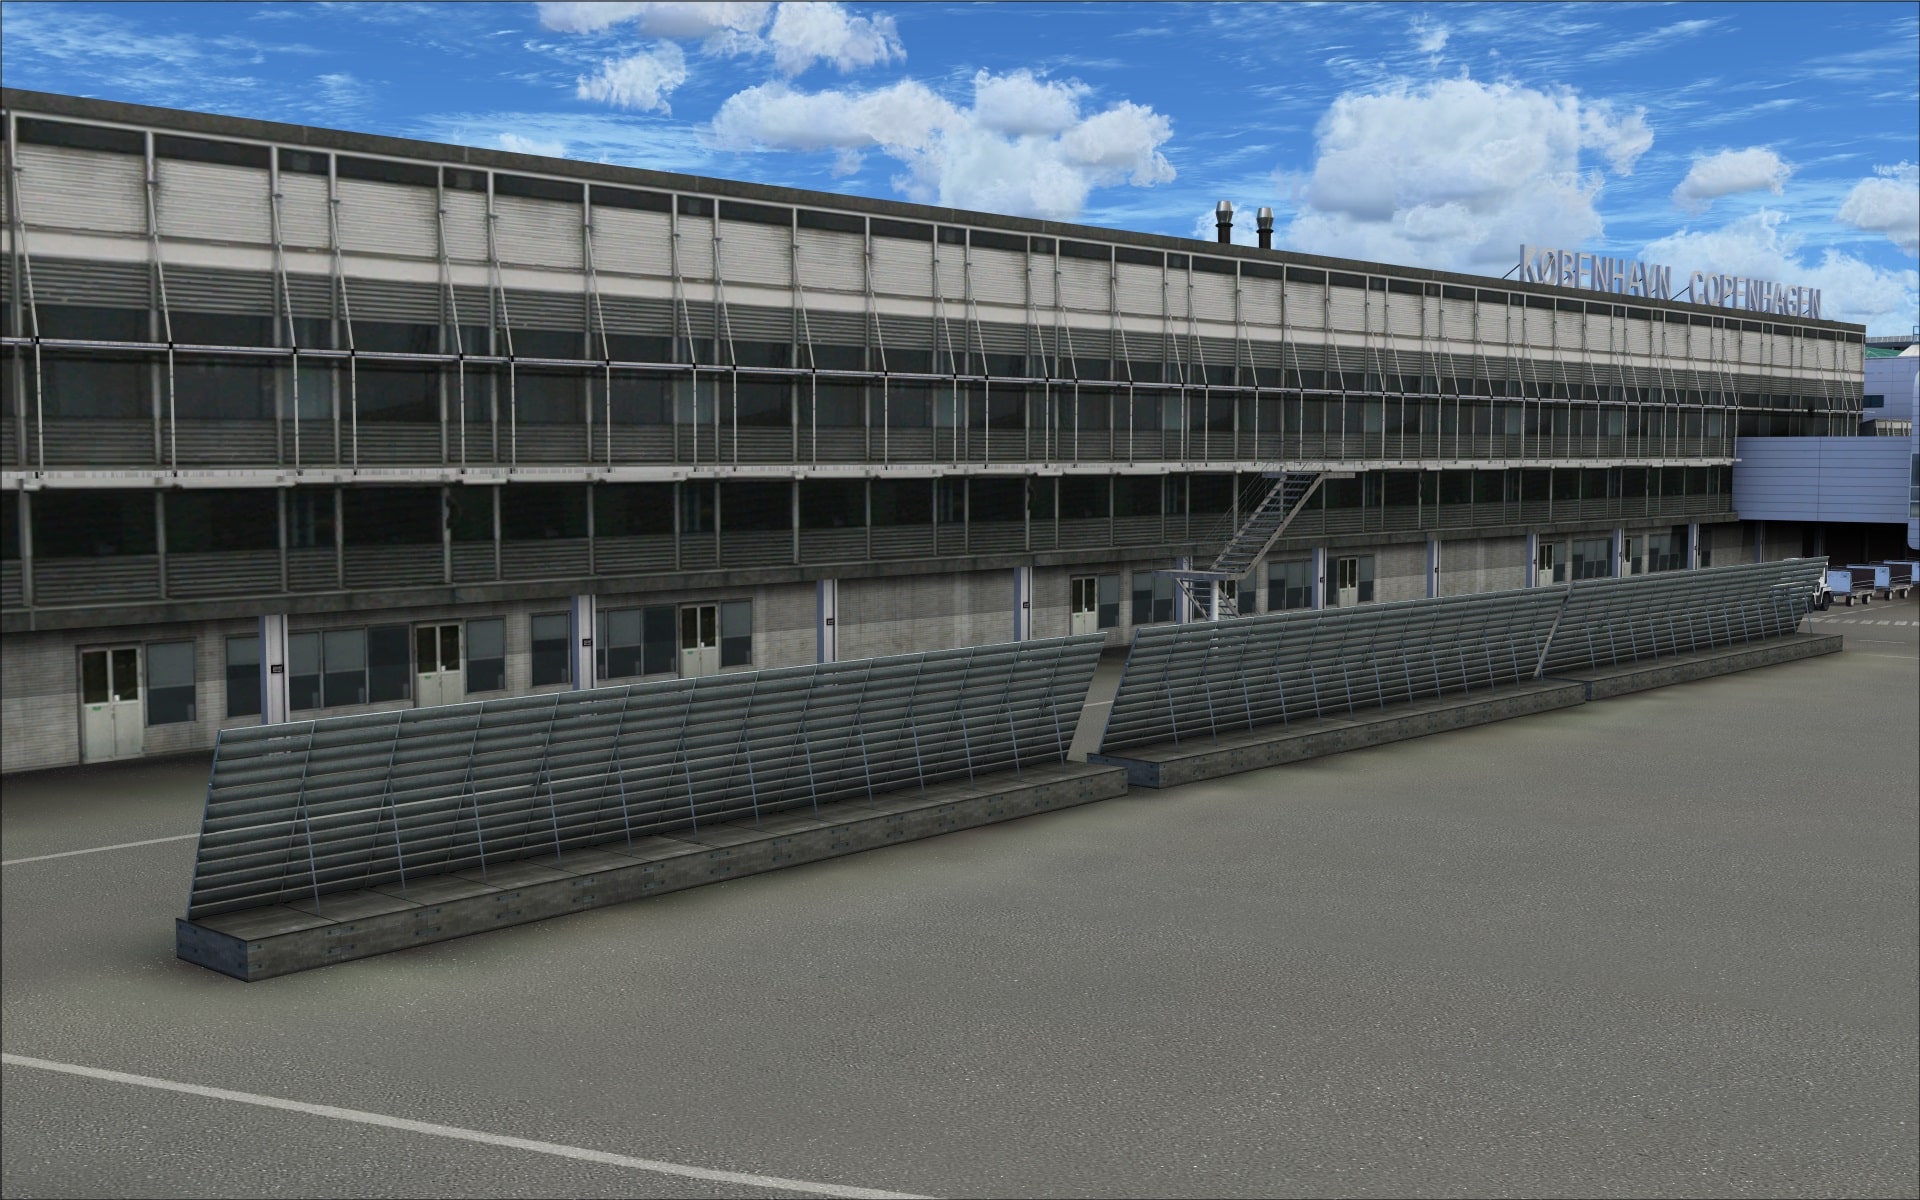
Buildings
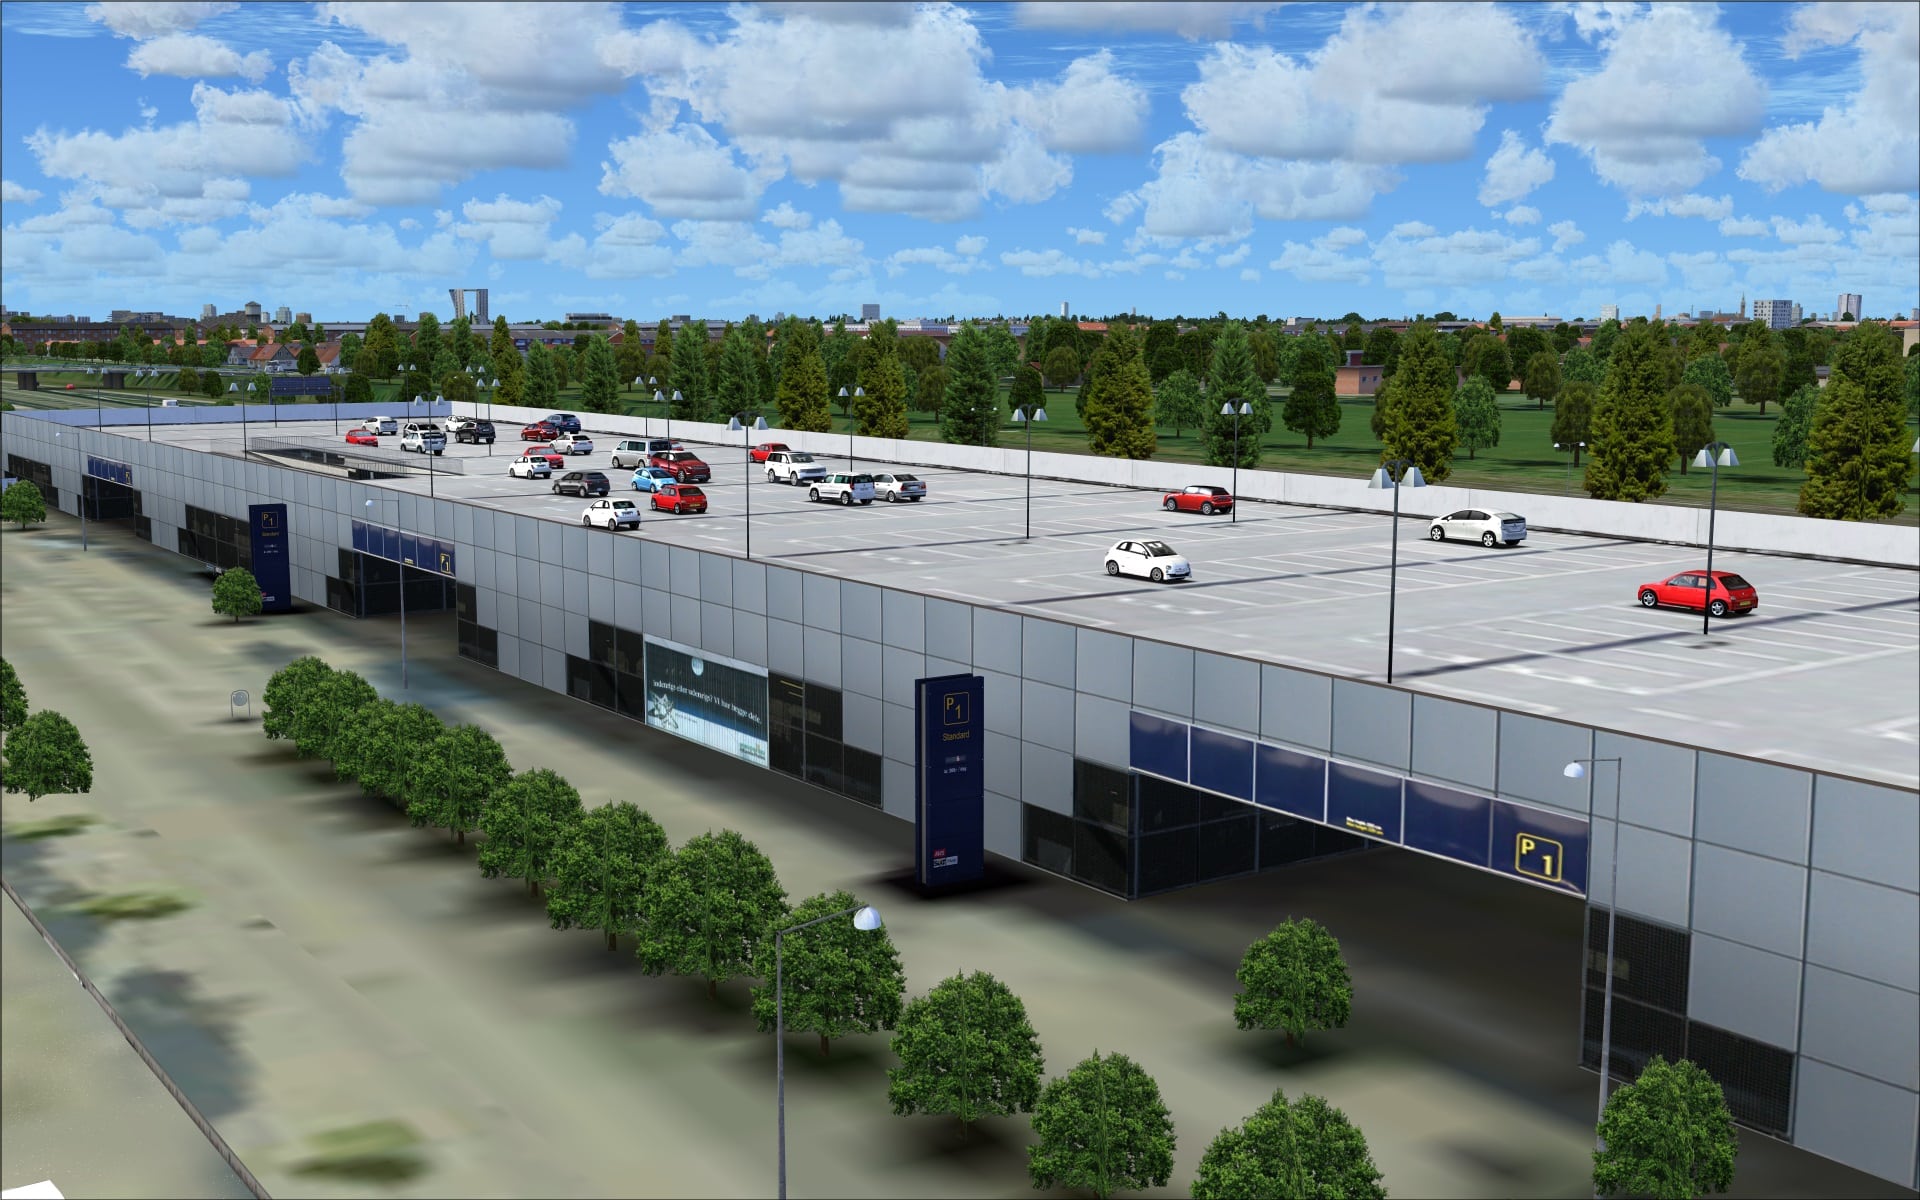
This airport has quite a variety of structures ranging in size from tiny airfield sheds all the way up to the large hangars and passenger terminal. Keeping with FlyTampa tradition they have all been recreated so we can enjoy and appreciate each one regardless of how significant or insignificant they might be. Some of the visual features I noticed and was impressed with include high resolution textures that show off lots of detailing and shading and the colouring techniques which add to the illusion of depth and aging. These textures also allow us to differentiate between various types of building materials. Additionally, they’ve included lots of extra 3d details that complement and enhance those visual features found in the textures. Accurate placement of structures on the ground textures is also a necessary quality and they’ve been able to provide that as well.
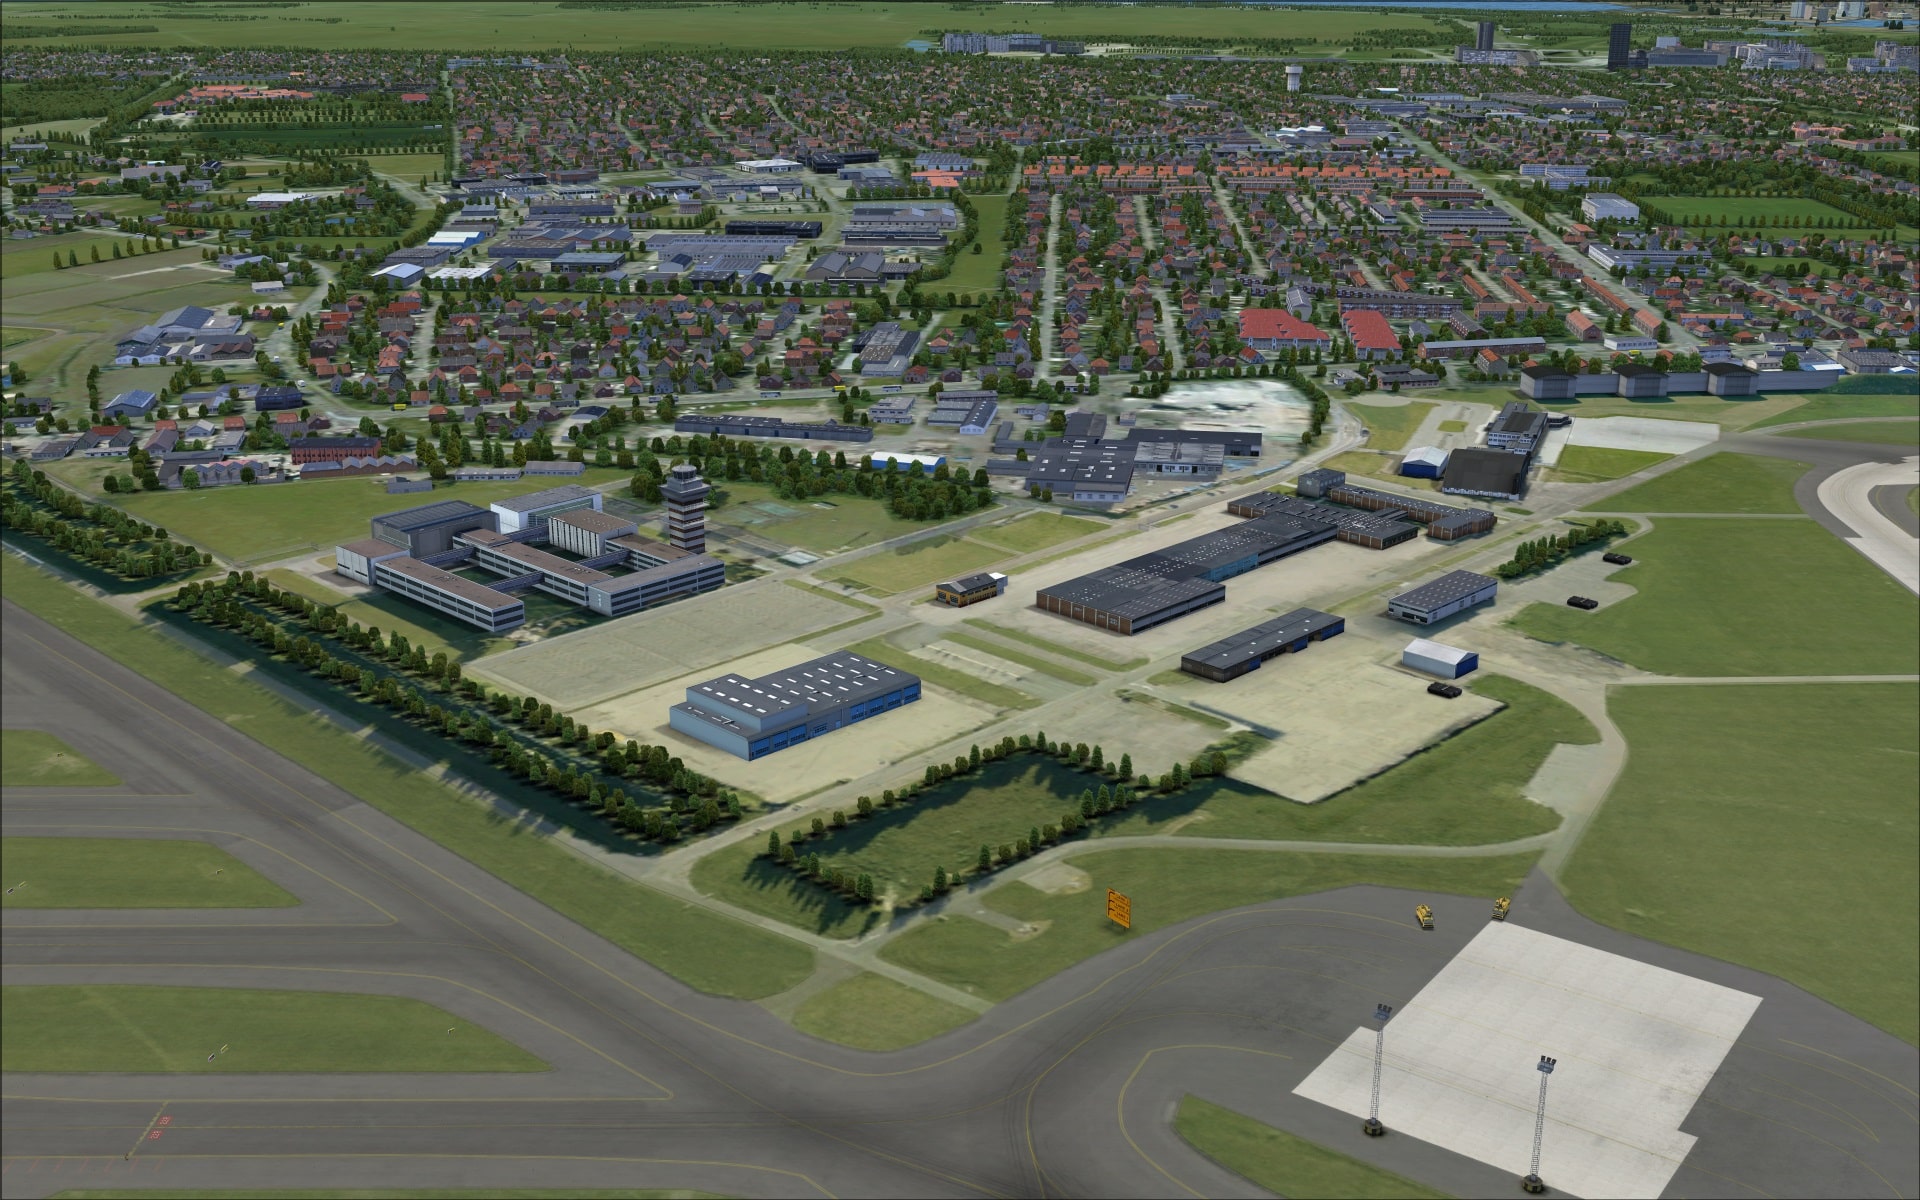
I’ve divided the airport into quadrants based on the intersection of runways 04R/22L and 12/30.
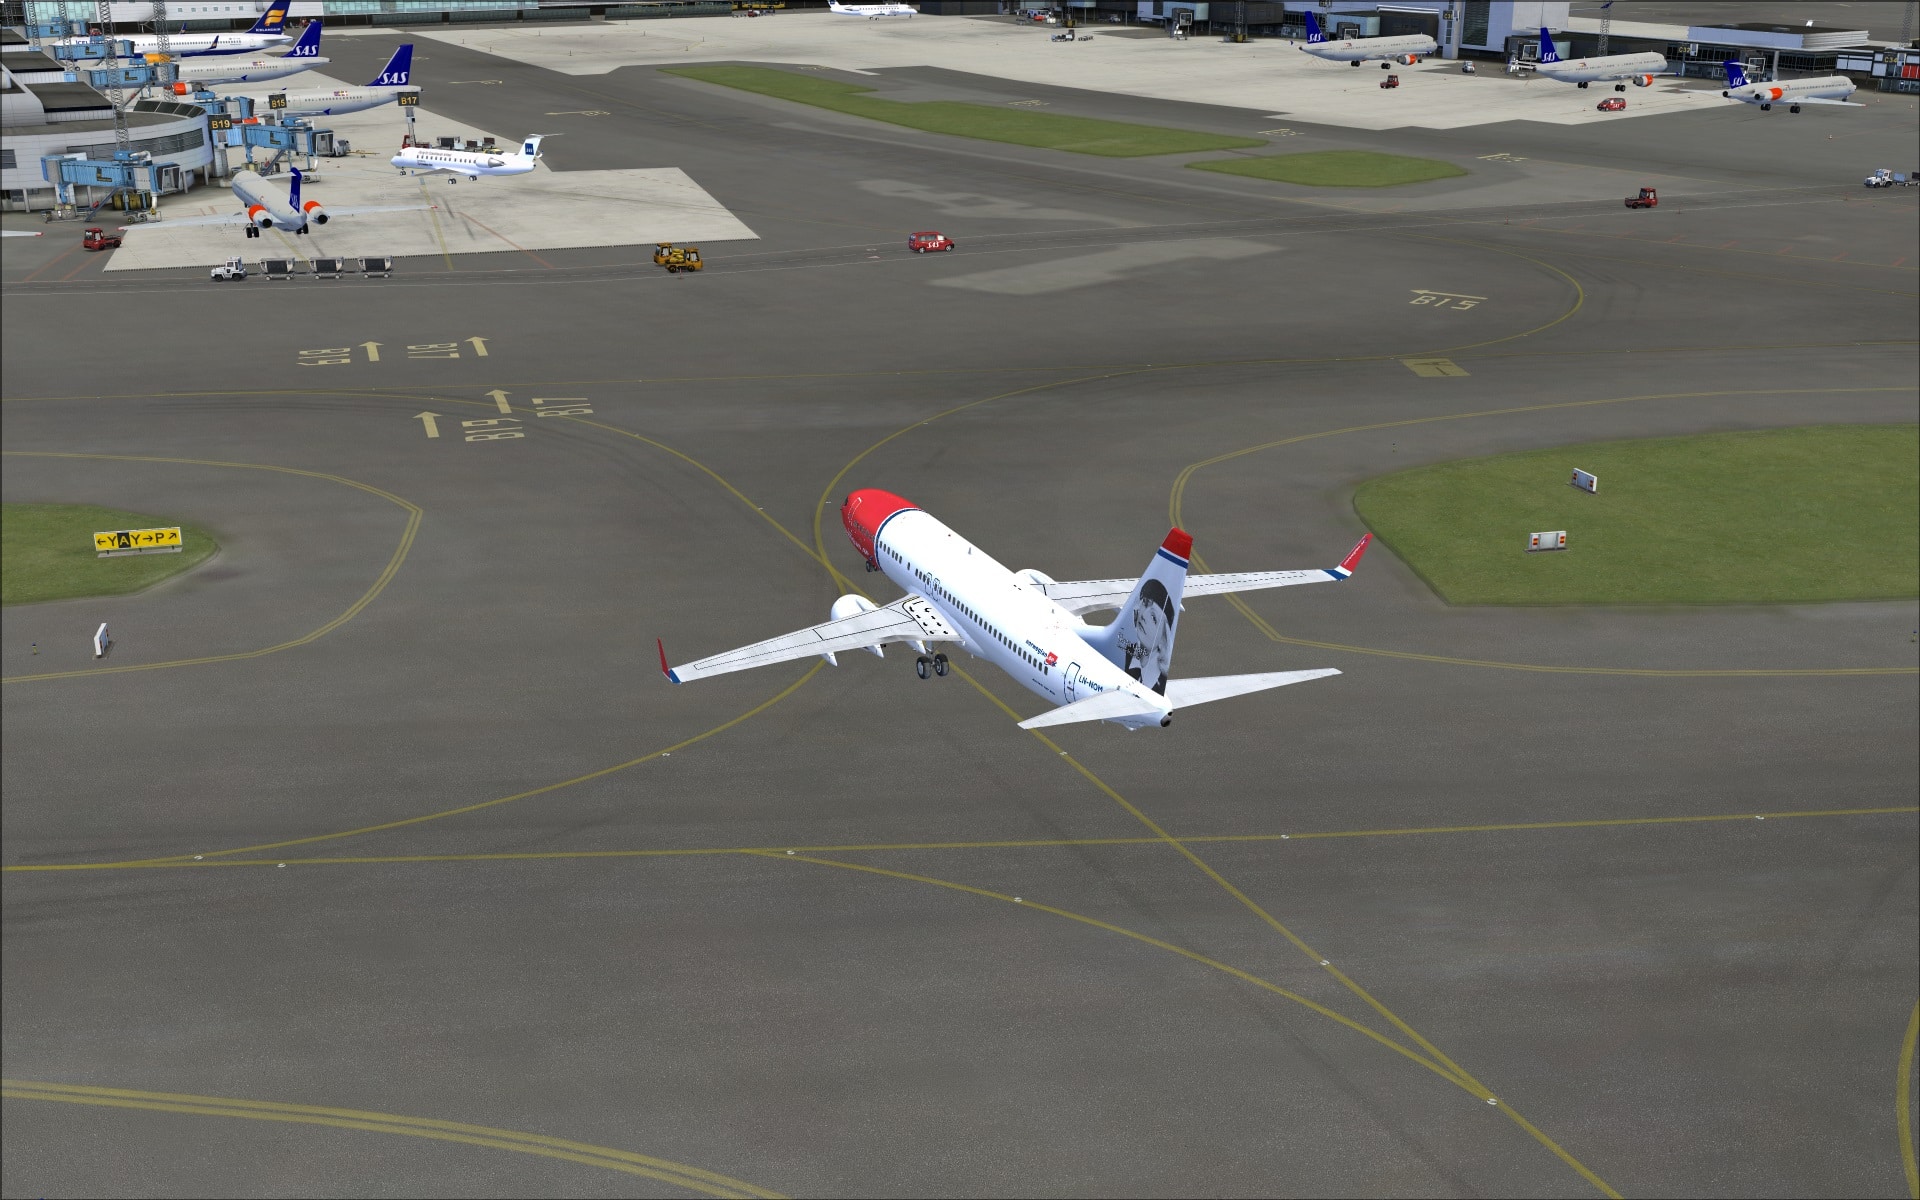
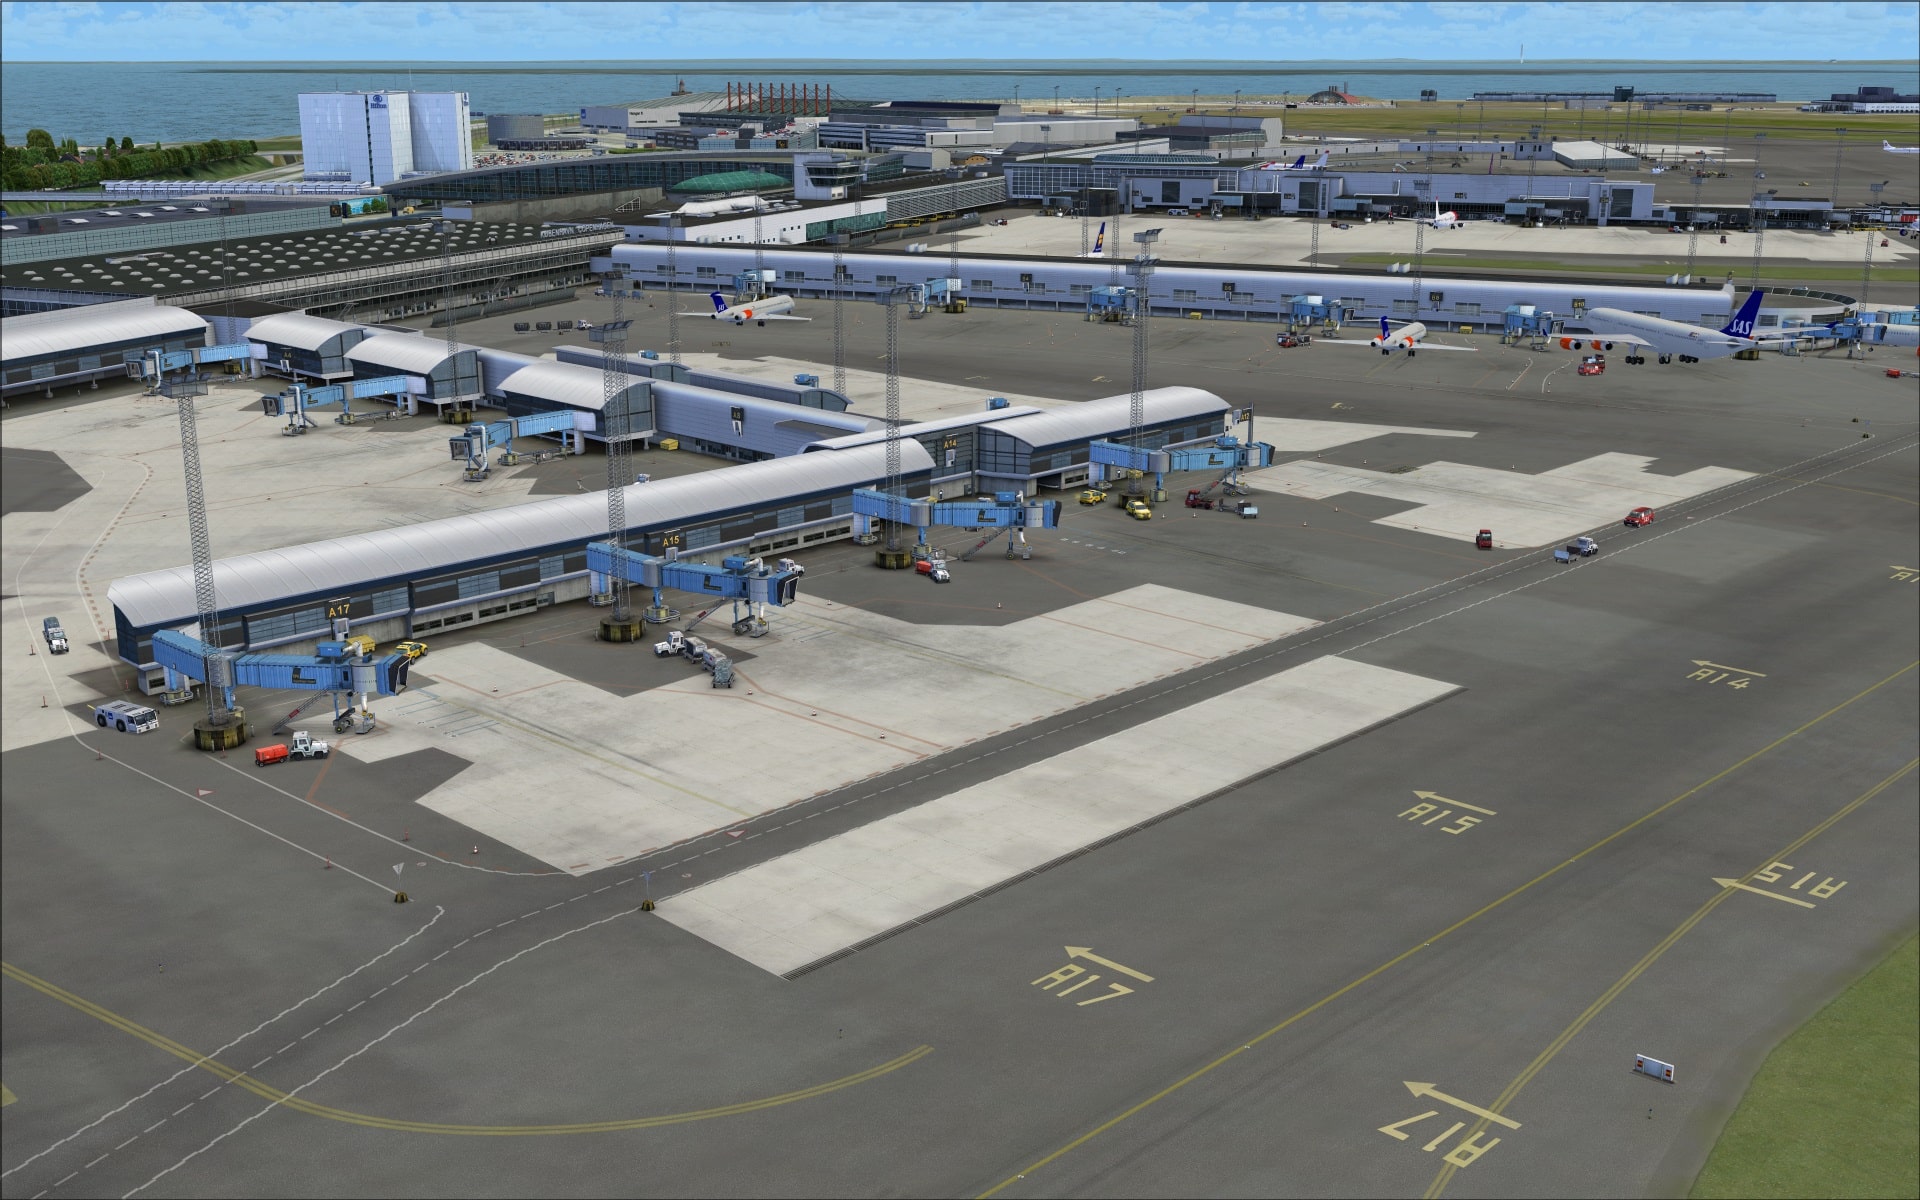
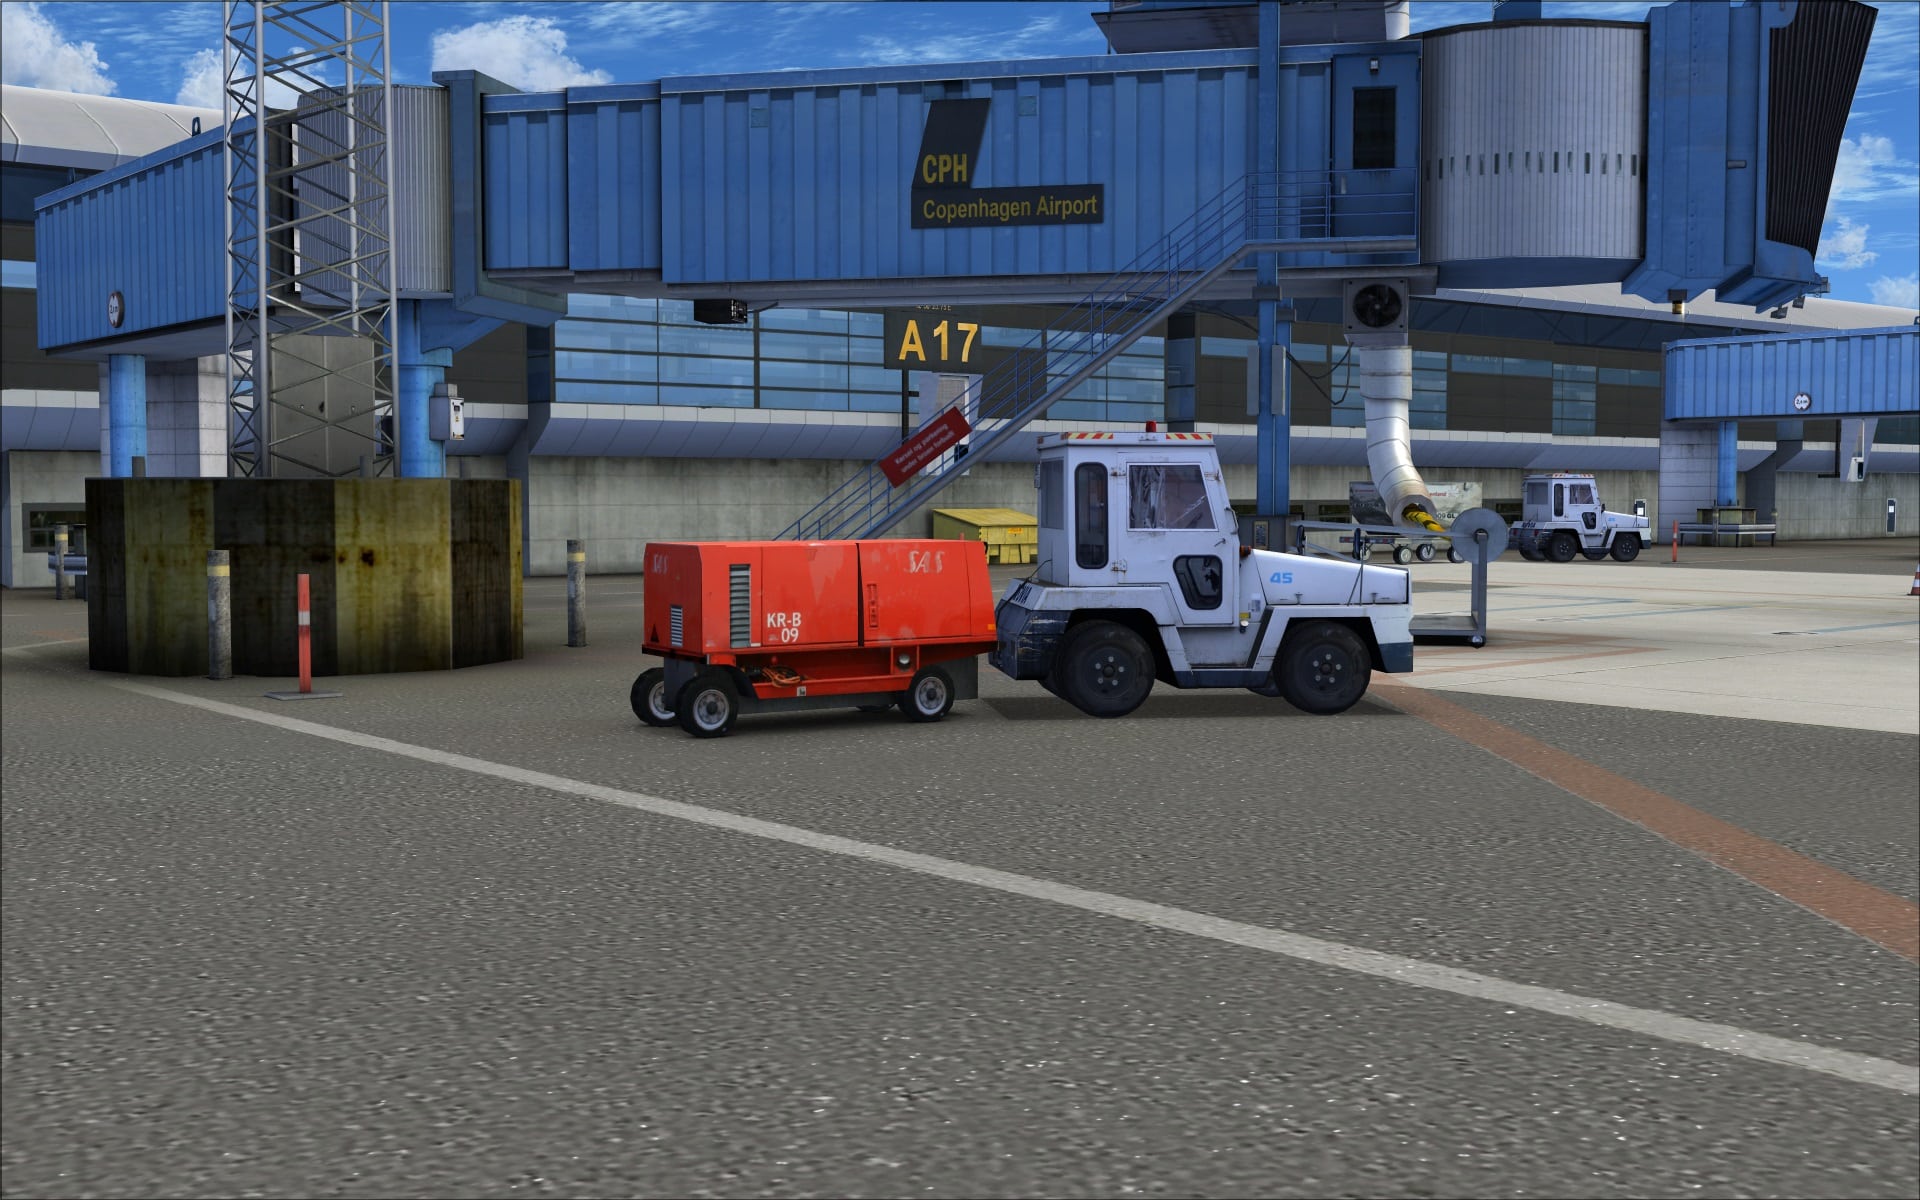
The north quadrant is where we find the largest concentration of buildings. More specifically the main passenger terminals and the cluster of SAS hangars.
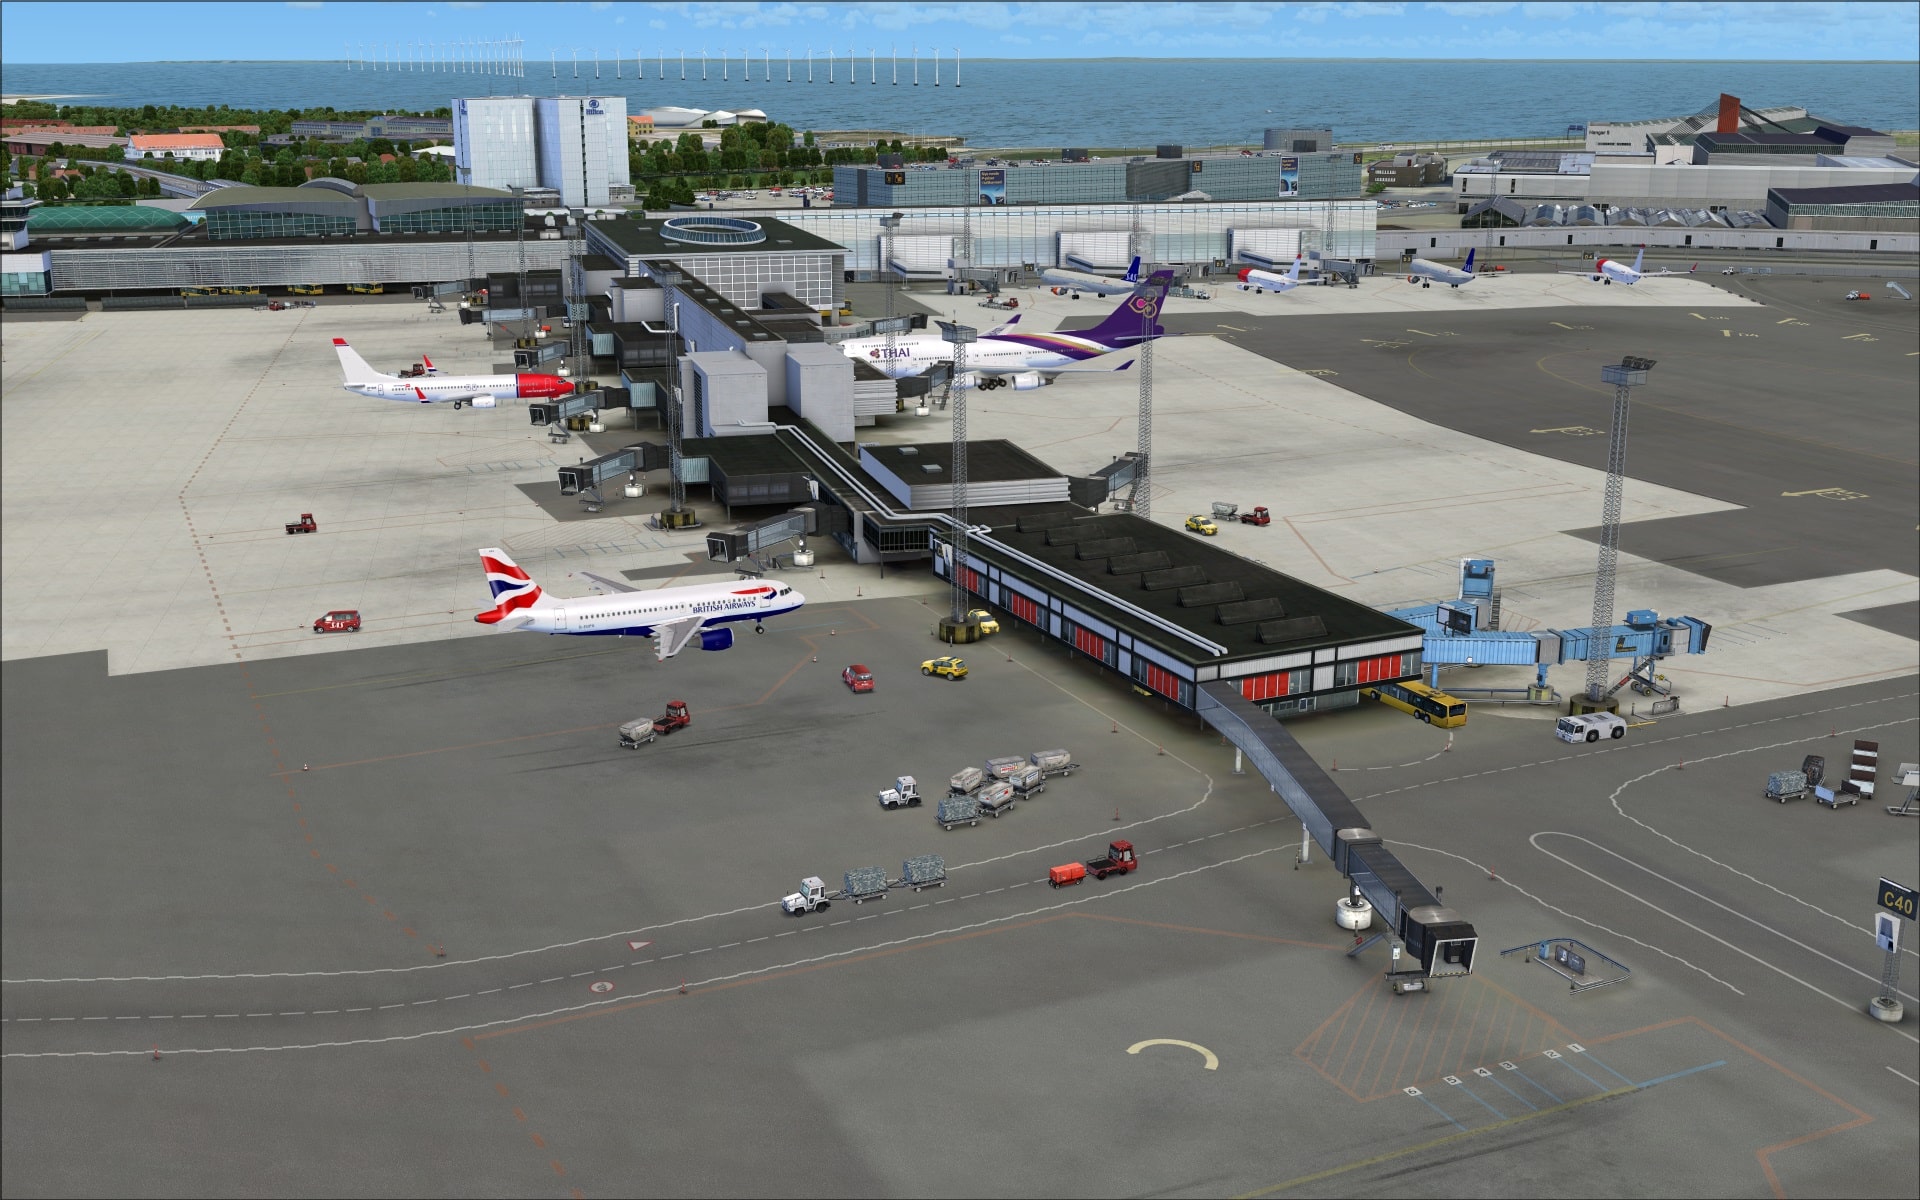
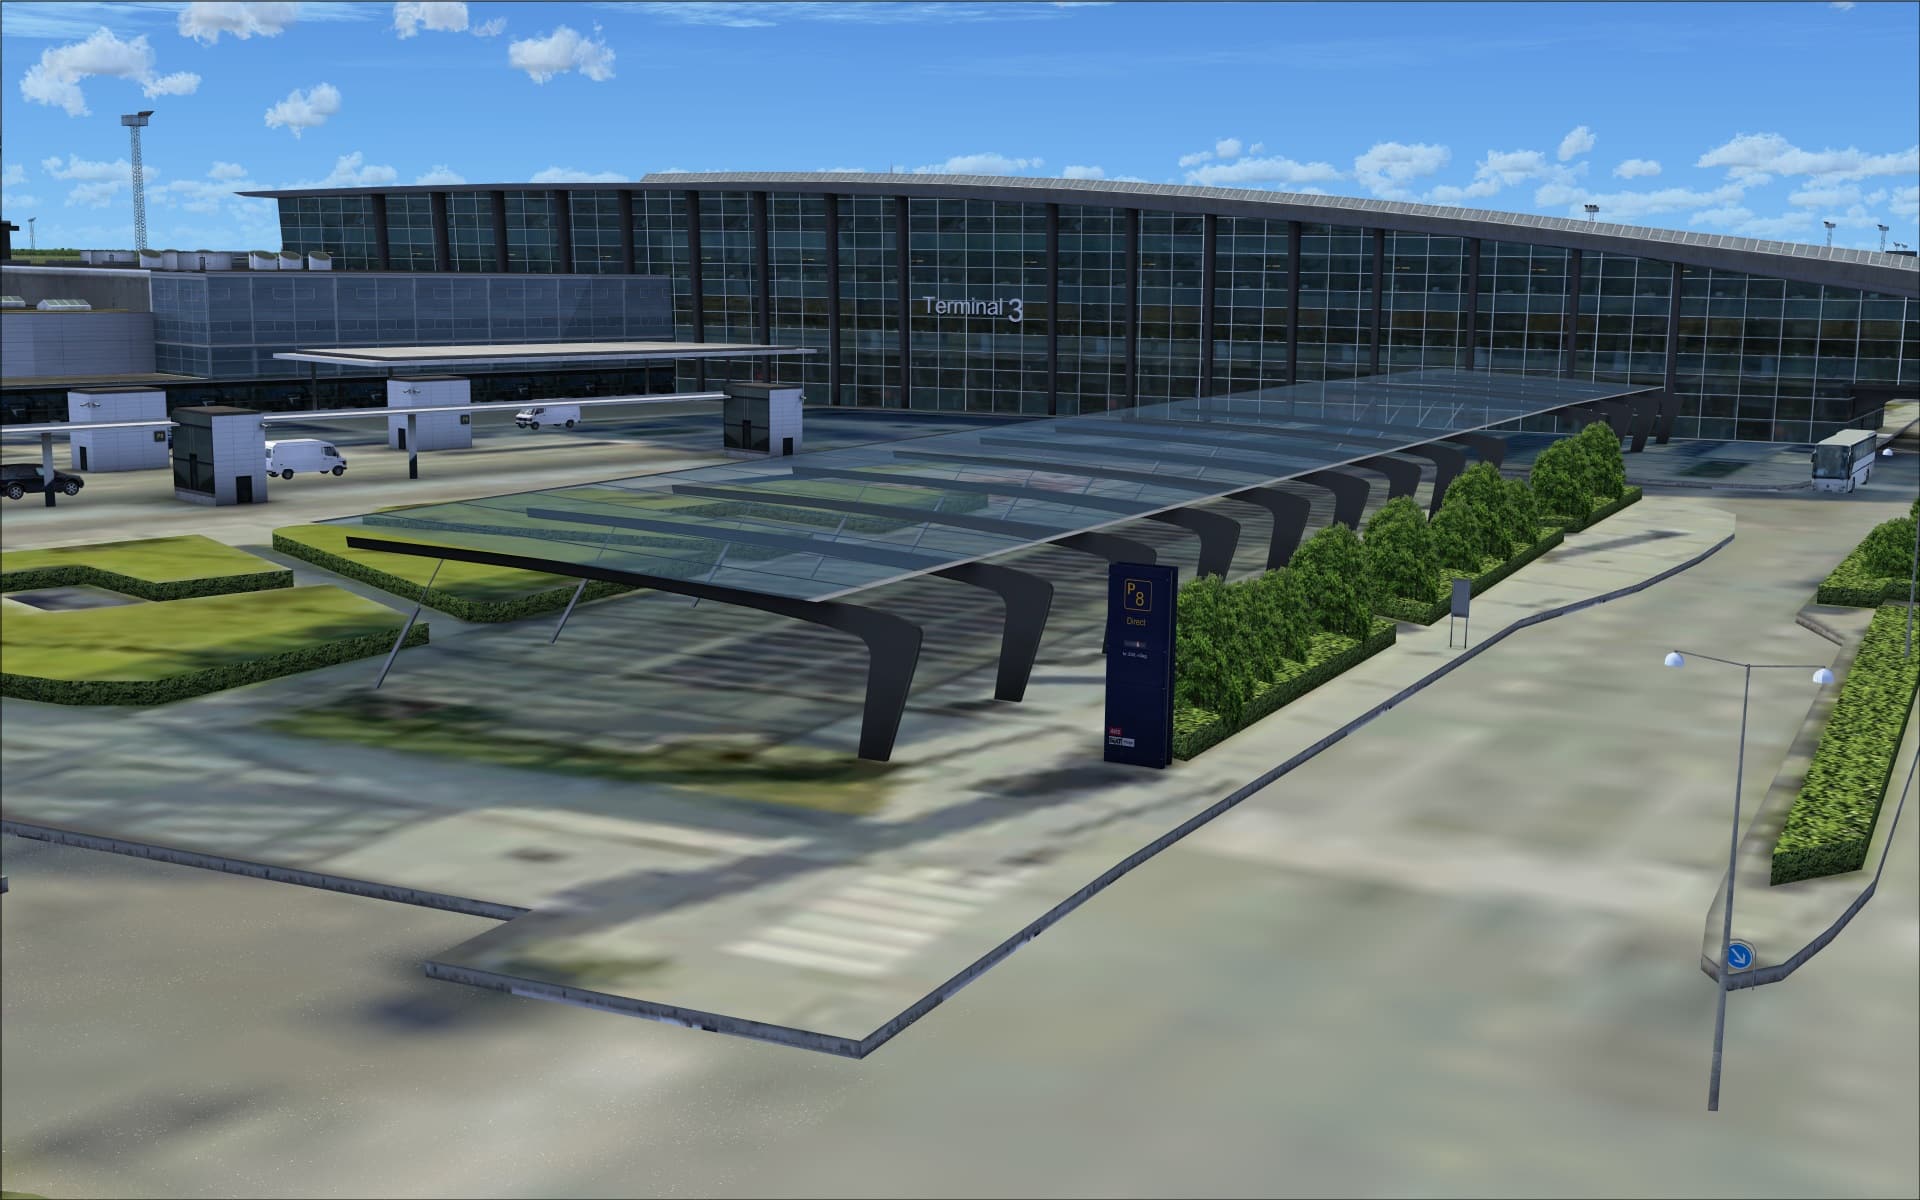
 Beginning with the passenger terminal which is actually divided into four terminals; T1 is for domestic flights, T2 and T3 for international flights and CPH Go which is for low cost air carriers. T2 and T3 share the three concourses.
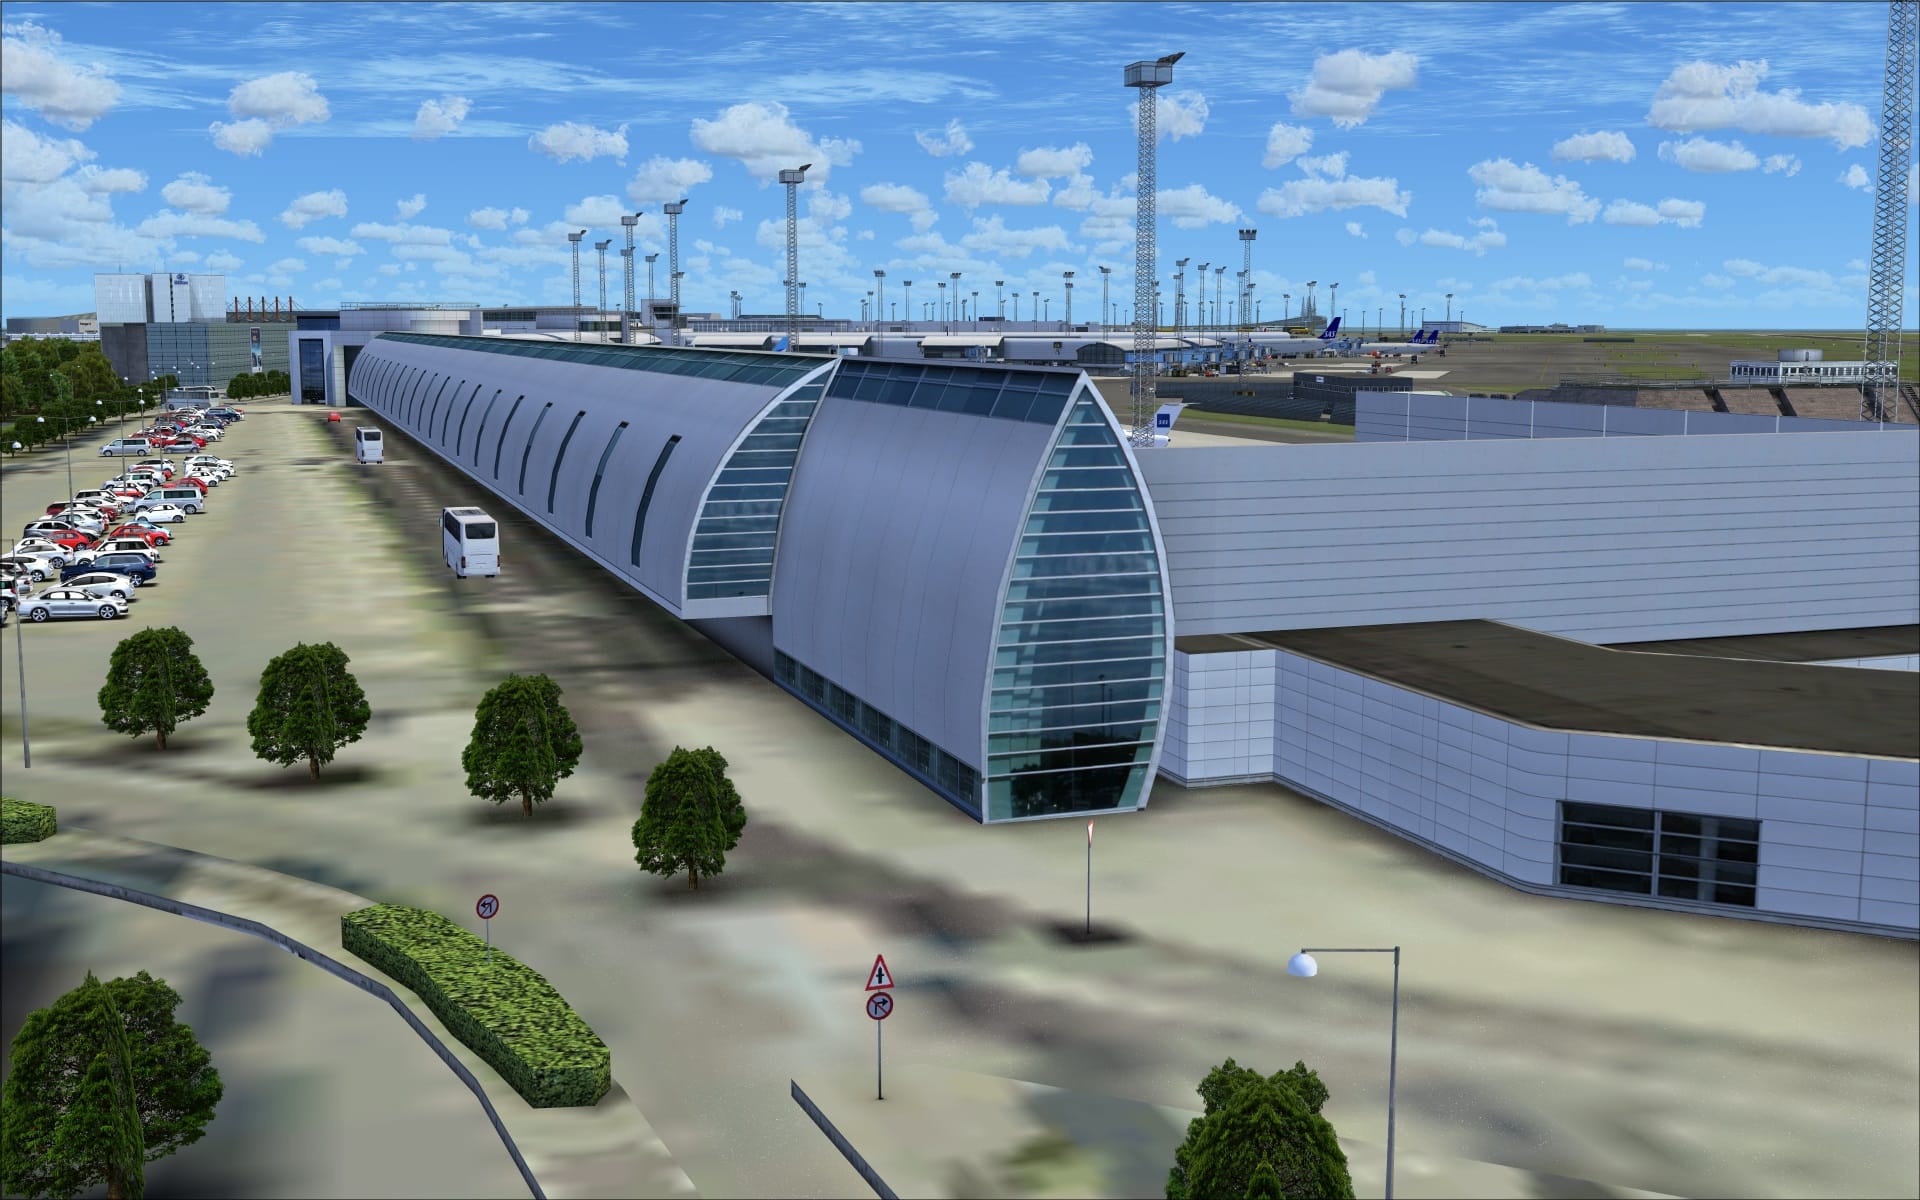
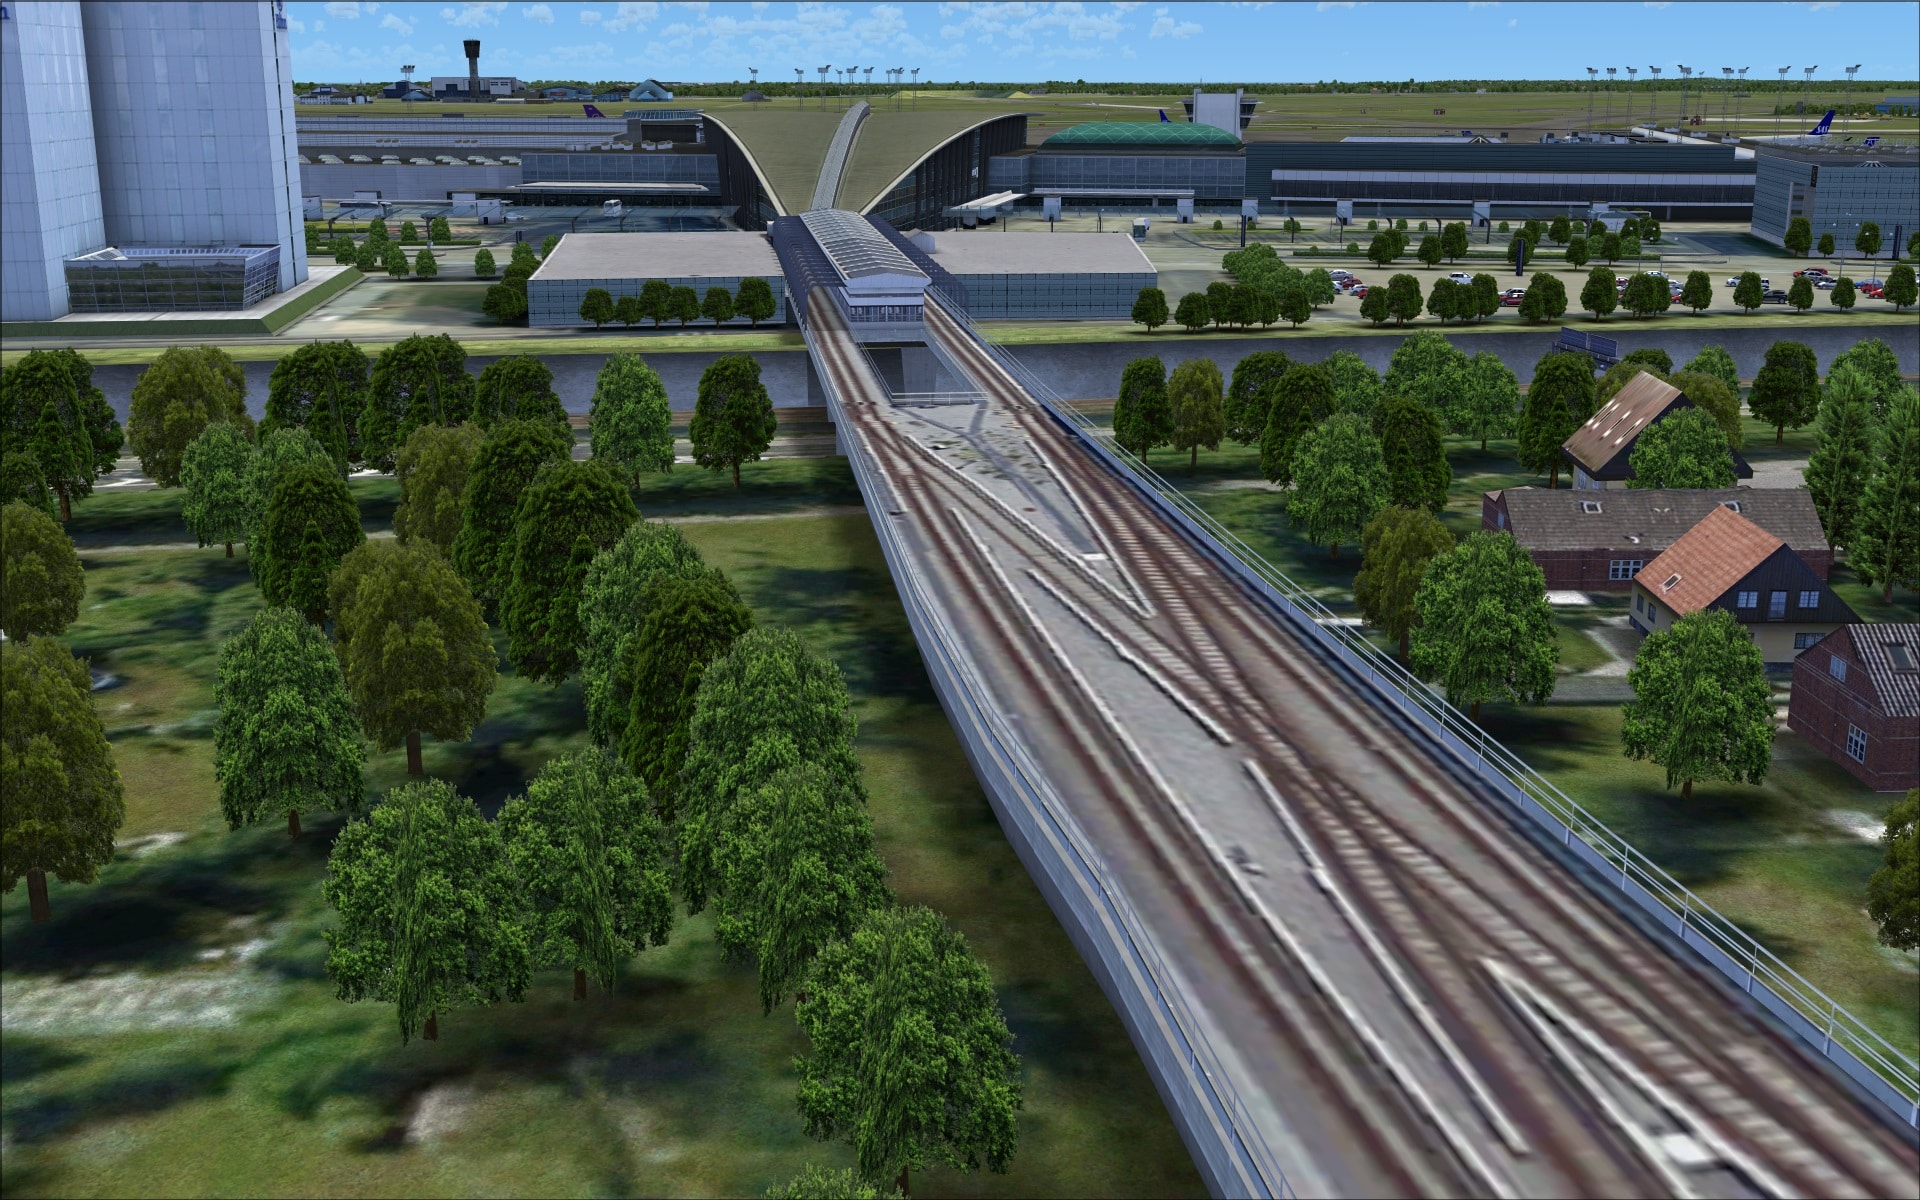
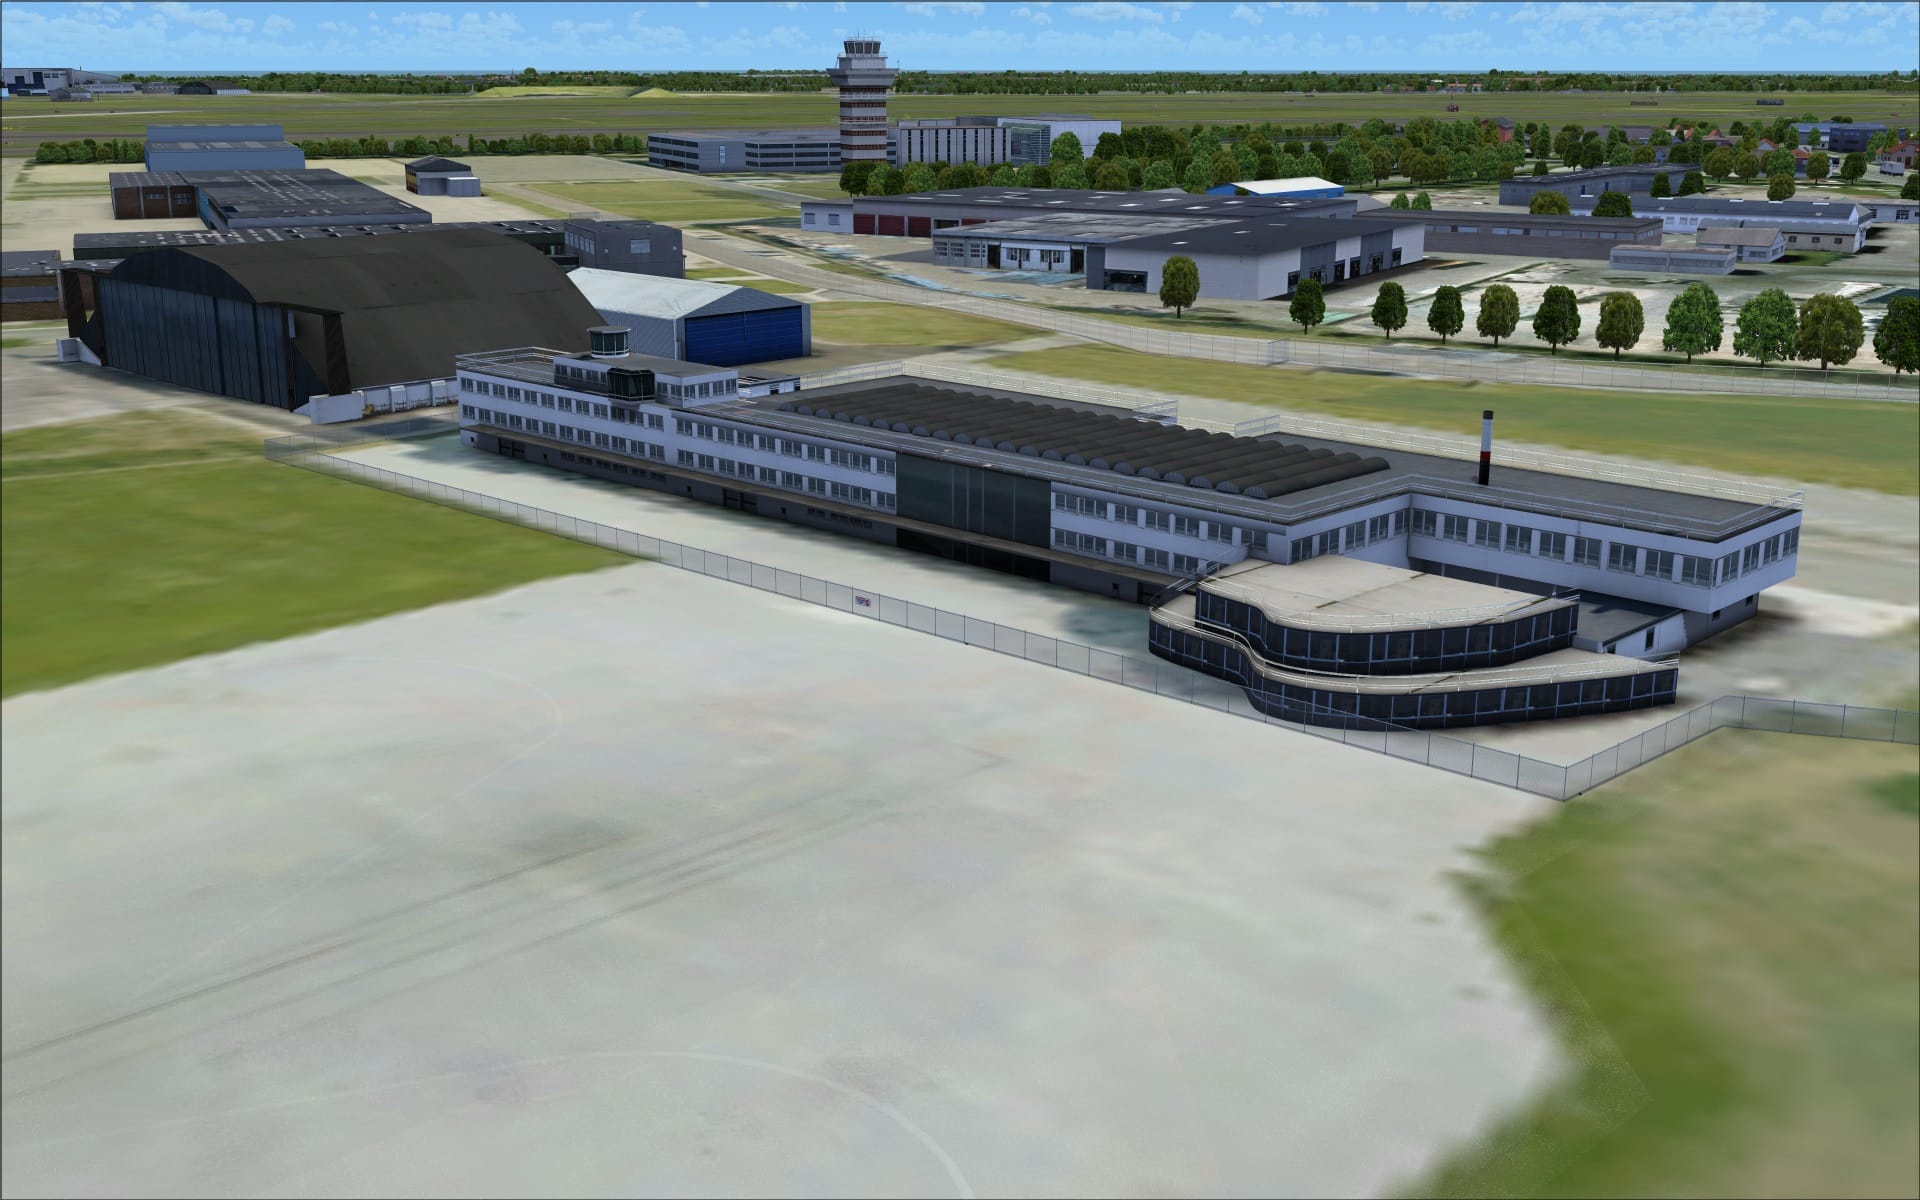
Looking at the main terminal the standout visual feature is the large “paper airplane” like structure that joins the terminal building to the train and metro stations. Its unique appearance has been convincingly recreated and certainly draws your attention.
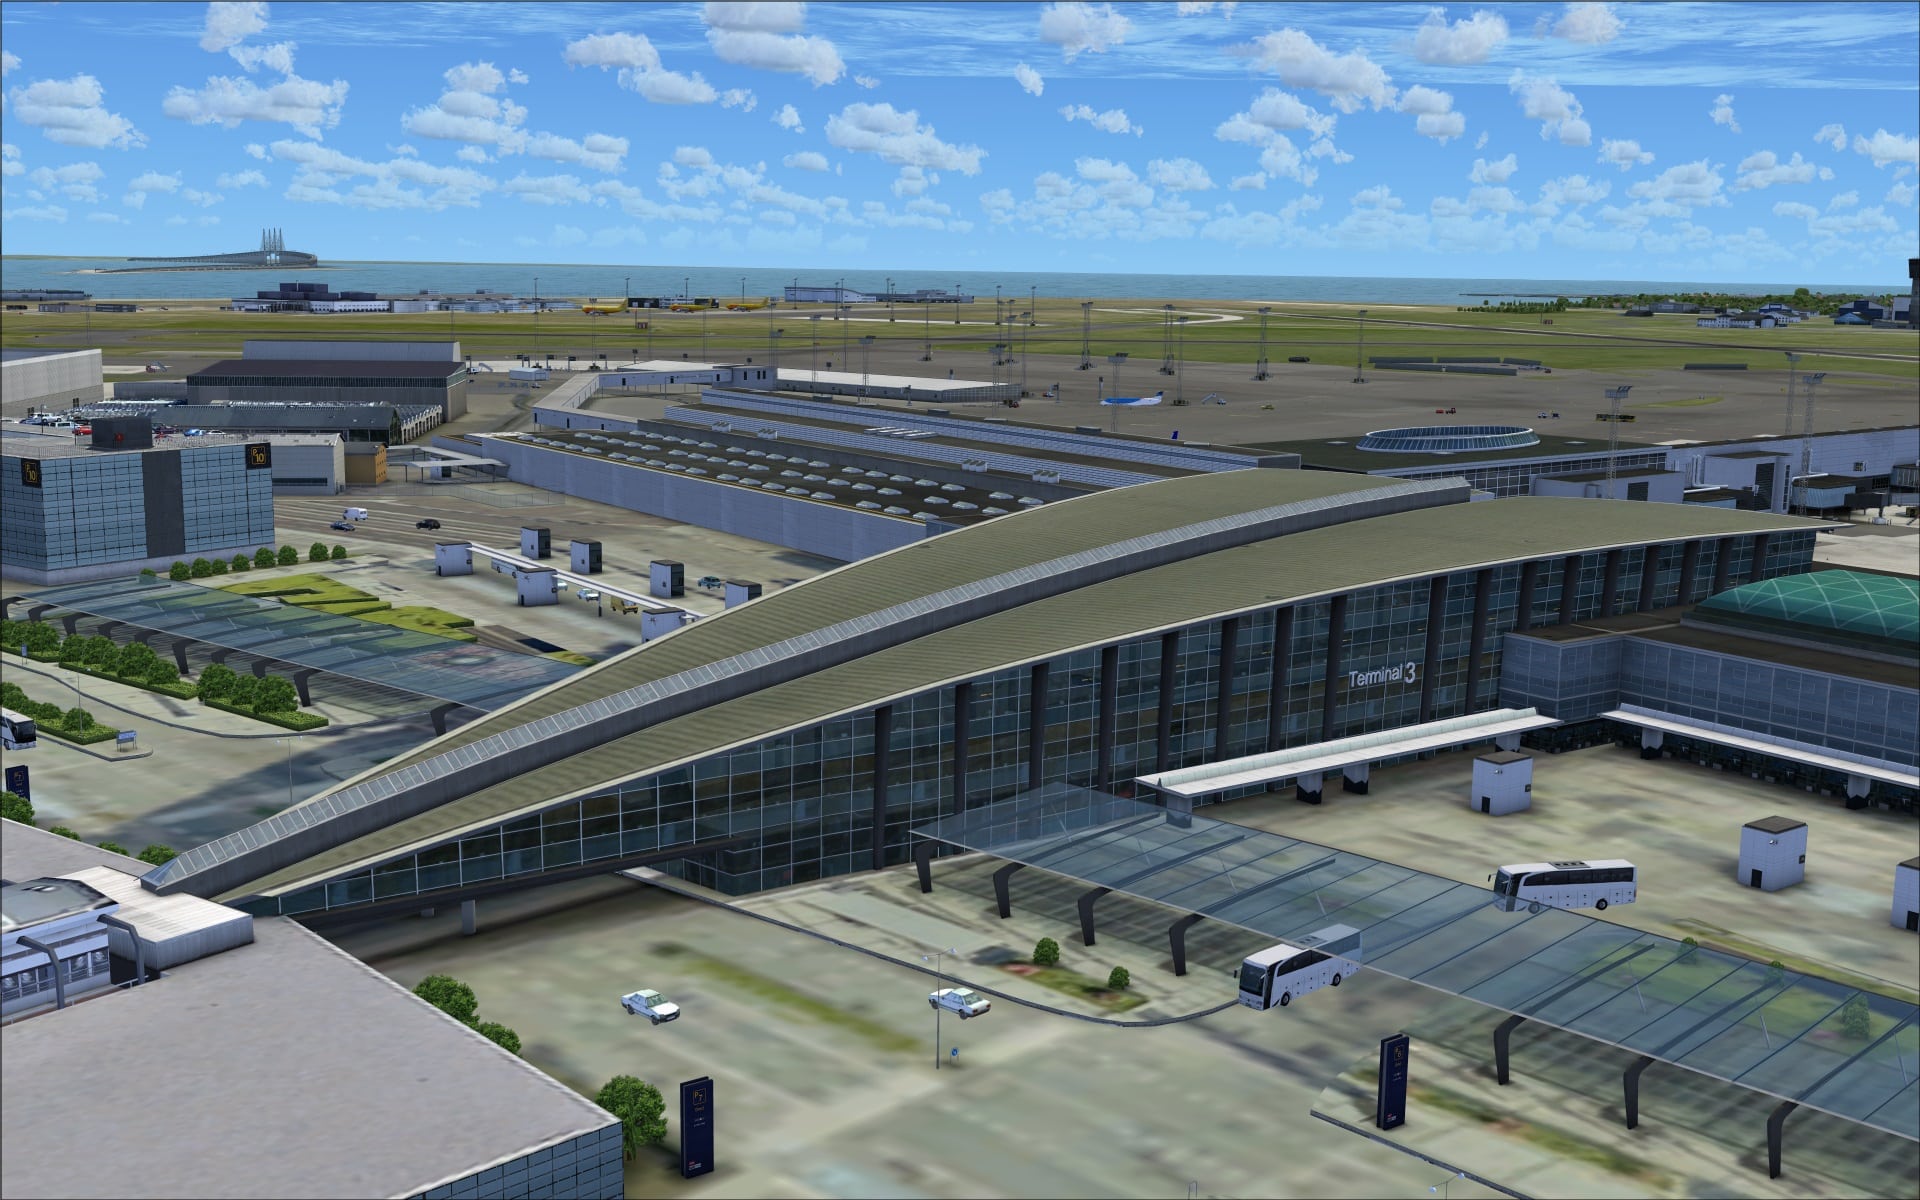 Other external features of the terminal include detailed rooftops, external structure supports and the curved lines of the terminal one walls. The concourses are also very detailed complimenting the exceptional work done on the jet ways.
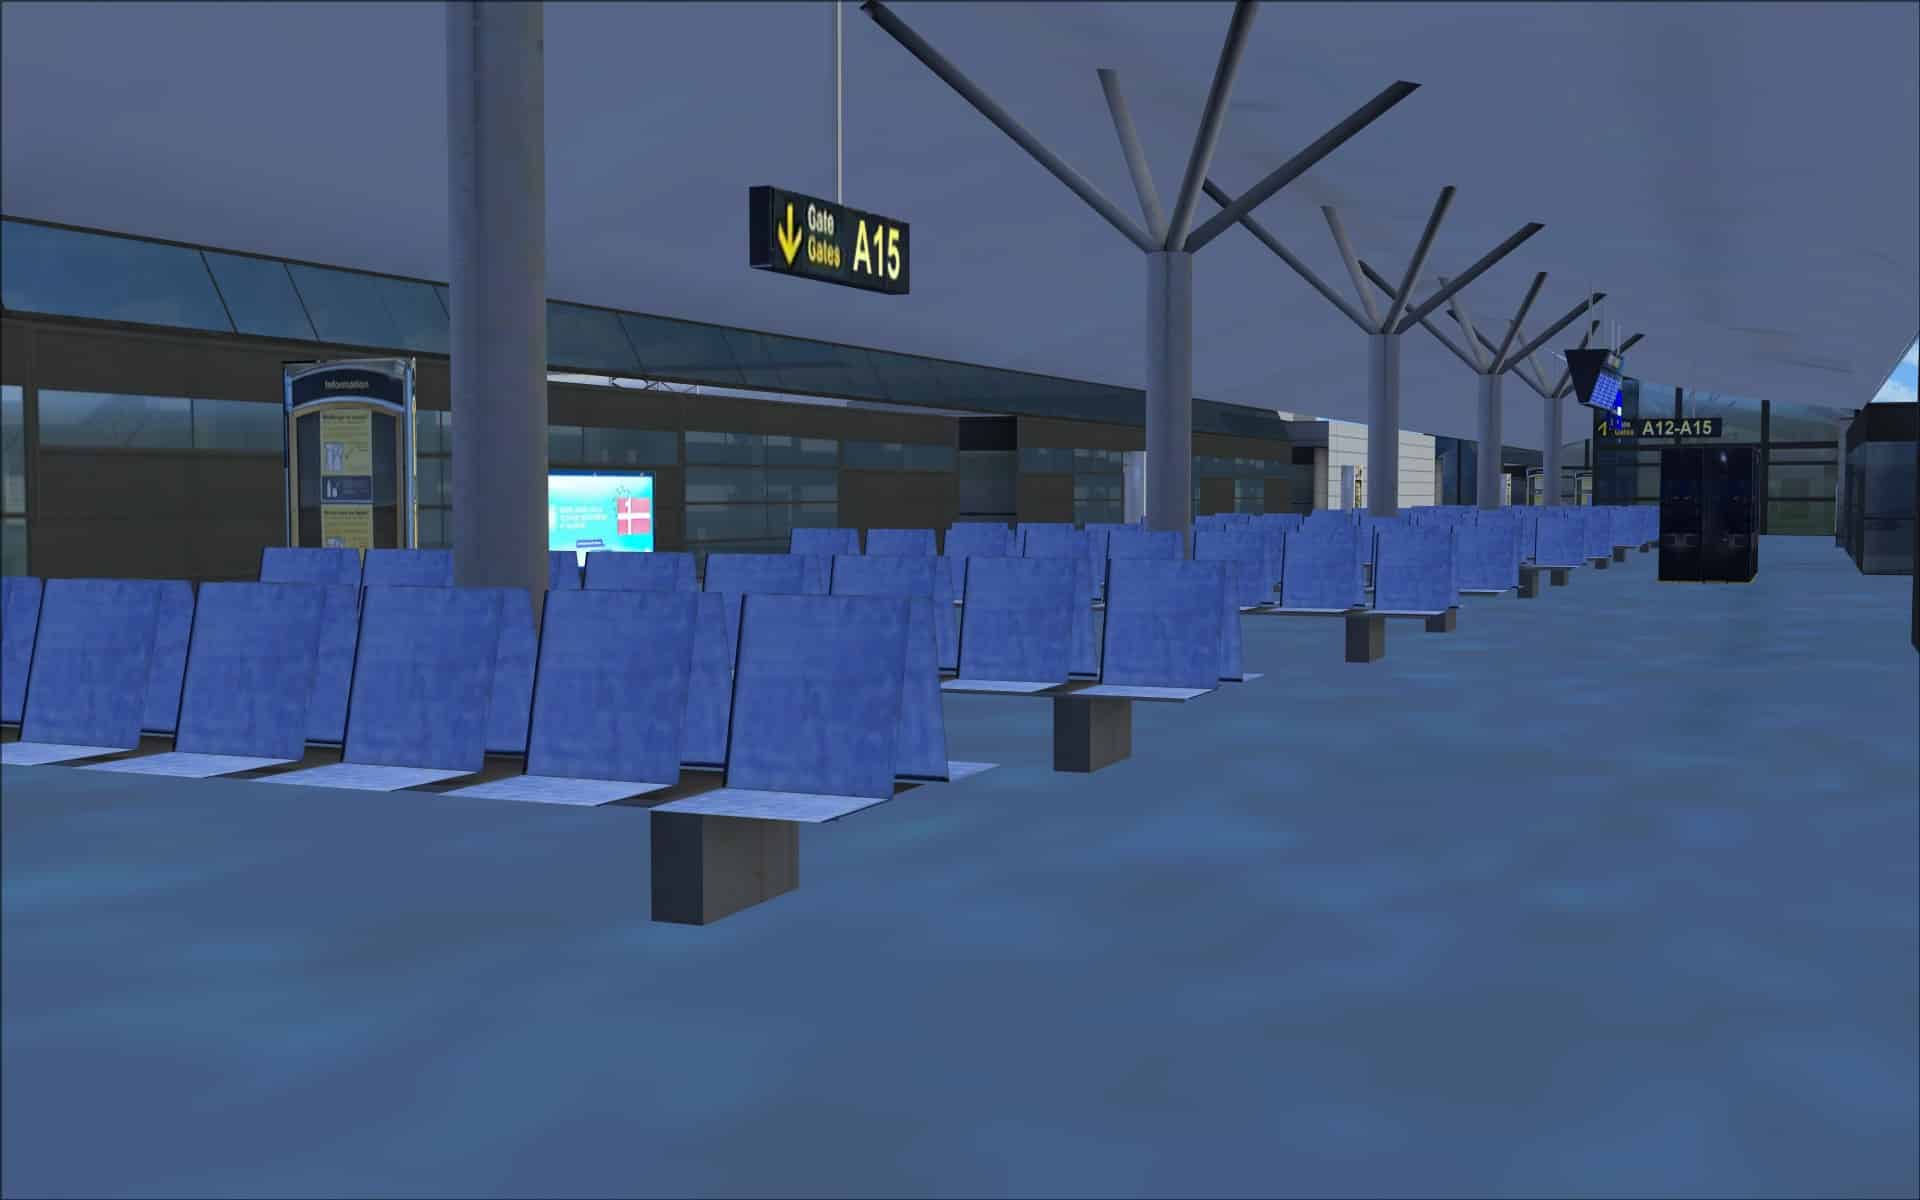
 Modelling of terminal interiors seems to be a trend that’s becoming more popular. I for one am not totally sold on its benefits. It does offer some degree of realism when you are parked at a gate and can see the interior with the chairs, etc however these same interiors are usually devoid of any people so when you take a much closer look they appear abandoned, not realistic at all for a large airport. The interior of Copenhagen’s terminal has been given some attention with rows of seats and various types of signage.
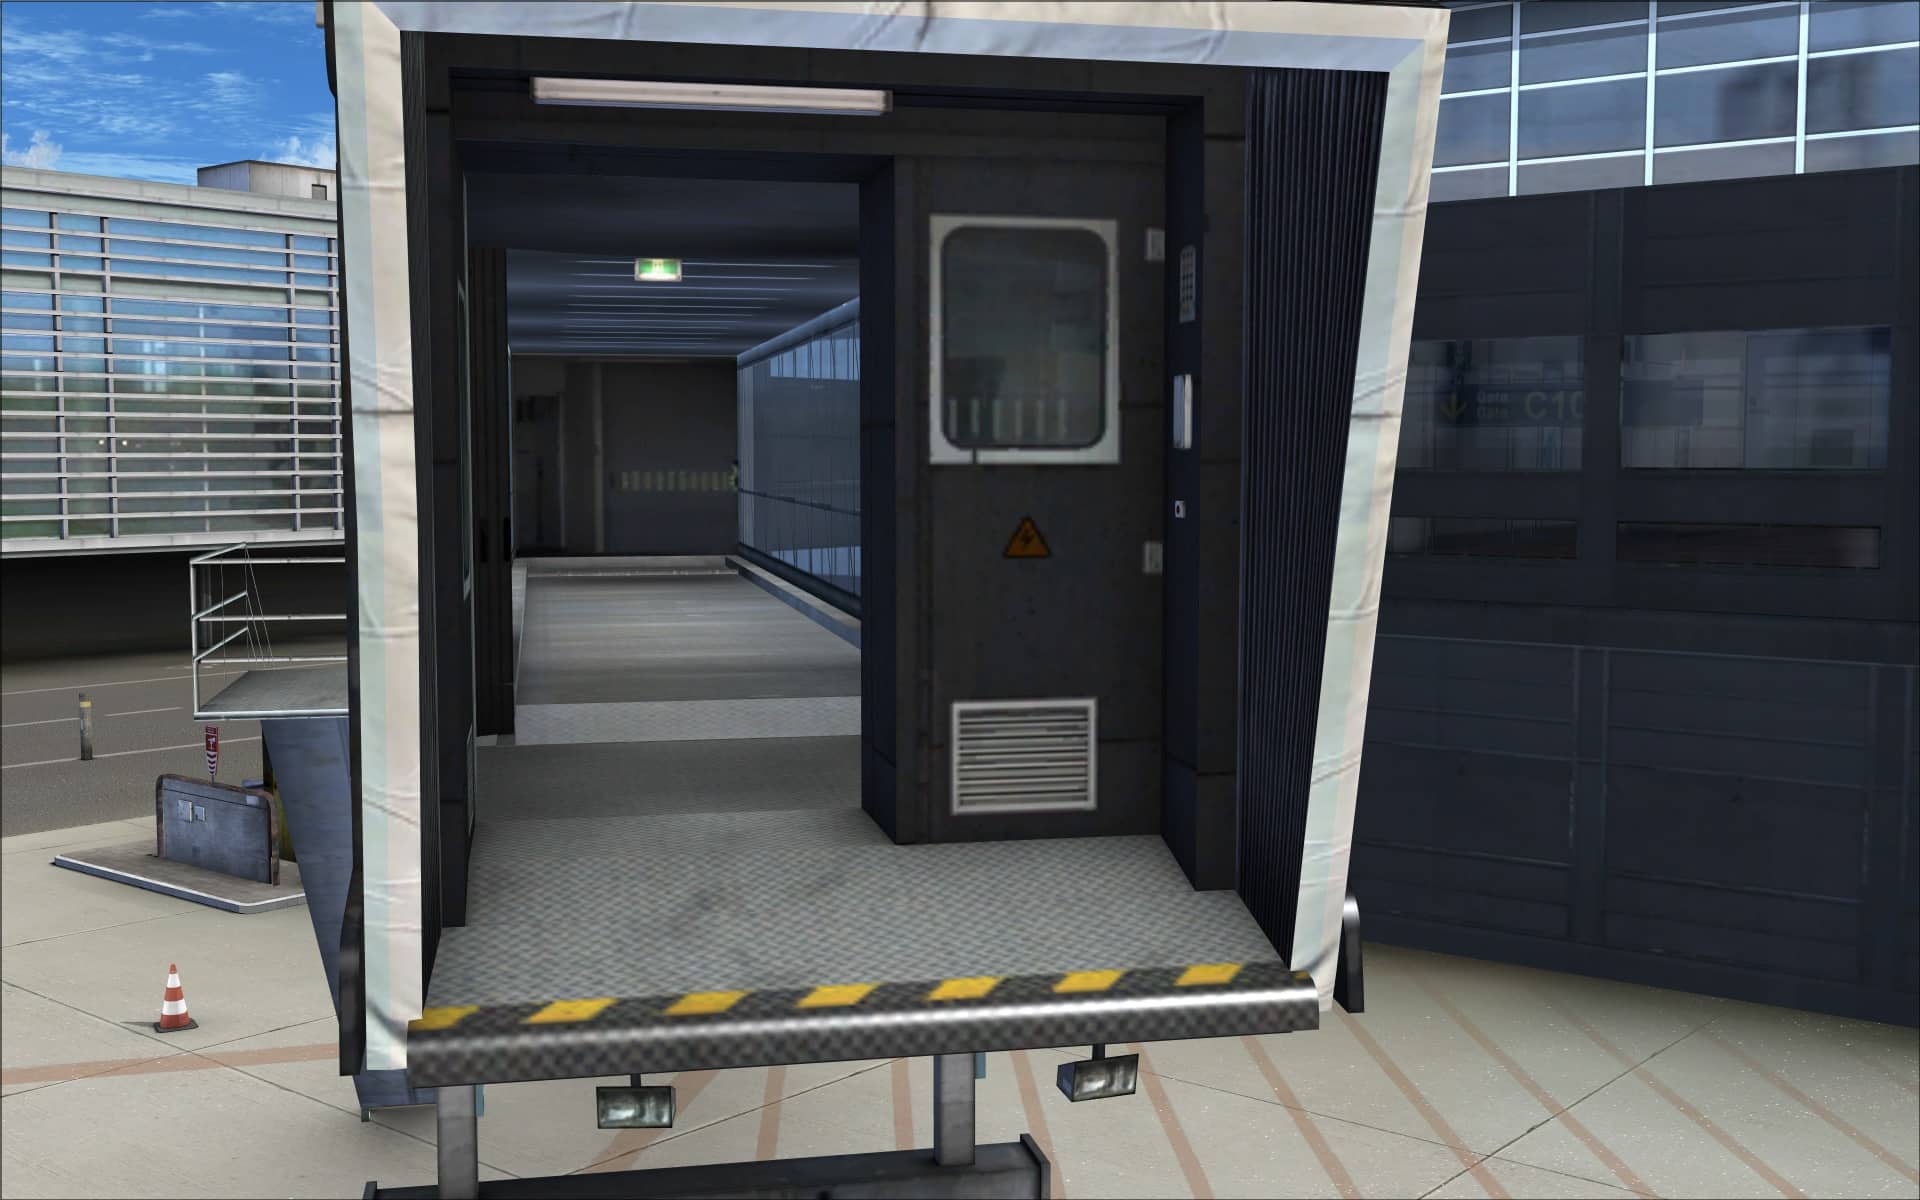
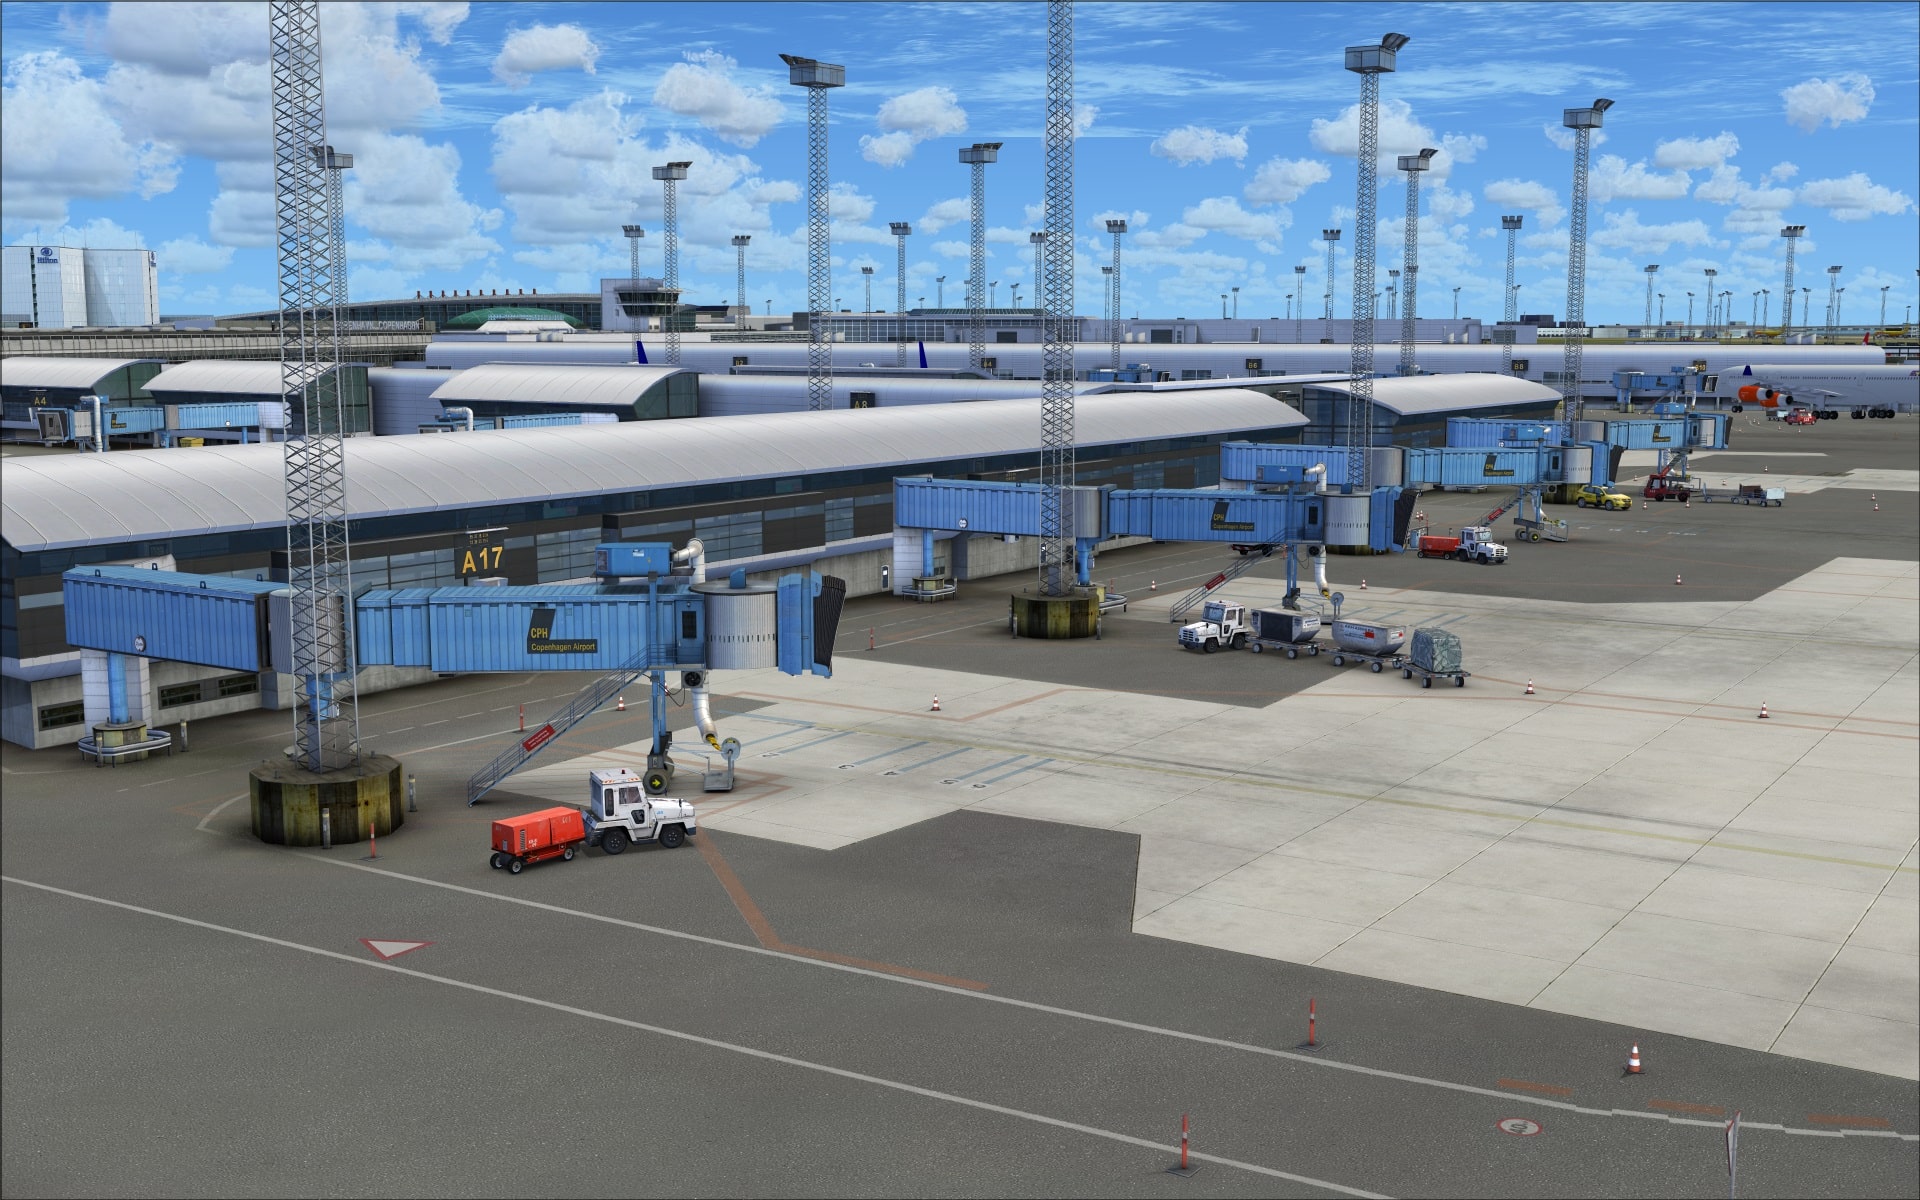
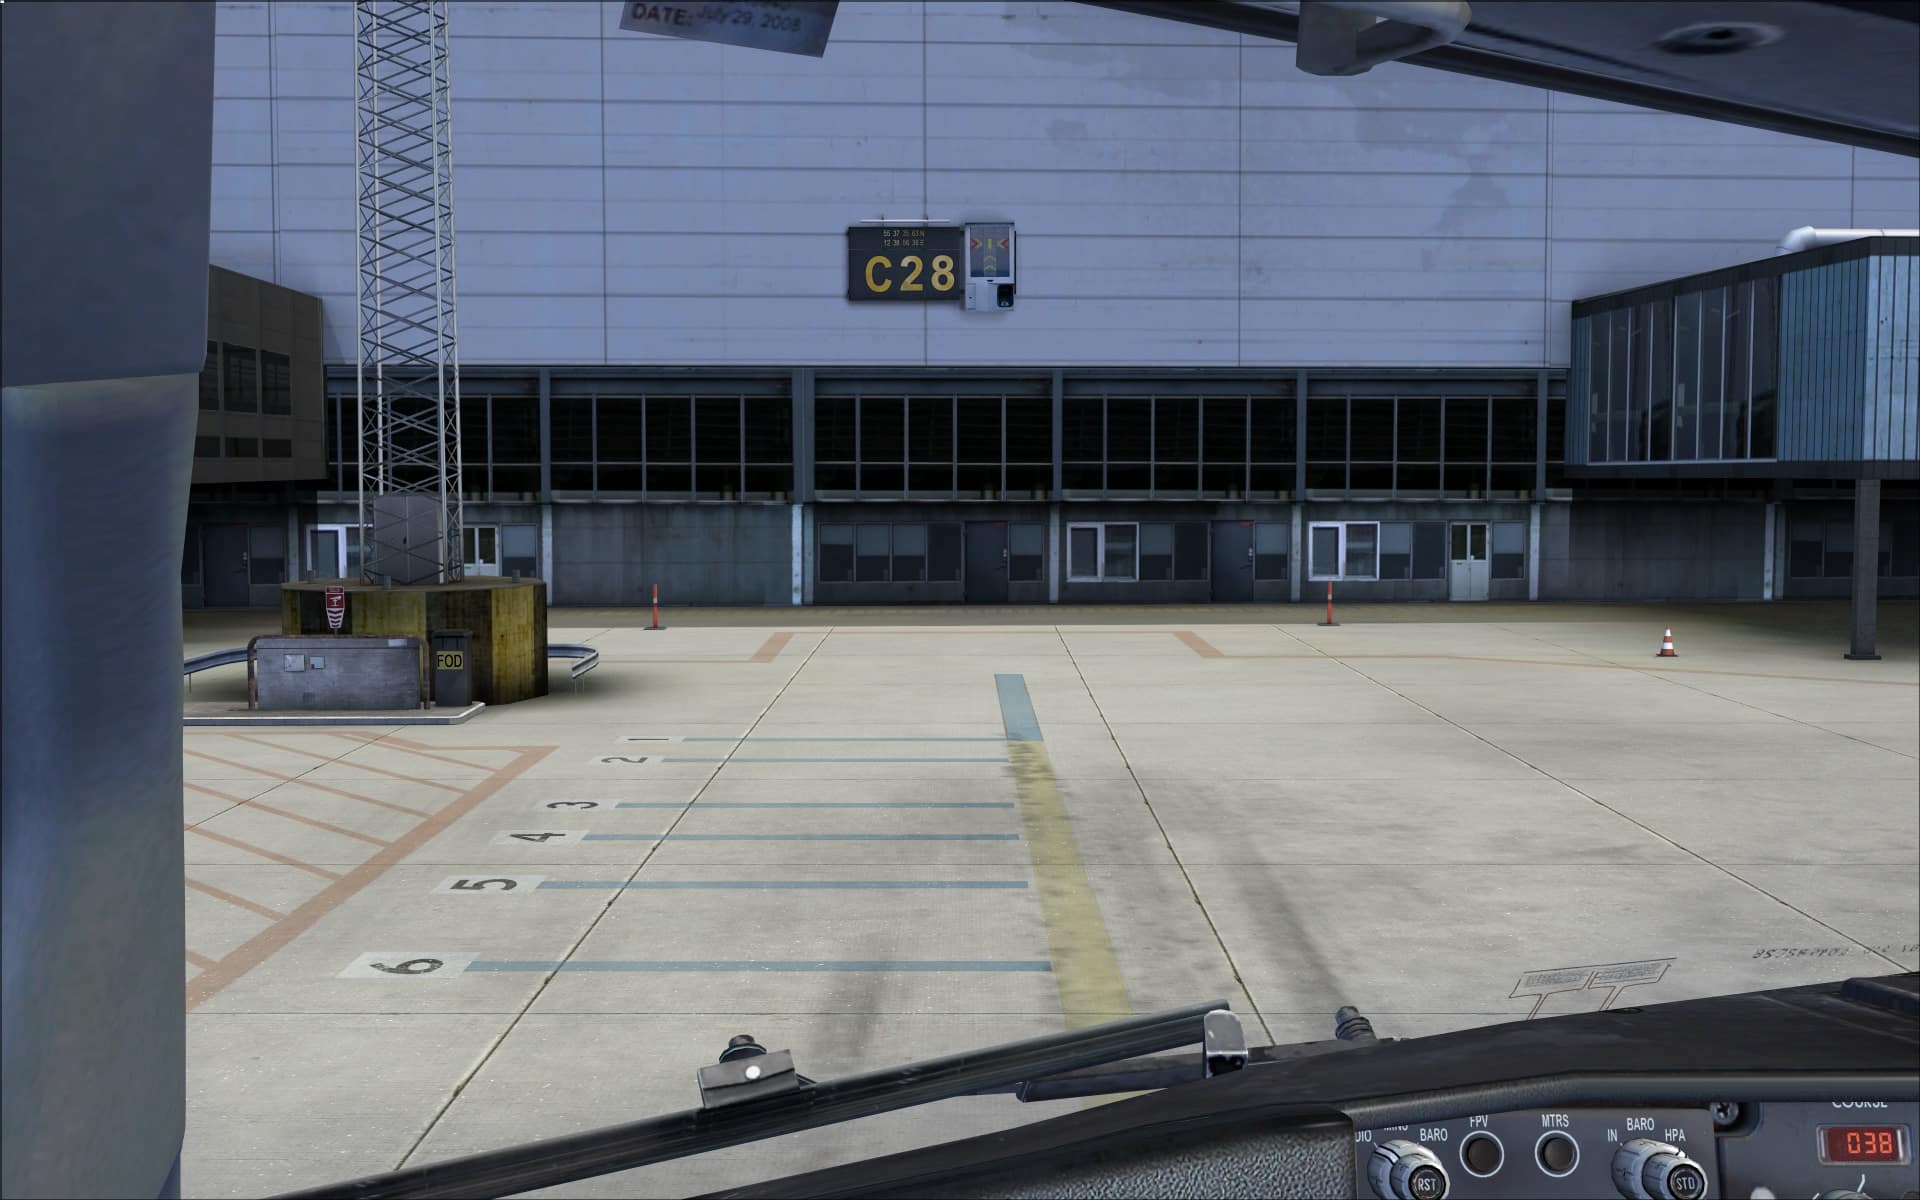
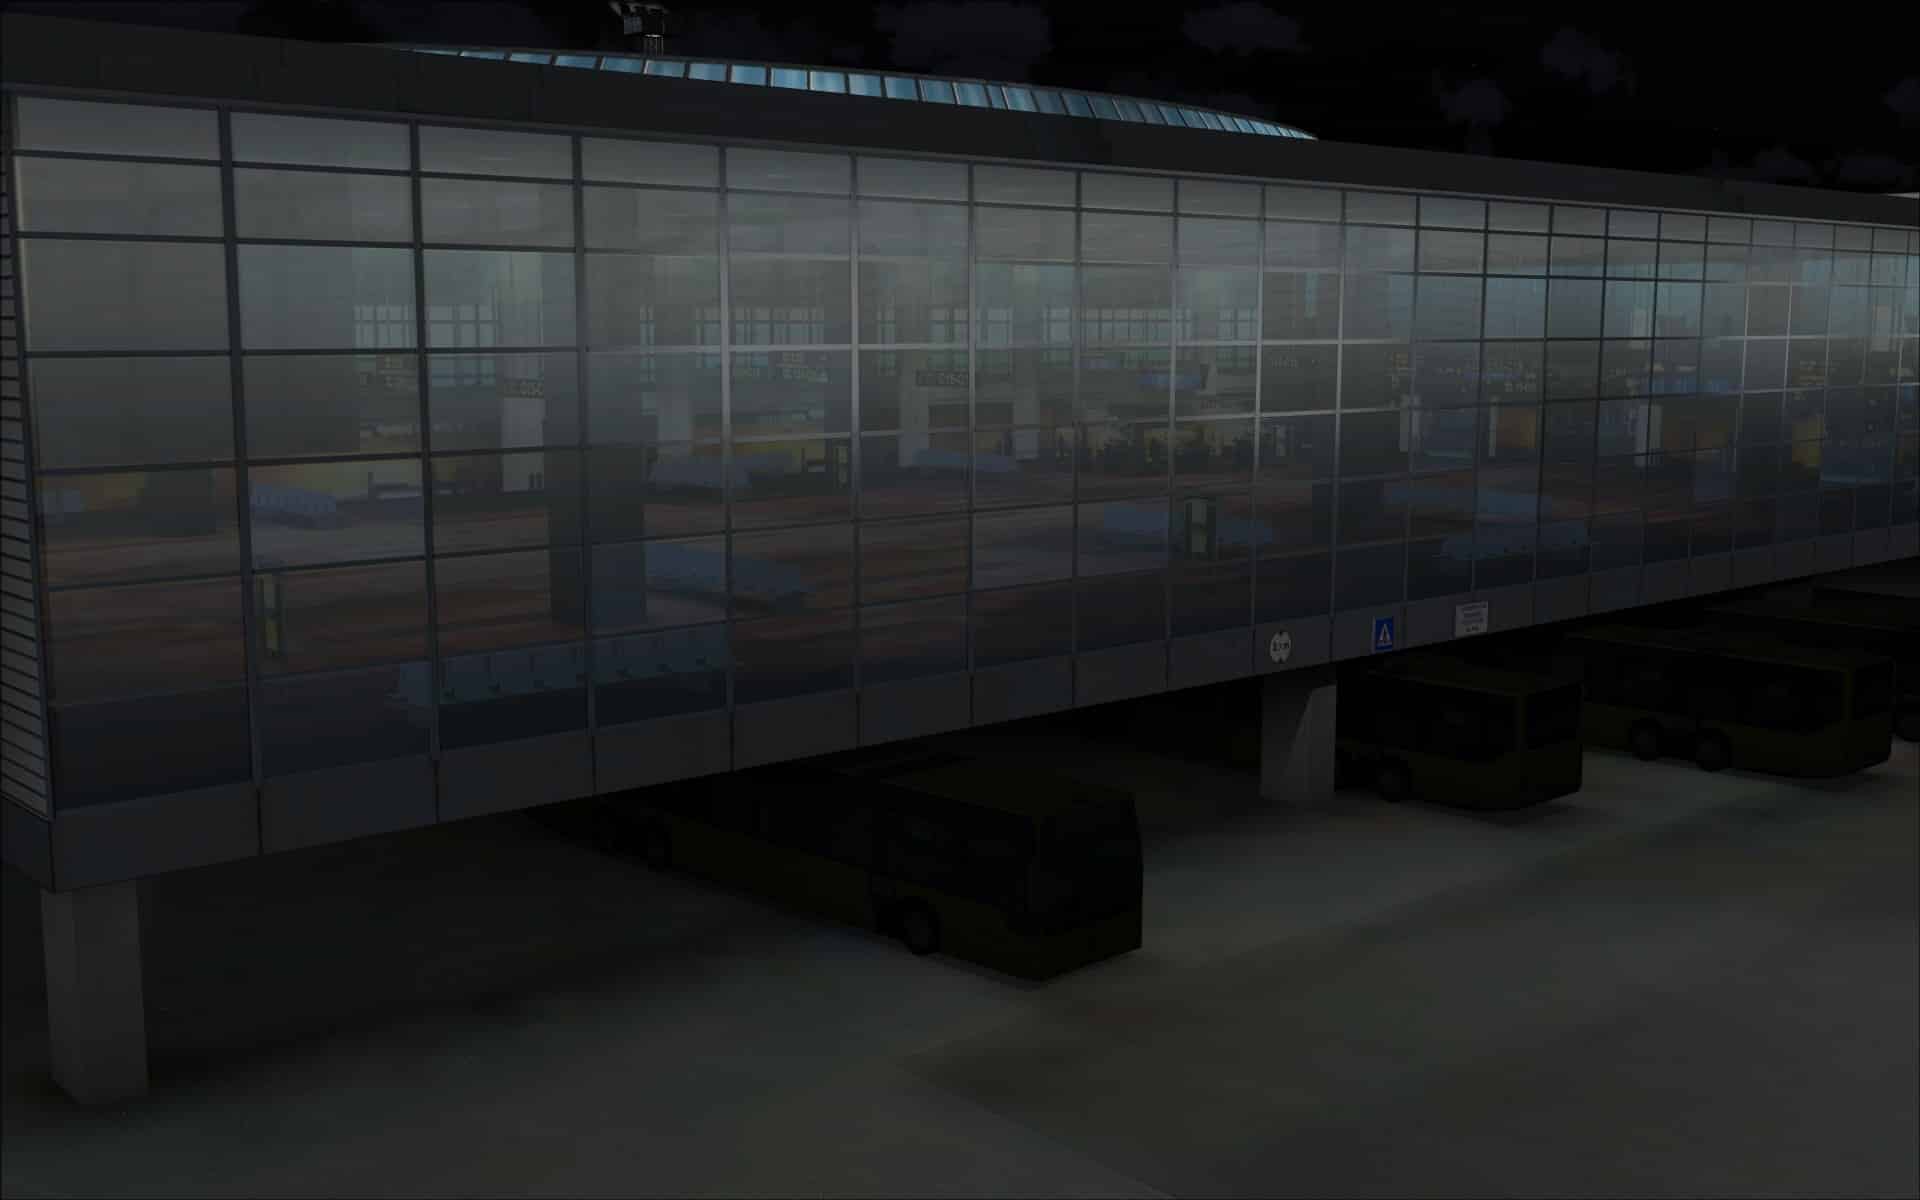
 Like most major airports the passengers embark and disembark aircraft via moving jet ways. As I looked at this part of the scenery I came away feeling like these were the most detailed jet ways of any FSX airport I’ve come across. The screenshots will amplify what I mean. Notice the quality and clarity of the details in and around the base and then the very realistic tunnel effect when looking down the jet way’s corridor. They are actually modelled that way it’s not just a flat graphic texture.

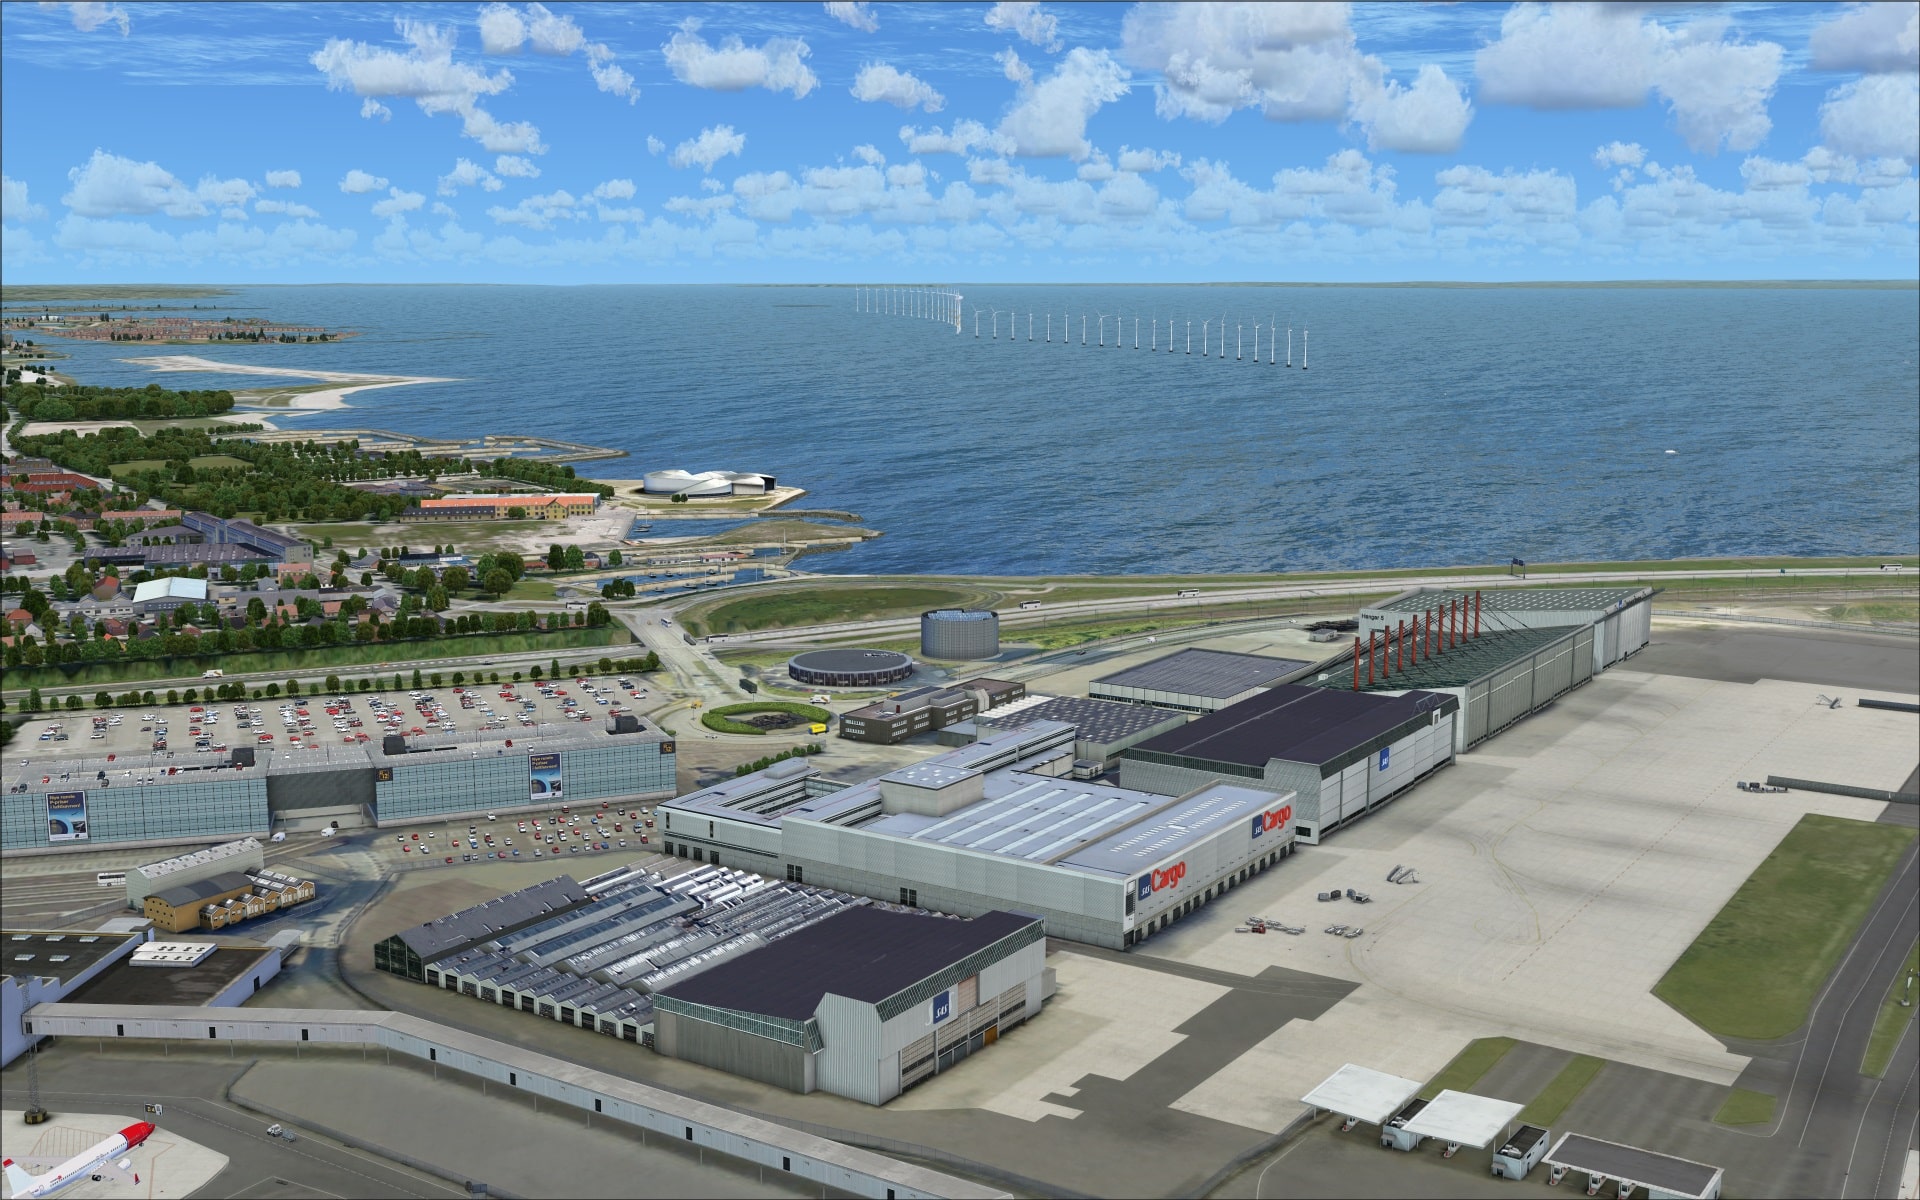
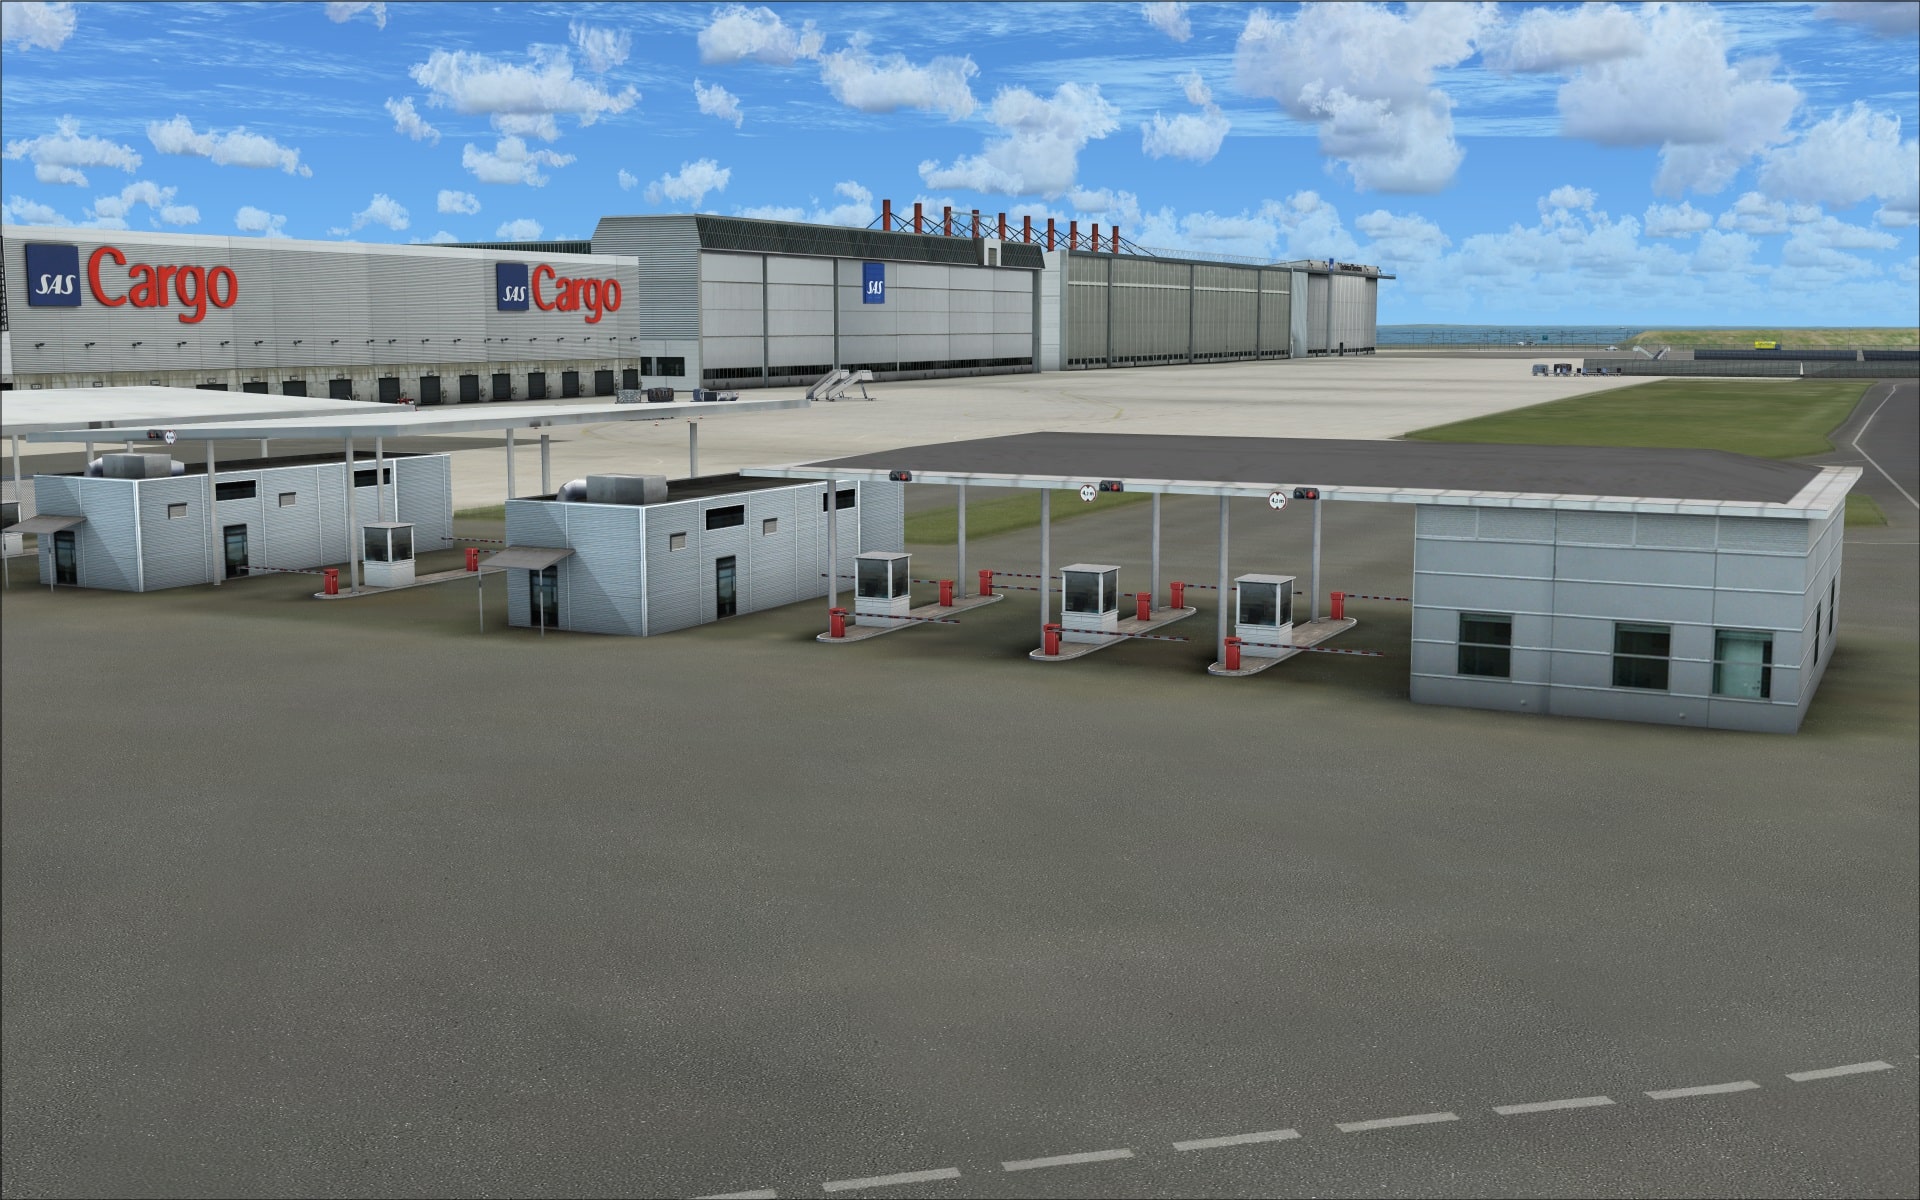
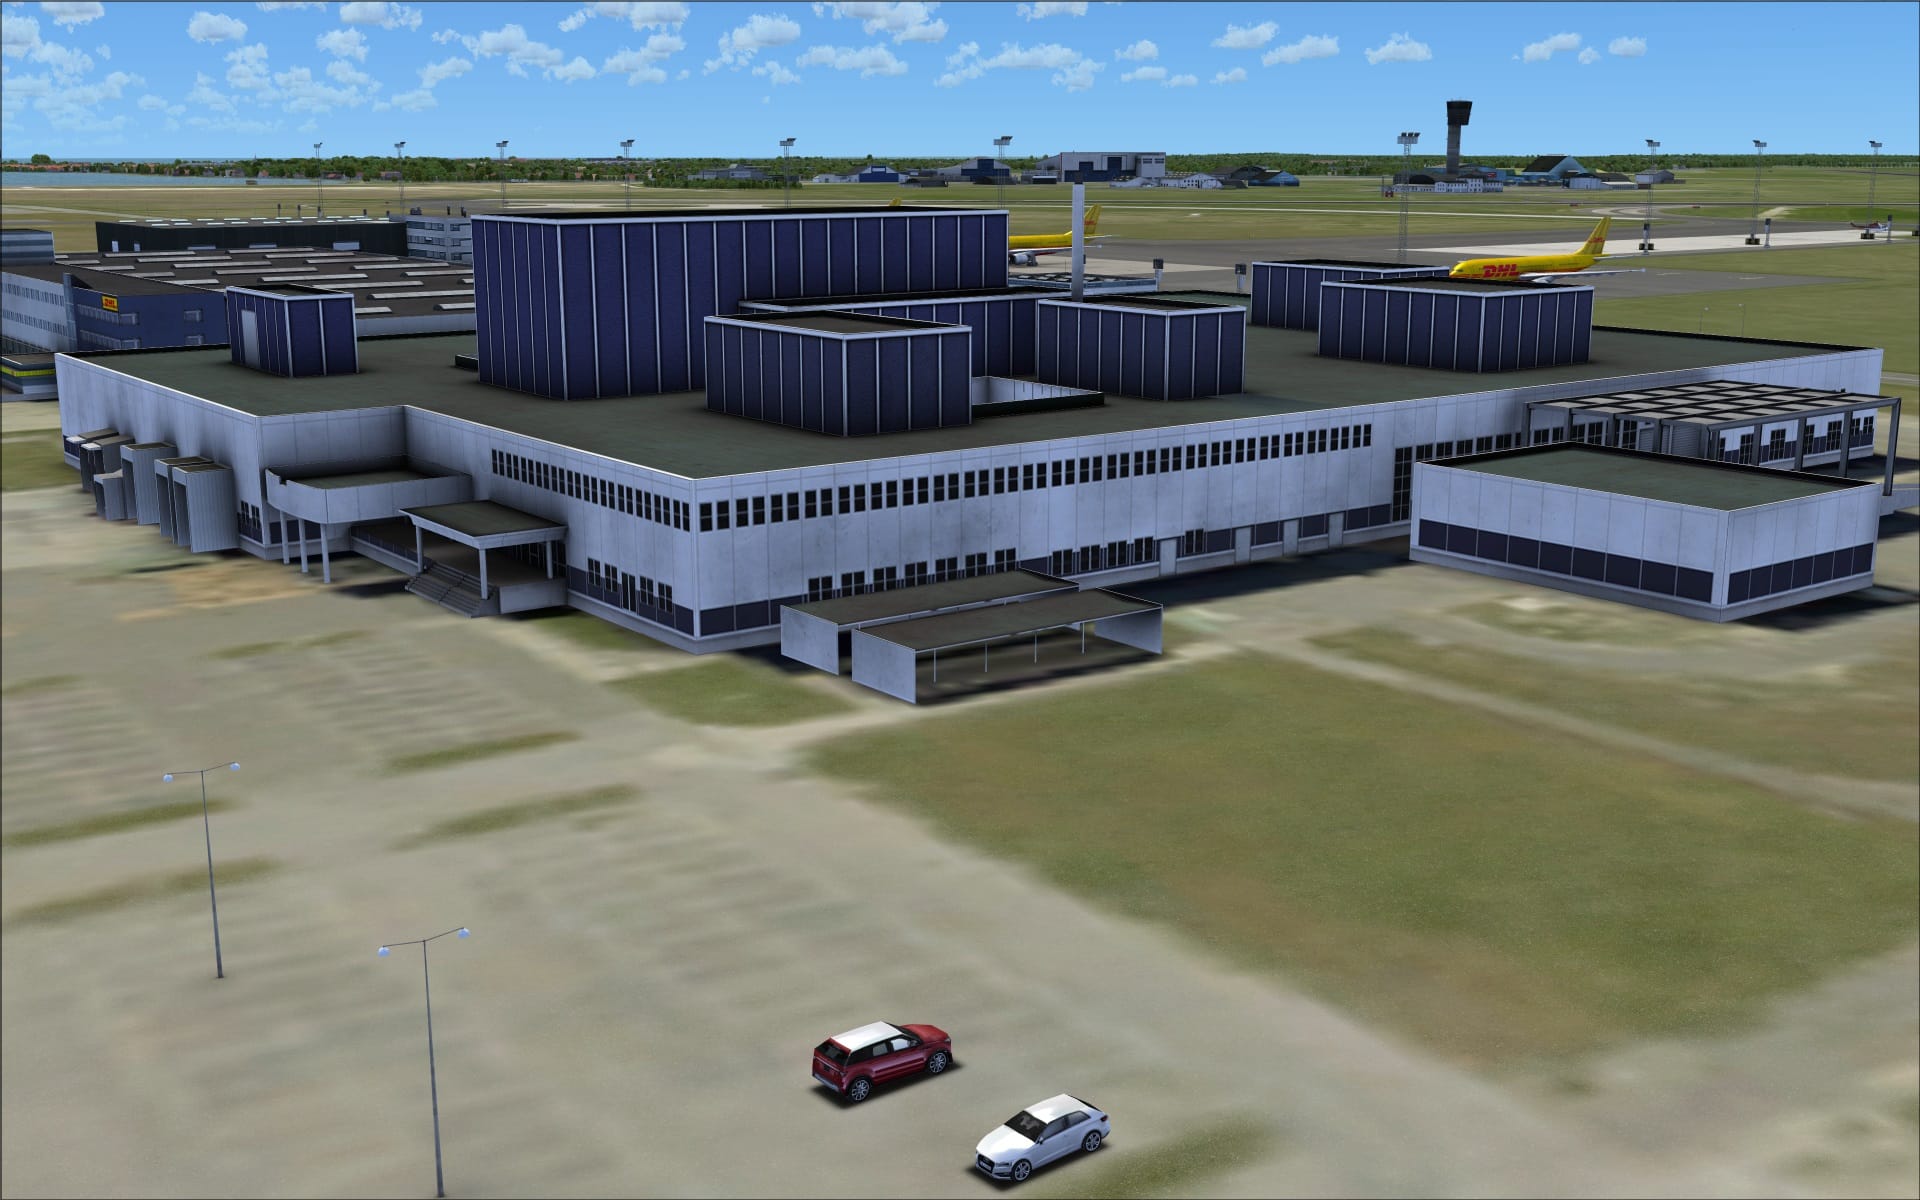
 Located directly to the east of the CPH Go concourse is the group of four SAS hangars. These are quite large and very impressive due to their size and also the quality of the work that has gone into recreating them. They’ve modelled the different roof tops including one that has external exposed support posts and cabling. There are plenty of extra 3d details on the walls such as light fixtures and door control boxes. Colouring and shading also serve to enhance the realistic appearance of the concrete walls.
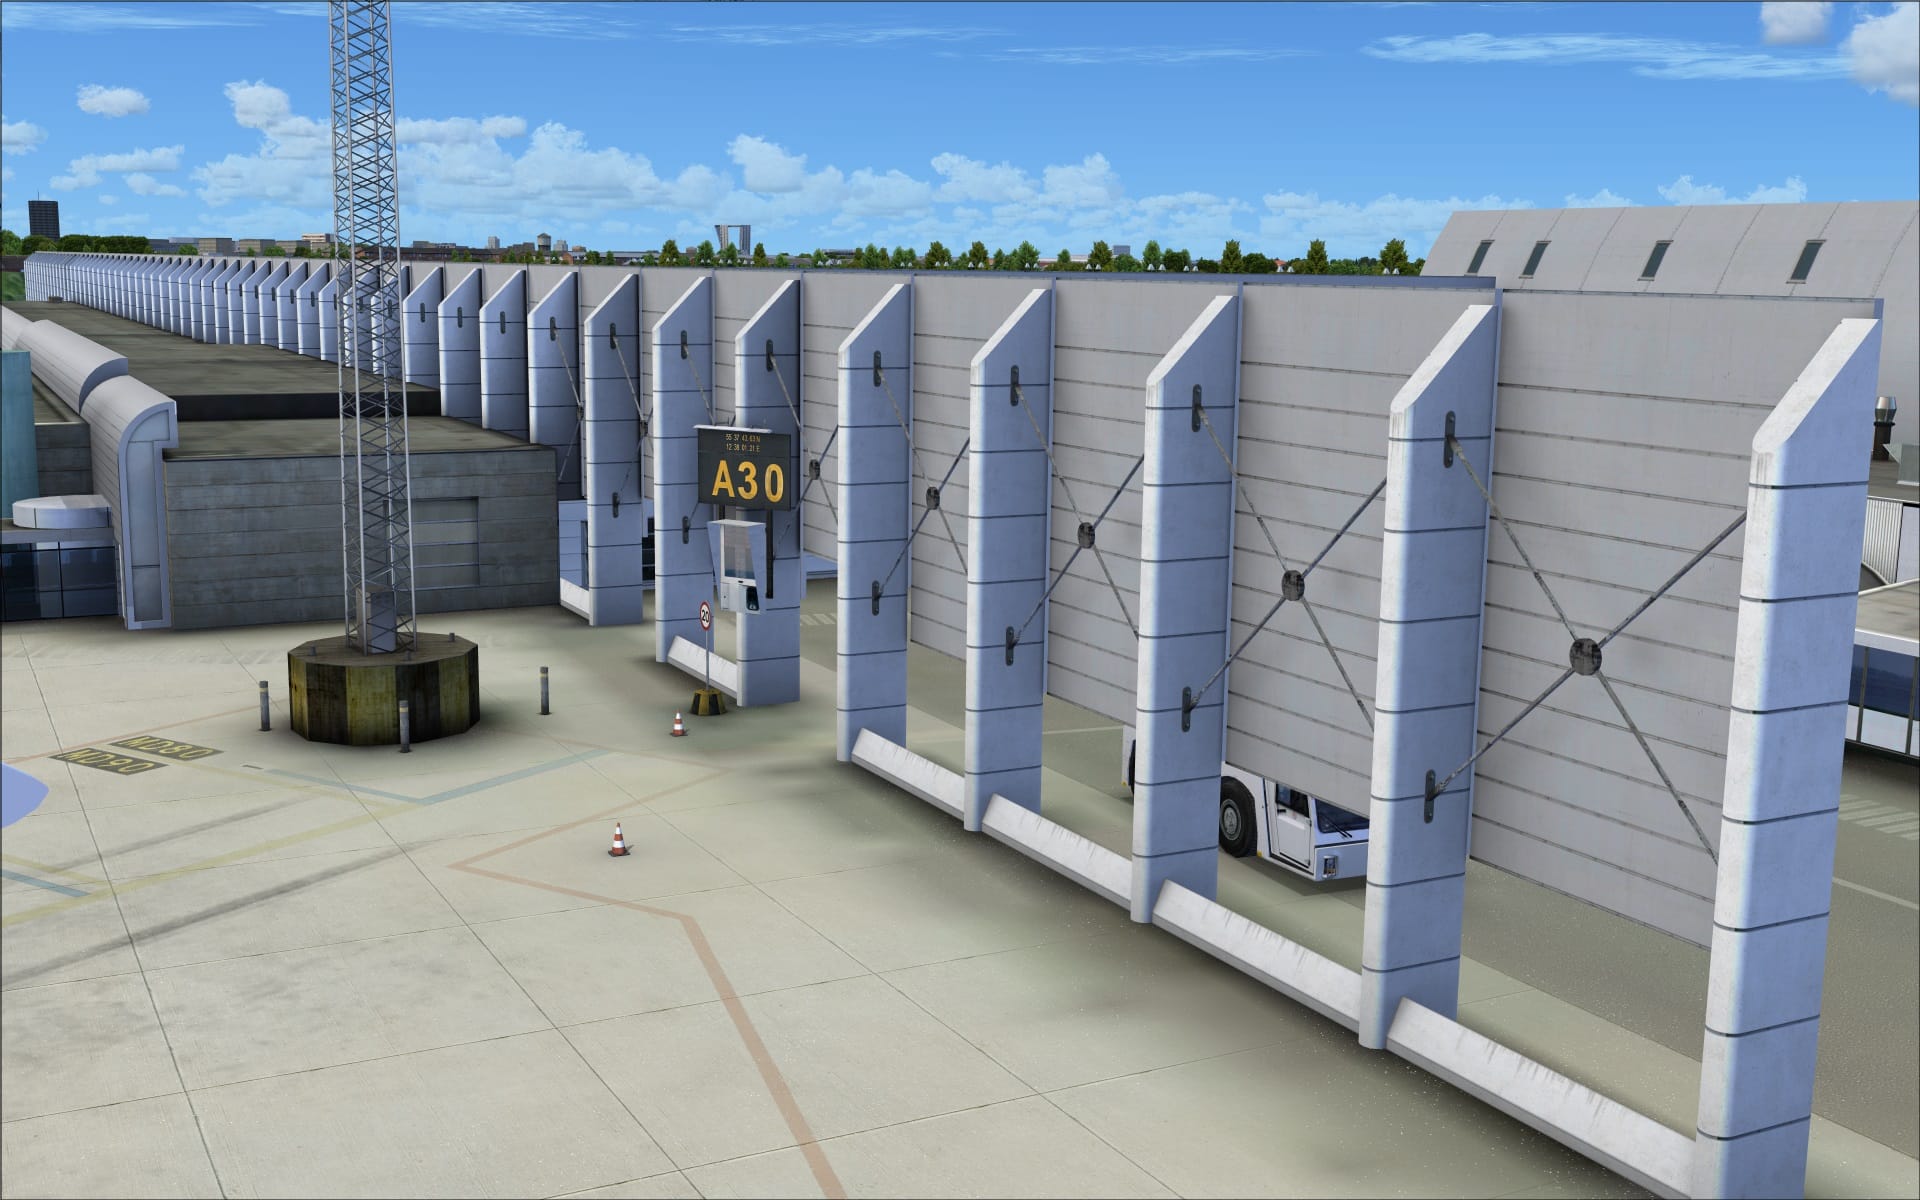
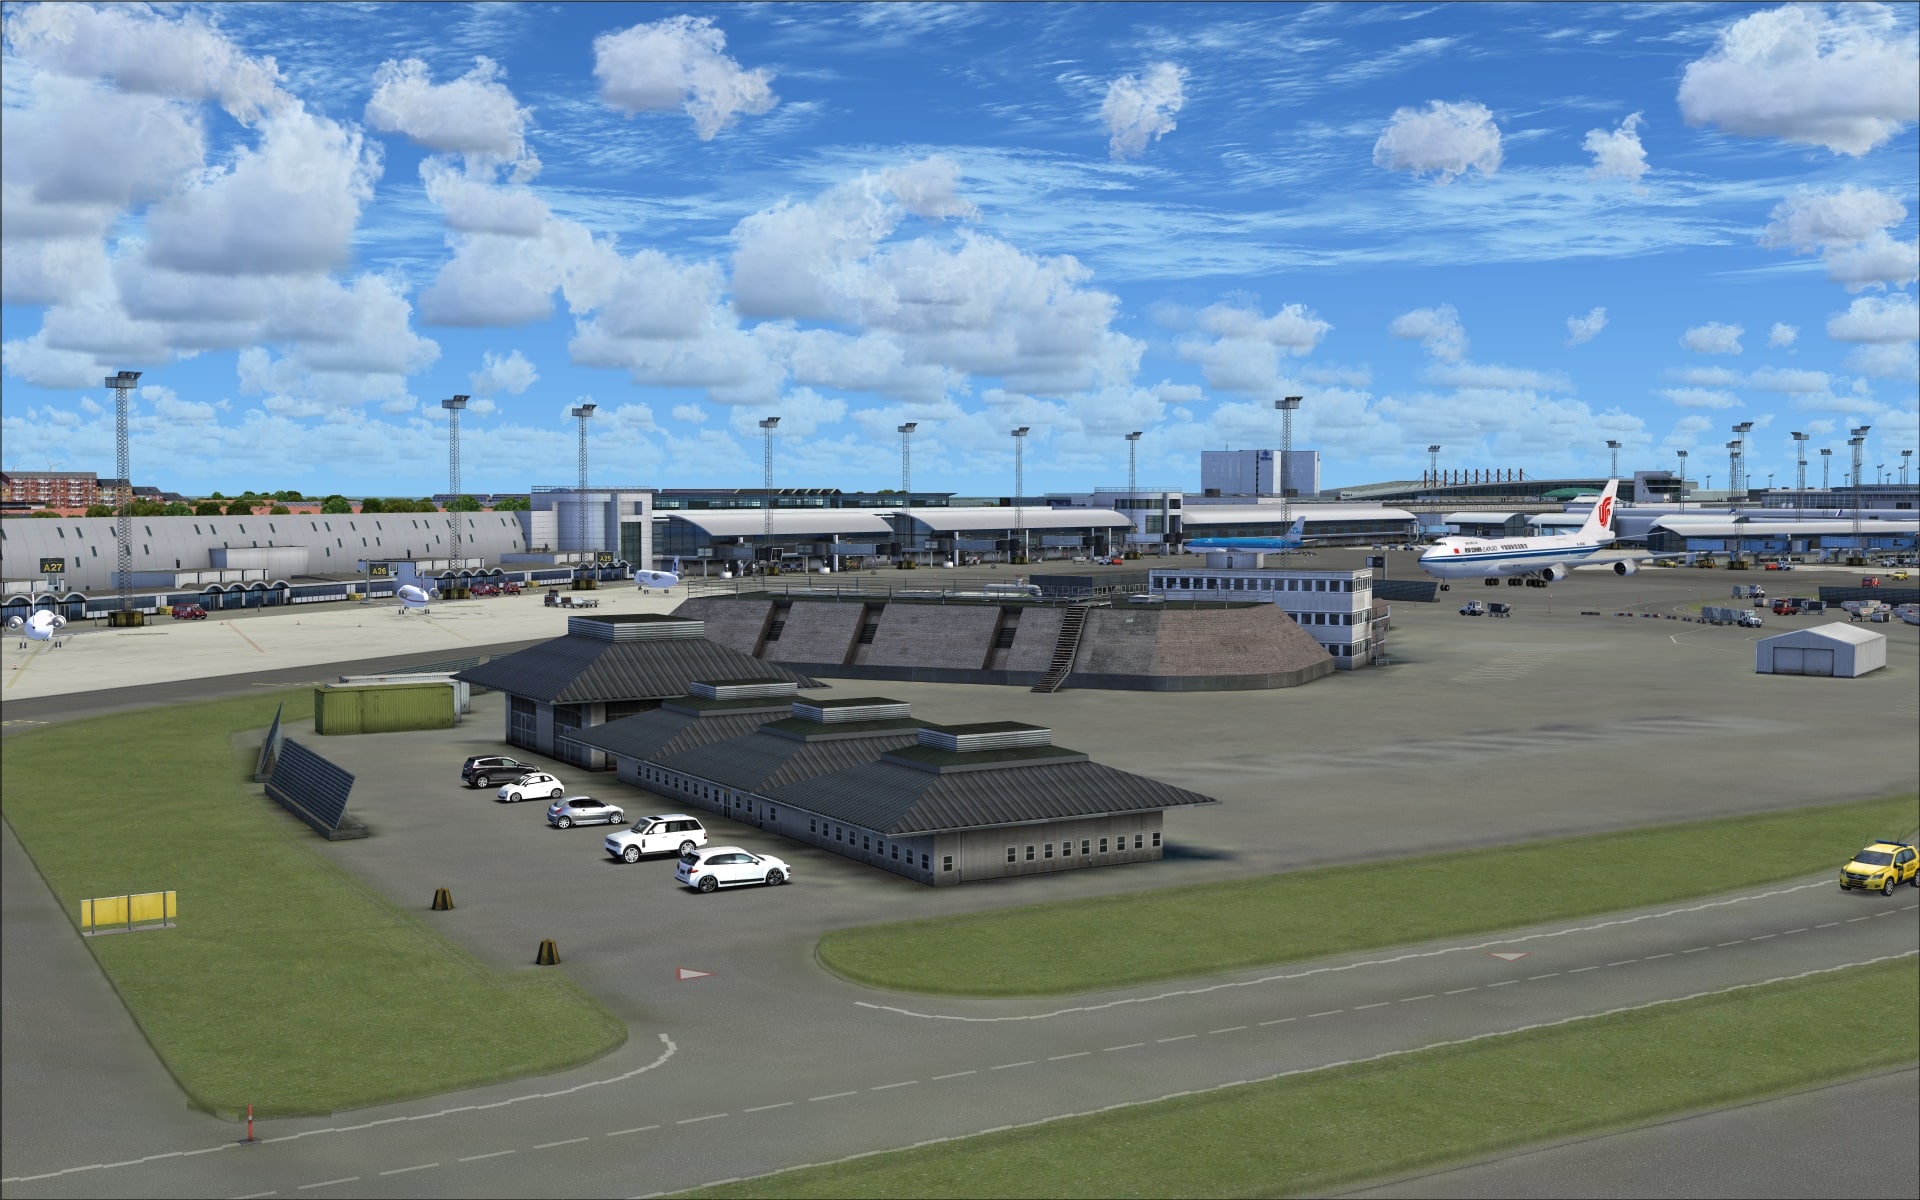
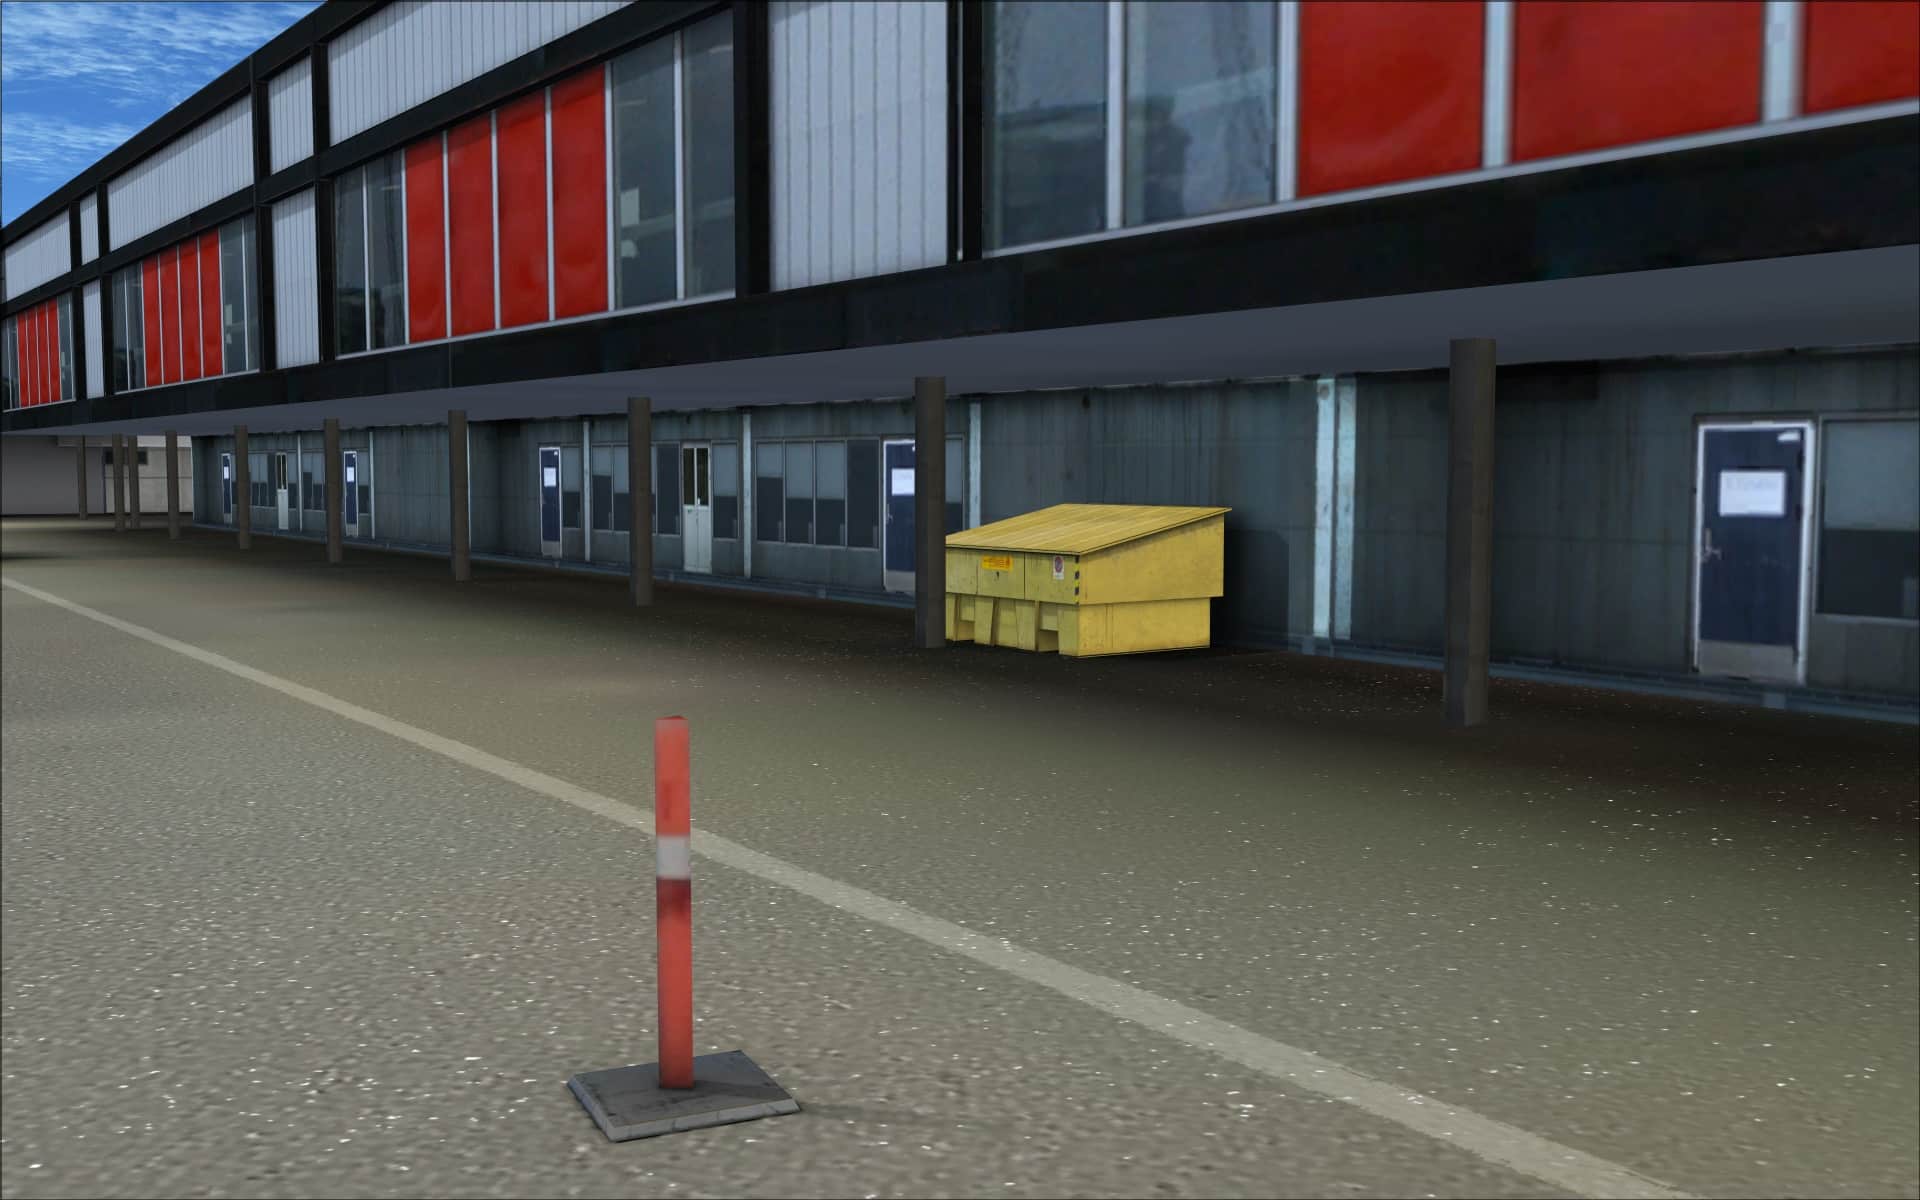
 The area around the terminal is also home to a few other interesting structures. Just in front of terminal one there are several small single storey buildings and what appears to be a fuel depot. I’ve also included a screenshot of one of several security checkpoints to help illustrate that size doesn’t matter as far as quality goes.
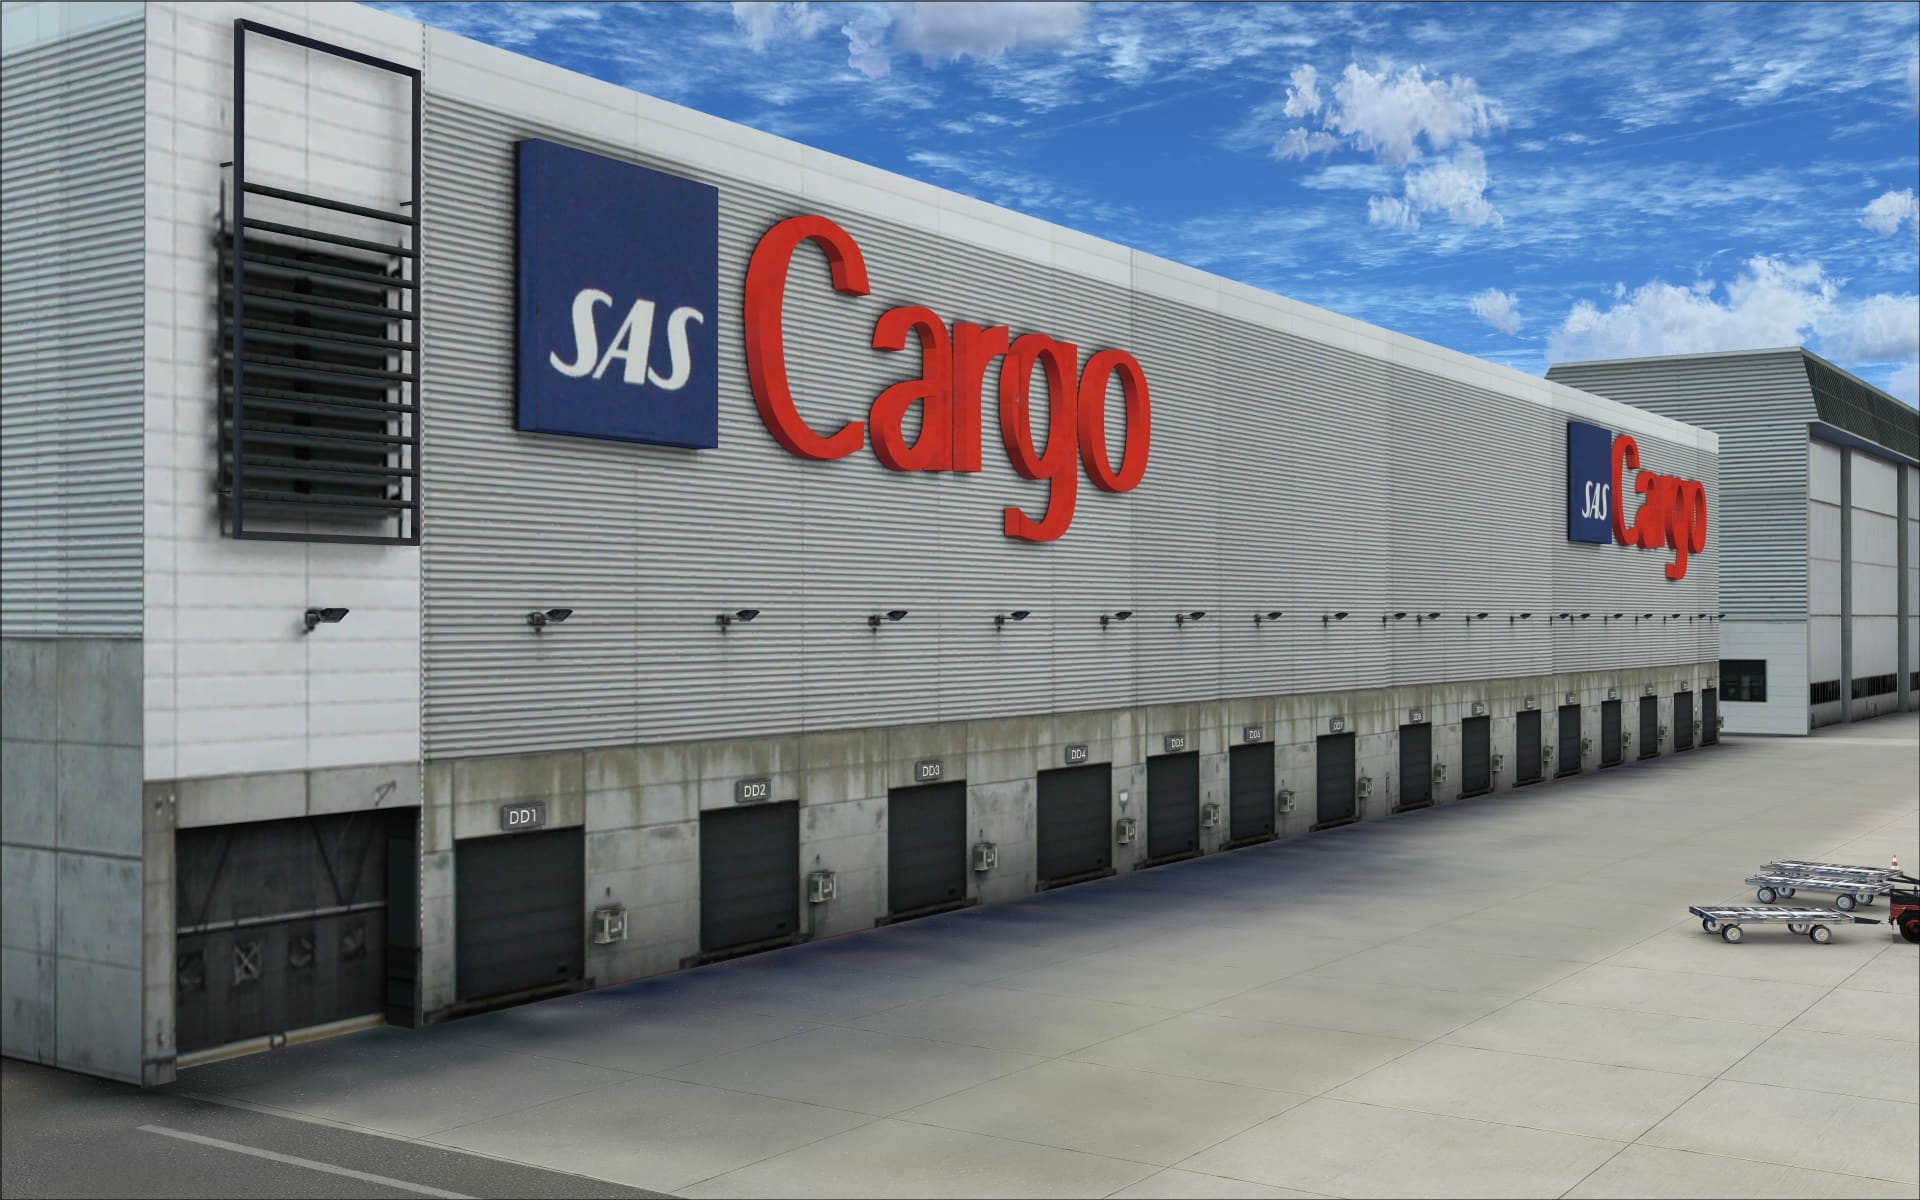
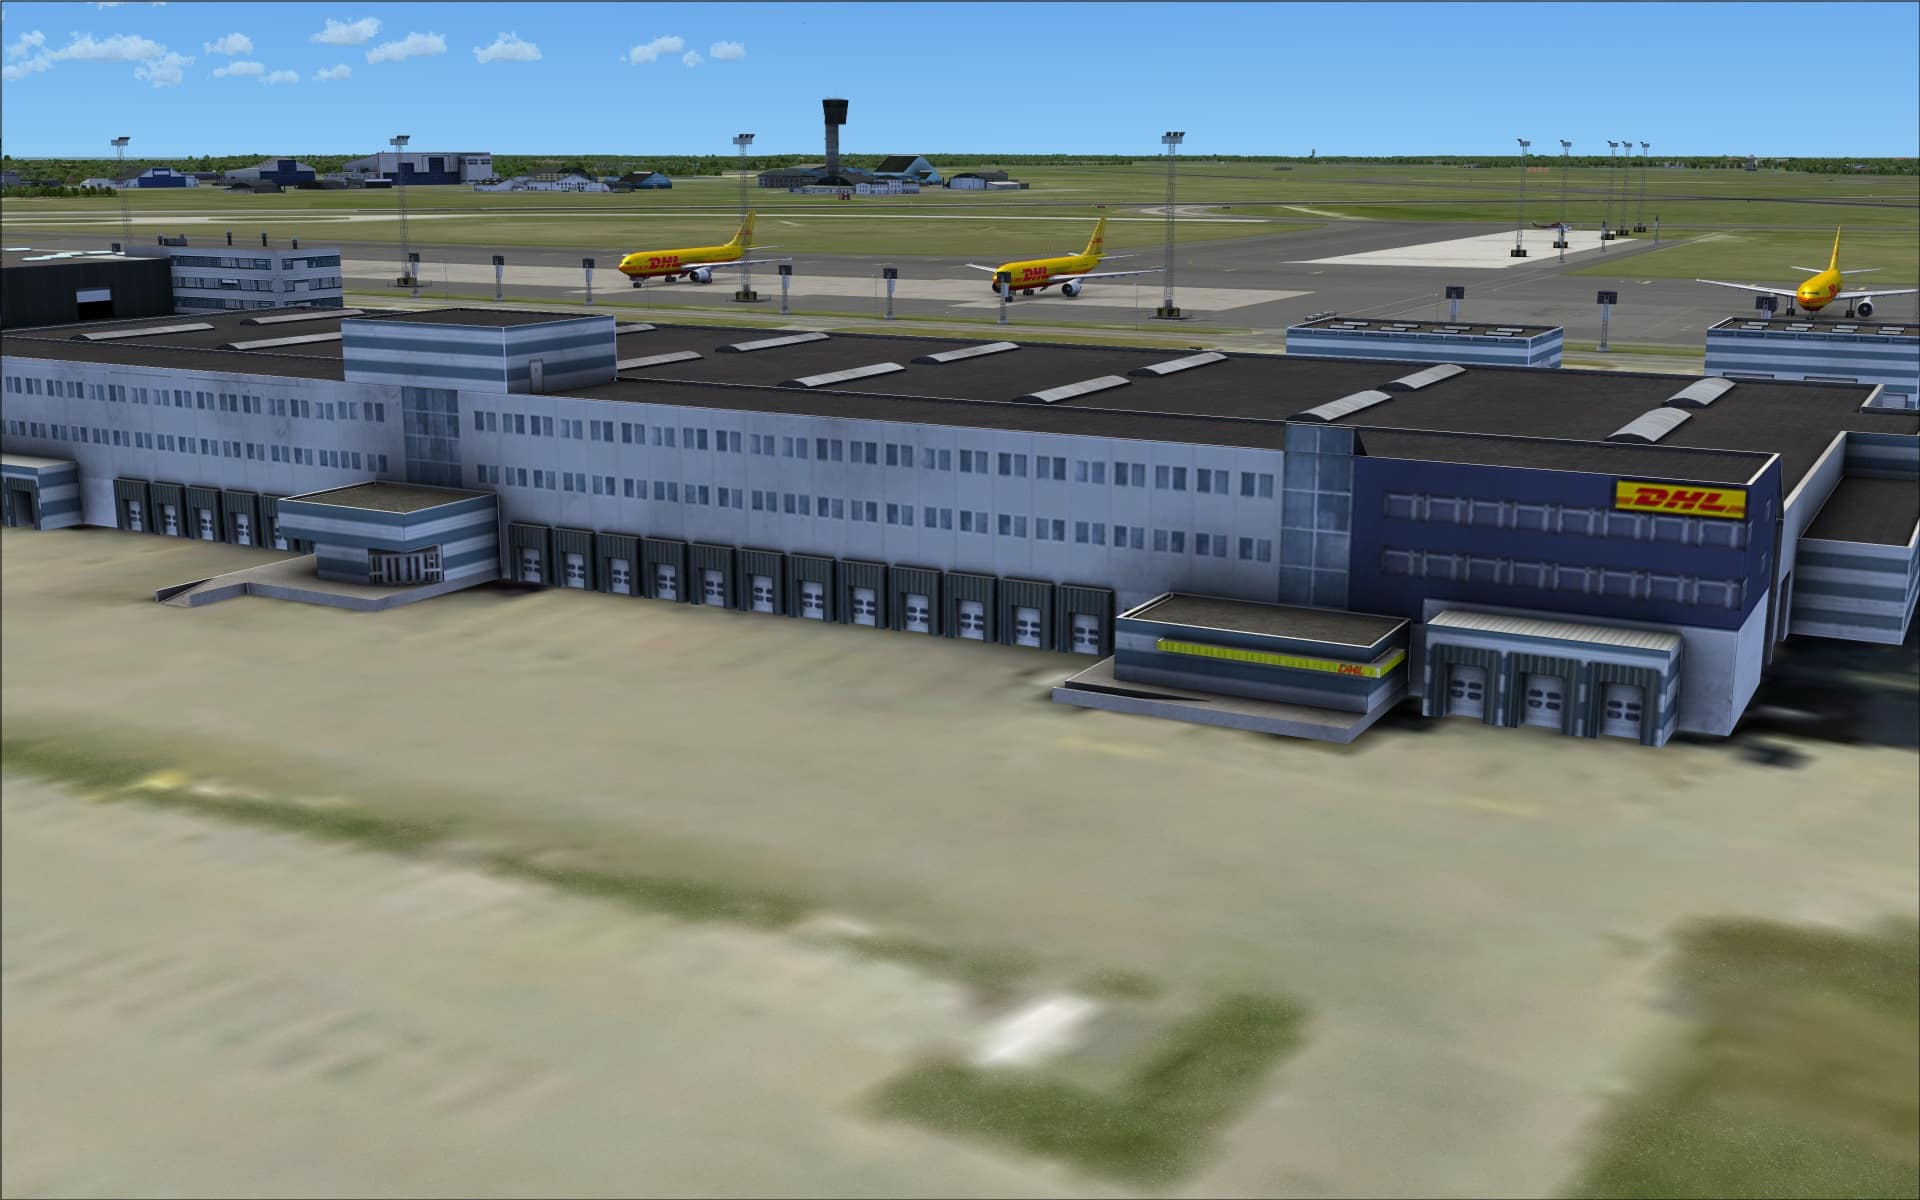
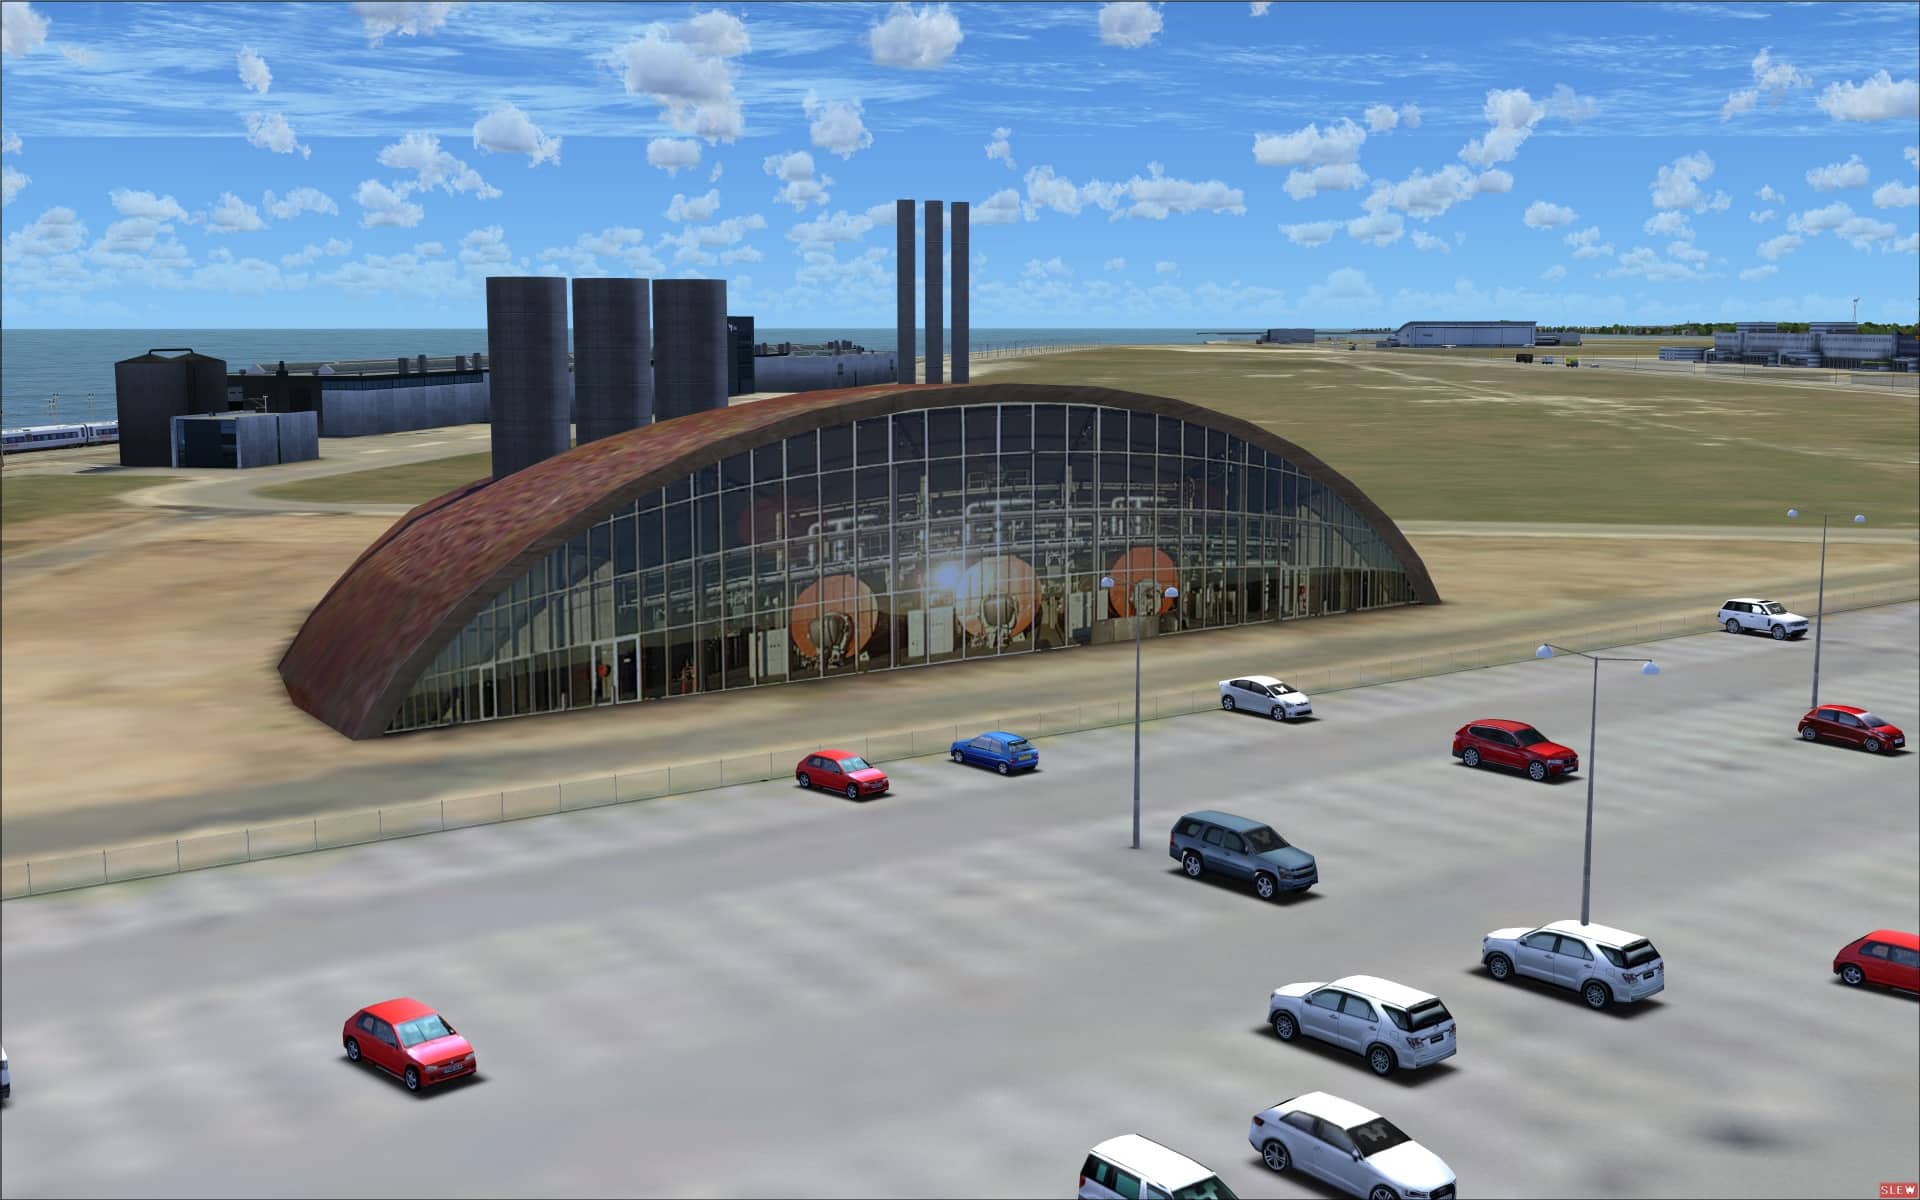
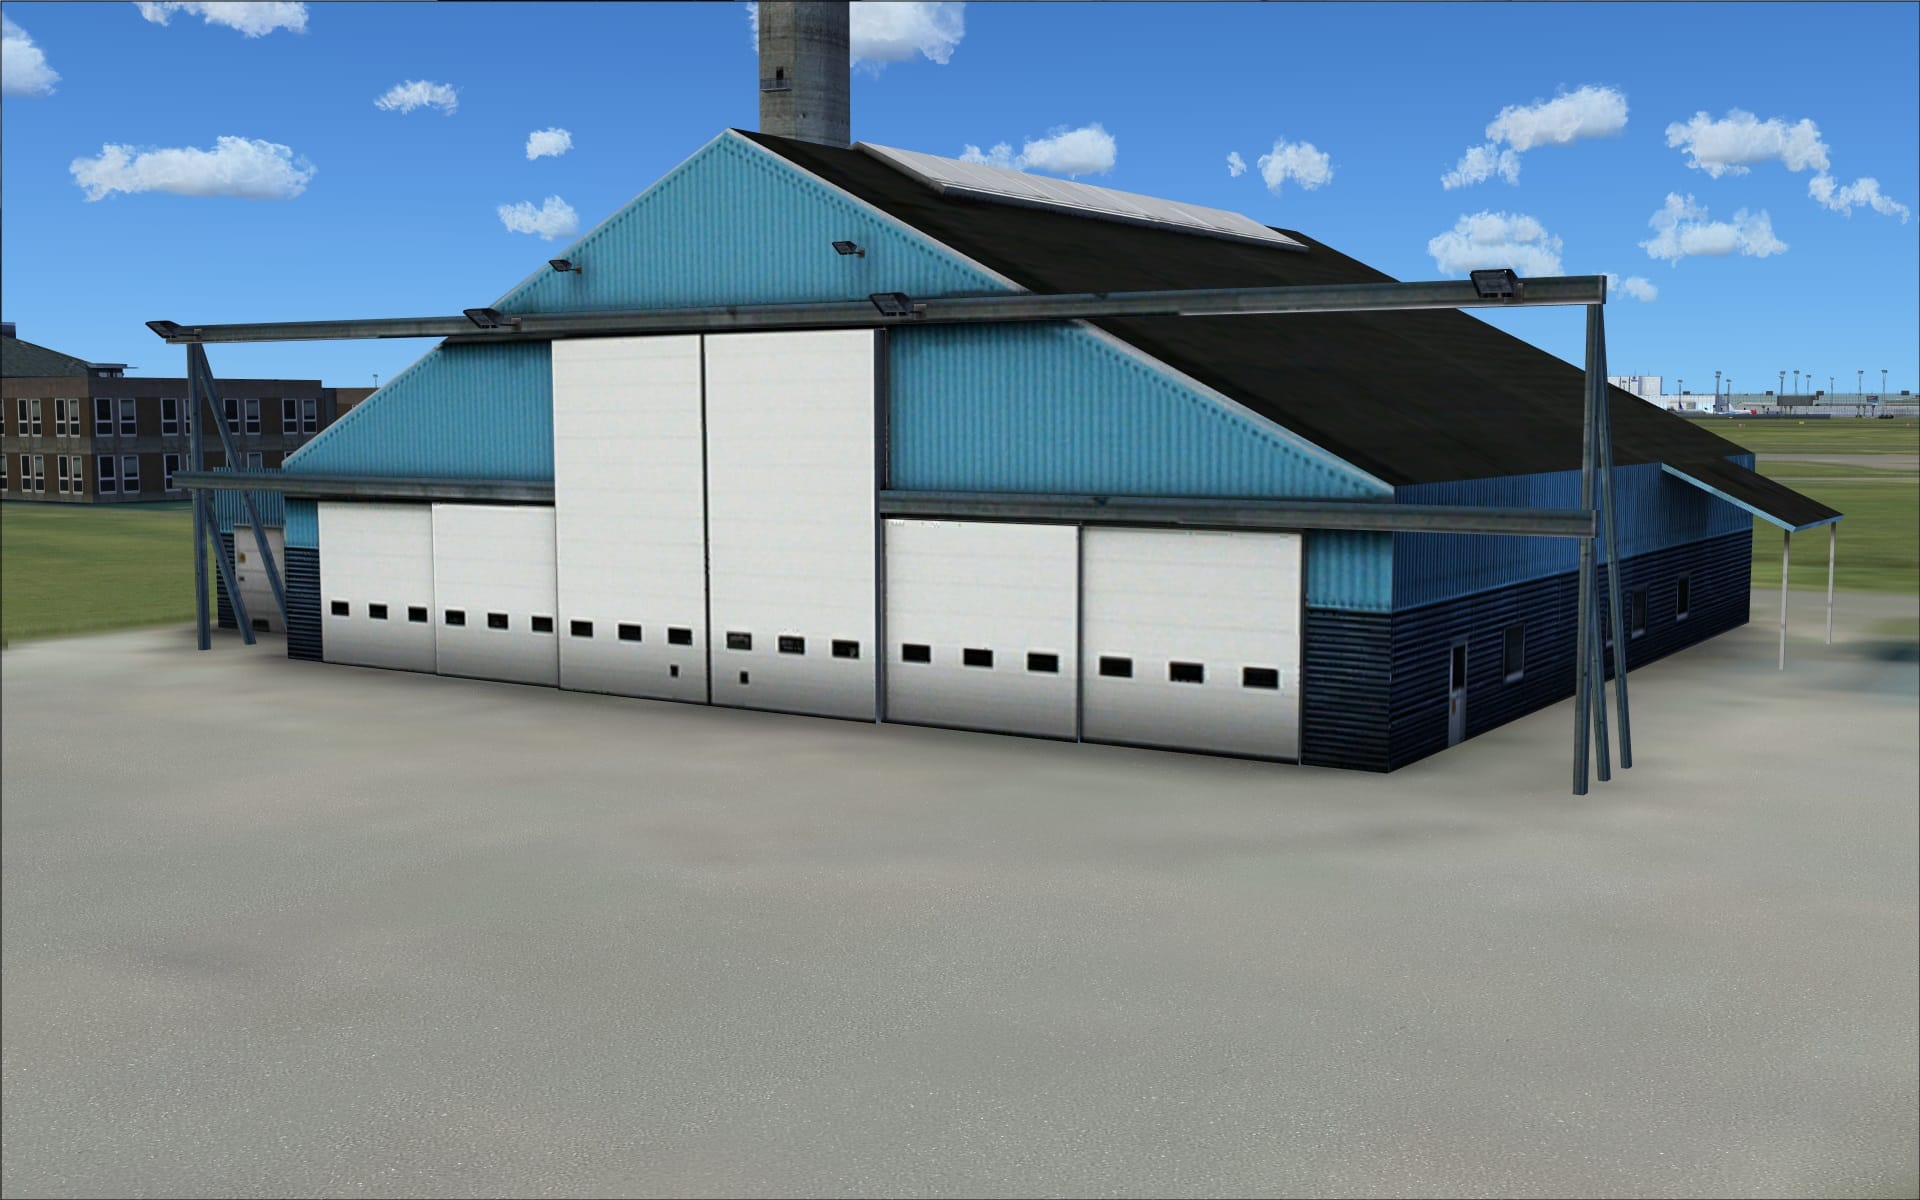
 The east quadrant is sparsely populated and this is where we find several large cargo hangars along with two other smaller GA hangars.
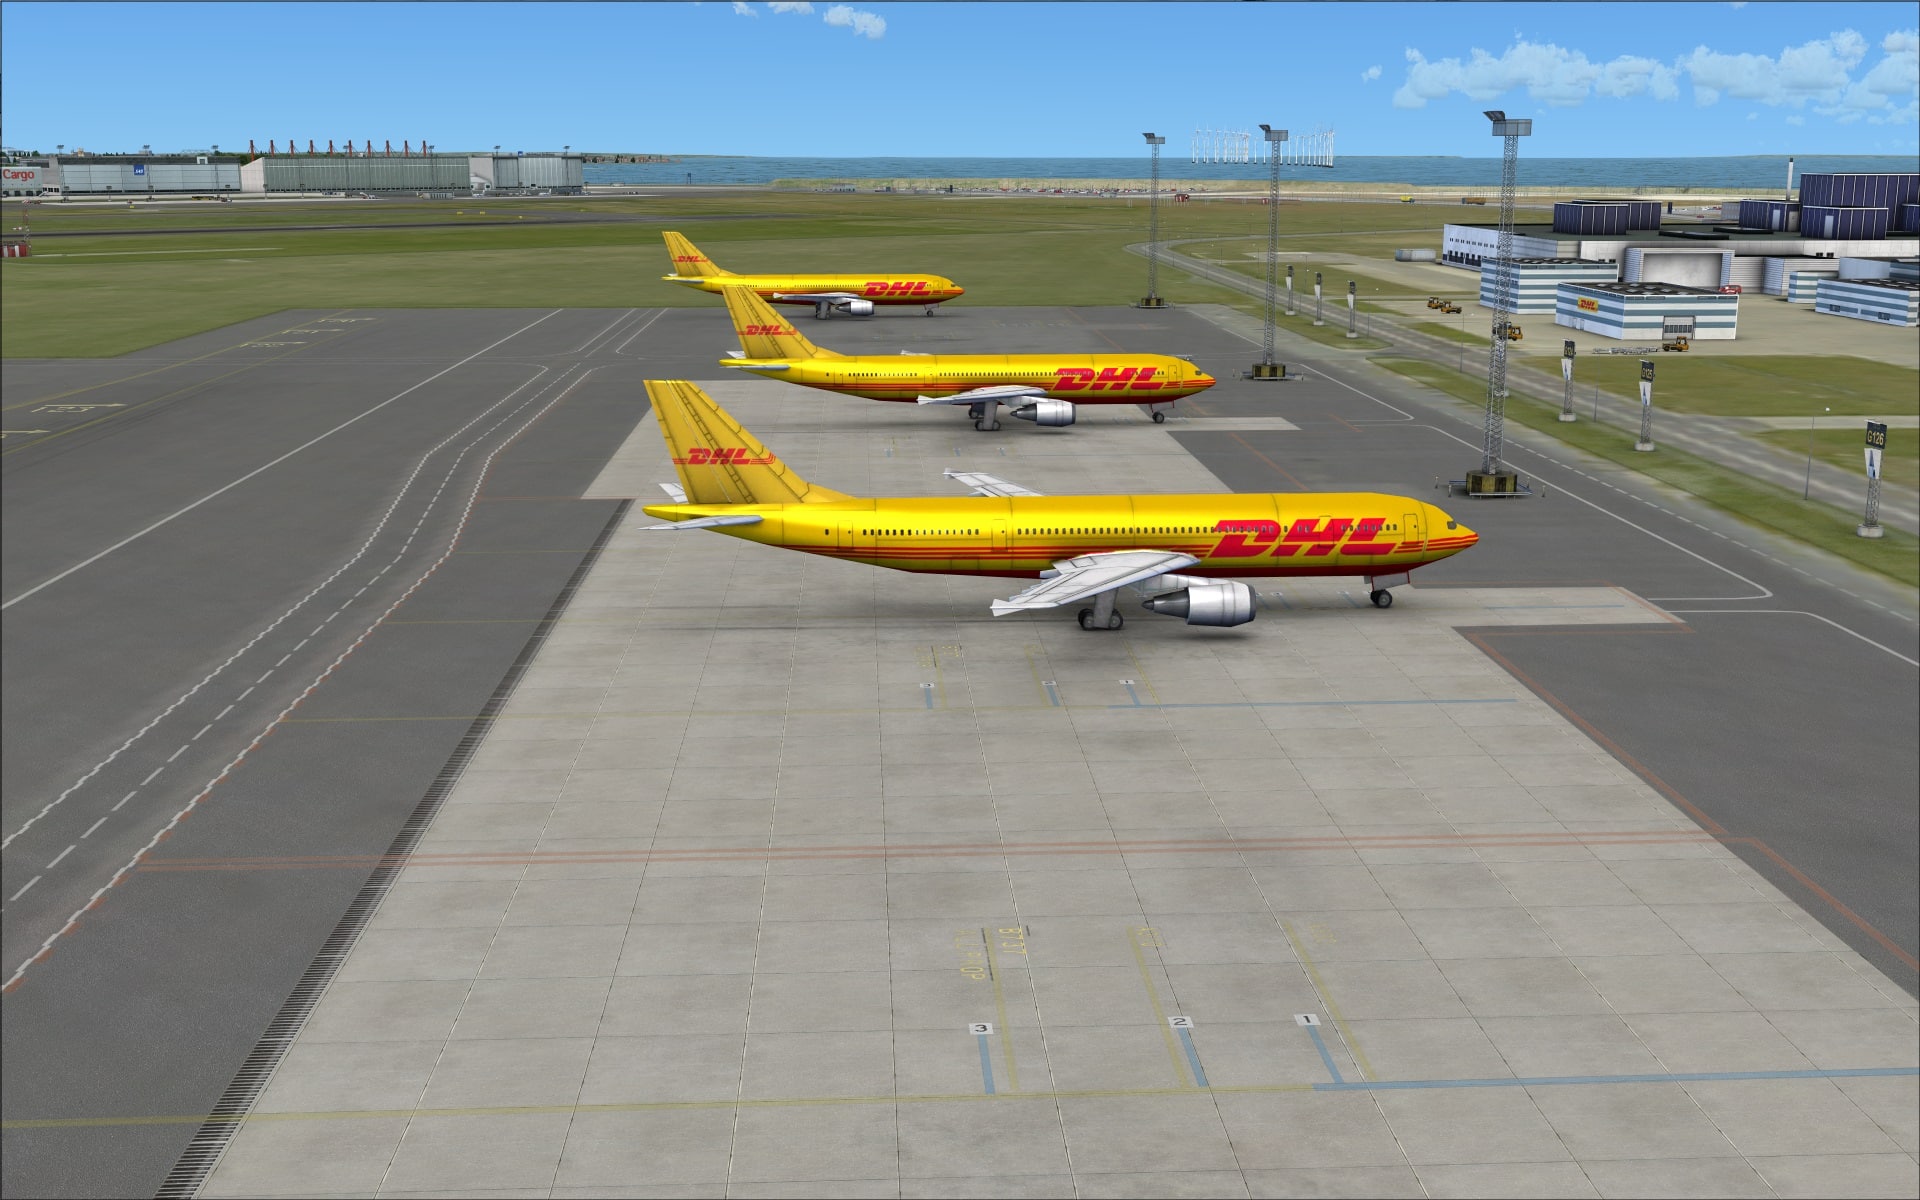
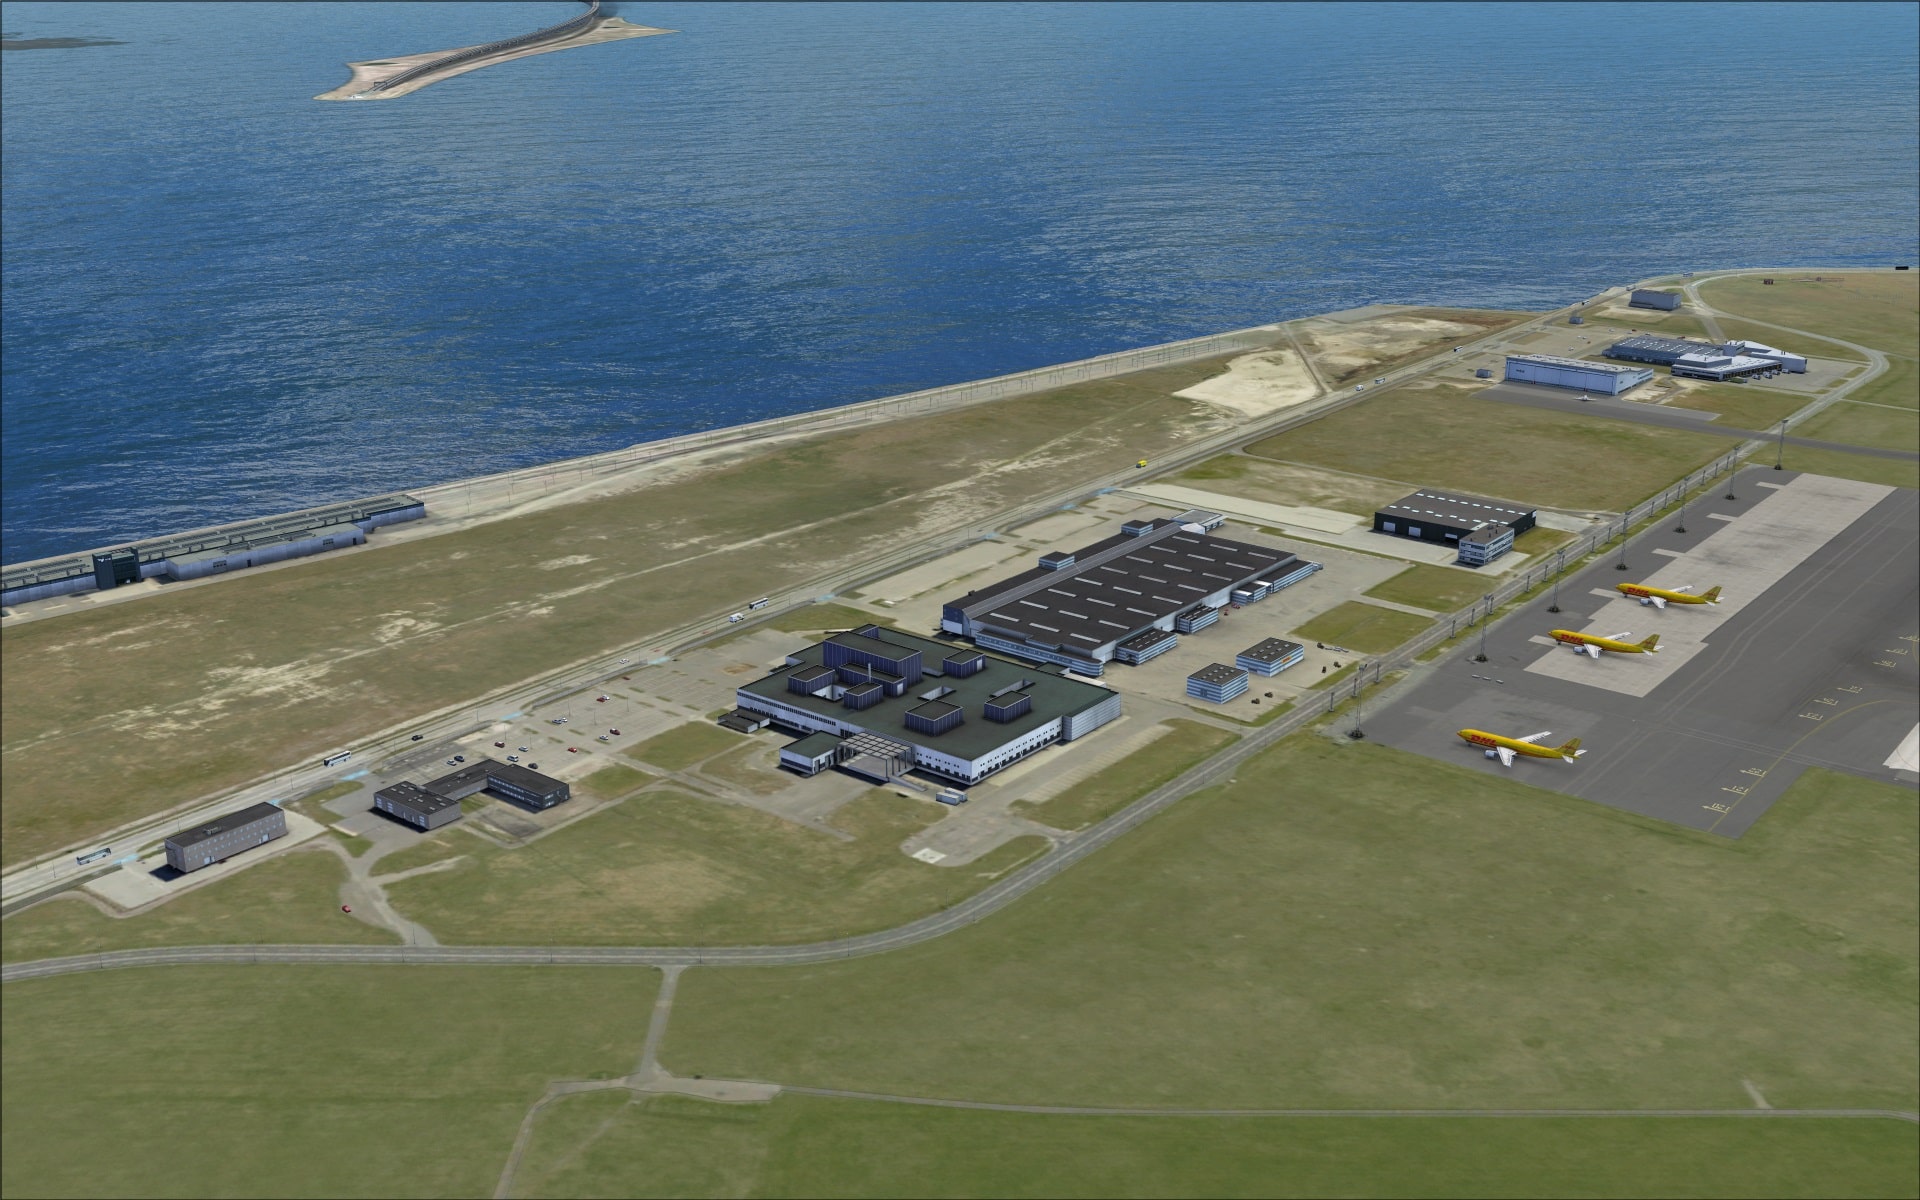 What stood out here was the large DHL building and what looks like some sort of power plant.
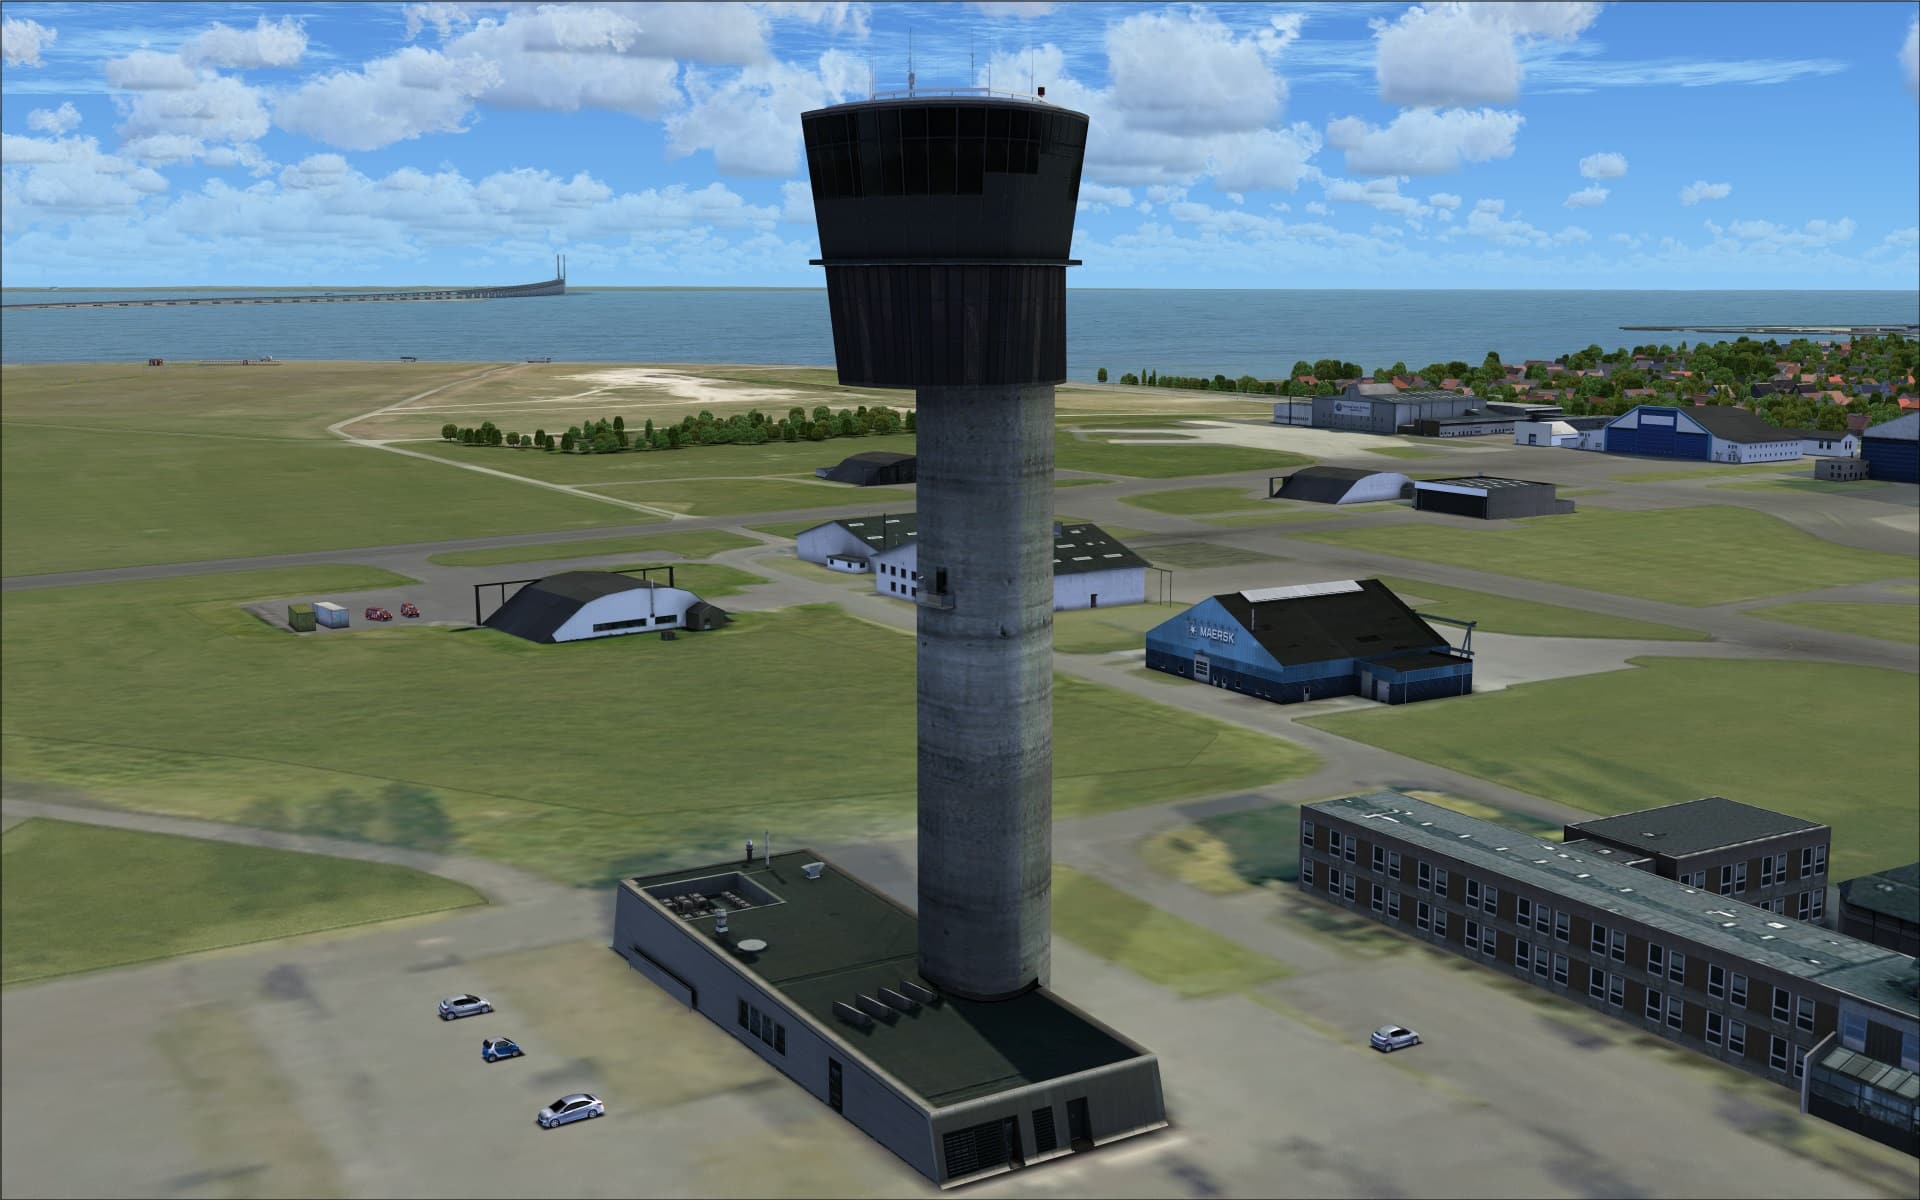
 The south quadrant is filled with mostly older structures and standing out form them is the modern control tower. The majority appear to be hangars and other general purpose buildings.
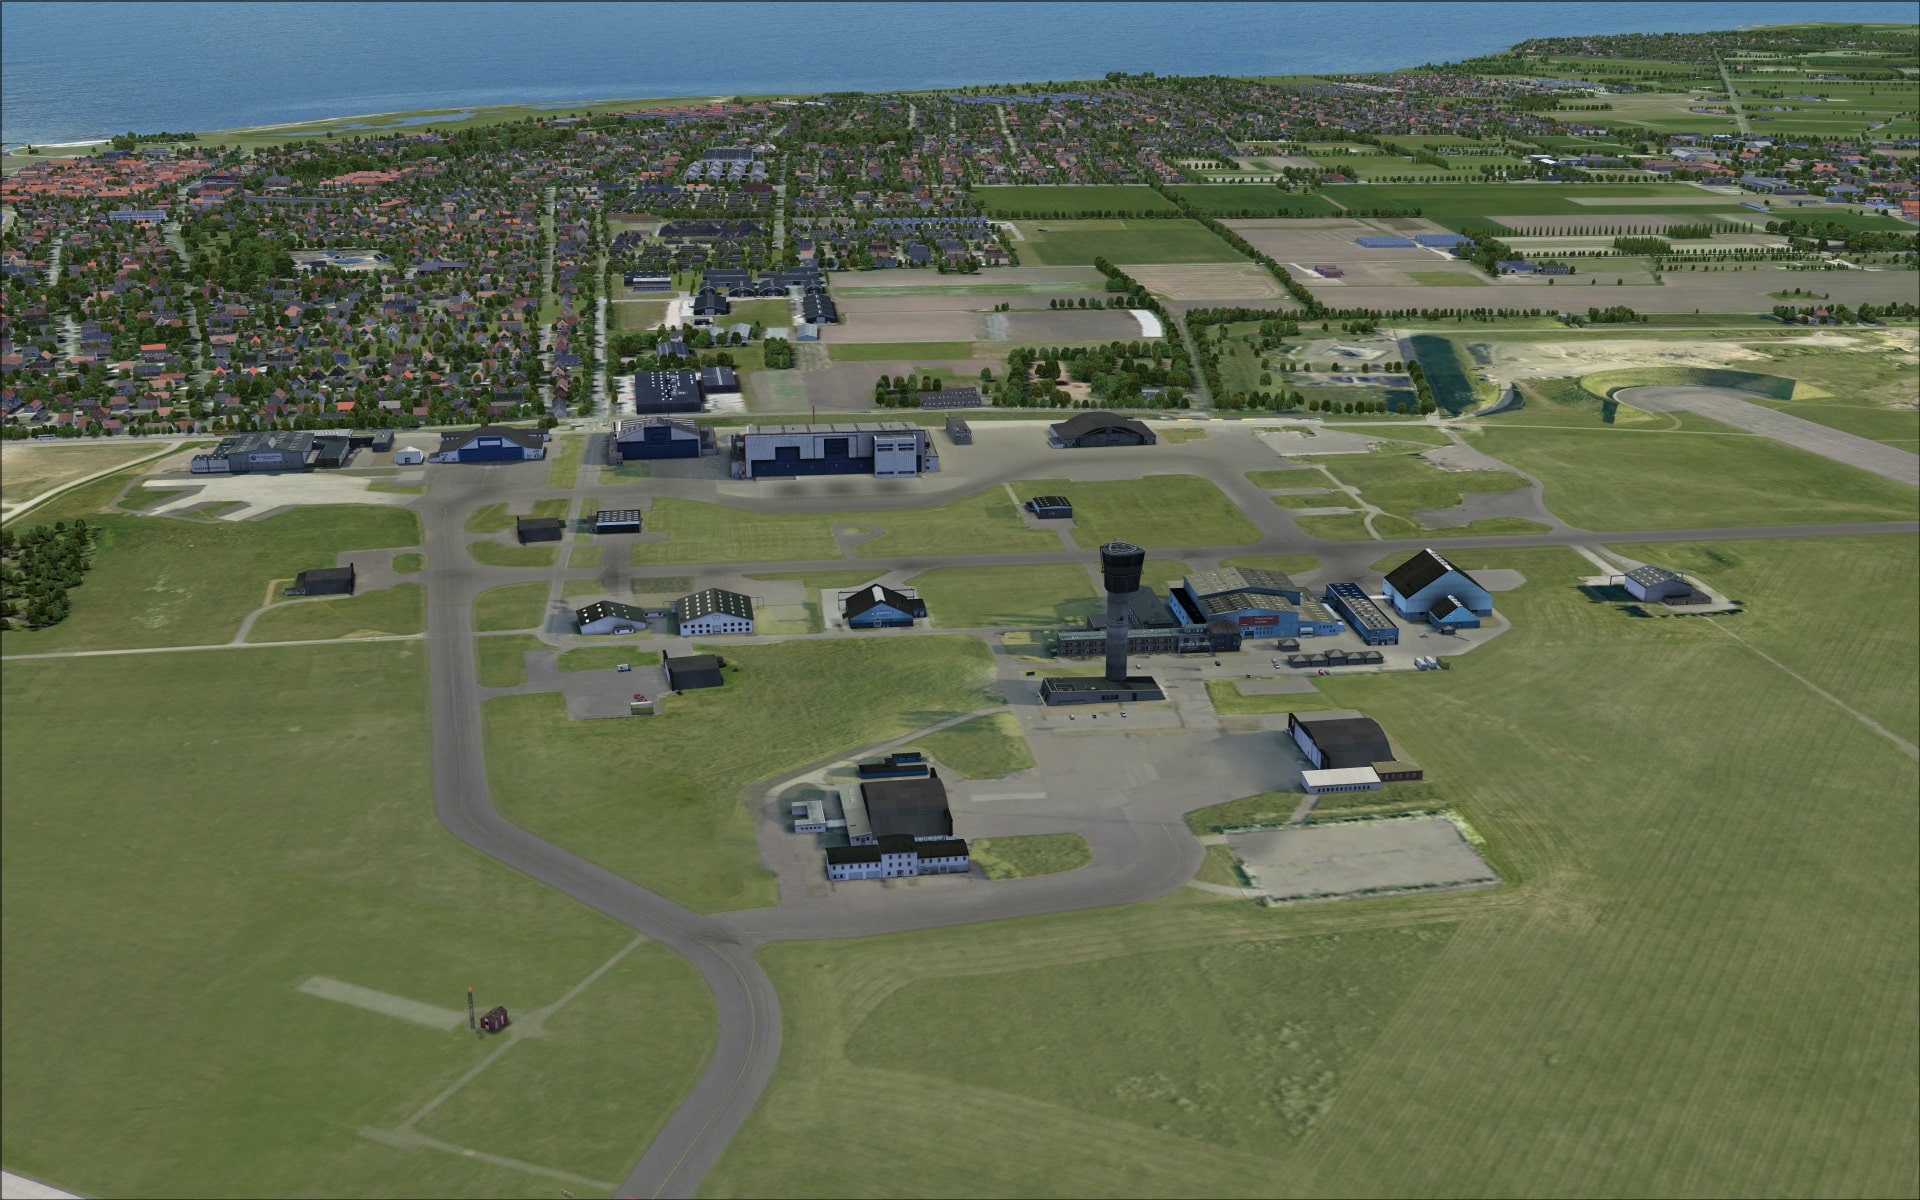 Graphic texture quality really shines here as we can fully appreciate aging. Rust, cracking, discolouration are all clearly visible and serve to accentuate the effects of time, weather and in some cases neglect.
 This is also where we find the airport’s modern control tower, opened in 2008. They made good use of high quality graphic textures plus they included some great additional 3 dimensional detailing. You can see this in the roof top and also the recessed doorways around its base..
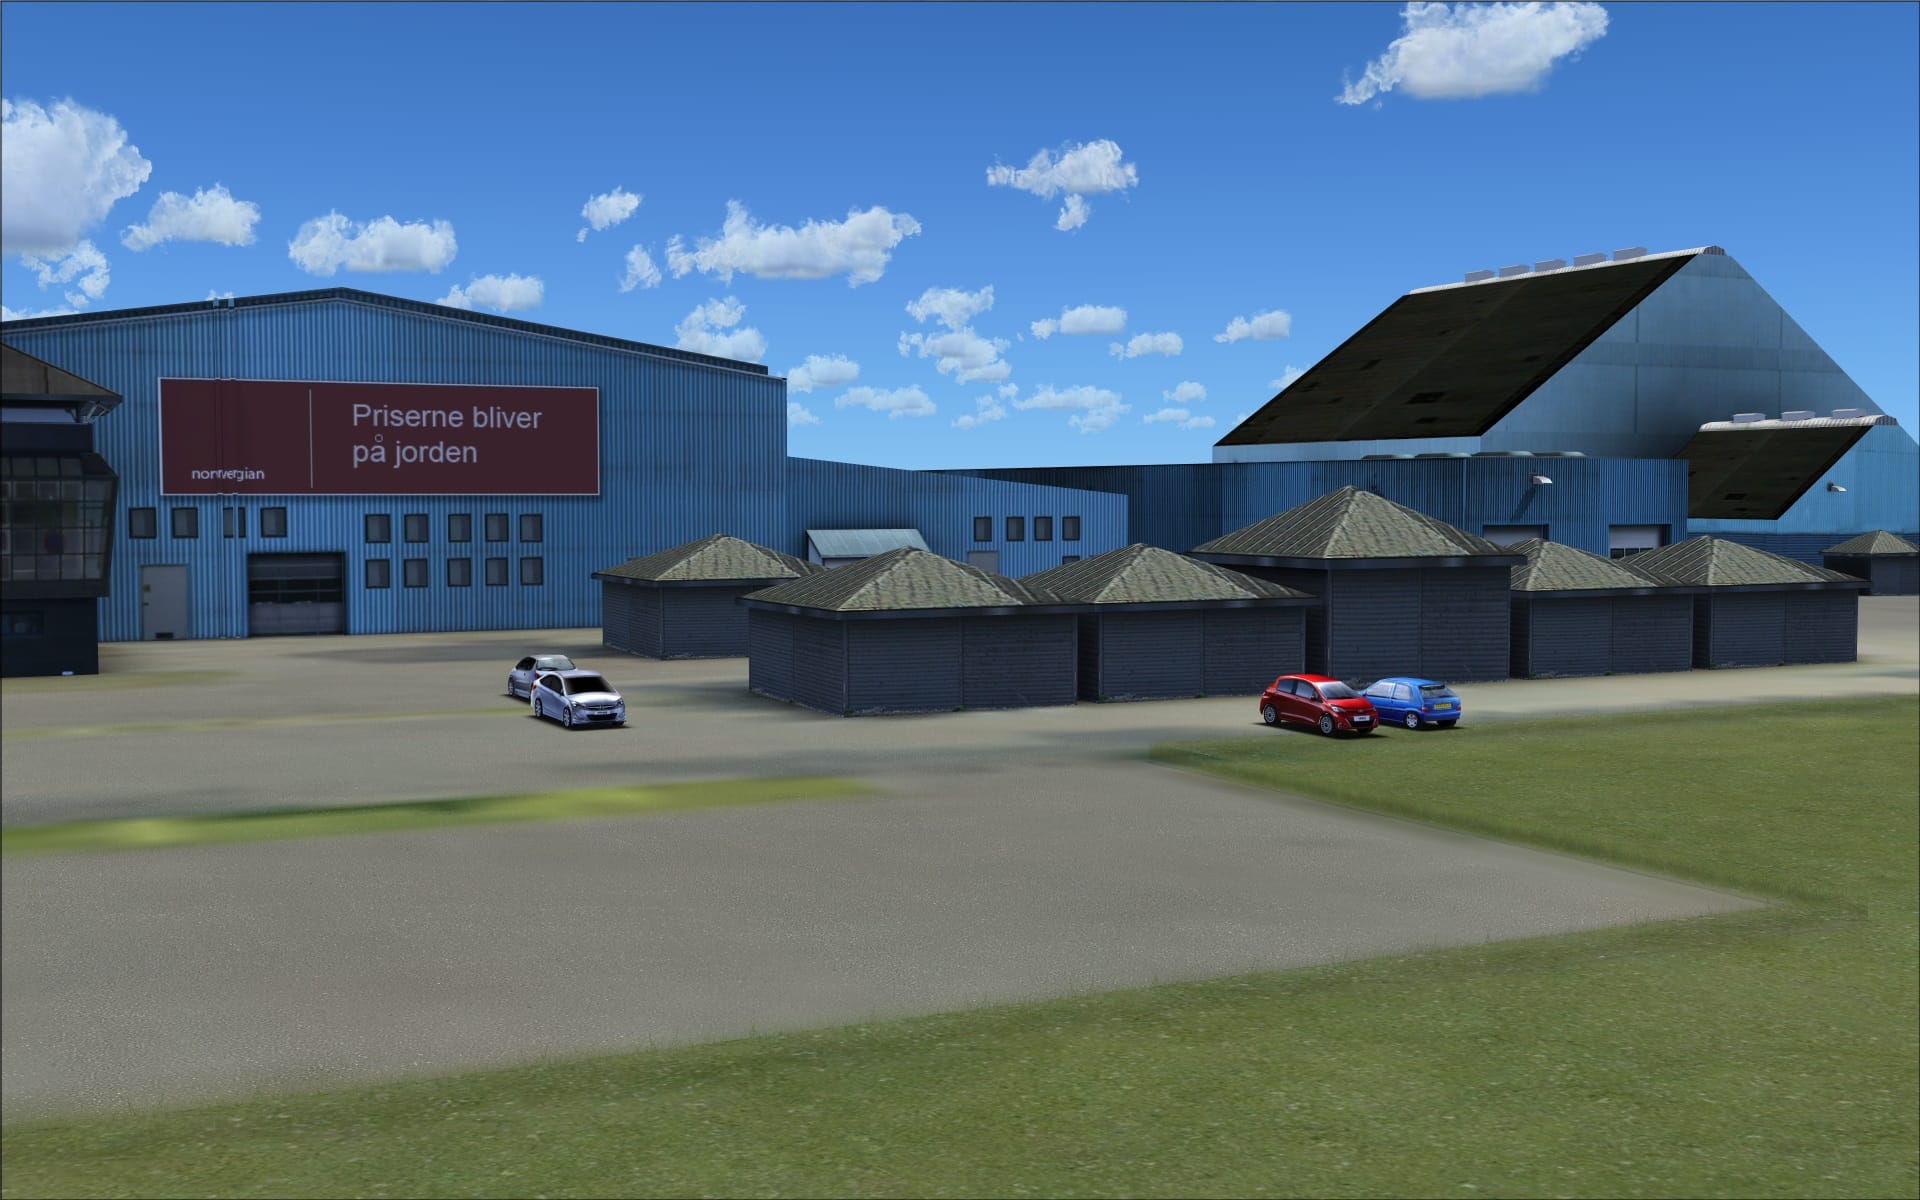
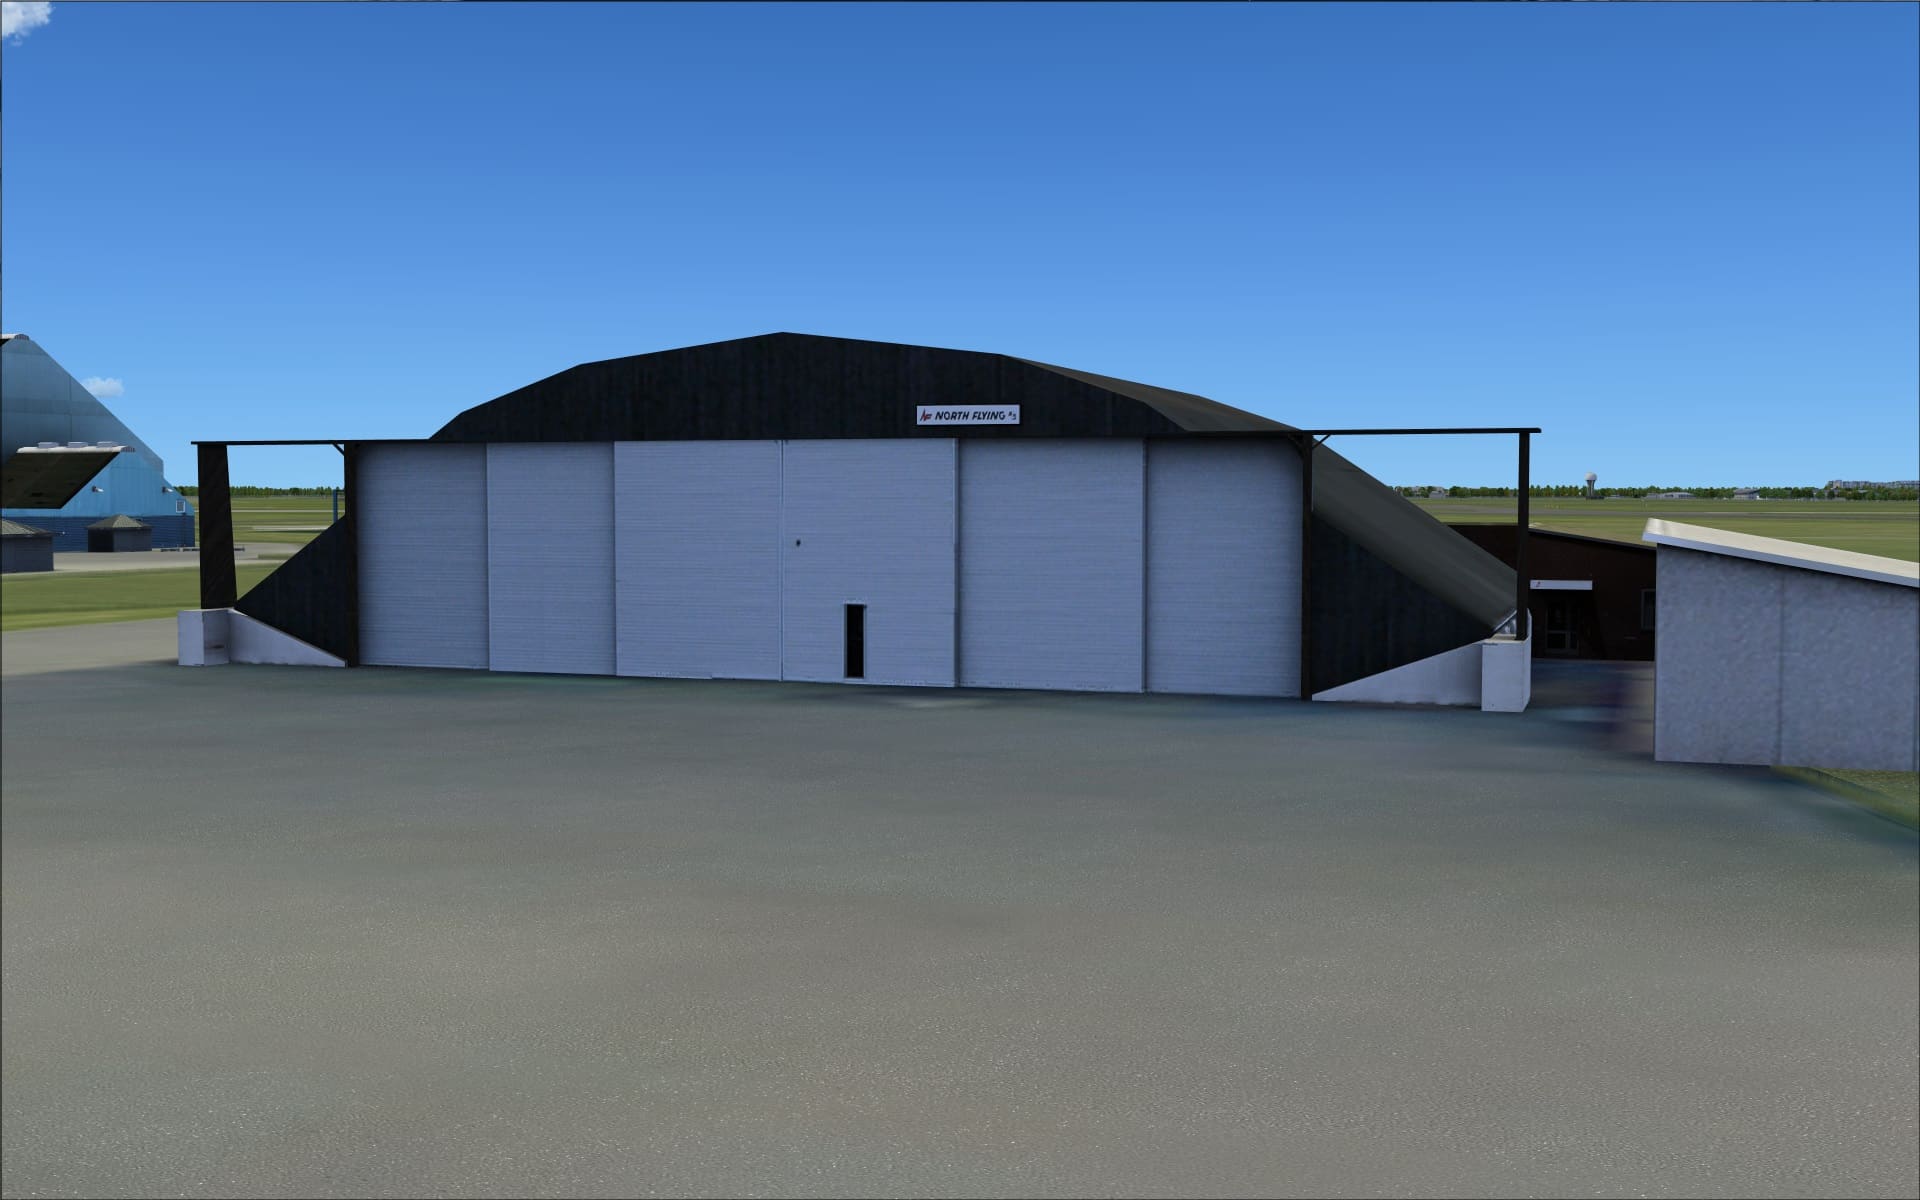
 The last area is the west quadrant. It too is populated with older structures that are a mix of hangars and other general purpose buildings. Weathering and aging are again portrayed nicely through the use of high quality graphic textures.
 Also located here is the old airport terminal that was moved in the 1990’s to be repurposed and reopened as a VIP terminal.
 Objects and vehicles
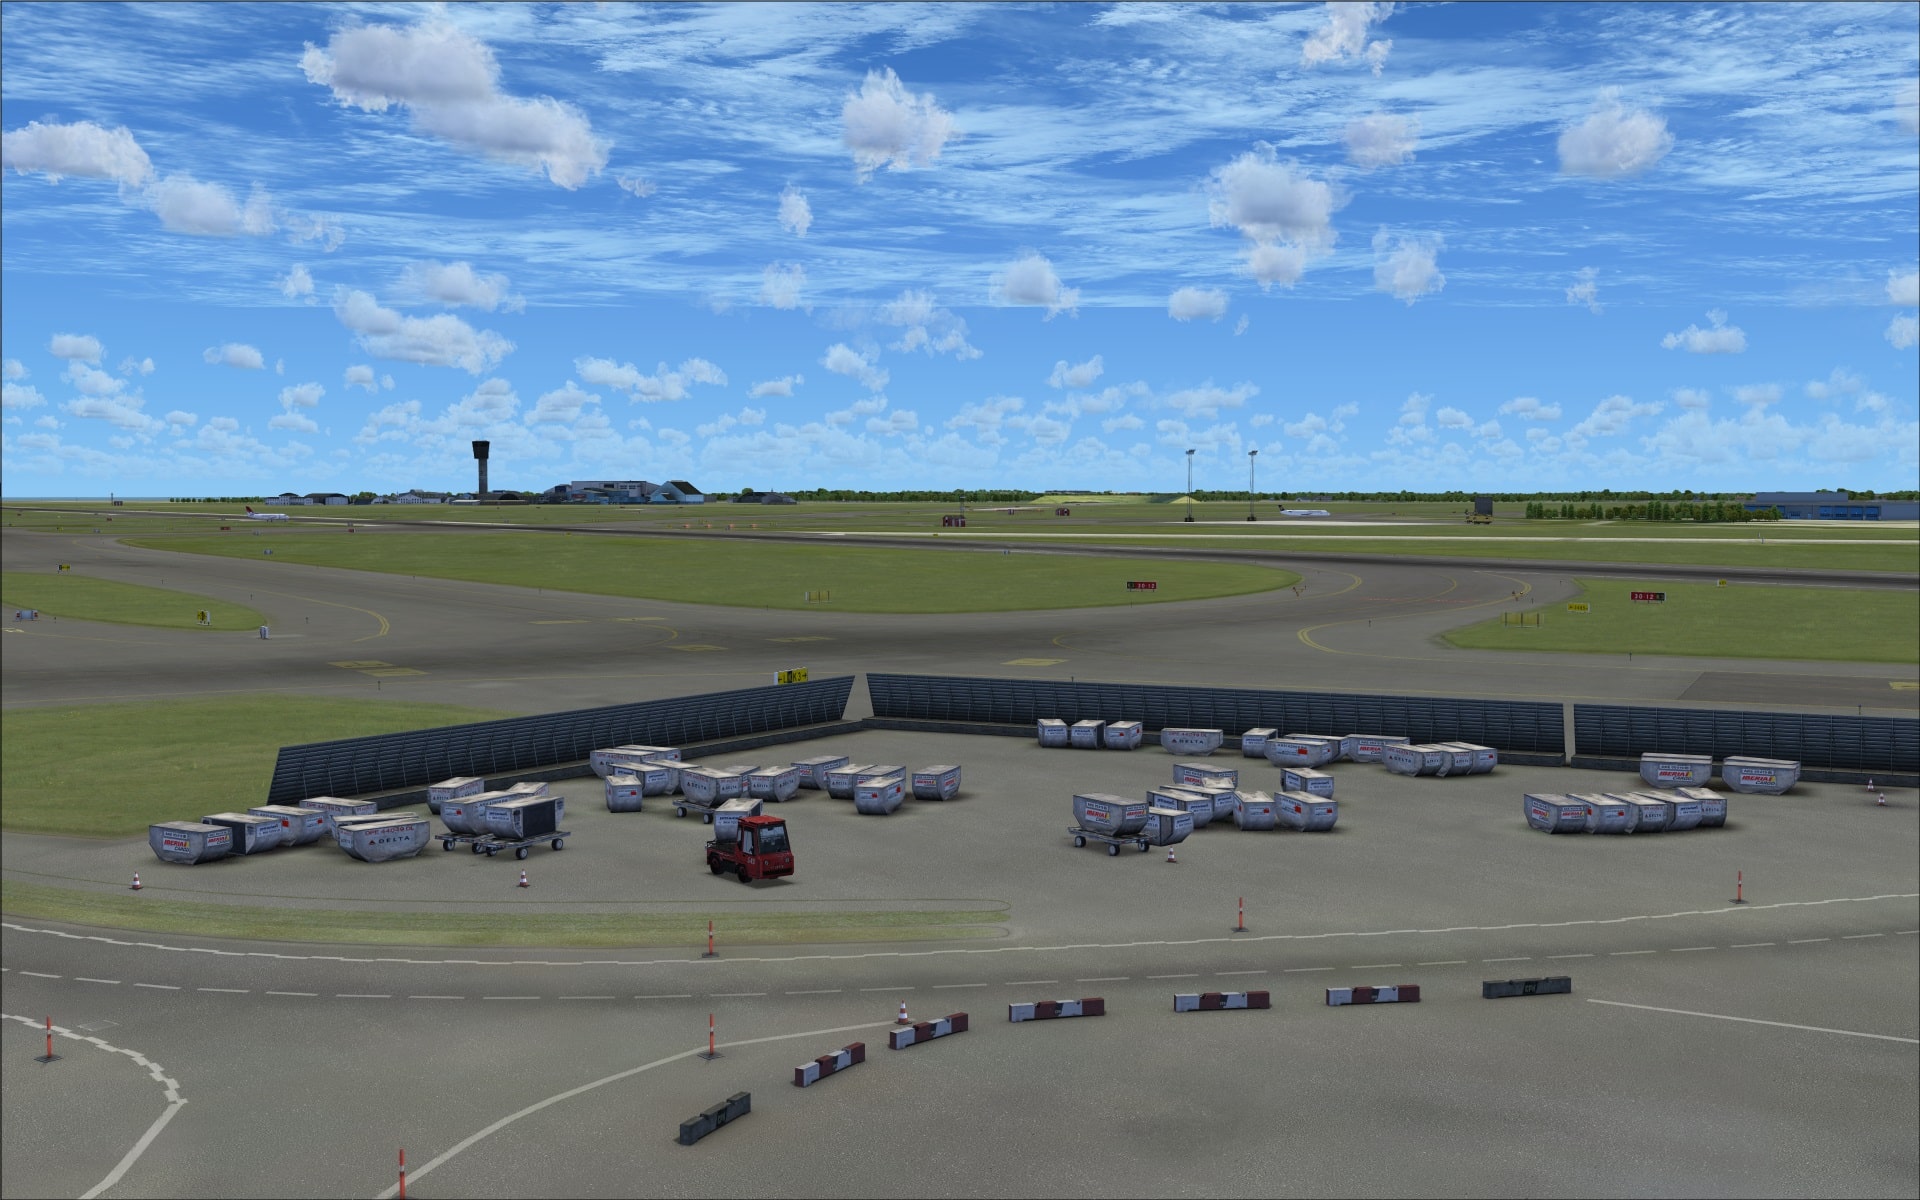
The quality of the objects/vehicles are of the usual high standard that we’ve come to associate and enjoy with each of this scenery developer’s releases. What makes this aspect so good goes beyond just the quality it includes the variety, the relevance of the objects/vehicles to the airport plus how all of these objects/vehicles are integrated into the scenery. Many are fundamental elements in the operation of an airport and they also bring to life what would otherwise be nothing more than a collection of buildings placed on ground textures. I won’t get into naming all of the different things I noticed as the screenshots will serve to highlight many of them but keep an eye out for the various types of objects that are both vital and ancillary to an airport’s day to day operations.
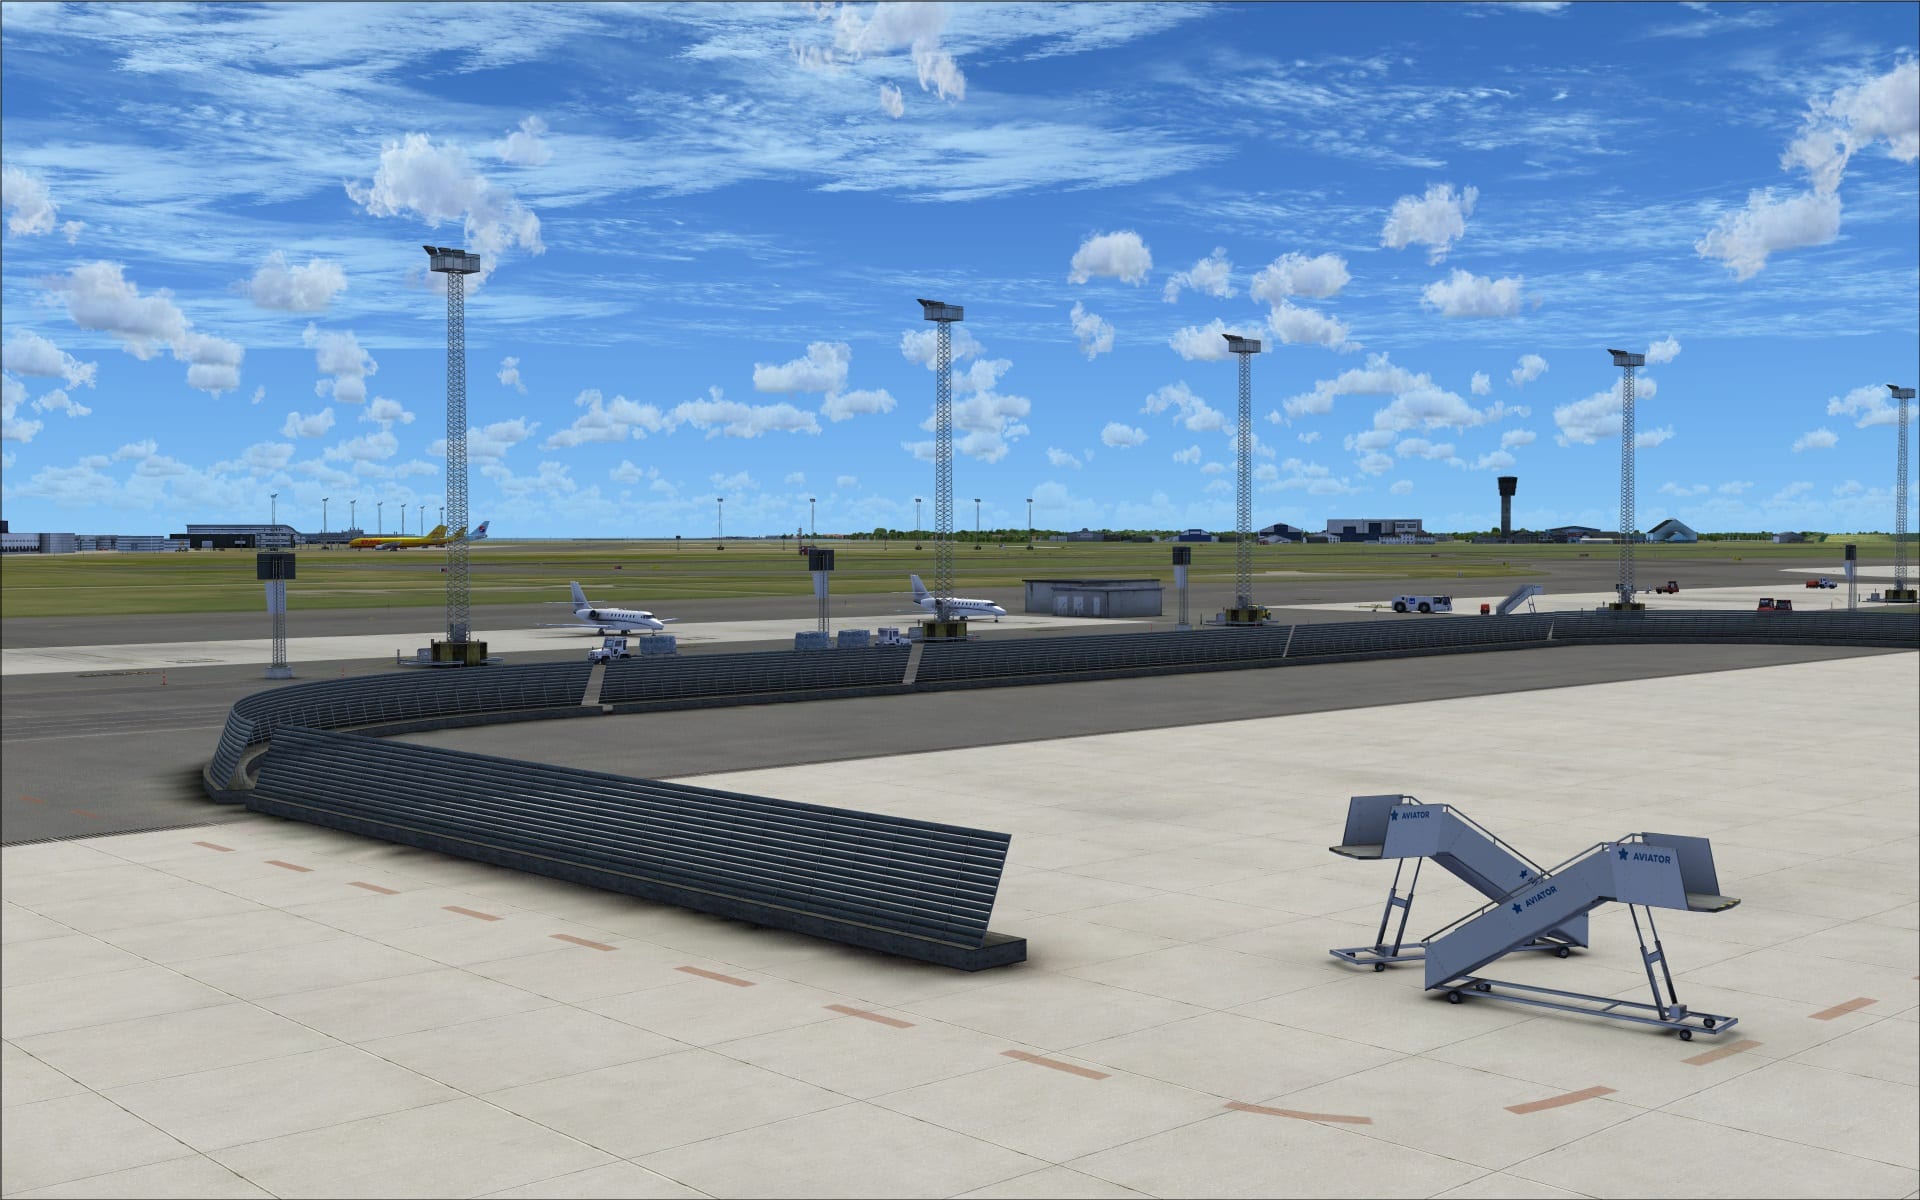

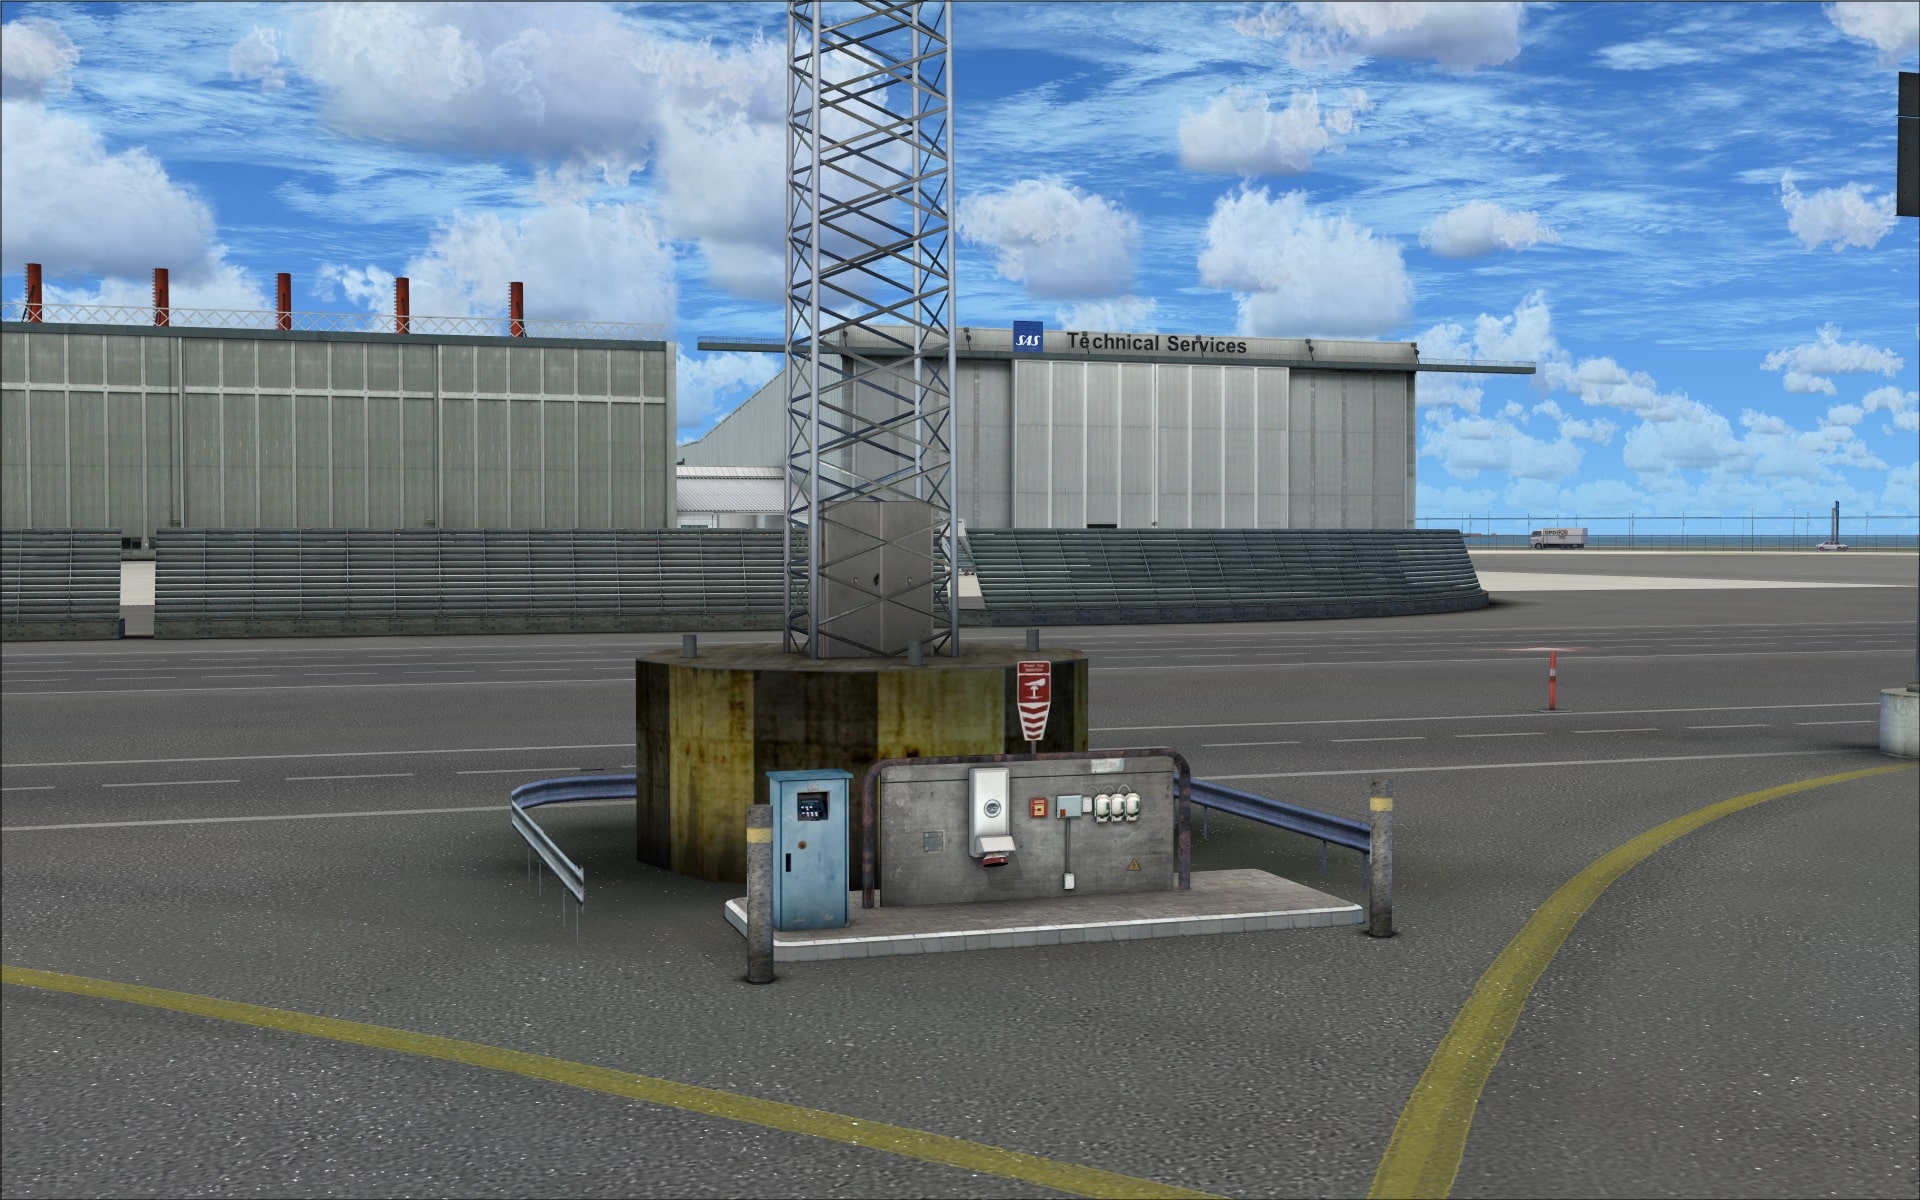
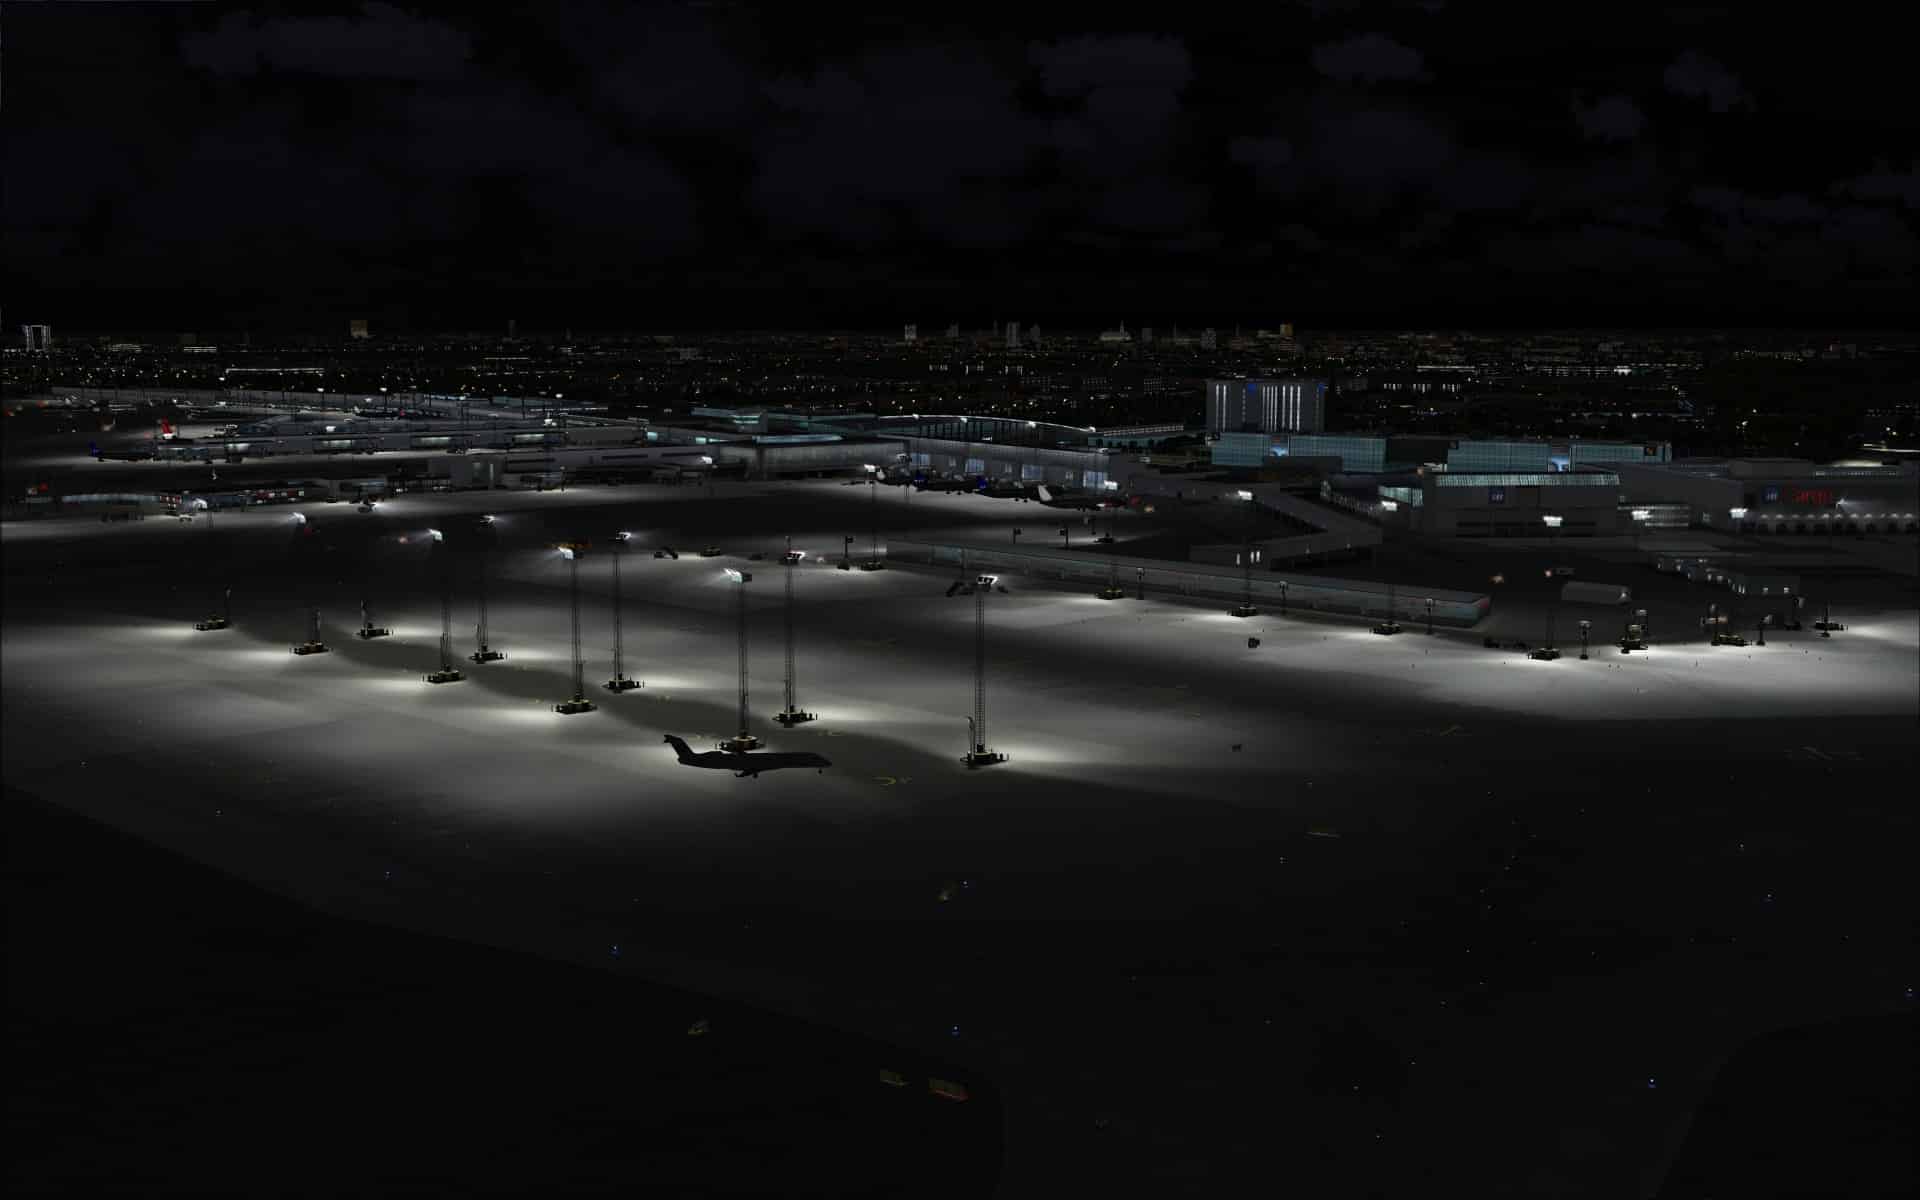
 I was very impressed with the large overhead lamps used to illuminate the aprons. The amount of detail they’ve included in modelling their bases; adding electrical boxes and hook ups for remote power. The concrete is also made to look weathered and soiled. The mast itself is also impressive as it is an open metal frame. All in all great work.
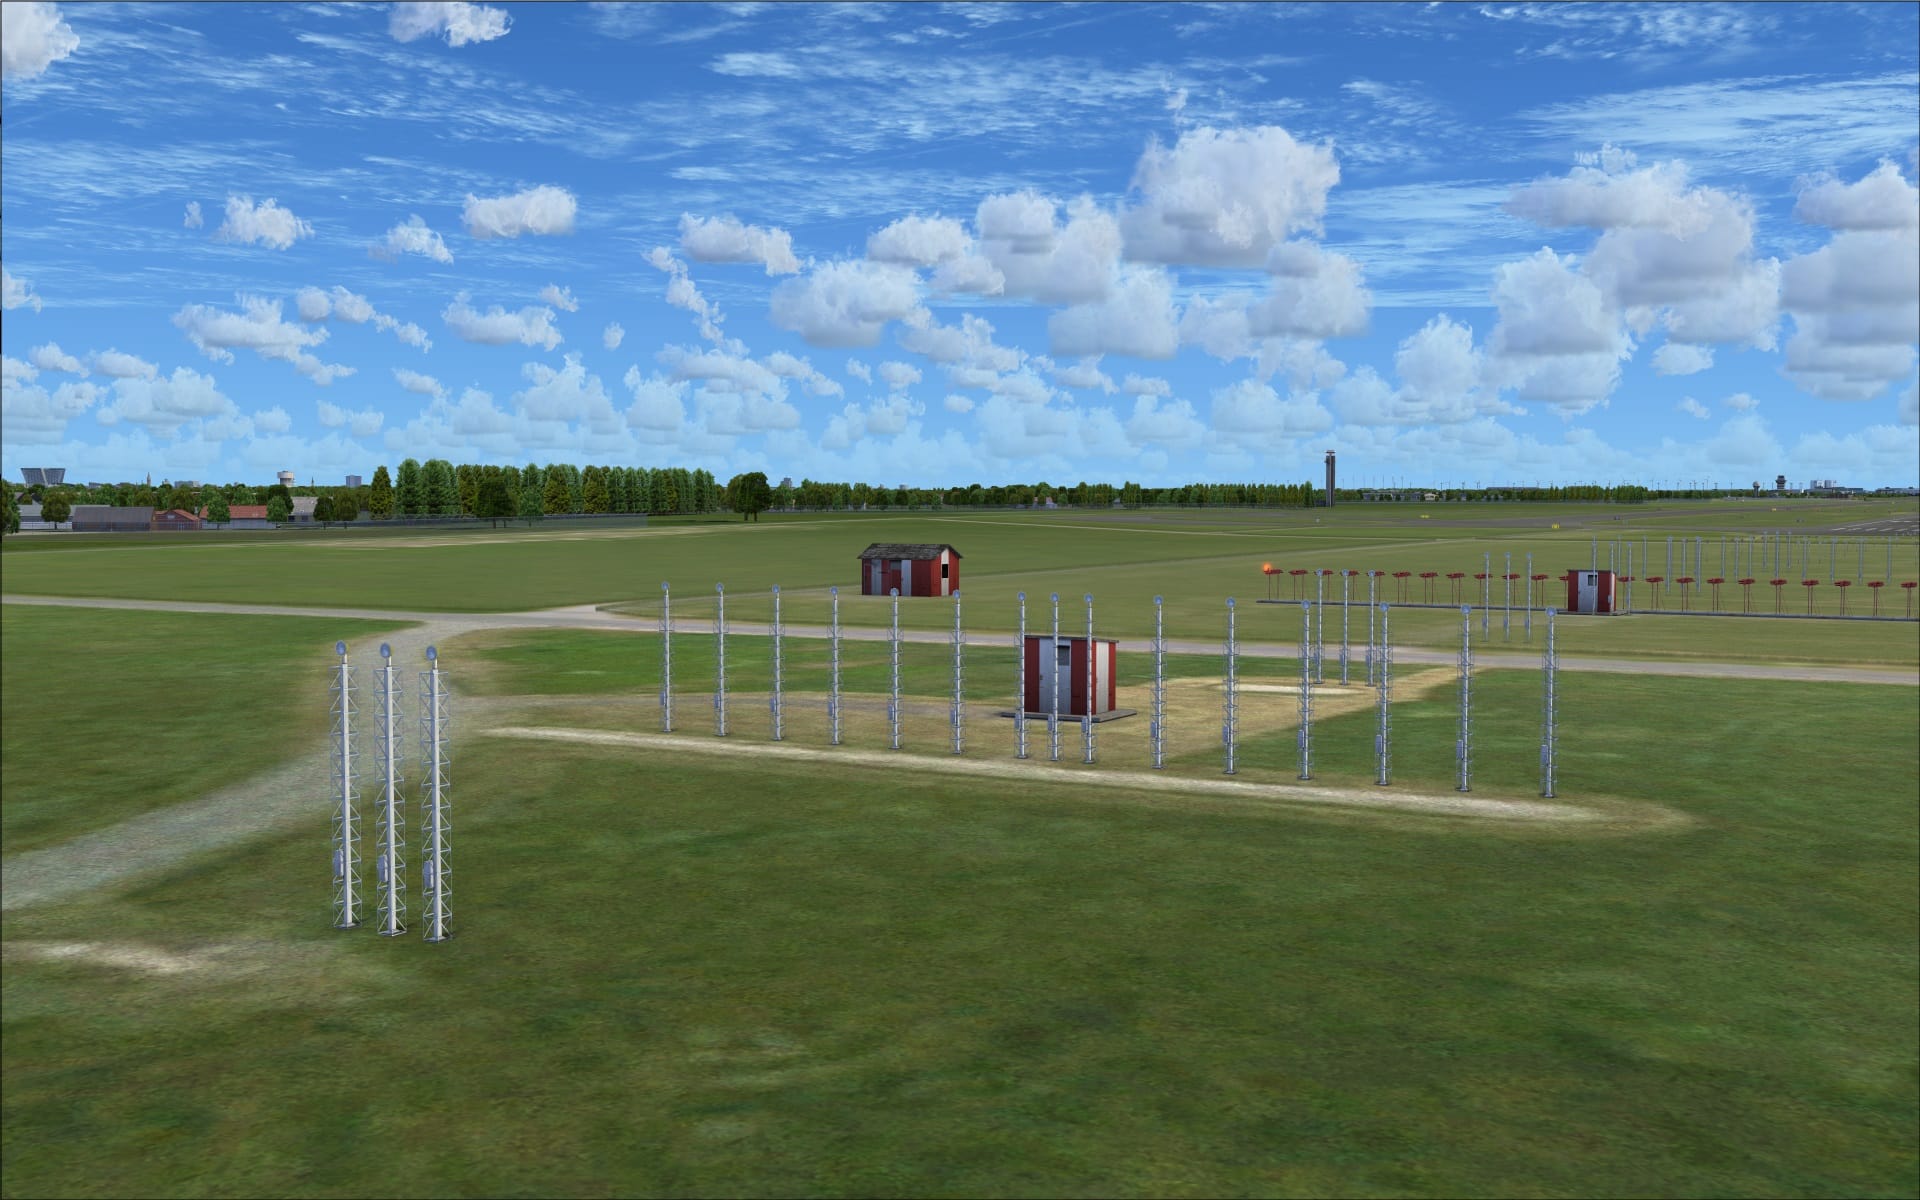
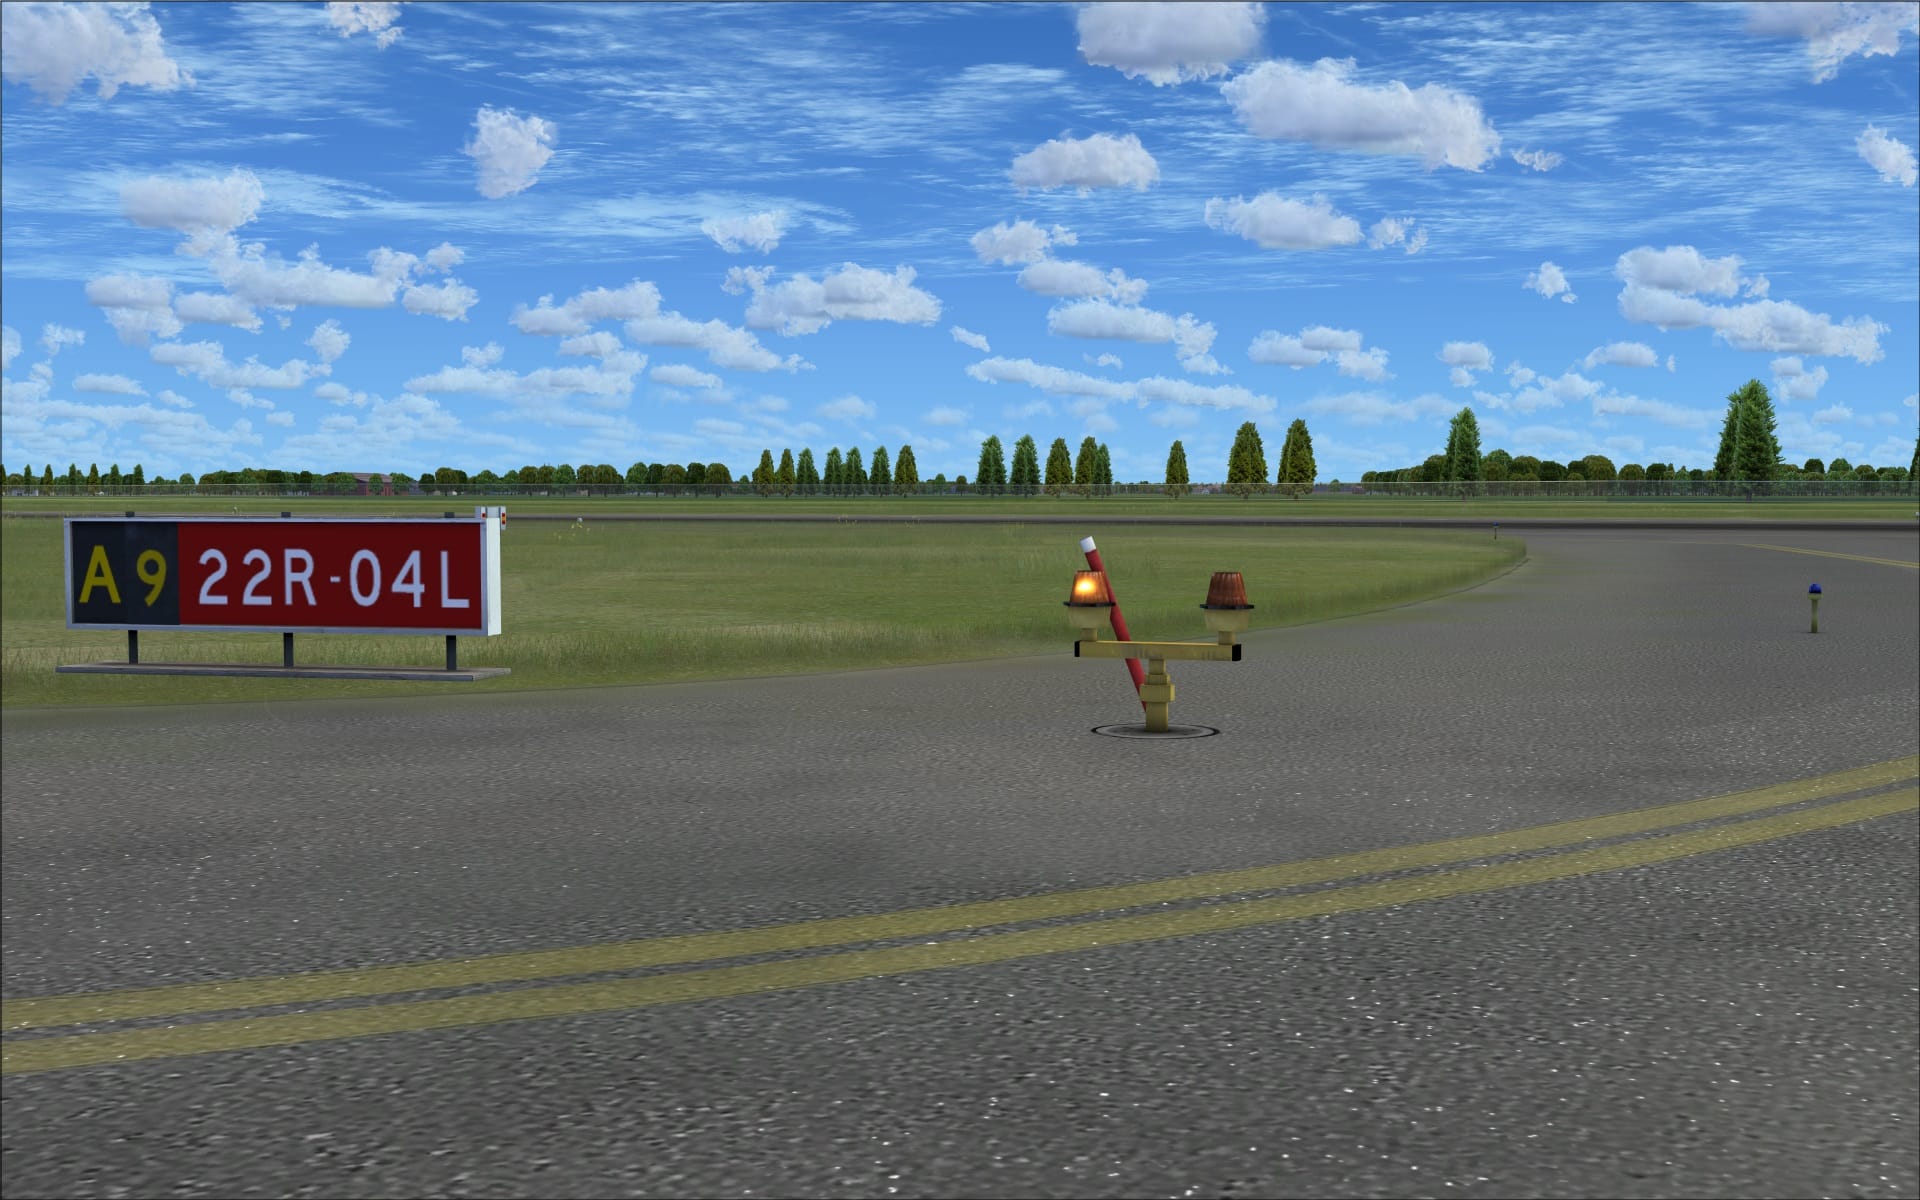
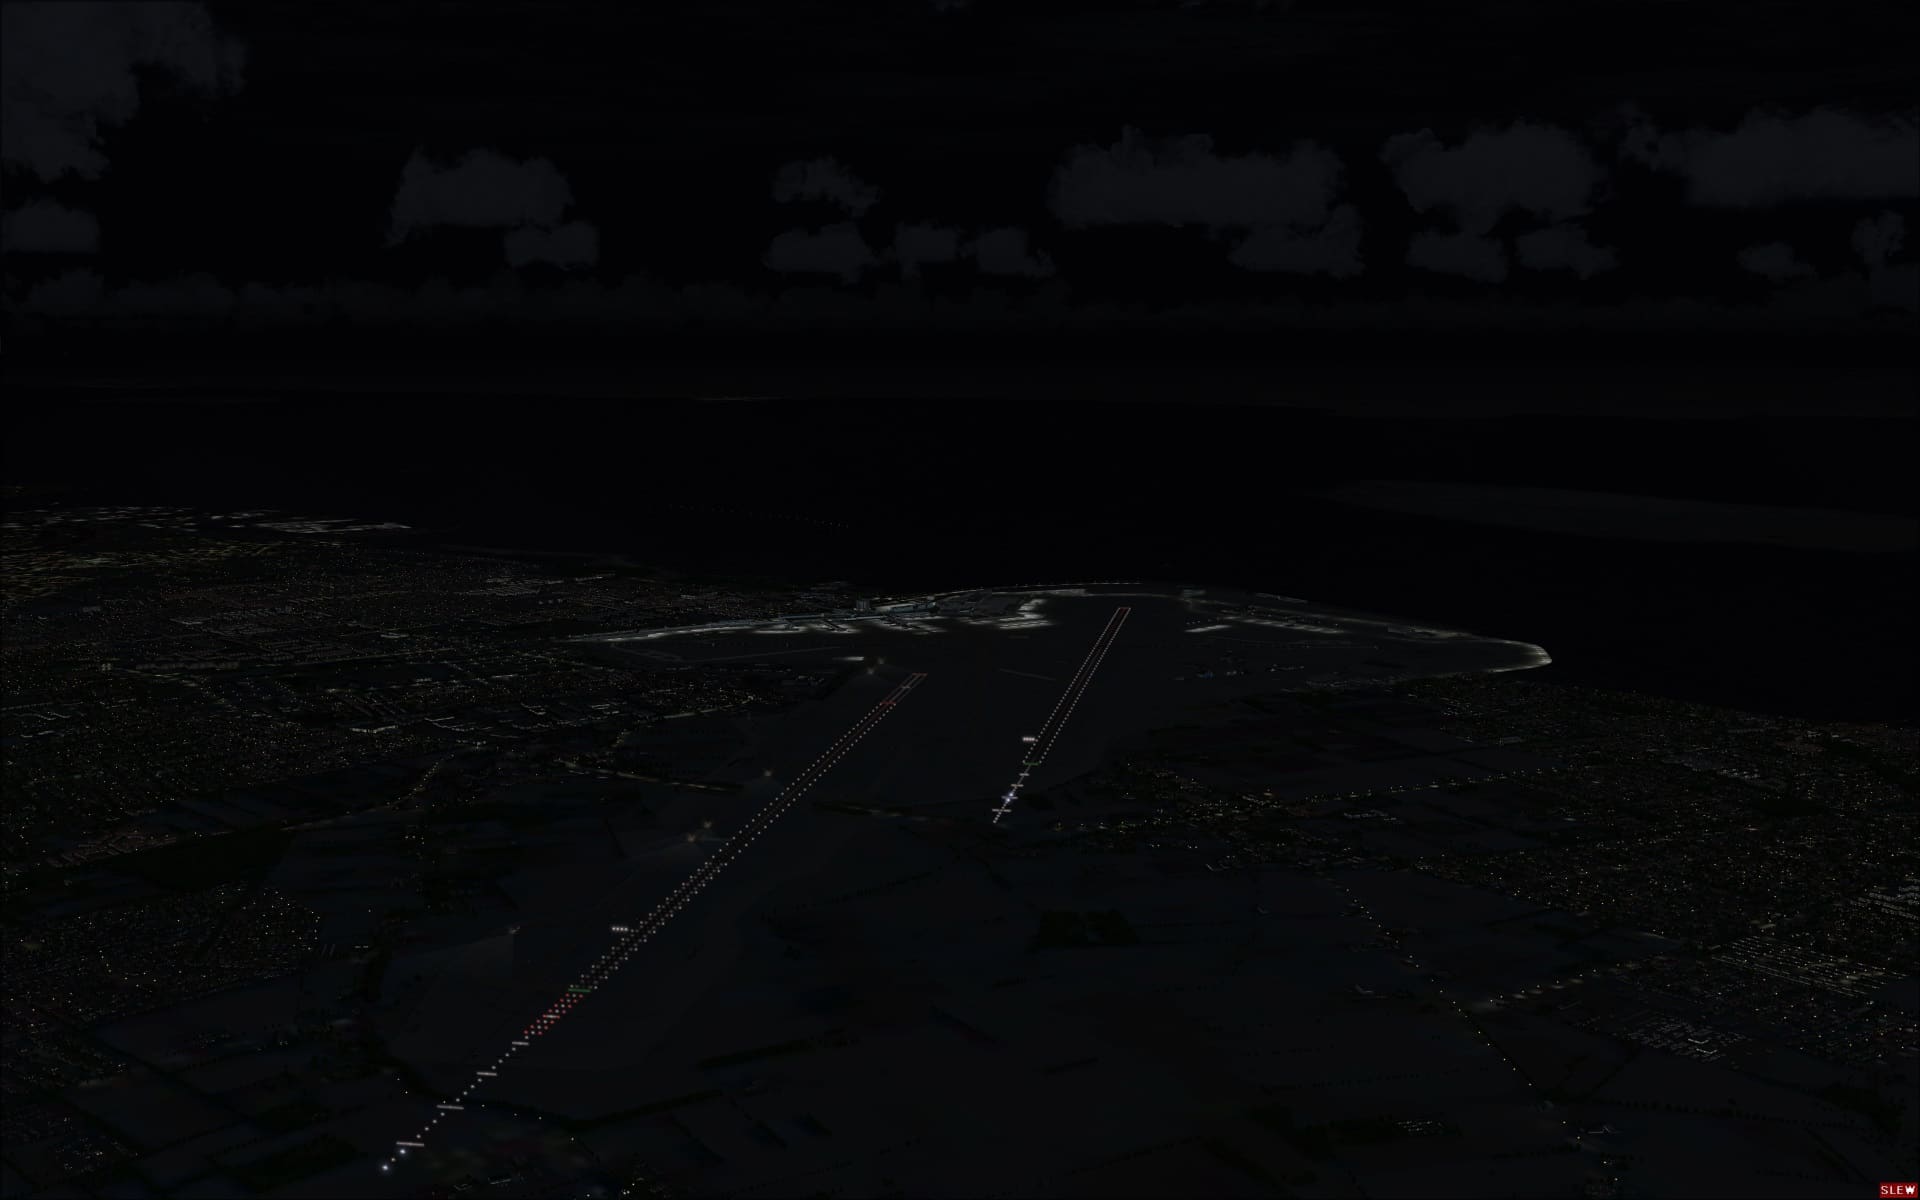
 Taxiing to and from the runways I couldn’t help but notice the quality and detail of the different taxiway/runway light fixtures and markers.
 There are many other very good examples of the outstanding quality found throughout the airport you need only take the time to look around.
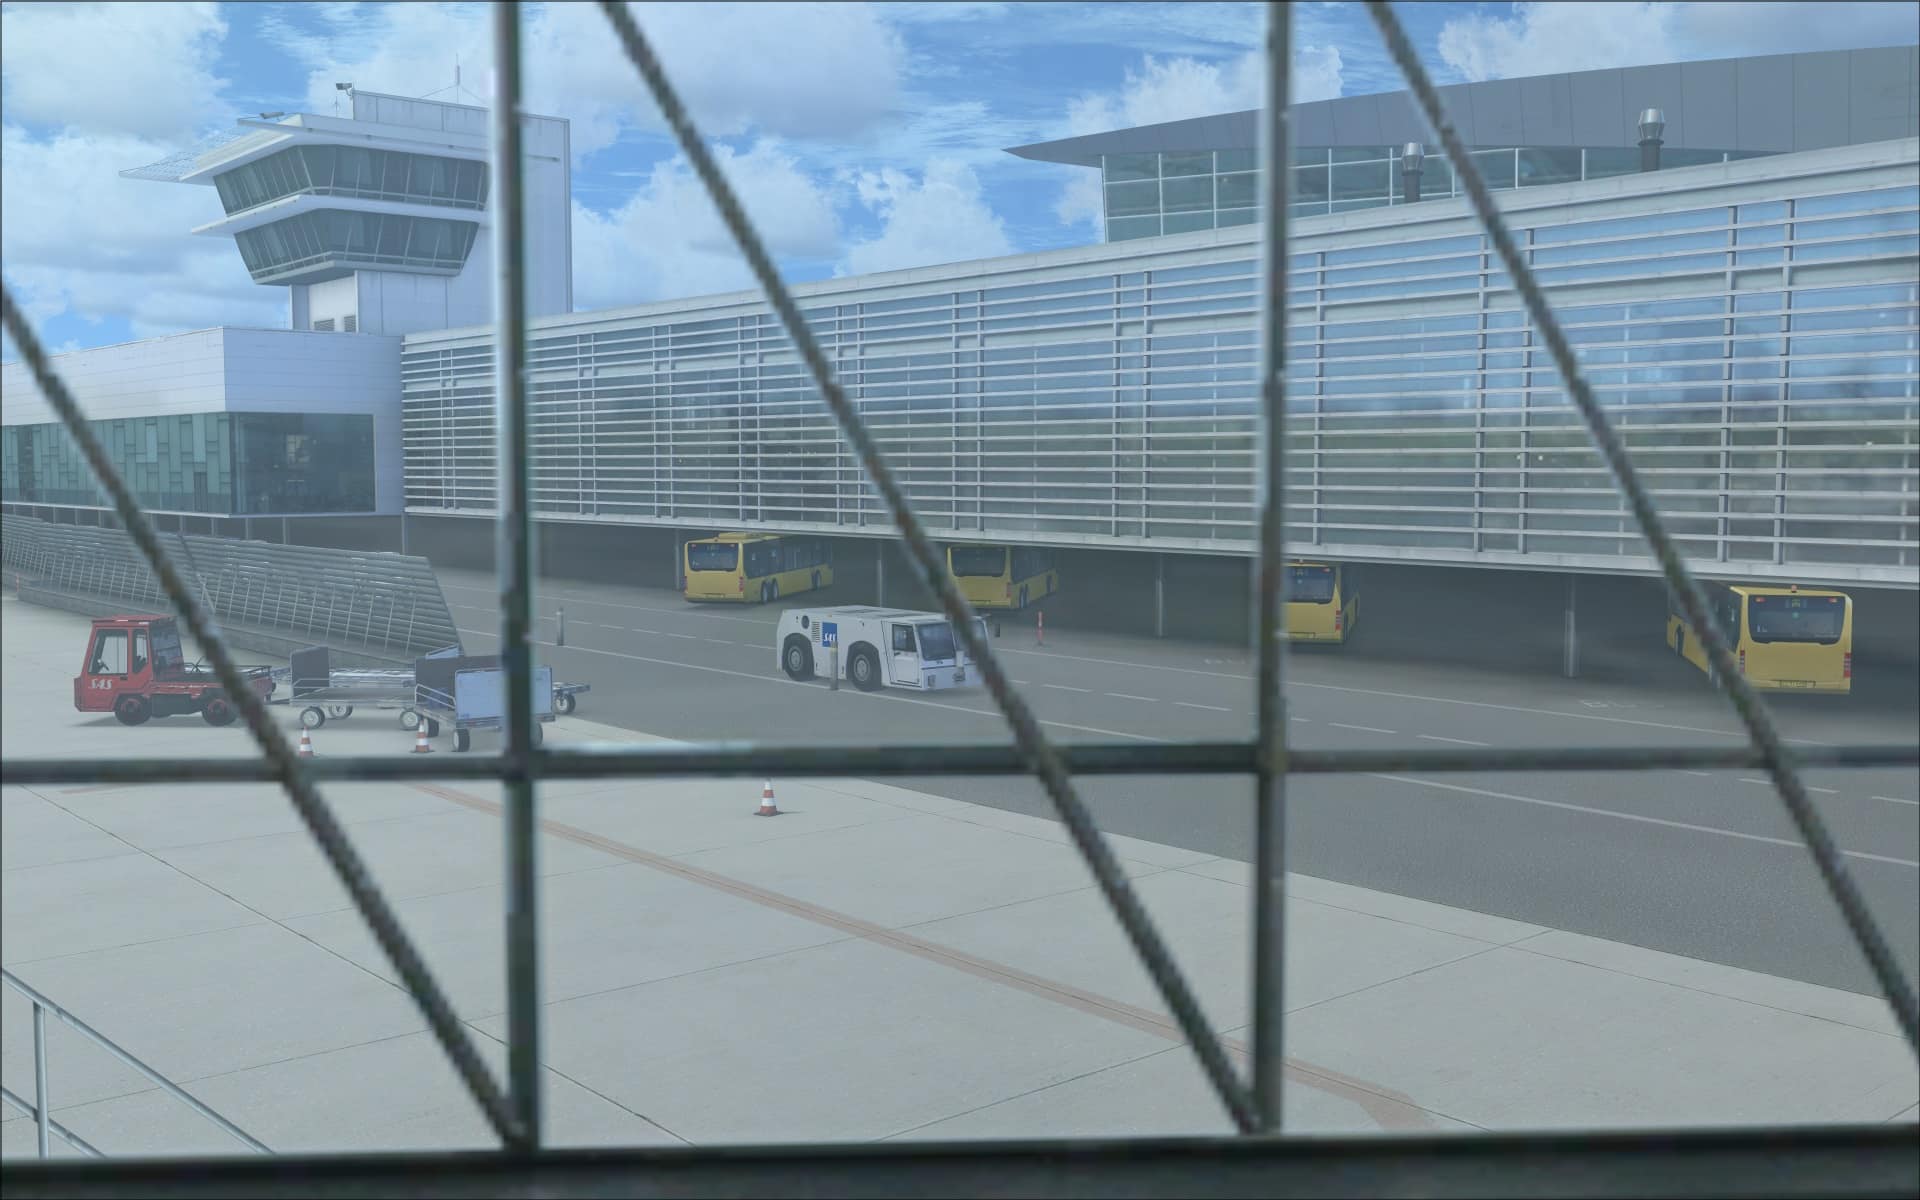
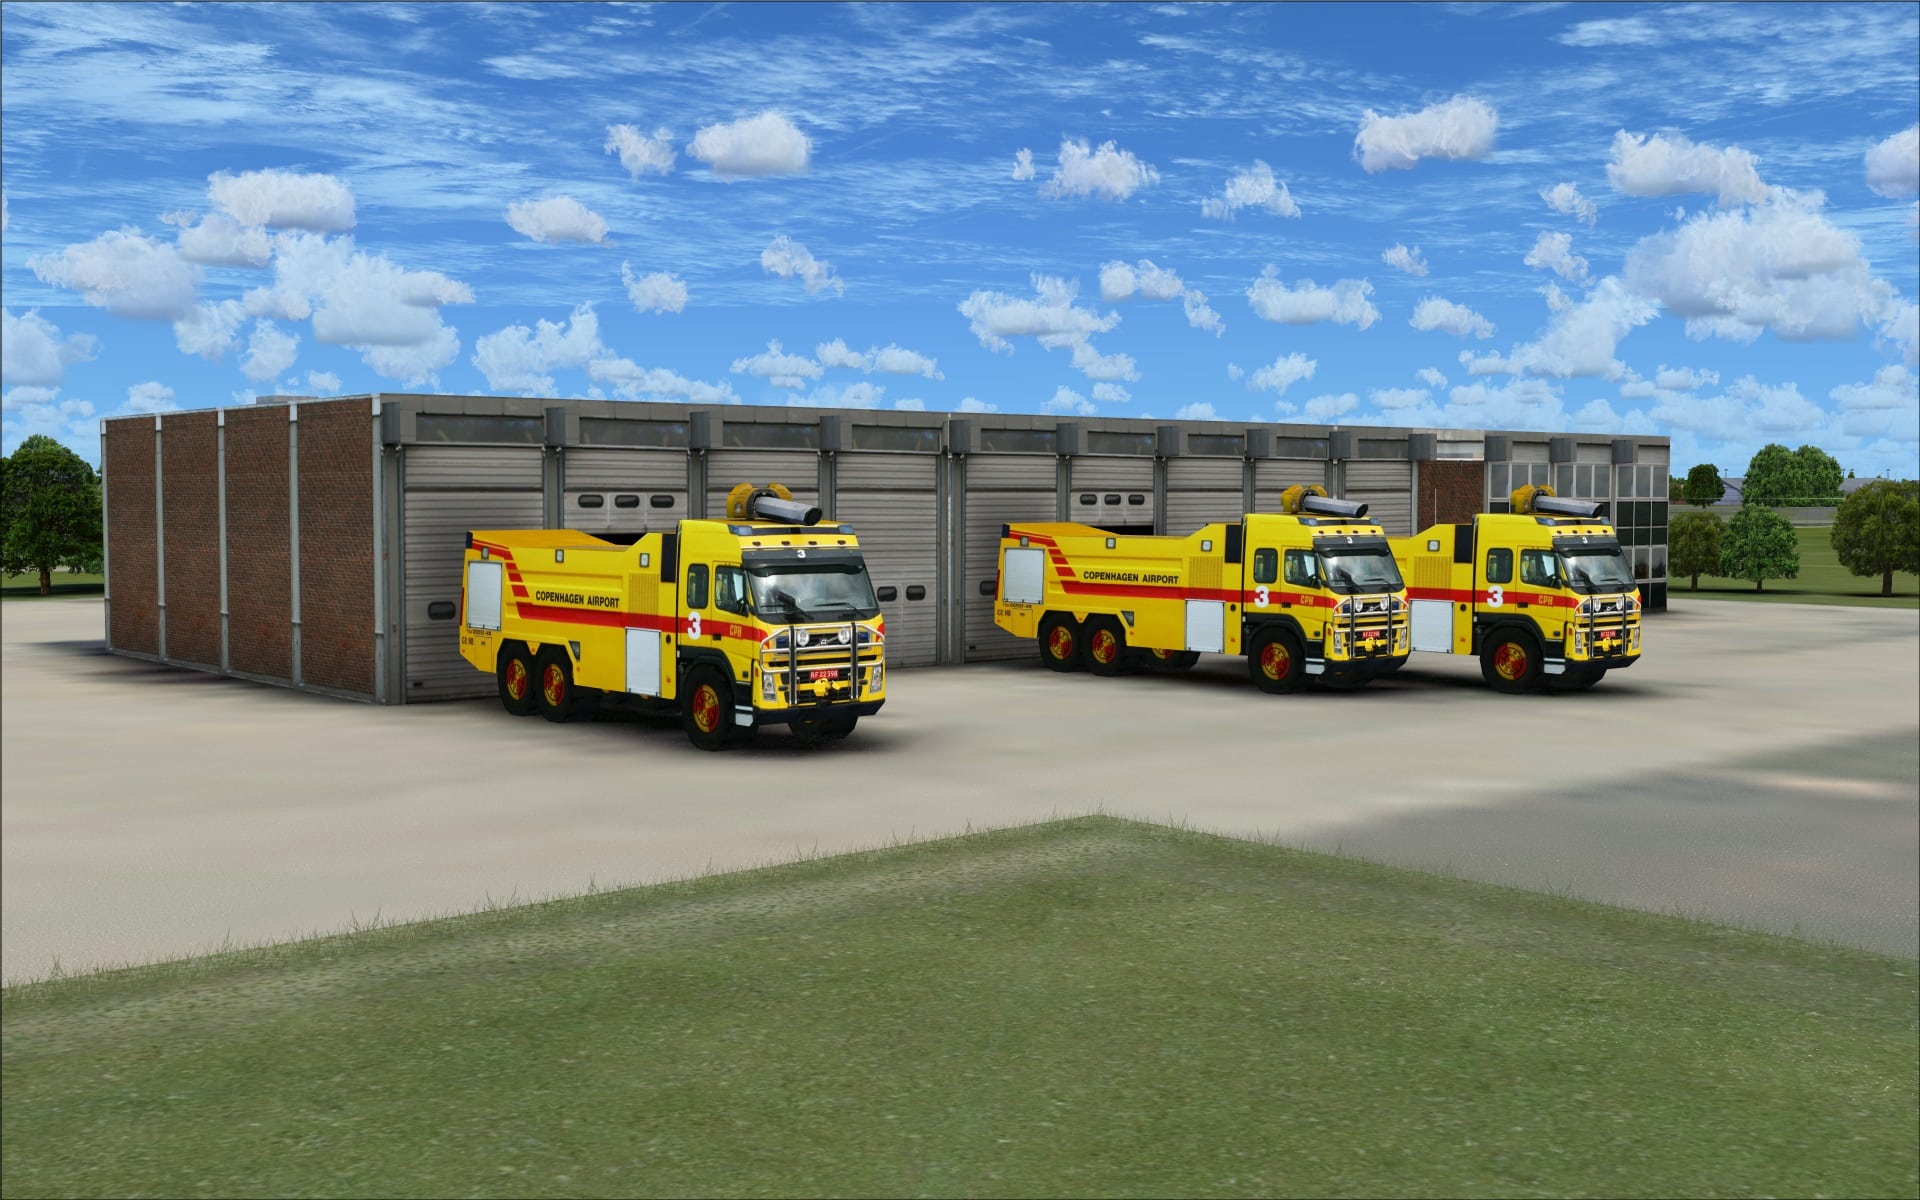
Vehicles, both static and animated, played a big part in bringing life to this airport scenery. Many of them include airport and airline specific markings and logos; always nice to see. Here again, quality and variety were important features that made them special in my opinion.


 Animations
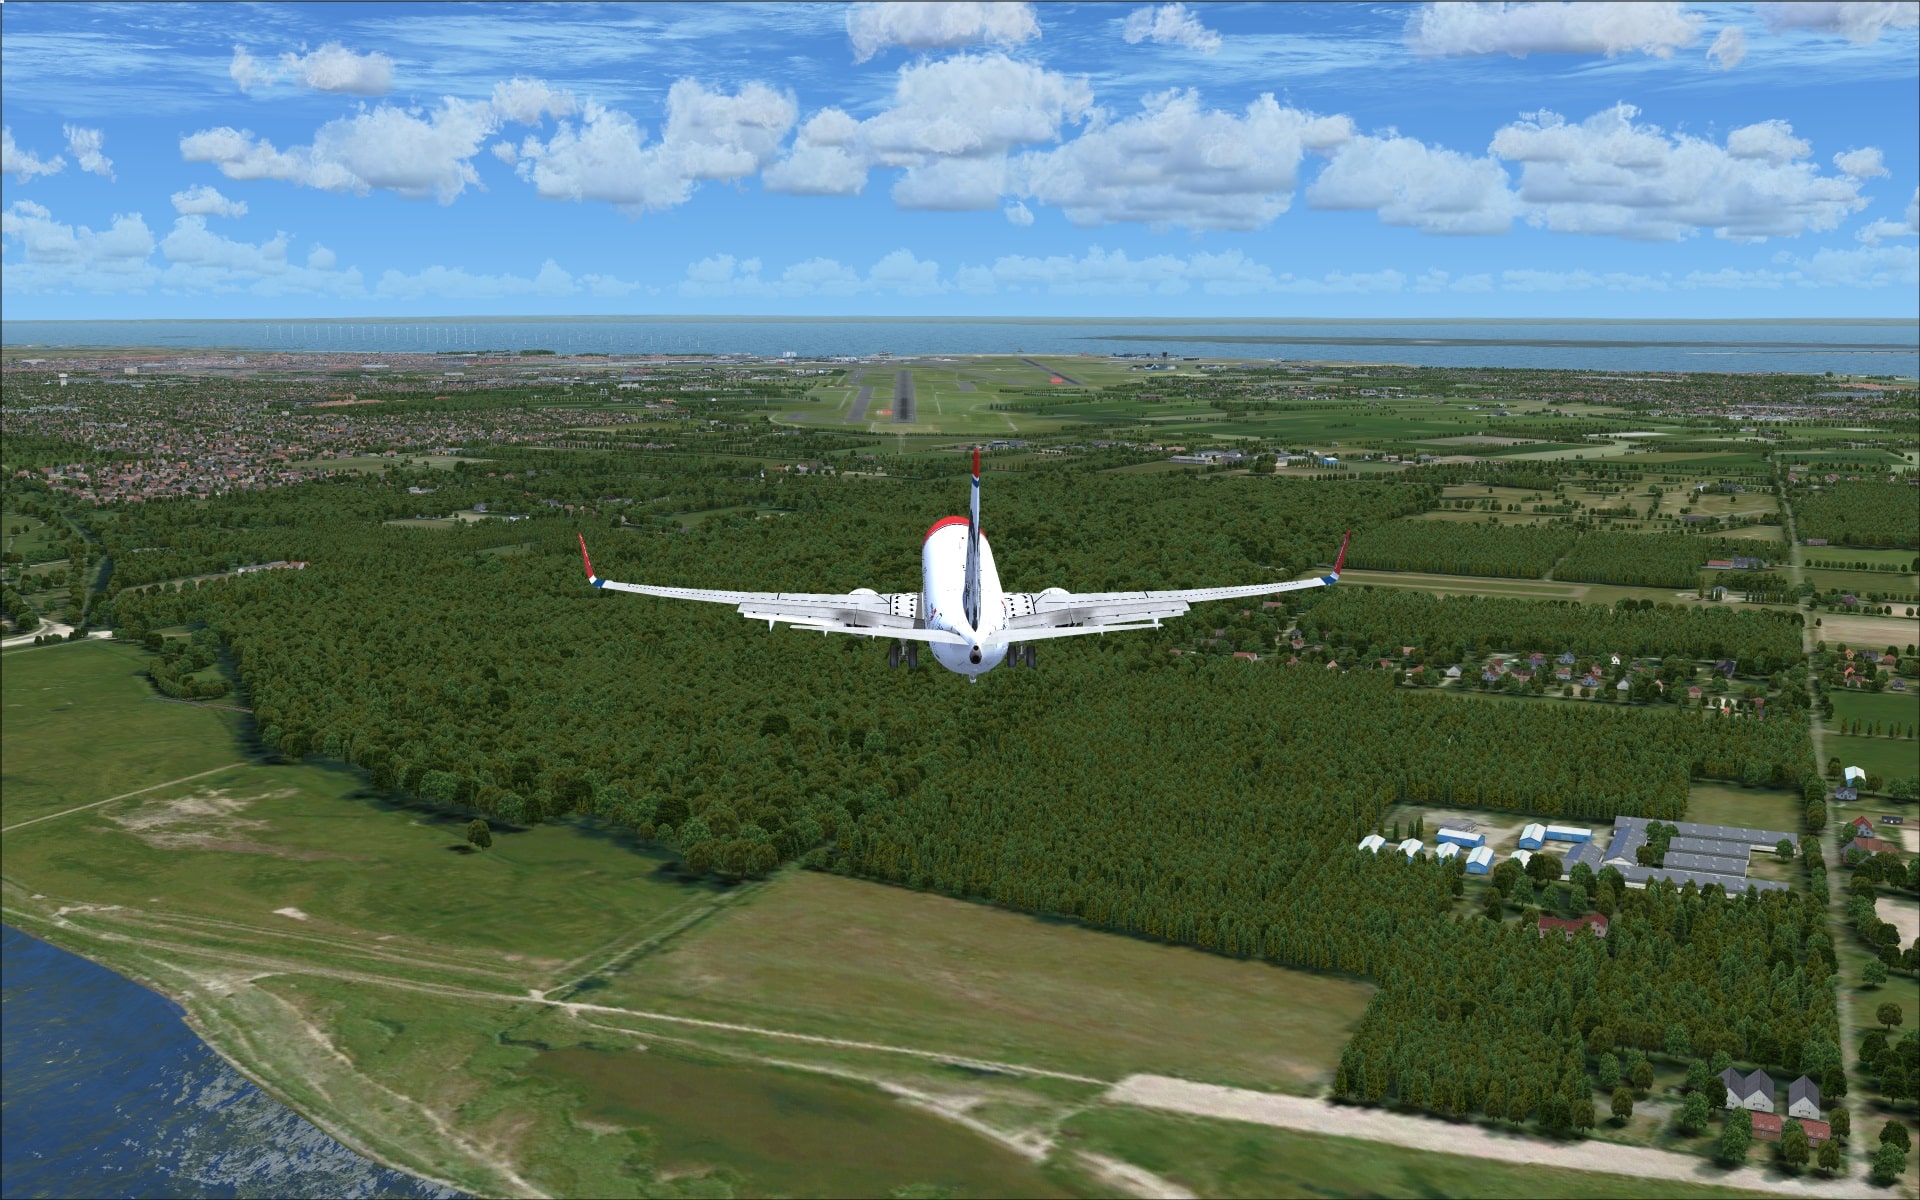
The airport is a very busy place with lots of activates taking. The most obvious was the variety and the amount of vehicular traffic moving around the apron and service roads. You will need to take care as you taxi to and from your runway.
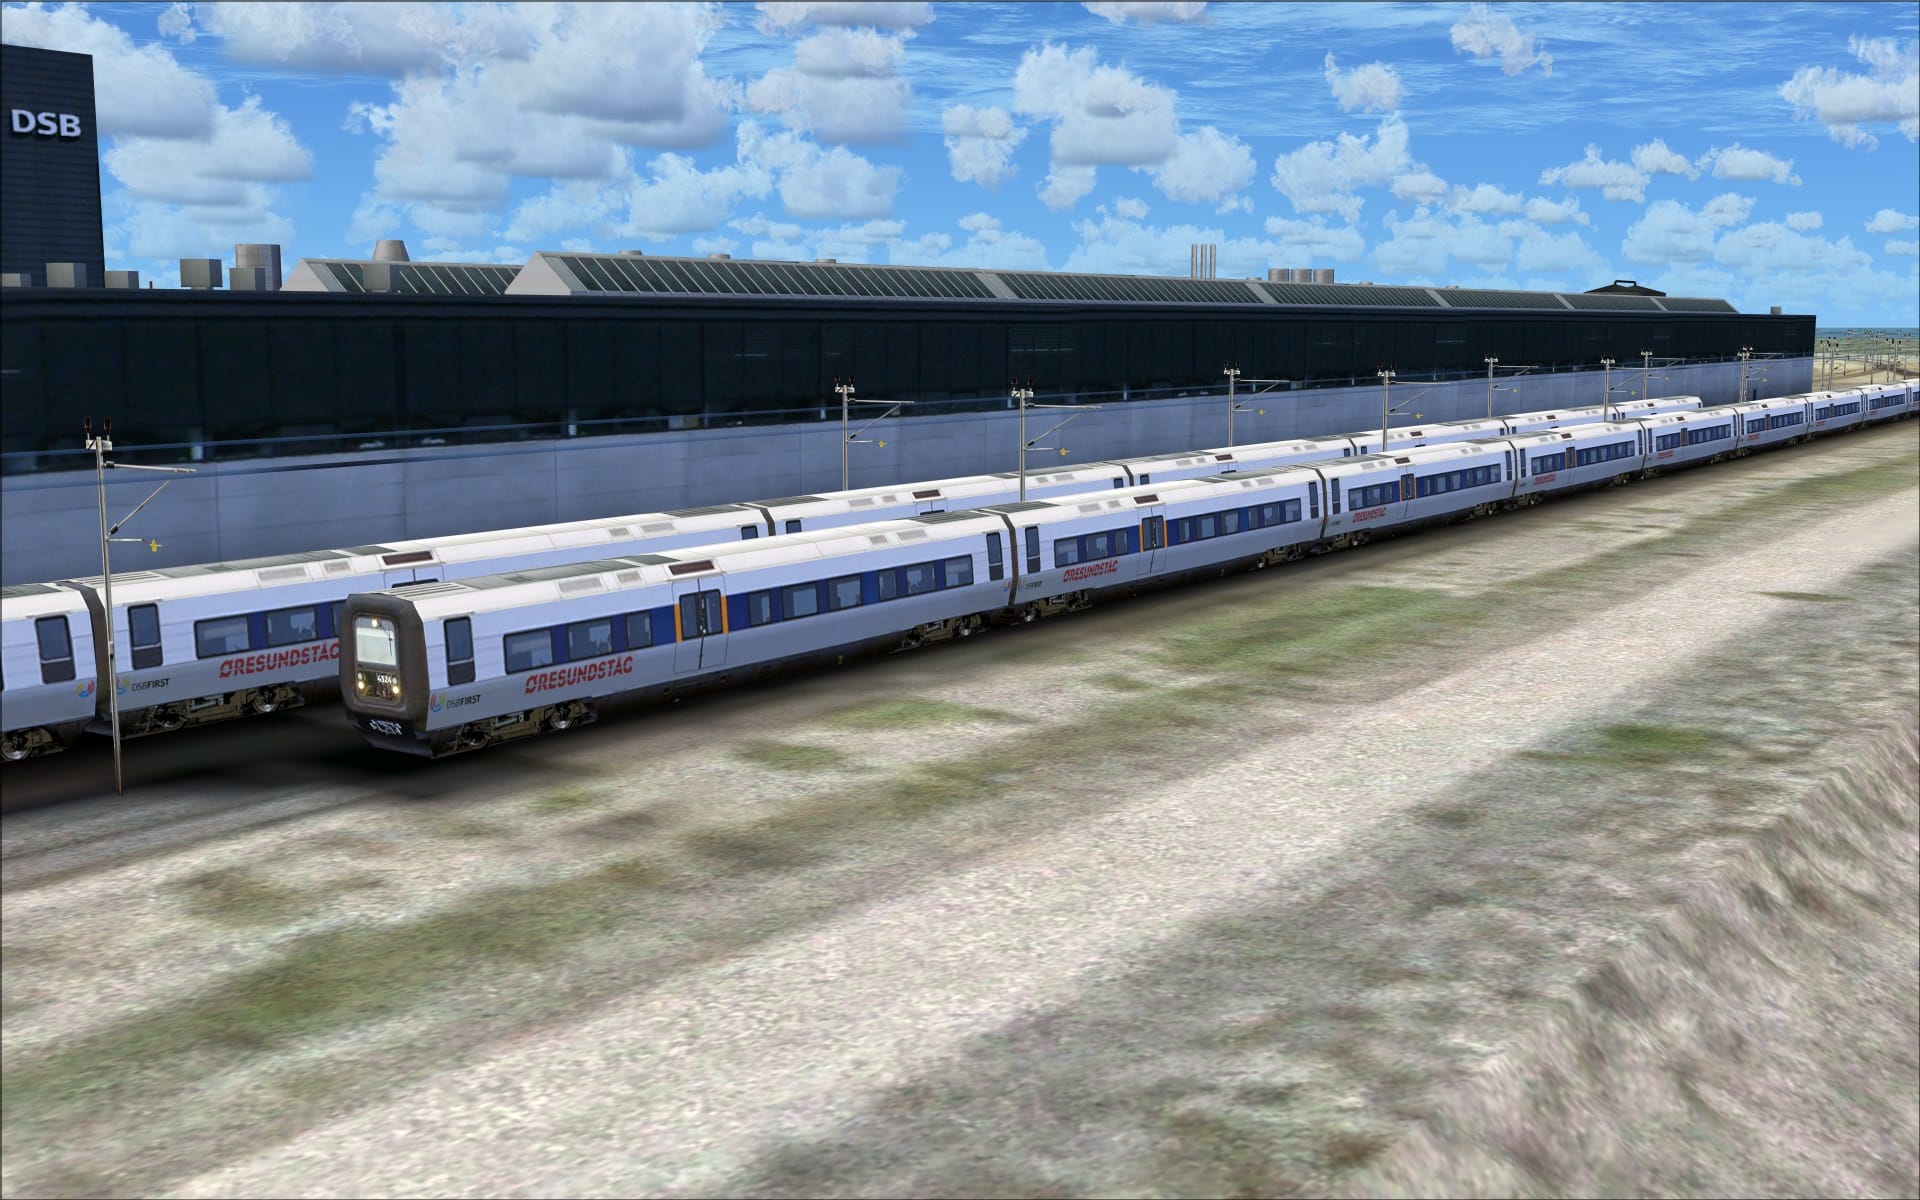
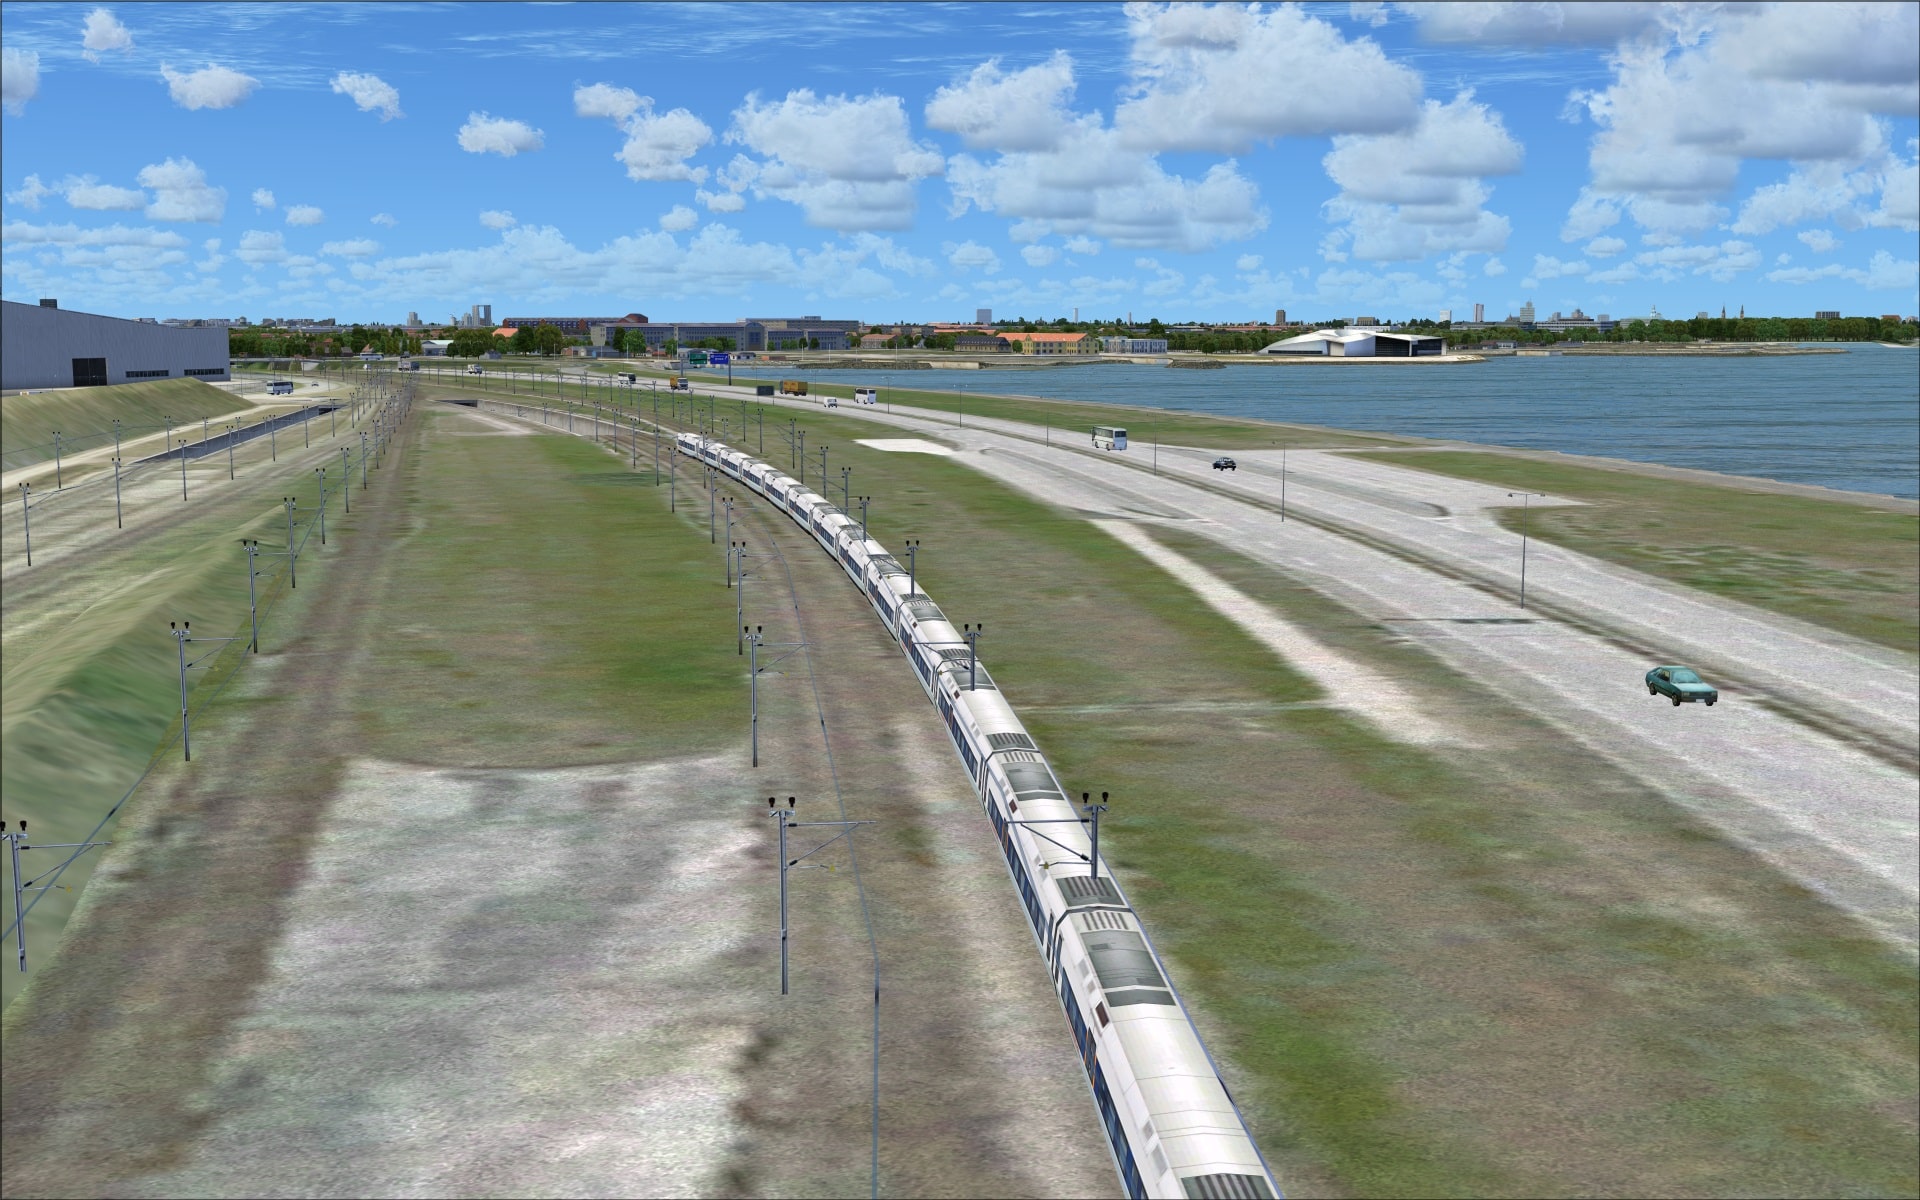
Outside of the airport on the neighbouring roadways and railway lines is lots of vehicular and train traffic. The Øresund Bridge was also home to road and rail traffic.
I found the rail traffic to be a very nice addition to the airport’s surroundings as the models were convincingly realistic and they could be seen quite frequently.
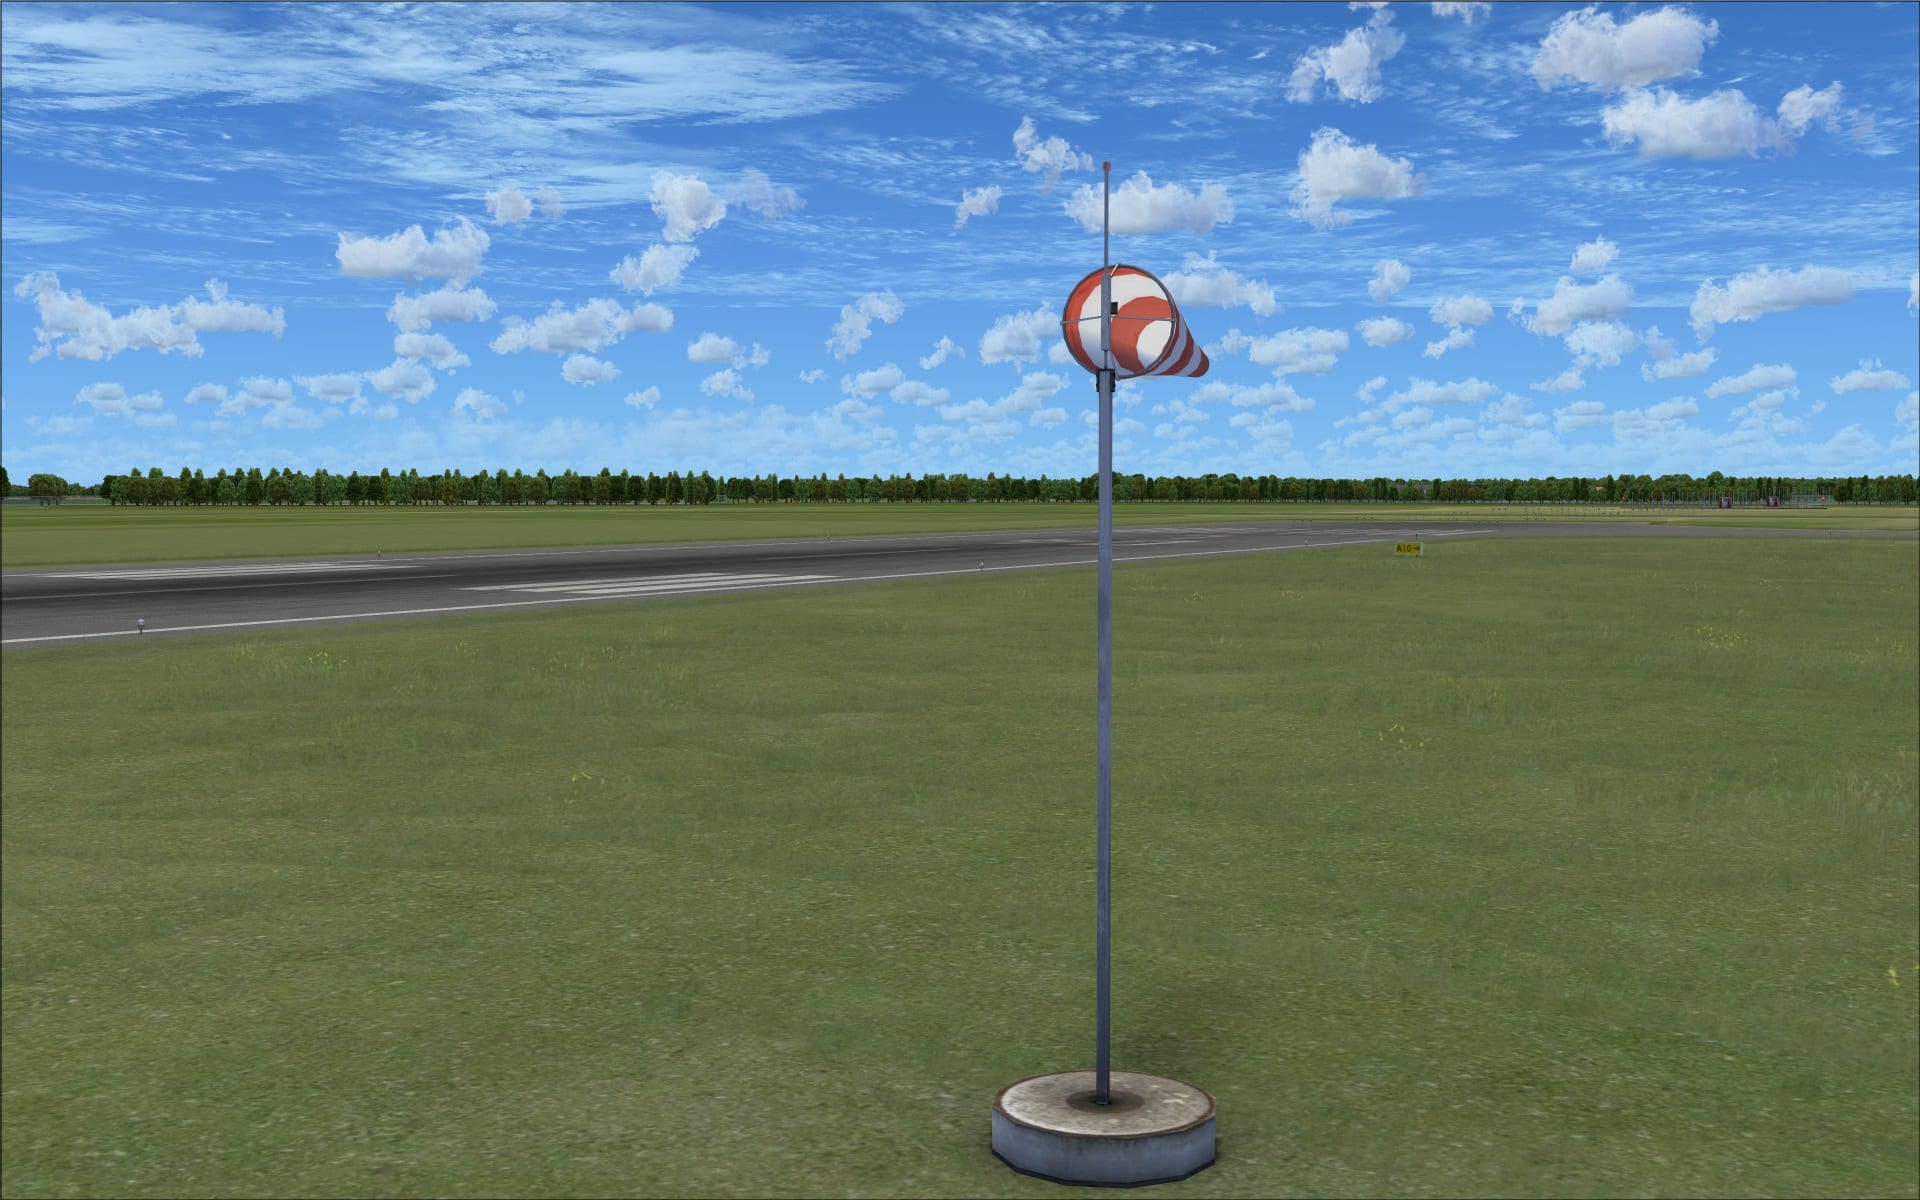
 Besides the more recognizable animations I just described they did include some others that weren’t quite so obvious. Windsocks are not normally anything special however at Copenhagan Airport they did catch my attention. Firstly they are very detailed; their shape, 3d modelling and transparent look give them a realistic appearance, then add to the animation of seemingly moving with a slight wind and you have a small yet impressive detail that shows you another subtle reason why people so anxiously await this developer’s products.
 The airport is equipped with visual docking guidance systems that have been modelled. I used them while parking at a number of different gates and found them to be very helpful.
 Surrounding Area
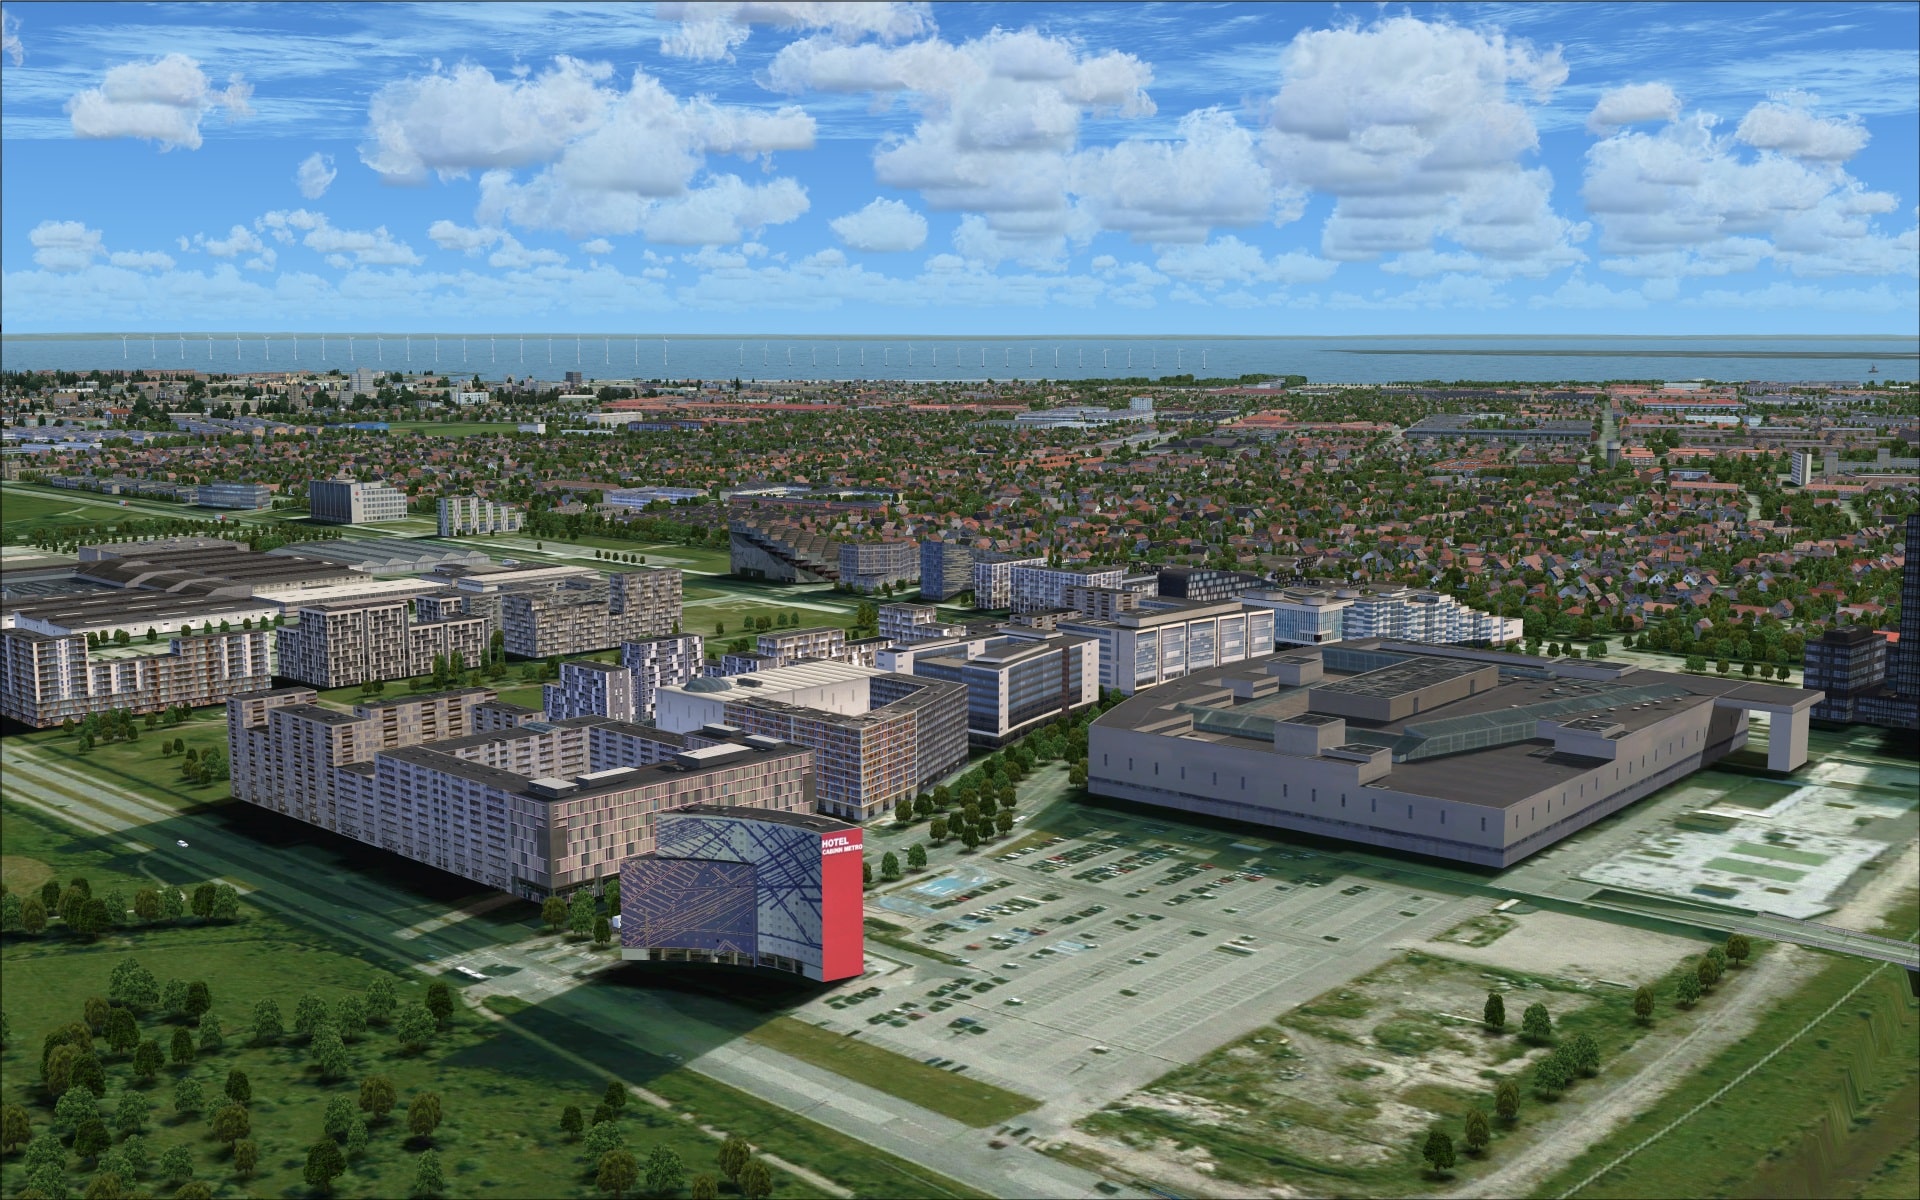
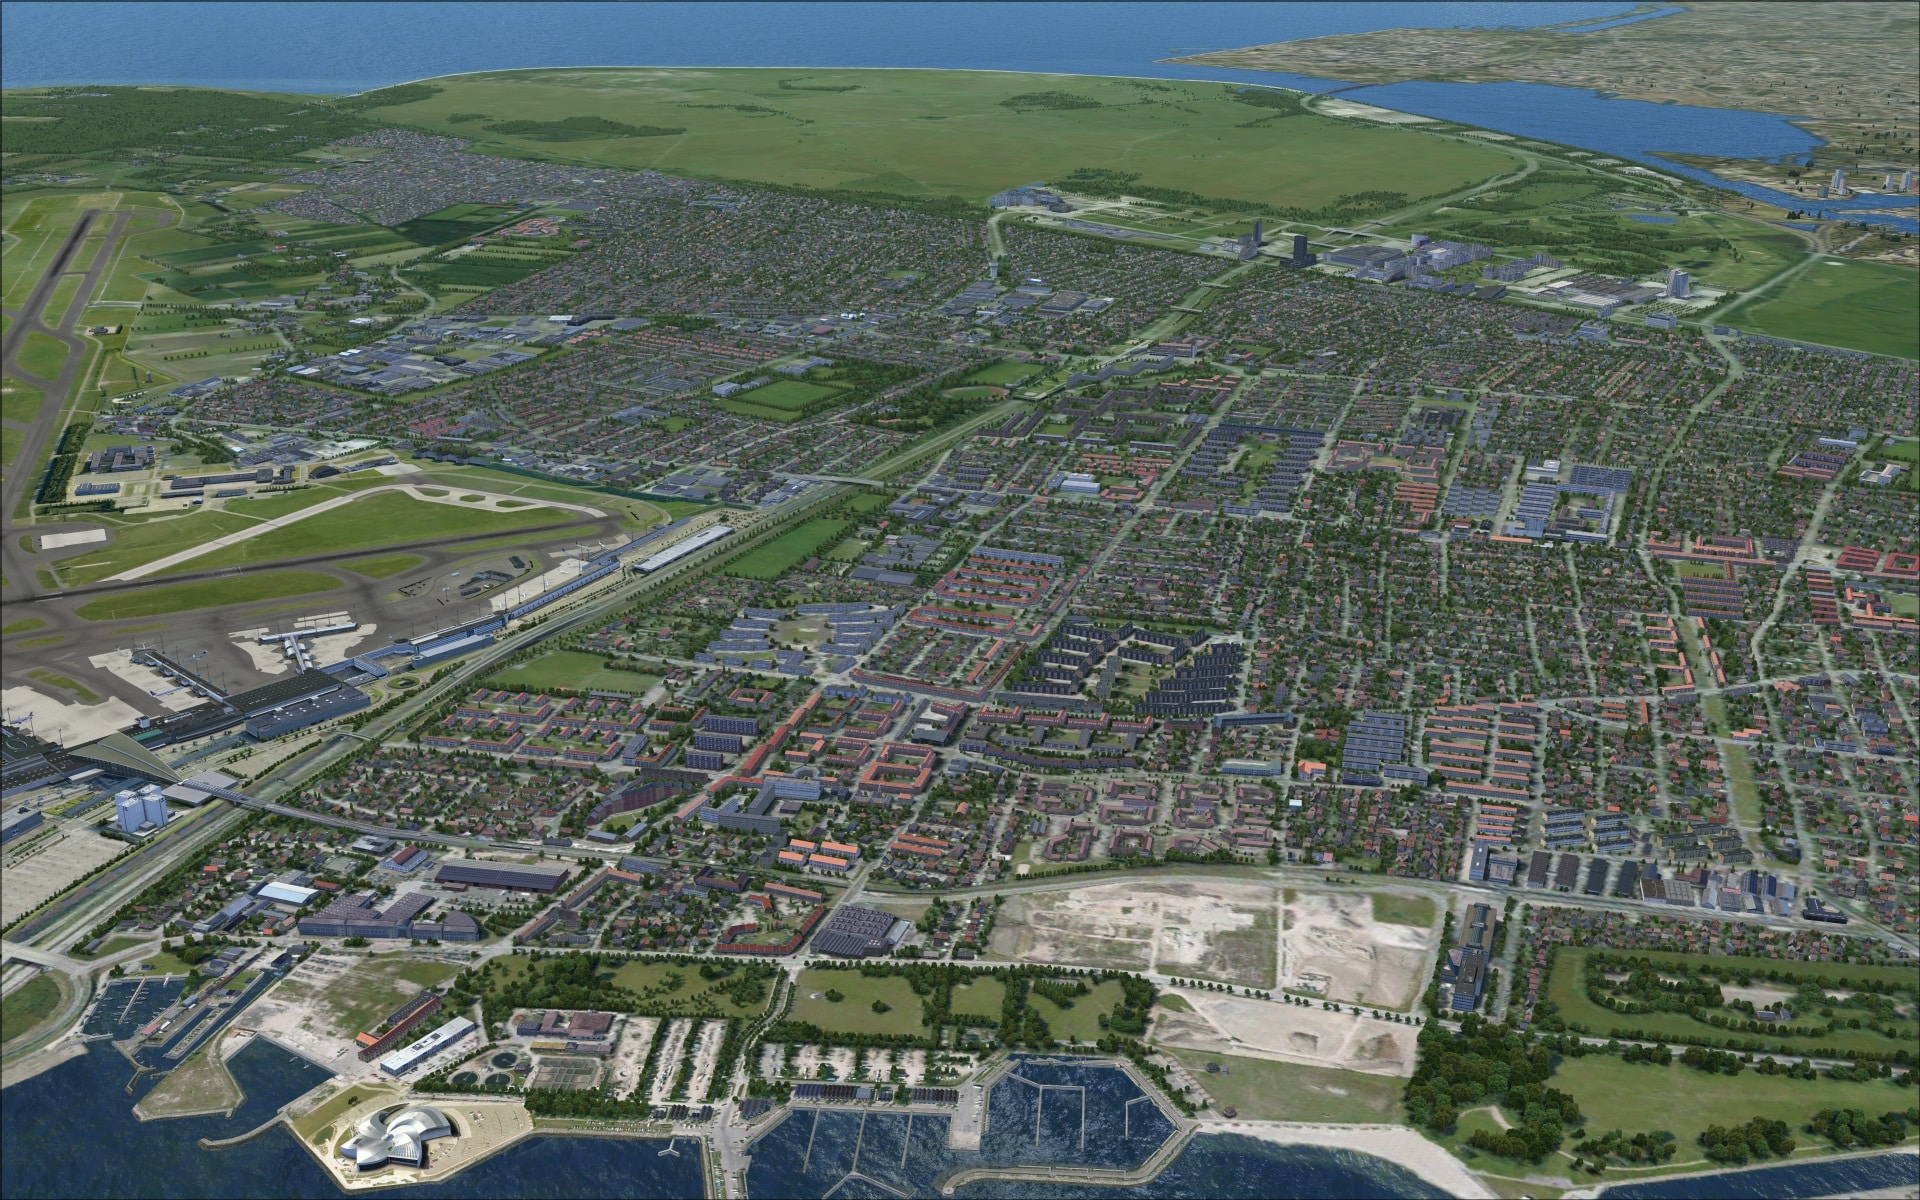
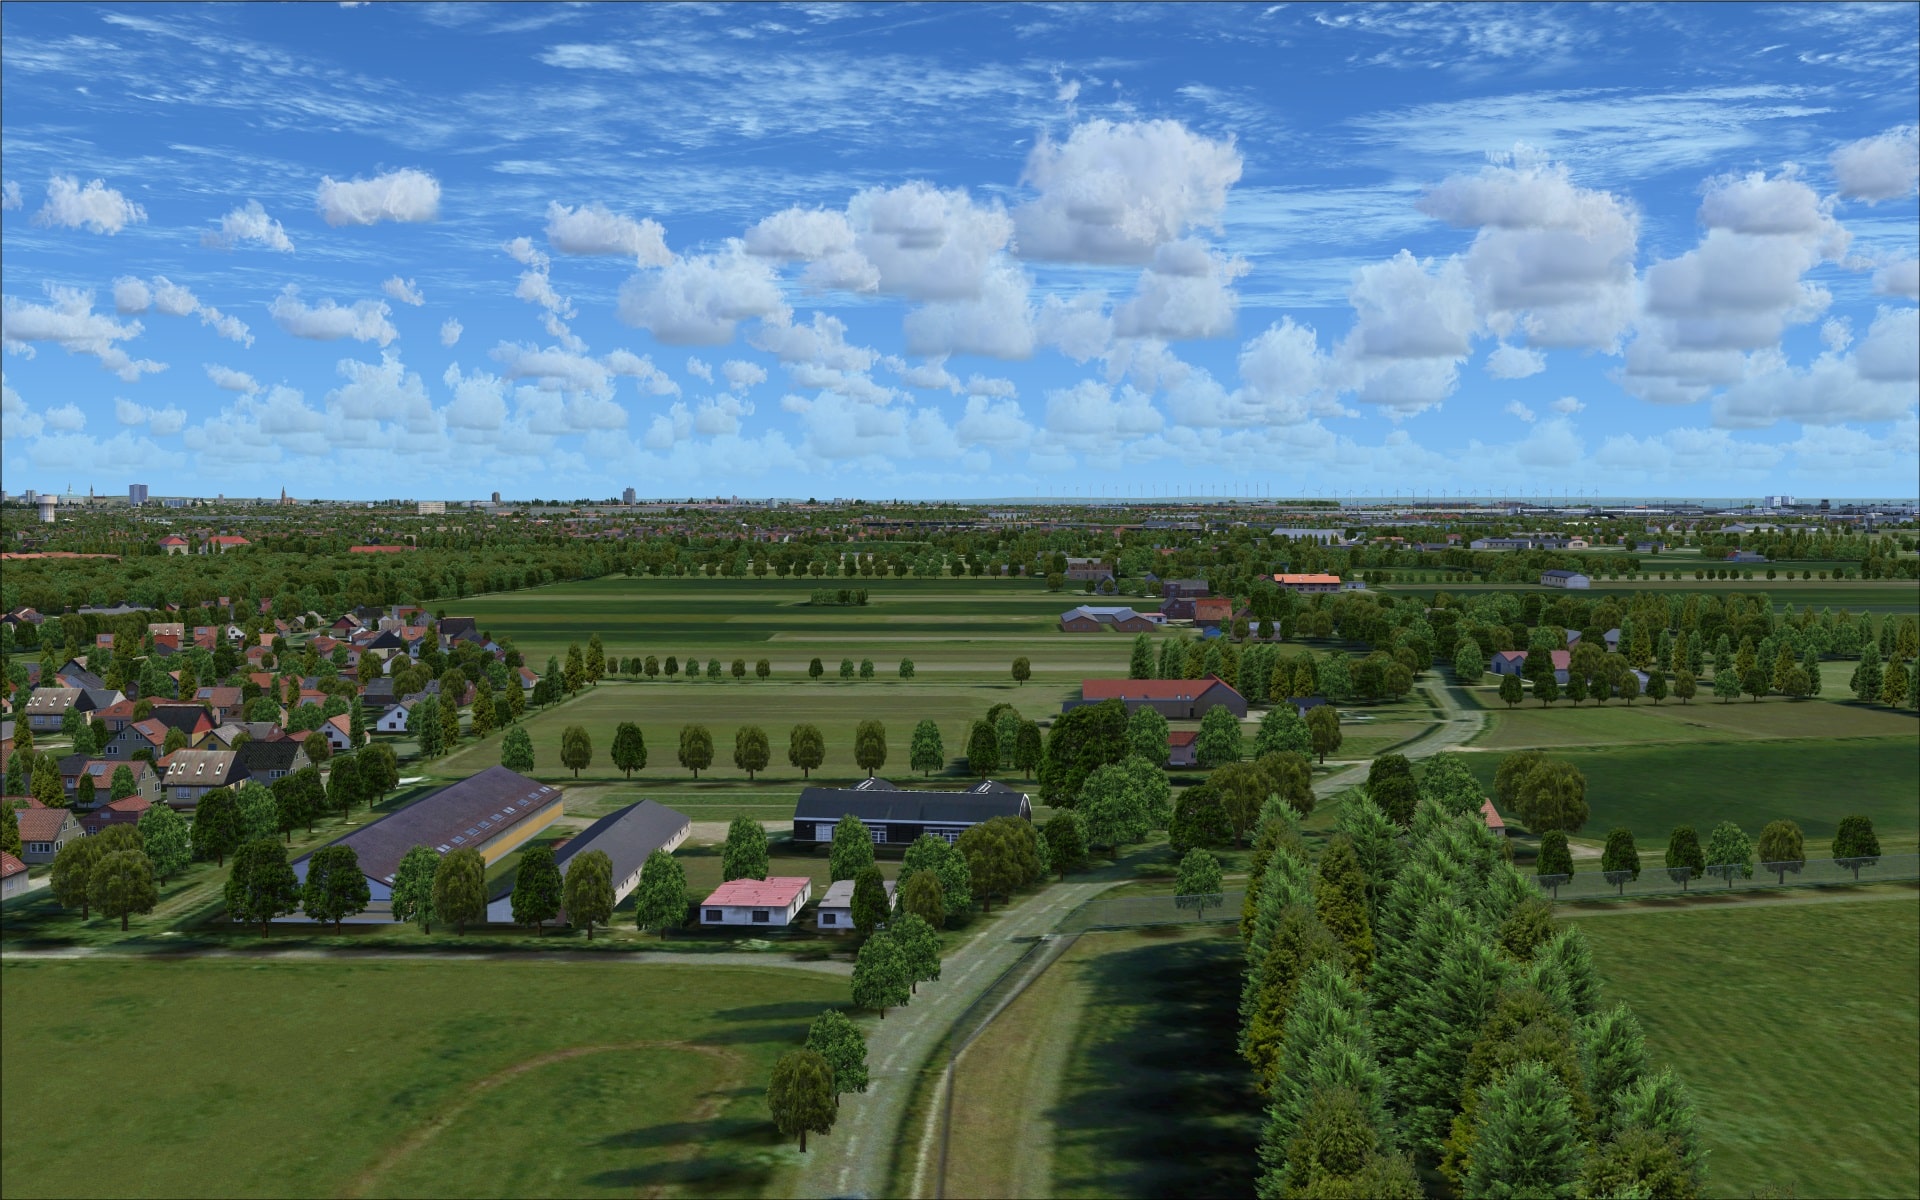
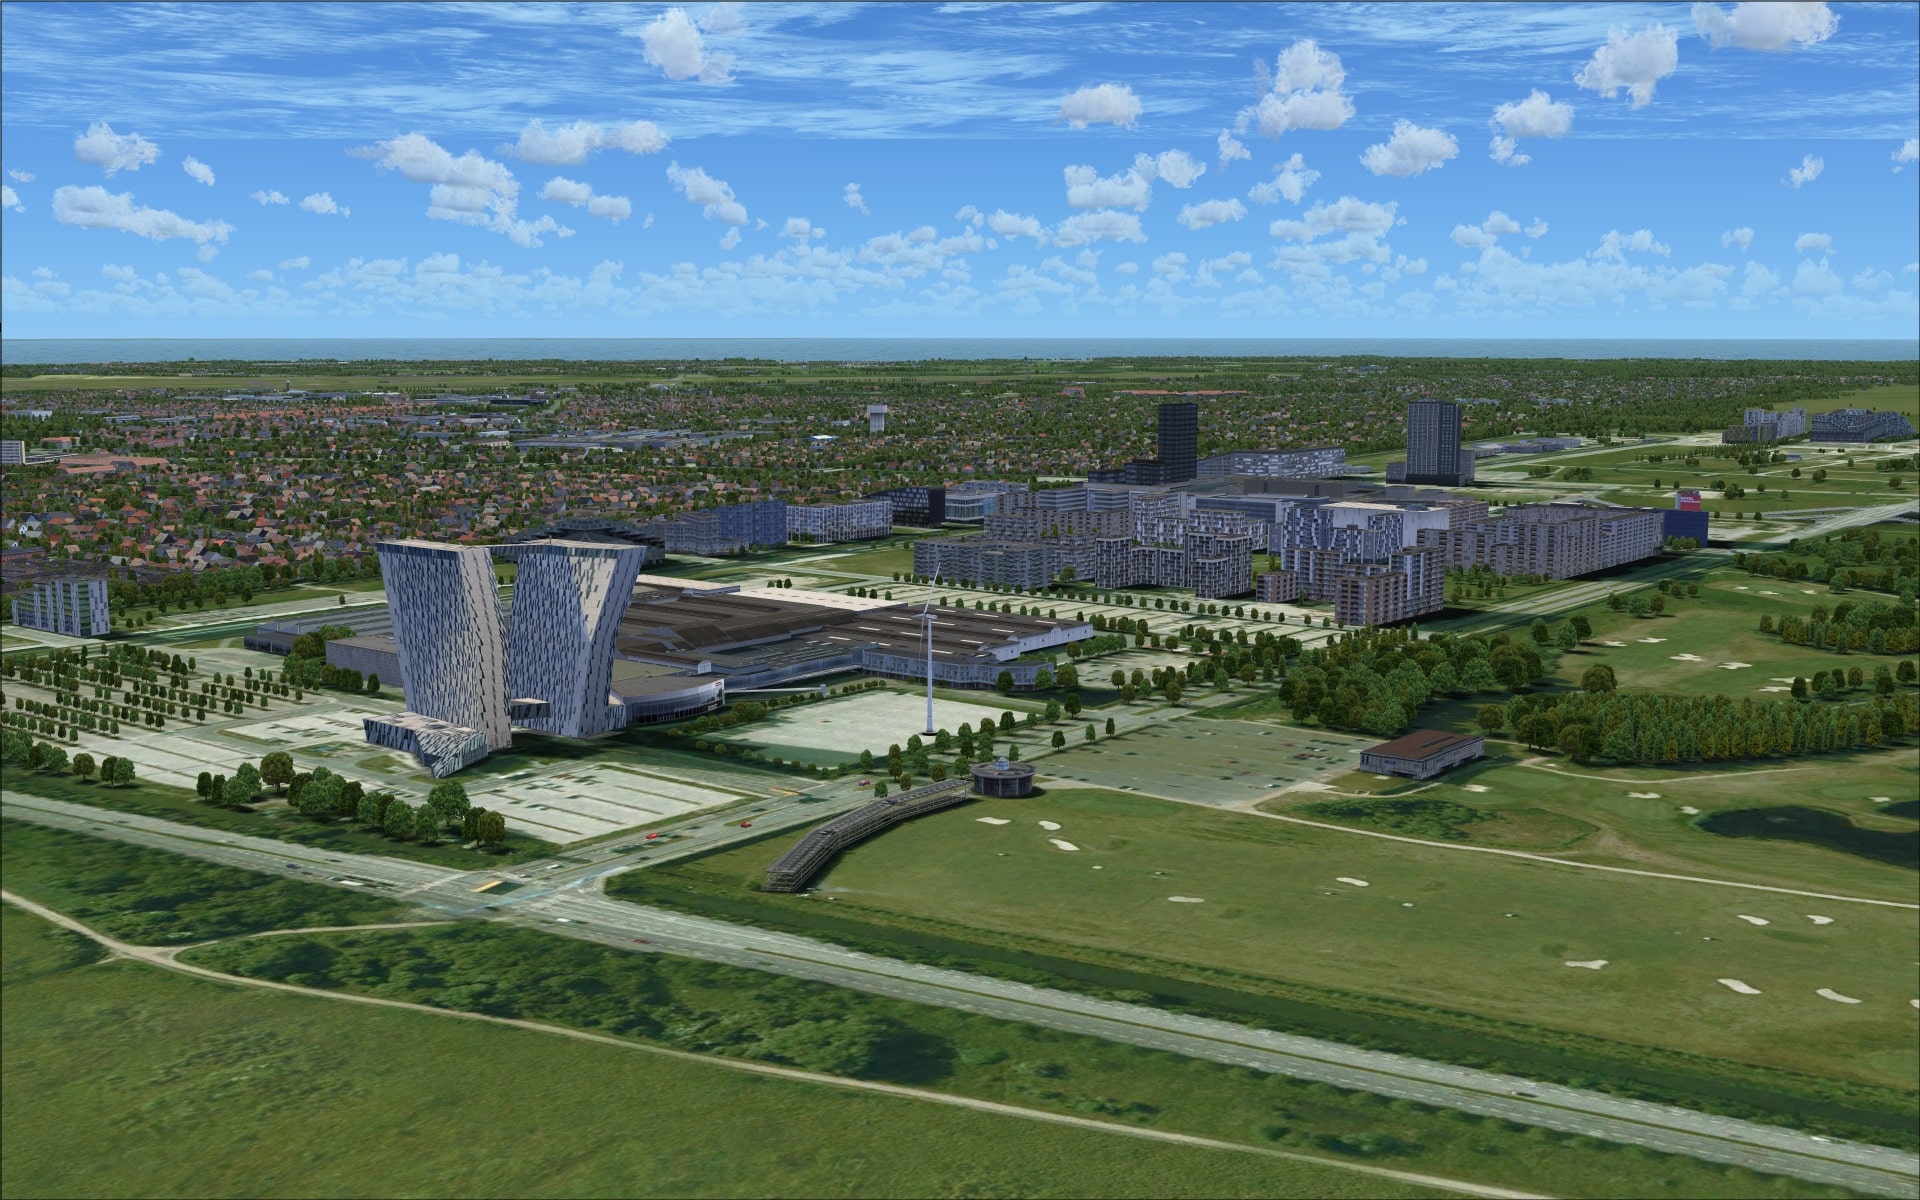
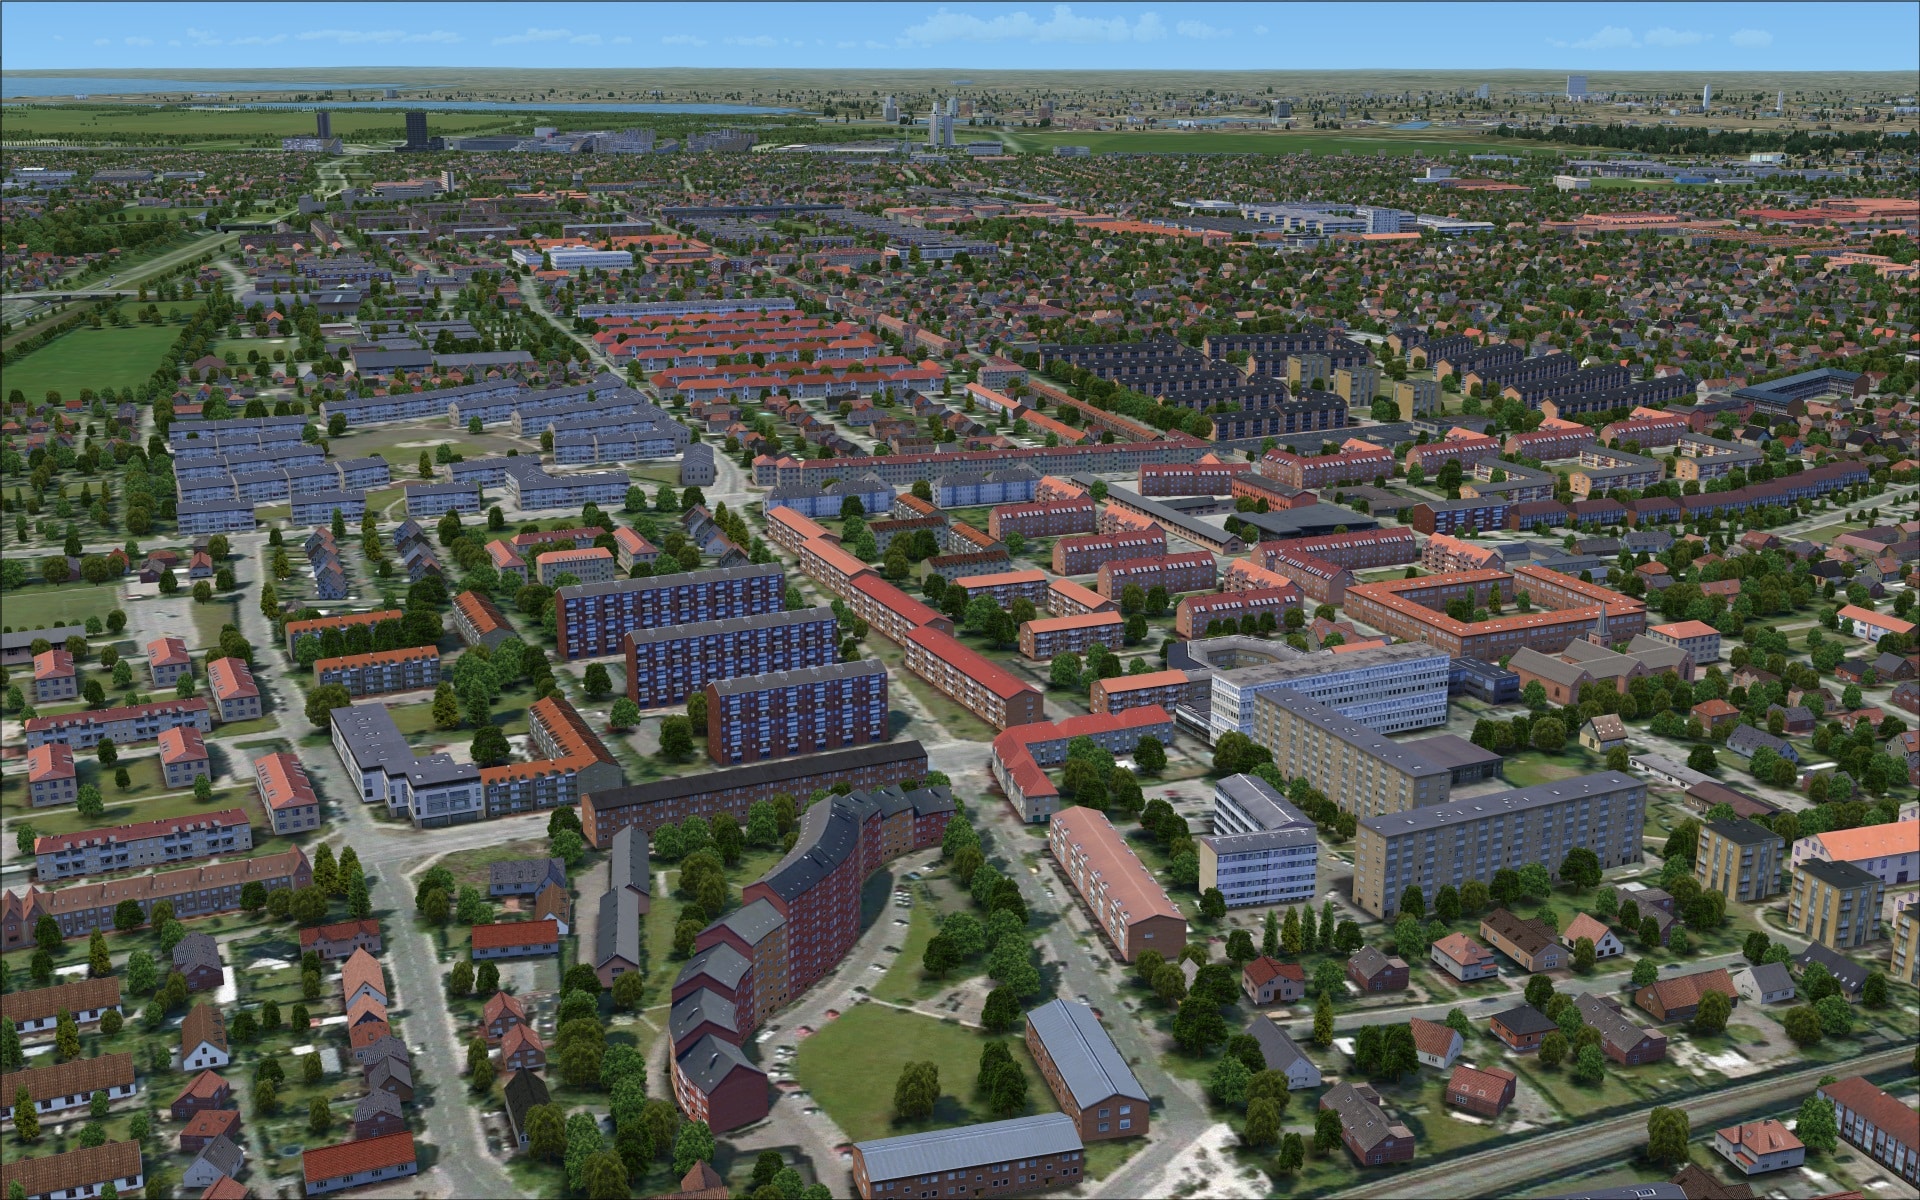
They’ve included as part of this addon a significant area of land in addition to the airport itself. It covers a large part of the island of Amager, the entire neighbouring island of Saltholm, the manmade island of Peberholm and the Øresund Bridge. The inclusion of this large modelled area made a huge positive impact on visuals when either approaching or departing the airport. Comparing how the area looked in FSX and with FlyTampa’s version the differences are quite significant.
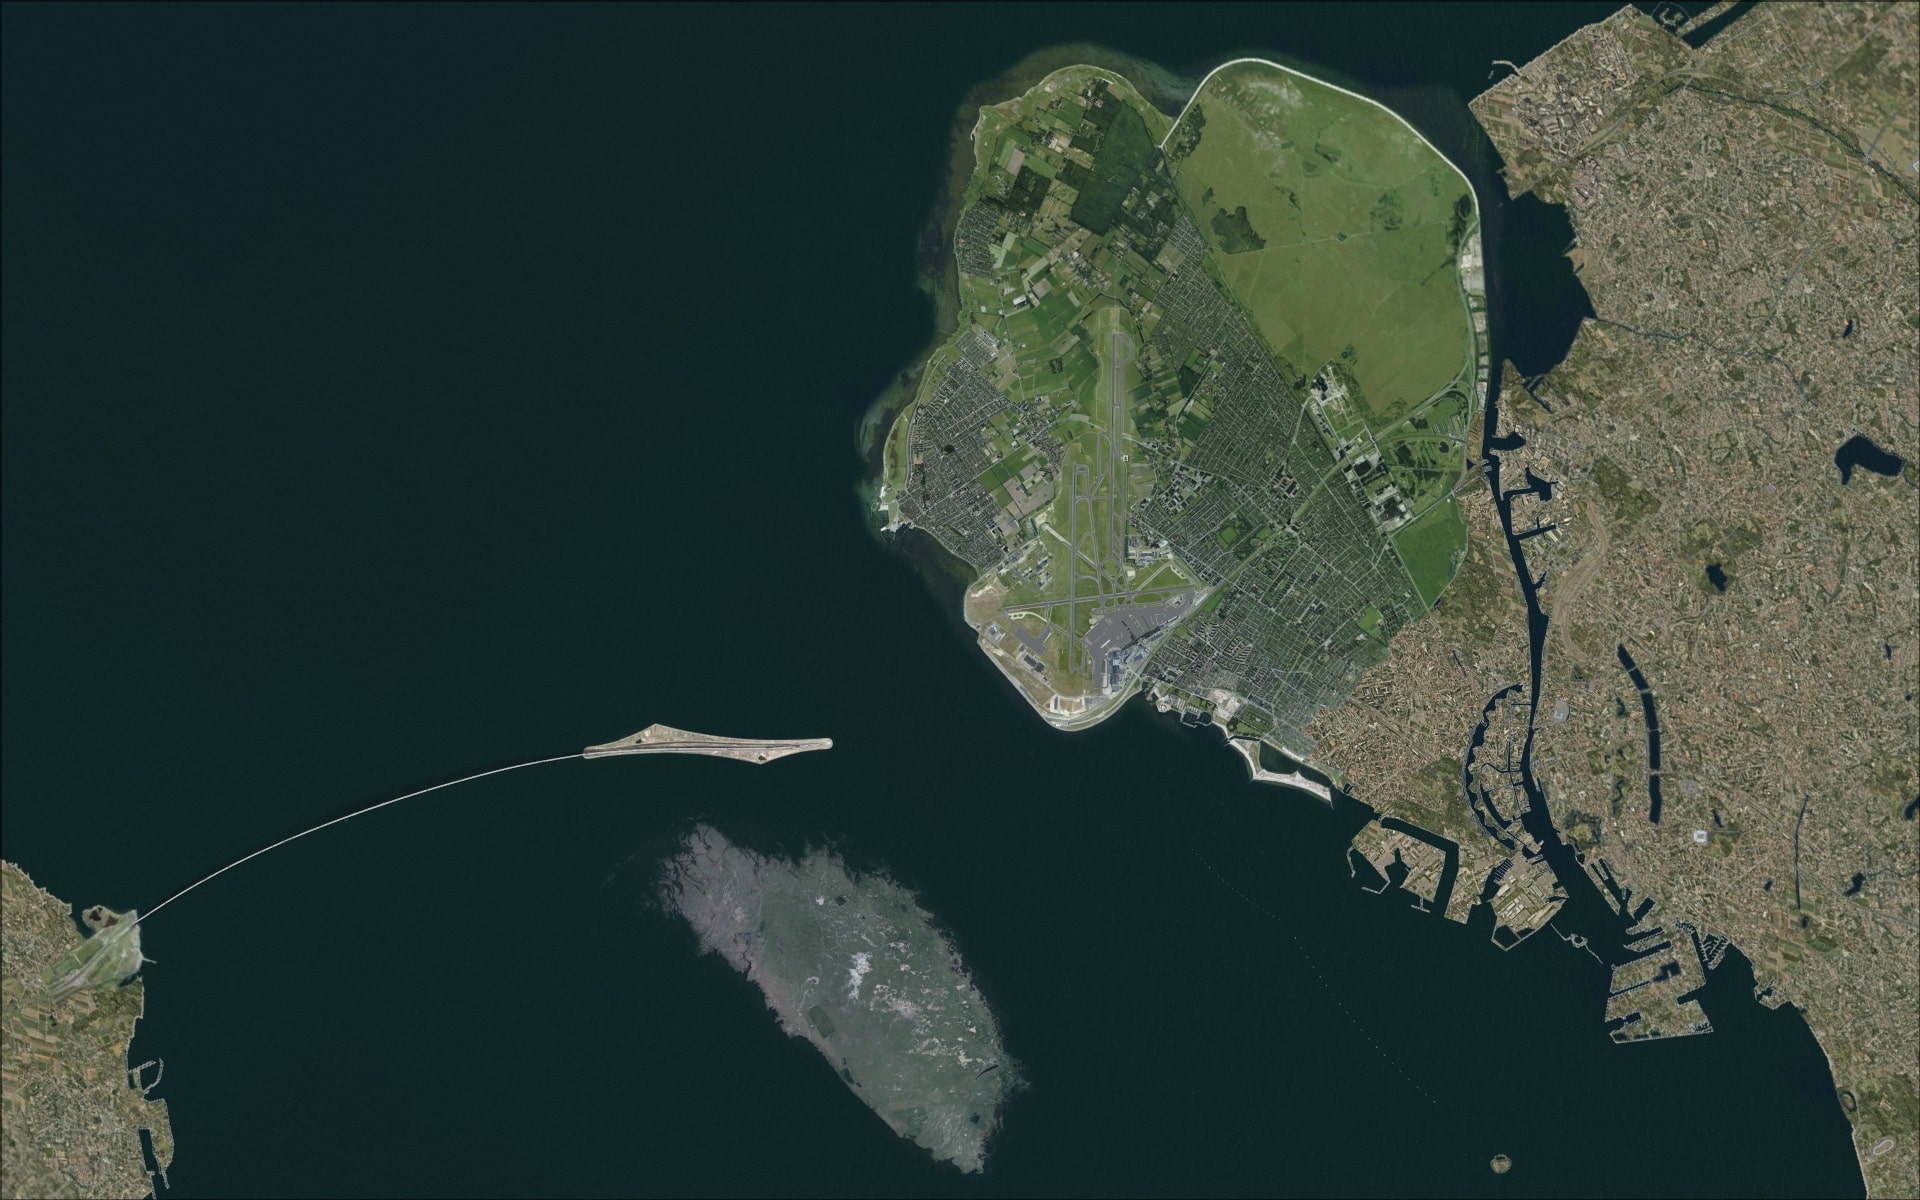
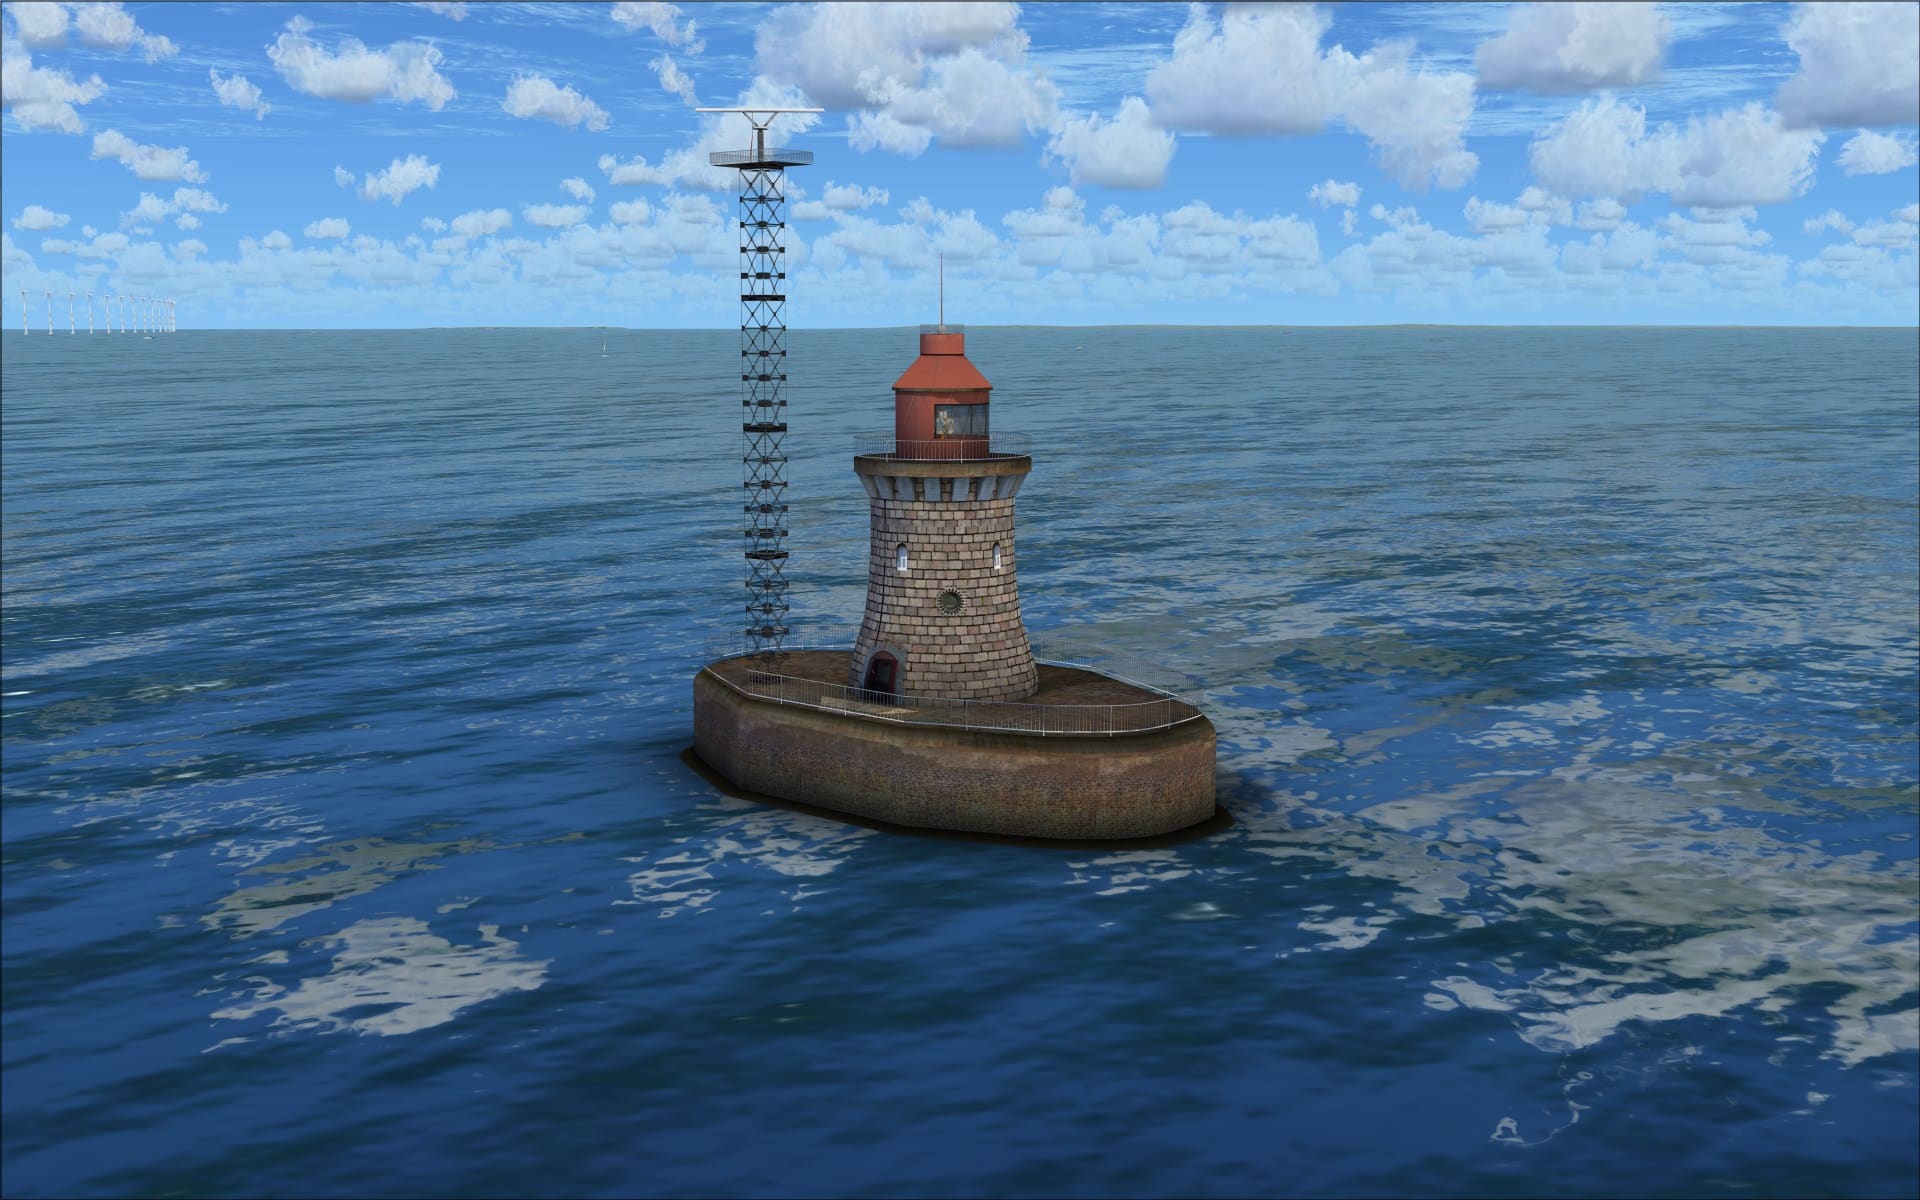
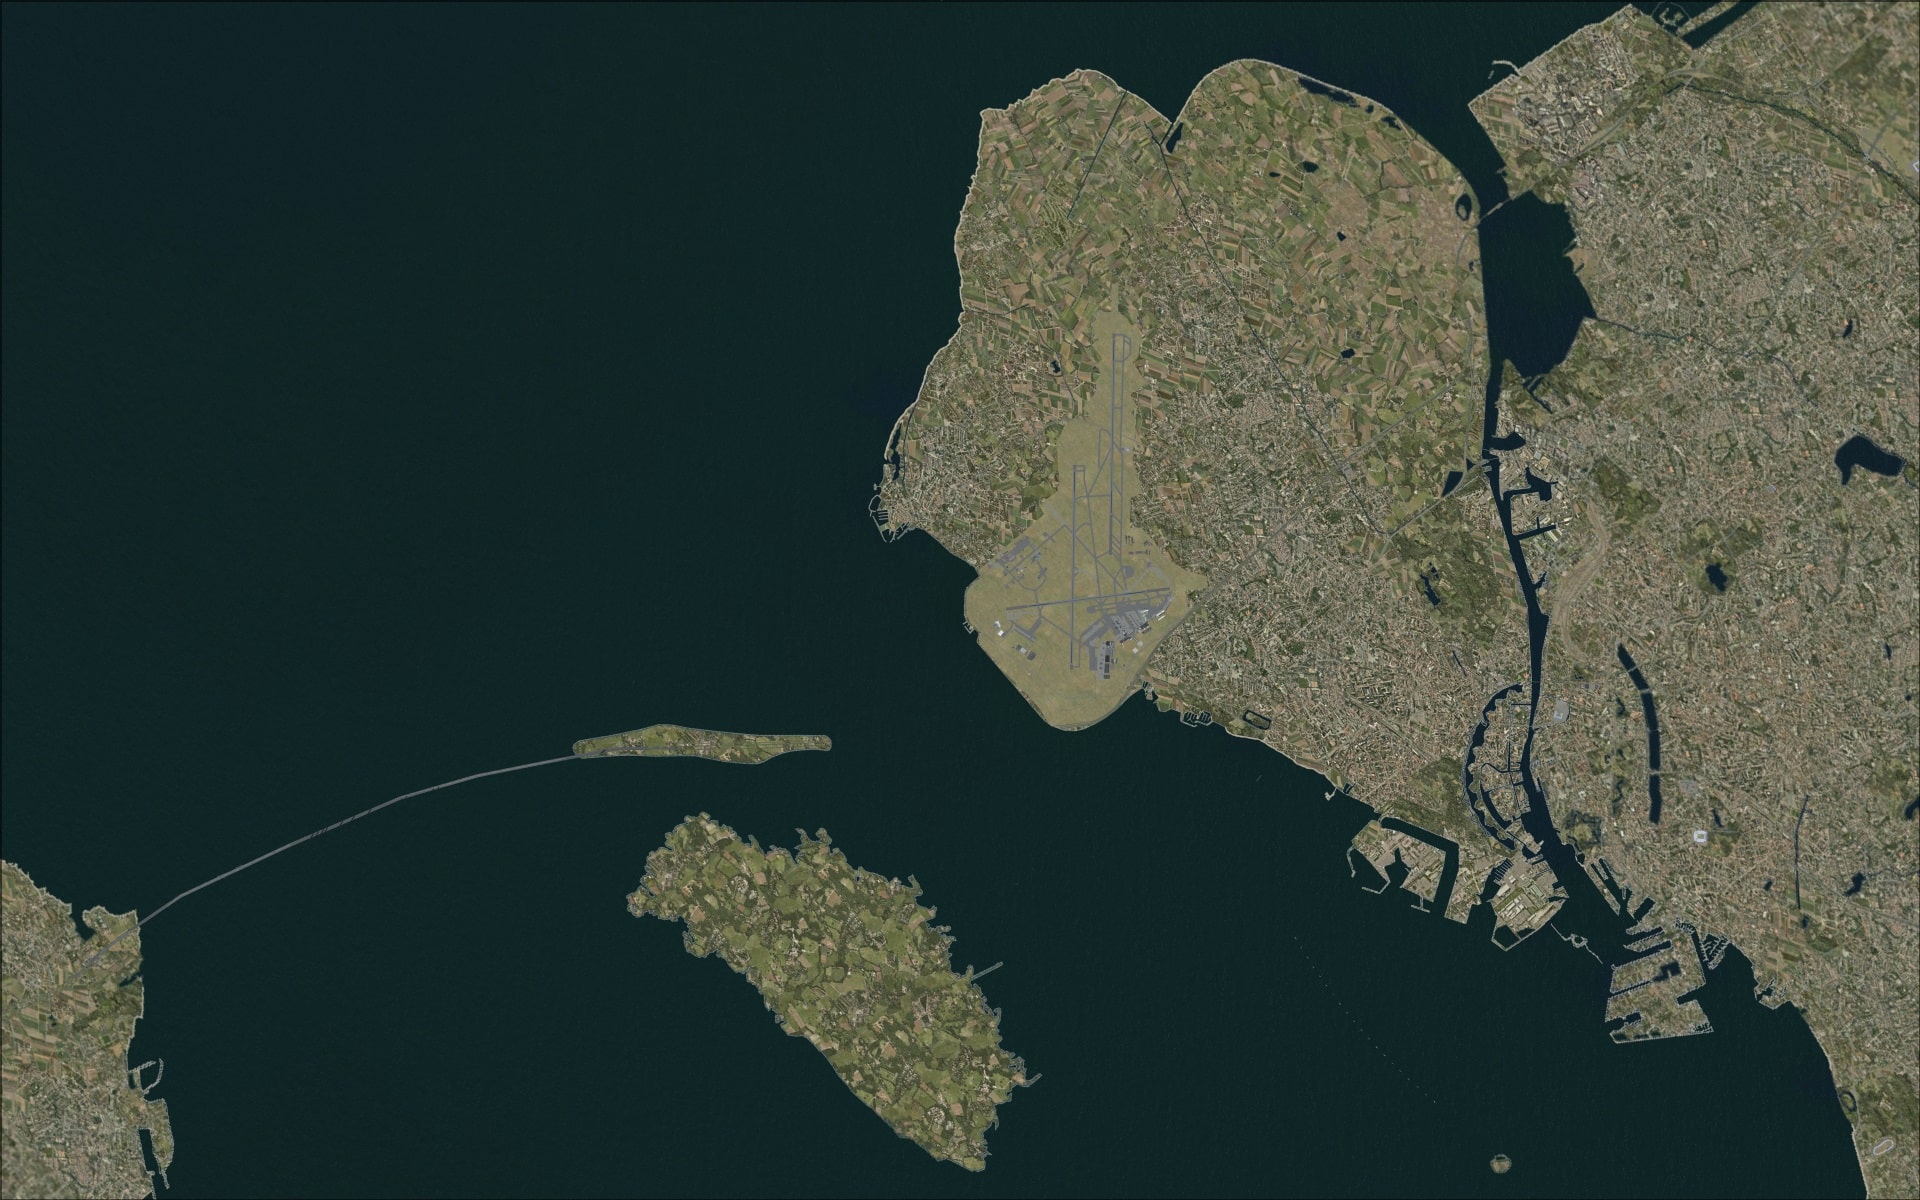 The area was made up of photo ground textures with both custom and generic objects/autogen added to populate it. Probably the most obvious visual landmark outside of the airport is the Øresund Bridge with the manmade island of Peberholm. I don’t think that one could consider any Copenhagen airport scenery as being complete without this landmark.

 Just off to the east of the airport in the strait of Øresundis is the island of Saltholm. It is small and flat with an area of only 16 sq kms and its highest elevation being only 6ft above sea level. It was recreated using photo imagery.
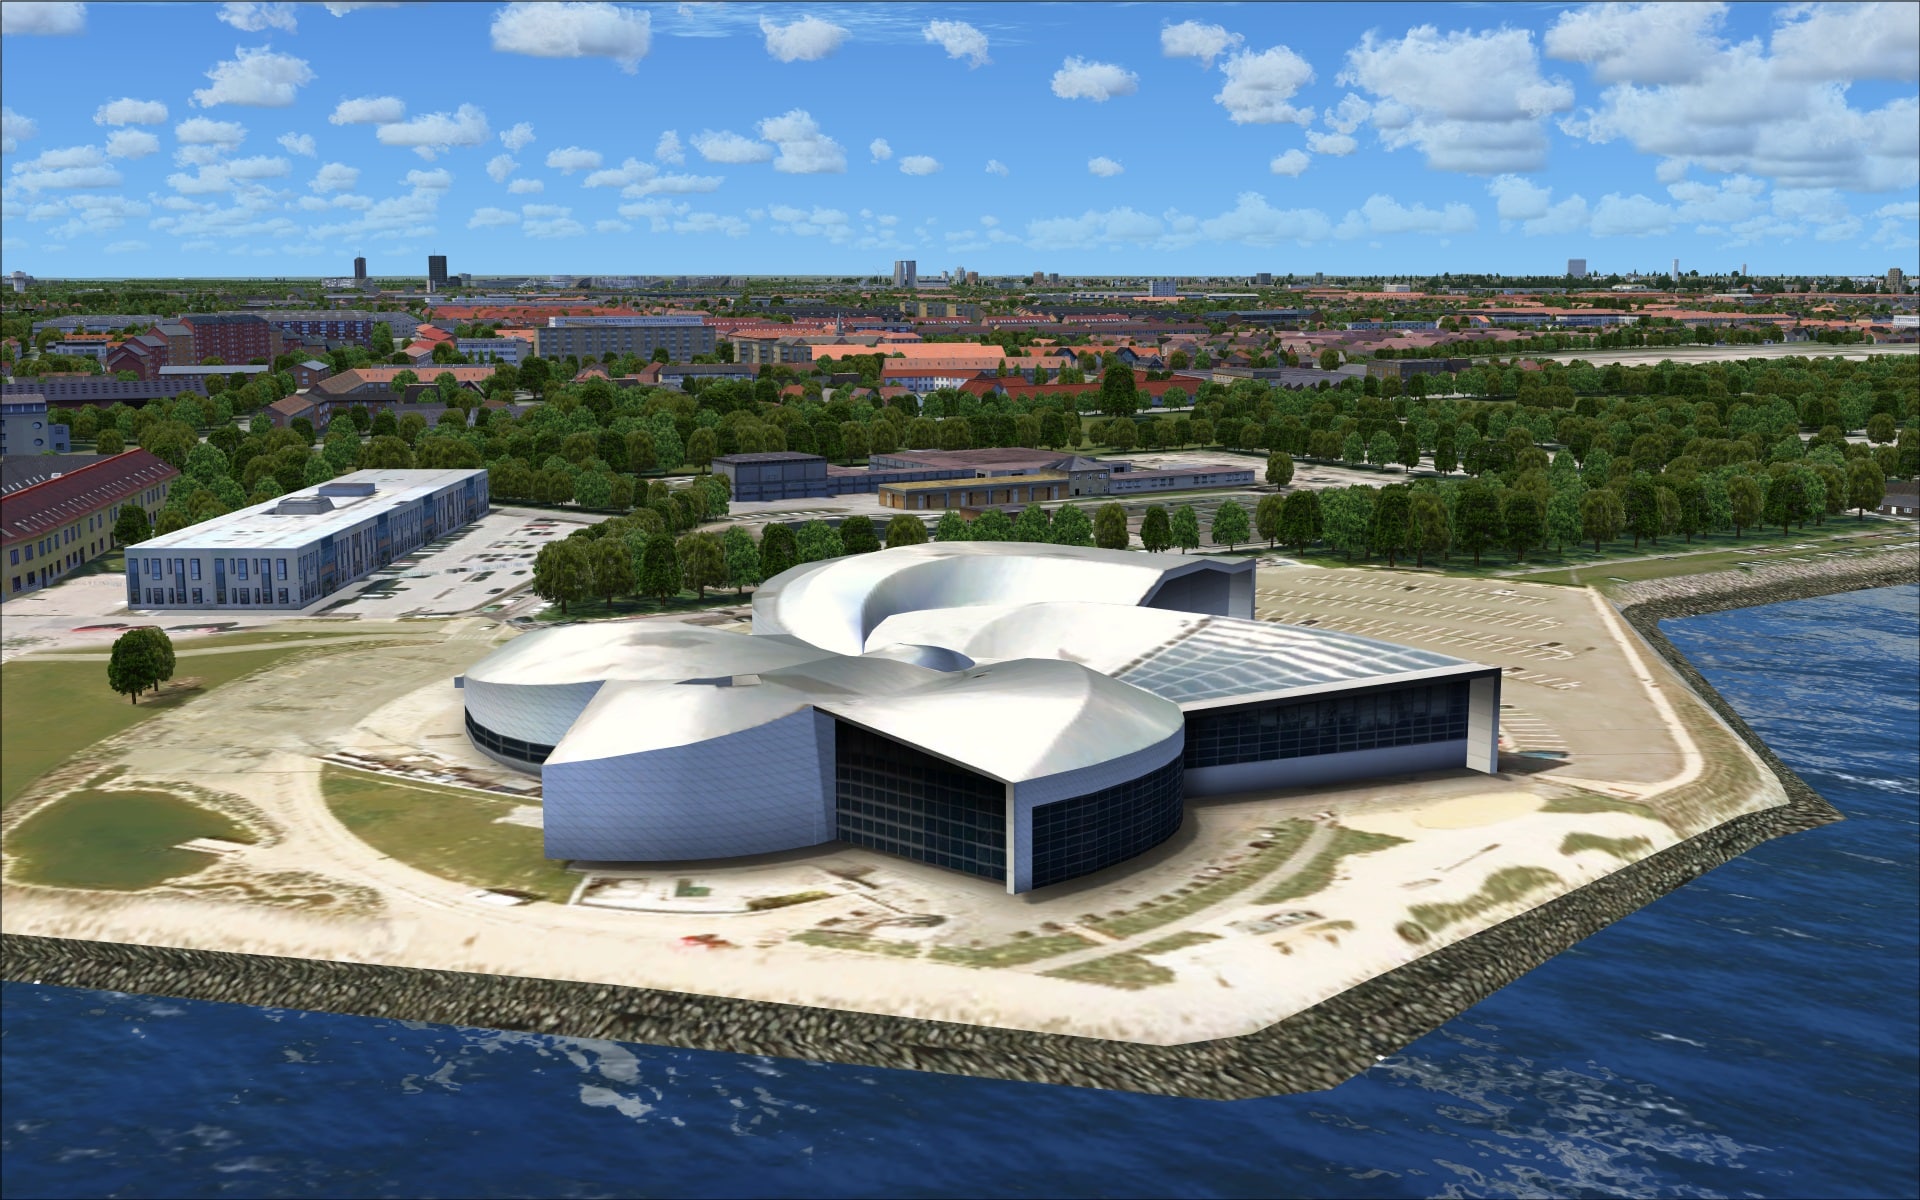
 Back to the mainland there are many structures that will draw your attention. The Hilton hotel located right next to the passenger terminal is one. The Den Blå Planet aquarium is a rather unique building shaped much like a large pin wheel. Also along the nearby shores are a couple of marinas each with detailed piers and some boats.


In addition to those landmarks I mentioned there are many more structures located within the scenery coverage area that will catch your eye as you approach or depart this airport.
The coverage area is large enough and sufficiently interesting that a sightseeing tour in a small single engine Cessna or something similar would be a worthwhile endeavour. This would allow you to fully appreciate all the work and effort put into this aspect of the addon.
 Night
Night
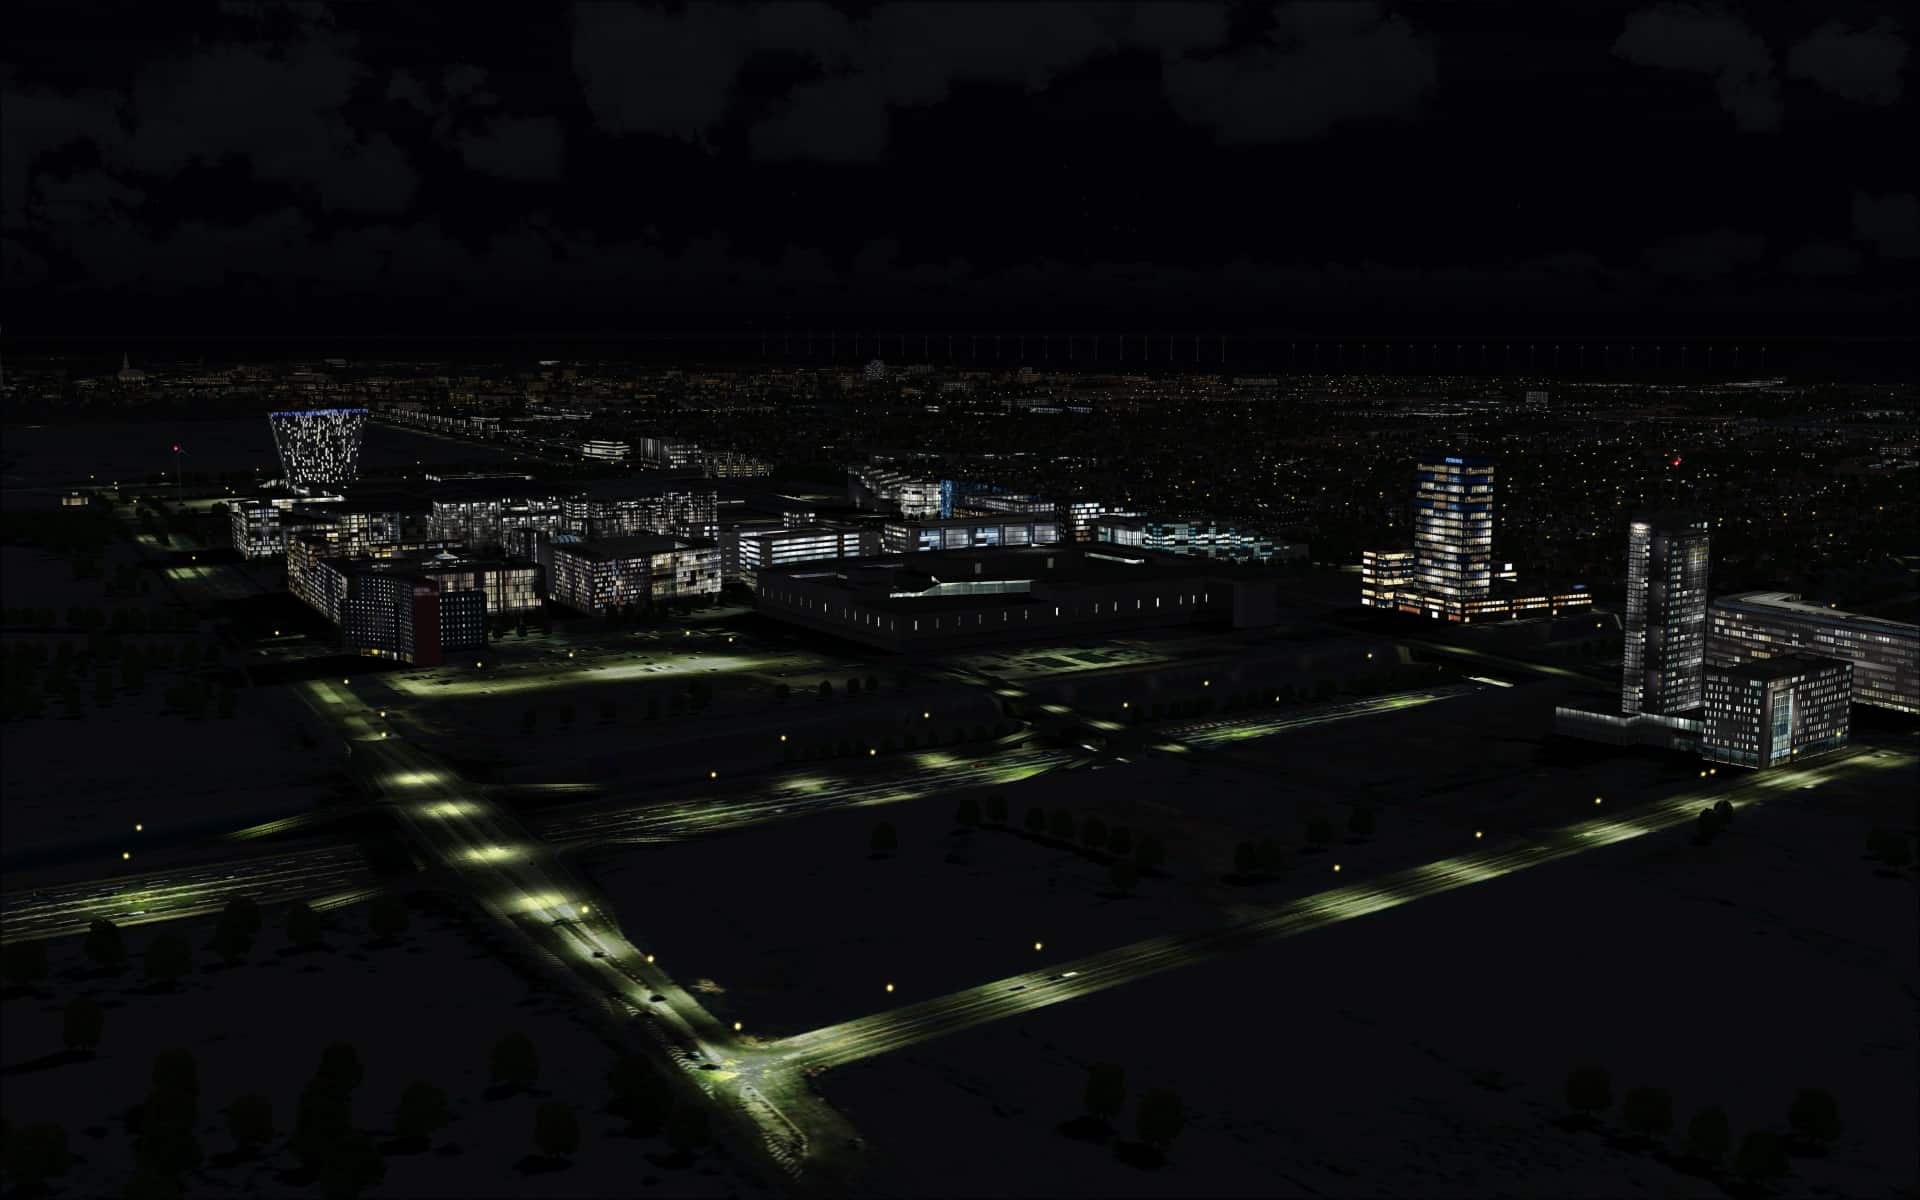
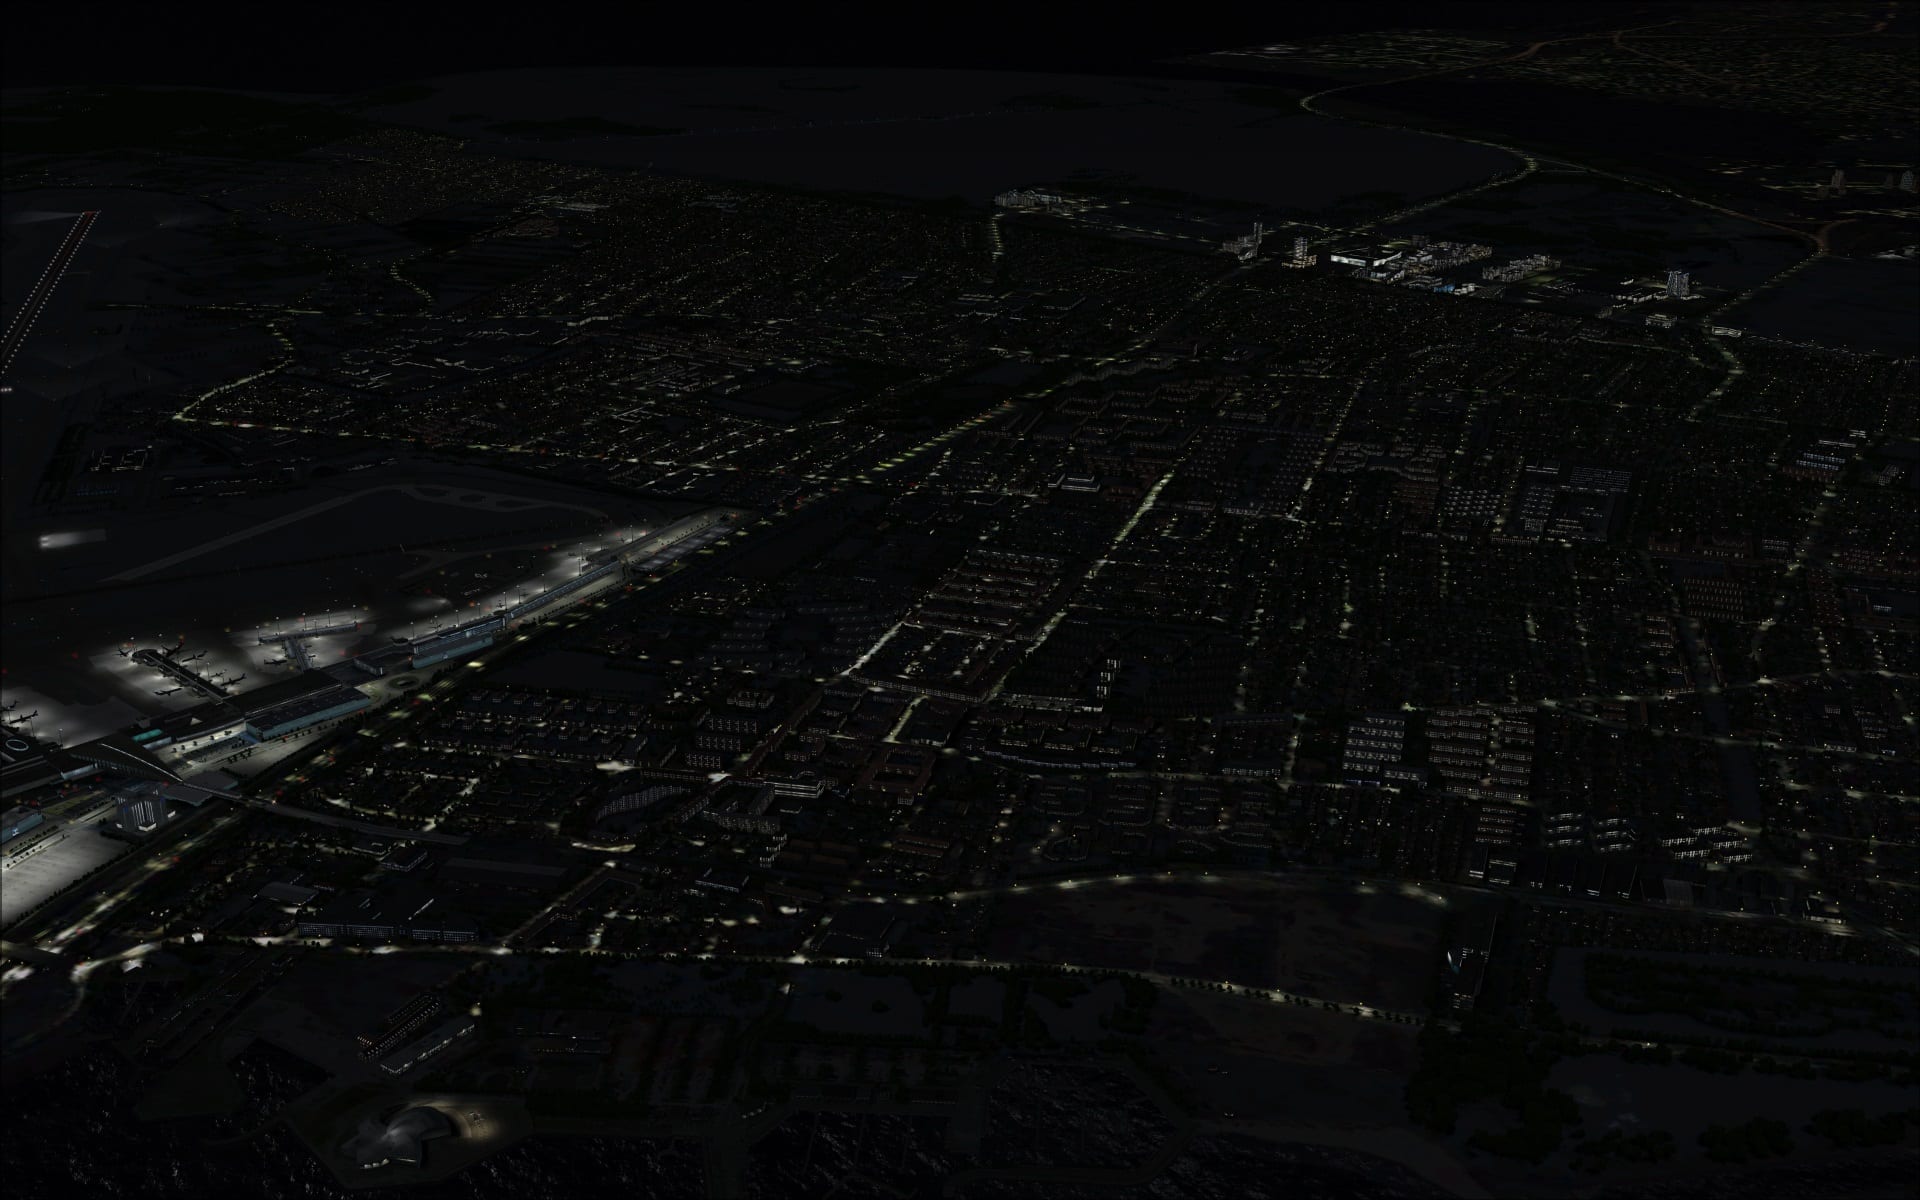
The daytime quality of the product was carried through to the night providing for a very enjoyable and immersive experience and I was very happy with what I saw. Lighting, probably the most obvious visual factor was very good. Ground lighting was applied in such a way that the brightness levels weren’t overdone. Building lighting showed differences in illumination based on proximity to light sources. Also interior lighting was varied so some areas looked occupied while others looked to be empty.
 Performance
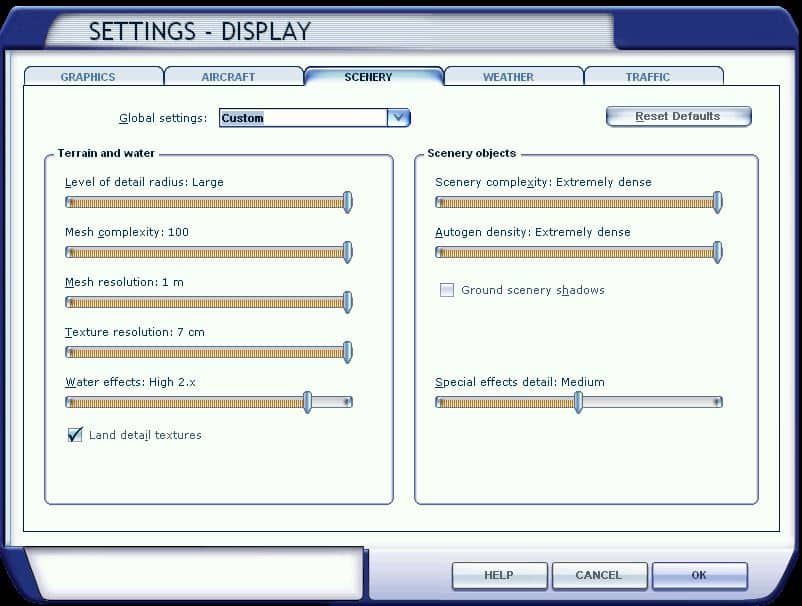
When I first installed the airport I set texture max load to 4096 and enabled all of the options in the scenery configurator. Guess what, as I approached EKCH in my PMDG 737 I began to hear the dreaded OOM warning chime and FSX soon shut down. With a scenery that contains so much I have to admit that it was not unexpected. Not happy with the outcome it was obvious that I would have to make some compromises. I decided to dial down my texture max load to 2048. I loaded my same flight and tried again. This time I was able to complete my flight and taxi to a stand without FSX crashing. I did briefly hear the warning chime for several moments while taxiing however I was able to complete my flight. Another area where you may want to look at when trying to minimize your chances of falling victim to OOM scenario is by reducing the amount of AI traffic if you have a program such as Ultimate traffic 2 installed. This is a very busy airport and as they state in the manual, airline traffic has a huge impact on performance. I have mine set at 70% and there is still lots of traffic.
I’ve included a screenshot of my FSX display settings to show that I have everything else pretty well maxed out.
 If you do run into OOMs don’t immediately blame the airport scenery. Have a look at the sum of all parts and decide what you might be willing to compromise on.
Final Thoughts
I see this as another winner from FlyTampa. The visual and immersive quality of the product is outstanding in all areas with the only real disappointment being some of the blurry ground textures near the terminal complex. I must say that I was a bit surprised by this. Some complain about performance and possible OOM shutdowns but there are ways of minimizing that effect and it is well worth the effort to figure out just how to do that.
Bottom line; I still think that this is an excellent product and worth every penny. I just can’t imagine ever going wrong with a FlyTampa product.
My Ratings
Installer: Excellent.
Documentation: Very good. Filled with relevant information.
Modelling: Excellent throughout the entire scenery.
Extras: Lots of configuration options available.
Download Size: 1.48GB split in 2 files for FSX and P3D
Price: EUR 28.00 without VAT
Developer Homepage: http://www.flytampa.com
Link: http://secure.simmarket.com/flytampa-copenhagen-fsx-p3d.phtml
Test System:
Intel i7 960 OC @ 4.2 Ghz, 6 Gb RAM, Gigabyte GTX780 w3Gb video, Win 7 Ultimate 64, FSX w/acceleration, DX9, UT2, REX Overdrive, GEXn, UTX, AES, GSX, FSUIPC.
Richard Desjardins


0 Responses
Good review. Just one little thing. The scenery is mostly made by FSDG with the help of FT and sold through FT but there is for sure a difference in quality when comparing this to an ‘original’ FT release