Complex aircraft like the Bombardier Dash 8 Q400 are flown with a two person cockpit crew. In FSX and P3D we don’t have that luxury and are required to take on the duties of both, a scenario that is not very realistic when you look at real world operations.
A company by the name of FS2Crew has endeavoured to change that for specific aircraft. Here is one of their stated goals. “Our line of Airline Flight Crew Simulations are aimed at home users who wish to simulate realistic multi-crew airline flying using Microsoft Flight Simulator.” The Majestic Dash 8 Q400 is one of the aircraft that they’ve taken on and this is my review of their addon as I experienced it in FSX.
From the developer’s website, here is a little more of what they say about this specific product.
Experience the most advanced and realistic FS2Crew turoboprop crew simulation ever created!
Based on the same Standard Operating Procedures (SOPs) used by a real-world Dash 8 Q400 operator, this product is an “expansion” pack for your Majestic Dash 8 Q400.
This download adds a highly realistic flight, cabin and ground crew to the aircraft, and allows you to simulate real-world airline multi-crew flying from the perspective of the Captain and Pilot Flying.
Installation
To use the program you must have version 1.009 or later of the Majestic Dash 8 Q400 installed.
Installation of the product is straight forward but does require an internet connection. Running the executable you will be asked to choose which flight simulator you are using and you have the choice of either FSX or P3D version 2+. After that the program takes care of the rest. Be prepared, it may seem like the program is hung, there were times when there was no discernable activity. Avoid the temptation to stop the installation. Eventually you’ll get the message that the program has been successfully installed.
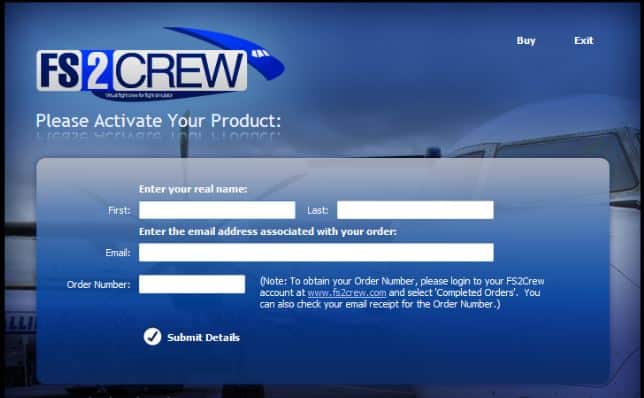
The next screen will require you to provide your personal info and purchase order number to activate the product. That’s it, now you’re done.
 To access the program you will have desktop shortcuts along with a new program group titled: FS2Crew 2014. From here you can get to the configuration manager, product manual and uninstaller.
Documentation
Product manuals, when provided by the developer, in my opinion, should always be read. In the case of this product it is a MUST READ!
The manual is in-depth, very well written and includes screenshots throughout. They cover everything you’ll need to know in order to be able to effectively use and enjoy this product.
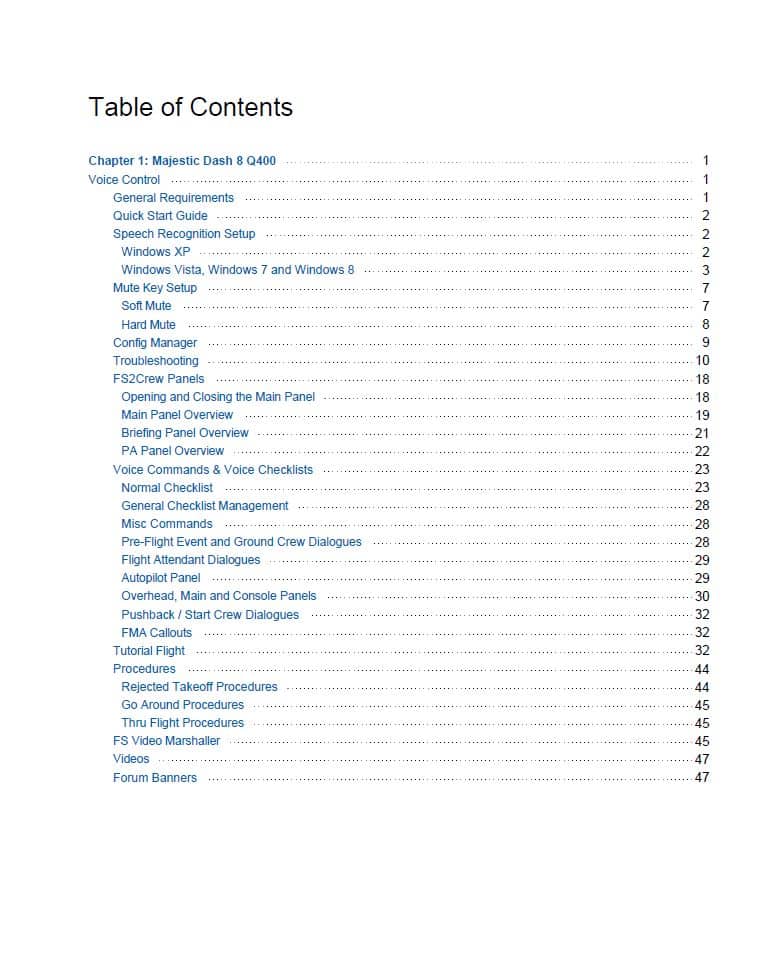
Looking at the layout of the manual it can be divided in two main sections. The first deals with setting up the program, the voice recognition and also FSX. The second is all about the voice commands and how to use them to manipulate the aircraft. As you will learn a bit later on in the review the manual also includes a tutorial flight that is colour coded so it helps to minimize any confusion you may have as to what you need to say and when.
Configuration
Before getting on with the configuration you will need a microphone.
This was my first experience at using a voice control program so I needed to go through the voice recognition process. Like everything else it is explained in the manual. Armed with an inexpensive headset that I had acquired several years ago I began. The results were less than stellar. The microphone sensitivity was terrible, and I found that running through the speech recognition setup more often than not Windows just didn’t recognize what I was saying unless I spoke louder than normal. Not a very good situation so I took the plunge and purchased a good quality gaming headset that had a sensitive boom mic. Needless to say this made a world of difference. I went through the speech recognition set up one more time and was now able to speak at a normal volume and have the computer recognize what I was saying. I mention this because had I tried to use the program with equipment that was inadequate my experience would have probably been very different.
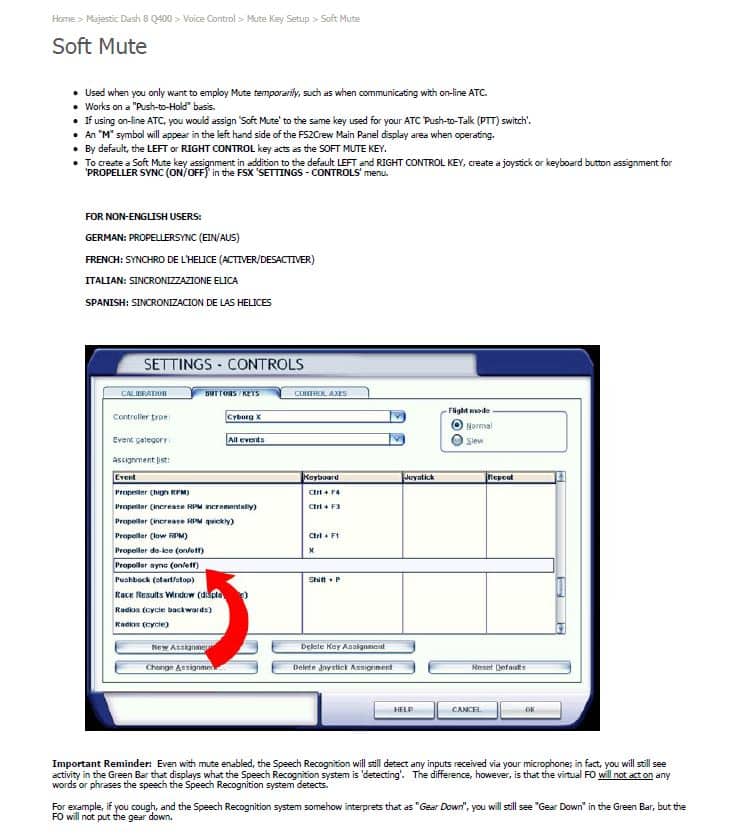
On to the remainder of the configuration. You need to set several hot keys via the FSX control menu. These are needed to control some of the basic program functions such as calling up the program’s main panel and also for hard and soft muting of your mic. This process is very well explained and again screenshots are included.
The configuration manager is important because this is where you ensure that voice control is ENABLED in order for the program to work.
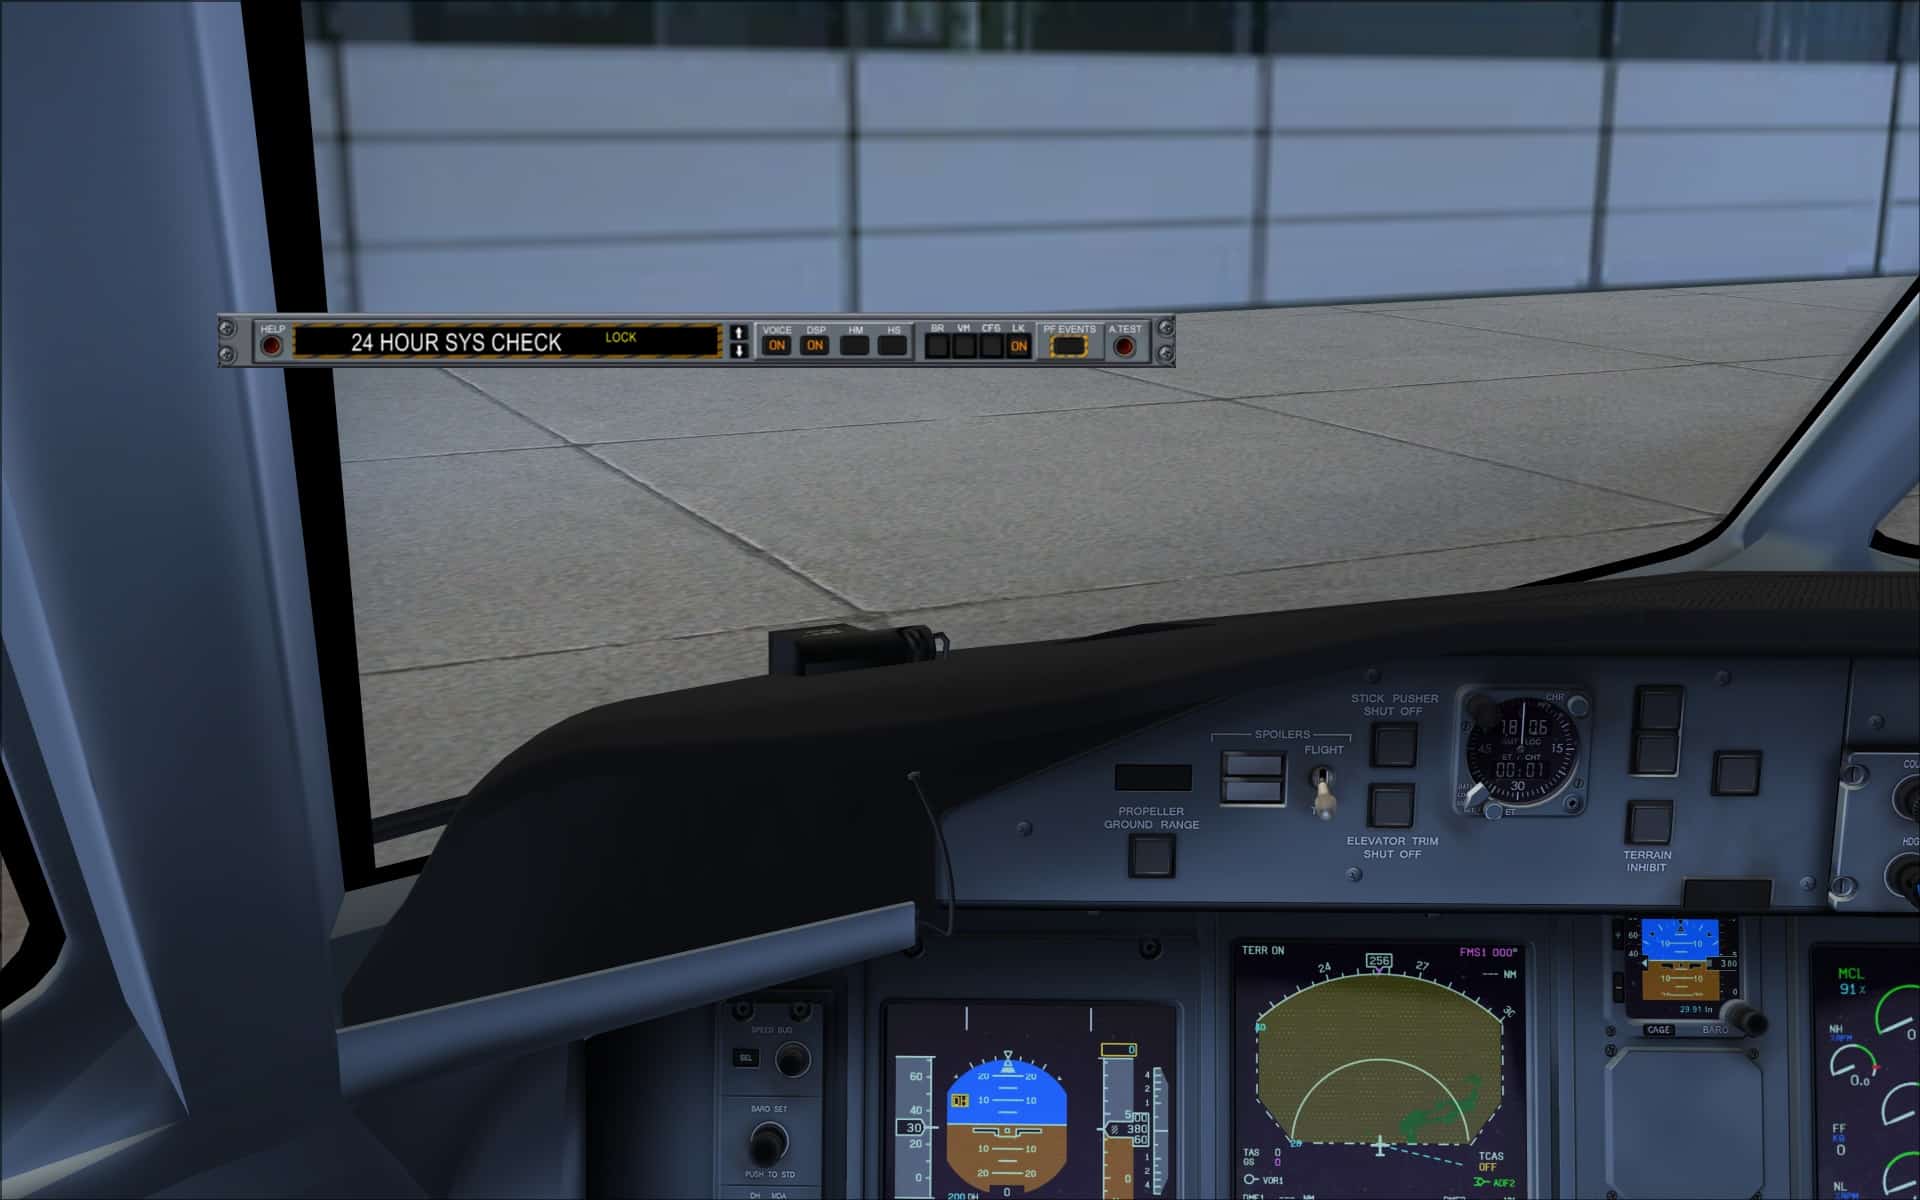
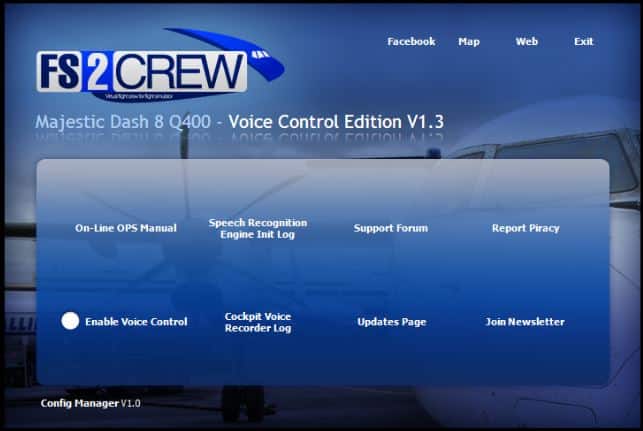 Once you bring up the control panel in FSX there are a number of options you can set. Some examples are; Crew Accent Language, toggling “on” and “off” speech recognition or the green display bar. This is also where you would access the briefing panel or video marshaller. This is also where you can easily see or select the active checklist.
Each button and option is fully explained in the manual.
 Using the Program
A fundamental premise you need to keep in mind as you set out to use FS2Crew for the Q400. You are the Captain or Pilot Flying (PF) while FS2Crew is the Co-Pilot or Pilot monitoring (PM). You’ll need to remember this as you navigate the various checklists and interact with the program. YOU are the one ultimately flying the aircraft, not the program, this is not an autopilot.
Again, I can’t state this often enough, read the manual, in fact you might seriously want to consider printing it out or loading it onto your tablet. Having it handy as a reference was invaluable, especially in the early stages of using and learning the program.
To get you better acquainted with the program’s flows and procedures they include a detailed tutorial that takes you through a complete flight, step by step. The tutorial includes all of the checklists and to make it even easier they went so far as to colour code the responses and commands that are expected of you the Captain. A few things to remember; if you get stuck you can say “skip” to go on to the next item and for a checklist to function that checklist must be the one displayed in the FS2Crew main panel. Also I found that the Pause key in FSX was very handy during the learning process.
For my first flight I chose to run the Pre-flight events which are optional. The Pre-flight events are triggered by pressing the PF button on the main panel. These are normally run for the first flight of the day. The entire process and series of events is quite extensive and involves its own checklists and trigger events. You as the captain will have several checklists to go through and then there will be some interaction with the PM and the cabin crew. All of these are very well documented. The countdown timer shows 30 minutes for the entire process. If you are impatient it is possible to fast forward through portions of it by left clicking next to the countdown timer shown in the main panel.
Without going through the entire Pre-flight sequence here are examples of some of the milestones, how well they are laid out and what is expected of you. These are excerpts from the manual.
1. At plus 24 Minutes Remaining: The Gate Agent will enter the cockpit and ask you if she can start boarding. Speak: “YES” or, if talking to the American
Gate Agent, speak “GO FOR IT / YEP/ SURE”.
2. At plus 22 Minutes Remaining: Load the FMS.
3. At plus 20 Minutes Remaining: The FO will return to the cockpit from the walkaround and start his Originating Flow.
ORIGINATING FLOW (FIRST OFFICER):
OXYGEN MASK TEST (NOT SIMULATED)
CIRCUIT BREAKER – CHECK
DE-MIST – OPEN
ANTI SKID SWITCH – TEST
EGPWS – TEST **
FLIGHT INSTRUMENT – CHECKED
CENTER PEDESTAL – CHECK
ARCDU – ON
FO’S MFD – NAV
TCAS – TEST
WX RADAR – TEST **
As you can see by the short snippet of the Pre-flight event flow you are interacting with the gate agent, performing your own tasks as captain and you also see that the FO has tasks to perform. As I said it is quite extensive in scope.
Should you choose not to go through the Pre-flight scenario there are still a few things you as the captain will need to do. Besides loading the FMS you will need to enter the Takeoff V-Speeds and also set the MDA bug to the Acceleration Altitude, typically 1000ft AGL. This one is important because the PM takes this as the cue for announcing “acceleration altitude”. That is why it is stressed that you don’t forget. Another good reason to read the manual.
Every phase of your flight has some form of checklist or routine. I’ve listed most of them below. As you can see they cover the entire flight from aircraft prep if you begin with the Pre-flight right to securing the aircraft after your flight has been completed.
Here is a short list of some of the other checklists.
Before start checklist
Engine start checklist
Taxi
Takeoff and initial climb to 10,000 feet
Climbing through 10,000 feet
Initial approach
After landing
Parking
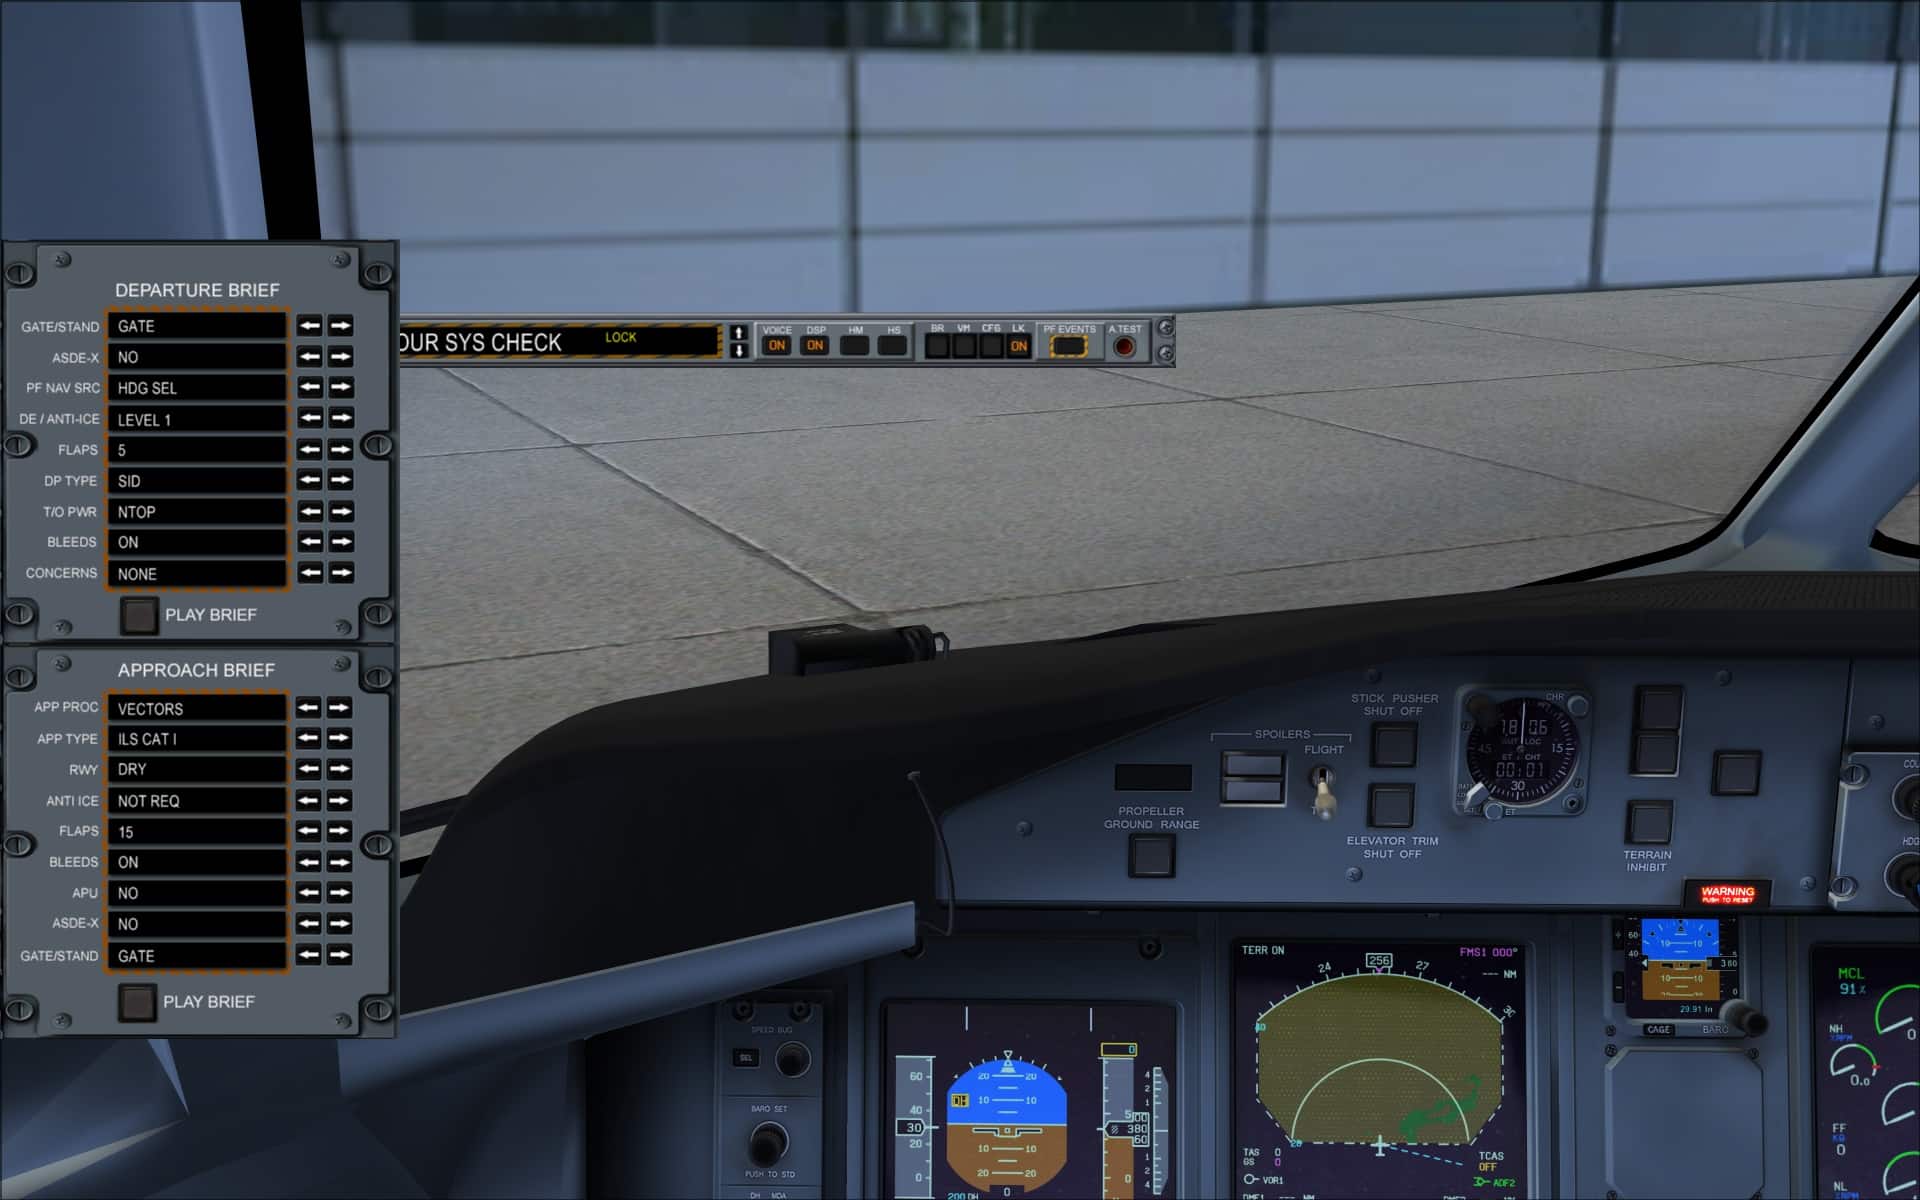
Another panel you might find yourself using is the Briefing Panel. It is accessed by pressing the BR button on the control panel. It is here that you can choose various parameters for both the departure and approach briefs. Once you have made your choices you simply press the Play Brief button on the panel. Its use is optional but again it adds another dimension to the whole flight experience.
 It was so nice to be able to speak to the co-pilot, issuing commands and having the tasks performed as requested. This was especially nice during the busy times such as the initial climb and the approach. This allowed me to concentrate on keeping the aircraft on track rather than changing my view point to try and find a button or turn a knob. The immersion factor is exponentially enhanced by the verbal interaction with the co-pilot and crew.
As I went through my early flights using the program I did run into instances where the co-pilot seemed to ignore my commands or got them wrong. When this would happen I’d hit the pause key and have a look at the situation. Was it me or the program? Looking at what had happened I found that when it involved checklists what I was trying to get the co-pilot to do usually wasn’t part of the checklist displayed in the control panel window. Remember, the correct checklist must be displayed on the control panel. If it involved simple commands it was generally because I wasn’t using the correct syntax. Checking the manual I would correct my phraseology.
I chalk these problems up to my learning the flow of the program and my lack of familiarity with command syntax. Again; practice, practice, practice.
The other situation I came across where things sometimes didn’t go as expected was when I asked the co-pilot to set, as an example, the heading to a certain value. This created what the developers describe in the manual as a “run-away” situation. To rectify this I gave the command “Cancel Last Command”. I then reissued my original command and all was good. This occurrence was rare.
In addition to the checklists used in throughout normal flight situations they also include several other procedures to cover those not so routine occurrences. These include Rejected Takeoff Procedures and Go Around Procedures. Just as with all of the other checklists they are thoroughly explained with the procedures spelled out step-by-step.
Checklists are a very big part of the program but there is so much more that you can do. Through the use of voice commands you can get your co-pilot to do all sorts of other tasks such as setting autopilot functions, setting the frequencies on your Nav or Comm radios or toggling the state of various switches on the overhead or consoles. The program is very versatile in what it is capable of doing. All of the possible commands are given in the manual.
Besides interacting with the co-pilot you are able to play cabin announcements to keep your imaginary passengers informed of various flight milestones. They include messages for welcome, cruise and TOD to name just a few. There are about a dozen altogether and they can be accessed via the captain’s PA panel. How to access and use them is very well explained in the manual. I’d say that this feature is not for everyone but speaks to the depth of the product in terms of immersion factor.
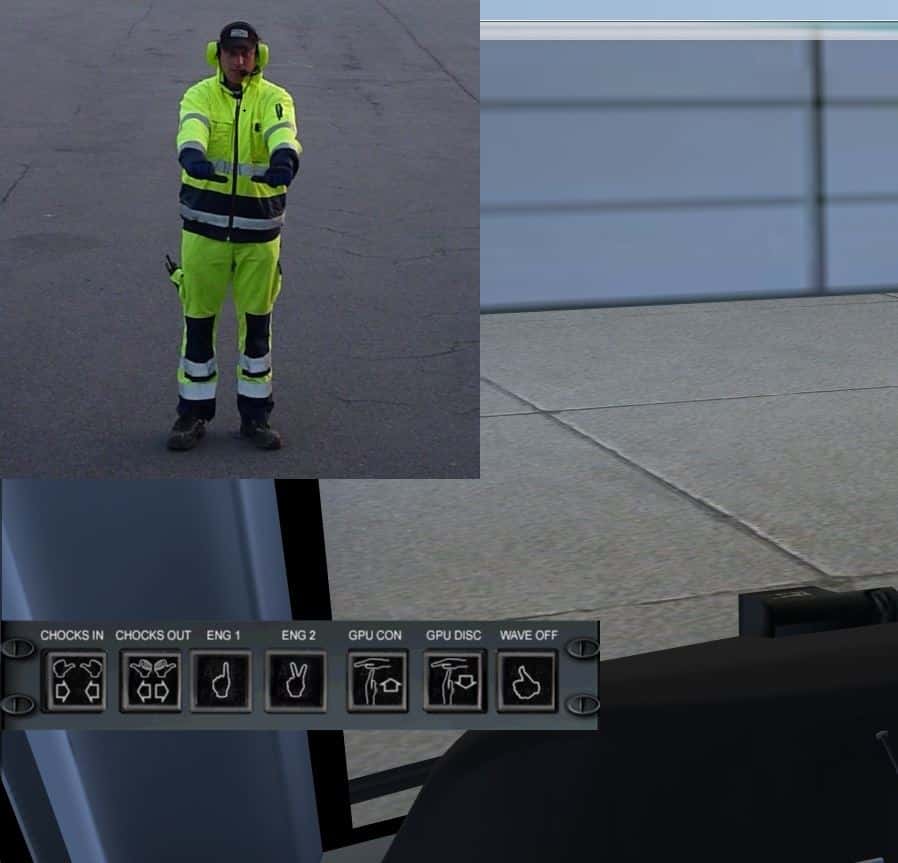
Also included as part of package is their video marshaller. This feature is totally optional and not required for the running of the main program. It is accessed via the main control panel but in order to run it you must have FSX in “Windowed Mode” otherwise it will crash. I tried it but prefer to pushback using other available resources.
 Final Thoughts
Flying a plane such as the Dash 8 Q400 by yourself is totally unrealistic and this program does a great job at overcoming that. You can now experience flying at a whole other level, one that would otherwise be impossible to attain without this voice control program. When I first began to use it I was overwhelmed but through repetition it became easier and more intuitive. I look back to my flights before I began using it and wonder how did I manage? Now I can’t imagine ever flying this aircraft without it.
My Ratings
Installer: Very good. Easy to use.
Documentation: Very good. In this case I’d say it is an invaluable tool.
Modelling: N/A
Extras: Includes a video marshaller.
Download Size: FSX 258 Mbs
Price: EUR 29.92 excl. VAT
Developer Homepage: http://www.fs2crew.com
Link: http://secure.simmarket.com/fs2crew_majestic-dash-8-q400-voice-control-edition-fsx.phtml
Test System:
Intel i7 960 OC @ 4.2 Ghz, 6 Gb RAM, Gigabyte GTX780 w3Gb video, Win 7 Ultimate 64, FSX w/acceleration, DX9, UT2, REX Overdrive, GEXn, UTX, AES, GSX, FSUIPC.
Richard Desjardins