In this review, I’ll be taking you on a flight with PMDG’s 737 NGX. By doing this, I can show you how the NGX actually works in FSX, instead of just highlighting its features and its pros and cons. So, Ladies and Gentlemen, welcome aboard! Please fasten your seatbelts, and enjoy the flight.
First, a little disclaimer here. I’m not a real-world professional pilot, let alone a 737NG driver. So, I probably did make mistakes along this flight, regarding procedures and checks. Feel free to point me to them in the comments (I love to learn) but please don’t hold it against me. Also, I know there are still some minor bugs in some of the NGX systems. But these are problems you only notice if you fly the thing in real life, or know the systems inside and out. I qualify for neither category.
Next, this ended up being a quite long review. To keep it easy to read, I’m splitting it in 2 parts, and publishing them separately. You’re currently reading the first part. In this first part, we go from aircraft selection to takeoff. The second part will cover climb through shutdown and securing. We’re just about ready to get going, so let’s start at the beginning:
Aircraft selection:
Aircraft selection in the NGX comes down to more than just choosing a livery. Obviously, you can also choose which variant you fly: 737-800 or -900, but also -600 or -700 if you have the expansion pack as well. Once you’ve decided that, you can choose a livery, but that’s not it. After choosing a livery, you can also decide on cockpit layout and systems. The NGX is filled with customizable systems and details, the so-called airline options. PMDG ships a number of liveries with accurate options representing that livery. I personally prefer not to change these options when using such a livery, although you always can change them, and then set the aircraft back to the original settings afterwards. In aircraft that don’t have these accurate airline options, I configure the aircraft to suit my taste. For this flight, I’ll be taking the 737-800 with winglets, in the colors of Qantas. PMDG has 2 Qantas liveries available on their website, but neither has accurate airline options. So I’ll set up the aircraft to be able to show you as much as possible of the advanced features built into the PMDG NGX. To give you a general (but incomplete) overview: I’ll be flying an aircraft that’s fail operational. This mains the following equipment is installed: Collins MCP and an Integrated Standby Flight Display. Also, my aircraft will be ETOPS certified. Furthermore, I have the Head-up Guidance System installed. It’s basically a ‘full options’ aircraft, except for the following: I didn’t install the flight test package (no airliner on a revenue flight has) or the Short Field Performance kit. Also, the aircraft doesn’t have eyebrow-windows and I’m using the round-dial fuel display. The latter just because I like how it looks.
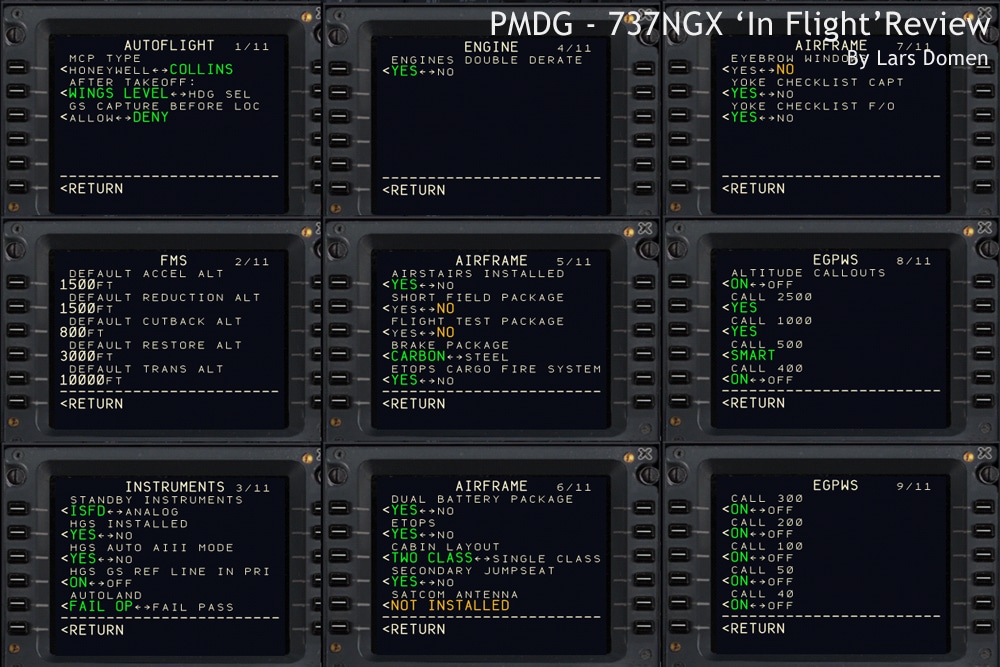 Pic1: A couple of CDU pages showing different options.
The option are controlled through special menu’s in the CDU’s. There’s even a trick (press and hold ‘menu’) so you can open those menu’s if the aircraft isn’t powered. I like the way PMDG did this, as it makes it unnecessary to open windows or tabs that interrupt the flying experience. Also, you can change options on the fly, if you want, the flight won’t be interrupted in any way. So, if you want to take this to the extreme, you can land with an aircraft that’s equipped completely different than the one you took off in. Also note that the process I just described can only be executed when flightsim is actually running and you’re in the cockpit (3D or 2D doesn’t matter), so I’m actually running ahead of the facts by describing this now.
So, we have our aircraft (a 737-800), the colors we want to use (Qantas), and something not before found in FS to this degree: the aircraft options we prefer. Next step is doing the flight planning and preflight.
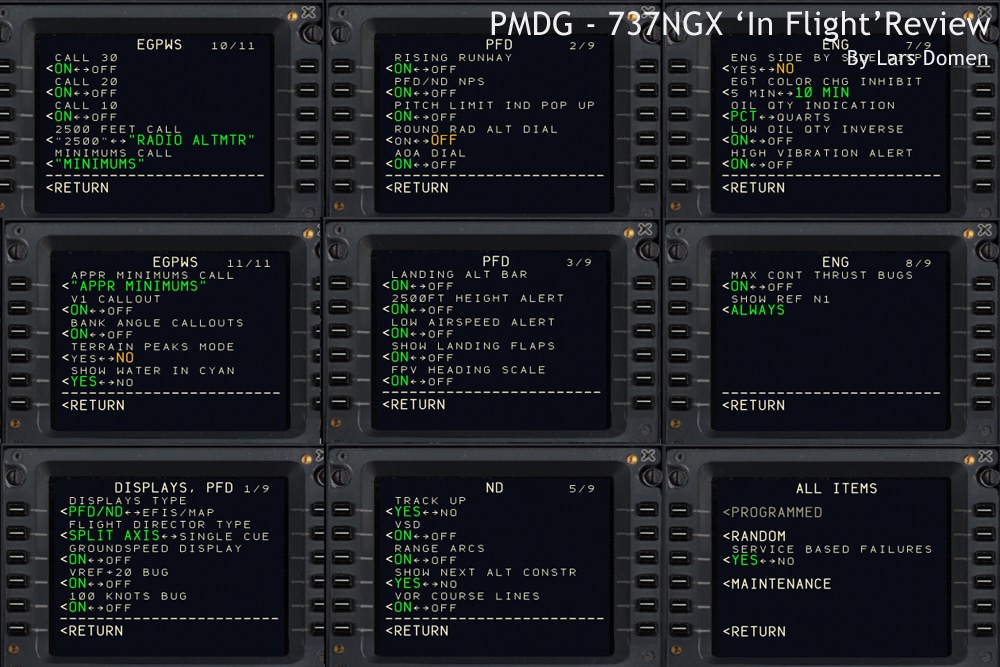 Pic2: More CDU pages showing different options.
Flight planning:
As with any flight, first step is to decide where you start, and where you’re going. Second, is making a flight plan. As I’ve already chosen an Australian aircraft, you probably could’ve guessed we’d be flying ‘Down Under’. I’ll be taking you on a flight from Coffs Harbor to Melbourne today. And because Melbourne has multiple airports, I can tell you we will be landing at Melbourne International airport (also known as Tullamarine Airport) while Essendon and Avalon are our alternates. Both our departure and arrival airports are available in a superb payware version by Orbx, and indeed, I’m using those airport add-ons in this flight.
Next, the flight plan. Now, there are numerous ways to come up with a flight plan, but the one I used for this flight is the online tool Routefinder. This is the flight plan I got:
YCFS DCT KMP W446 NICLA W223 WMD W347 MQD W214 RIC W368 KAT W713 BIK W817 AY V147 ELW STAR YMML
The length of this flightplan, without SID and STAR, is 619nm.
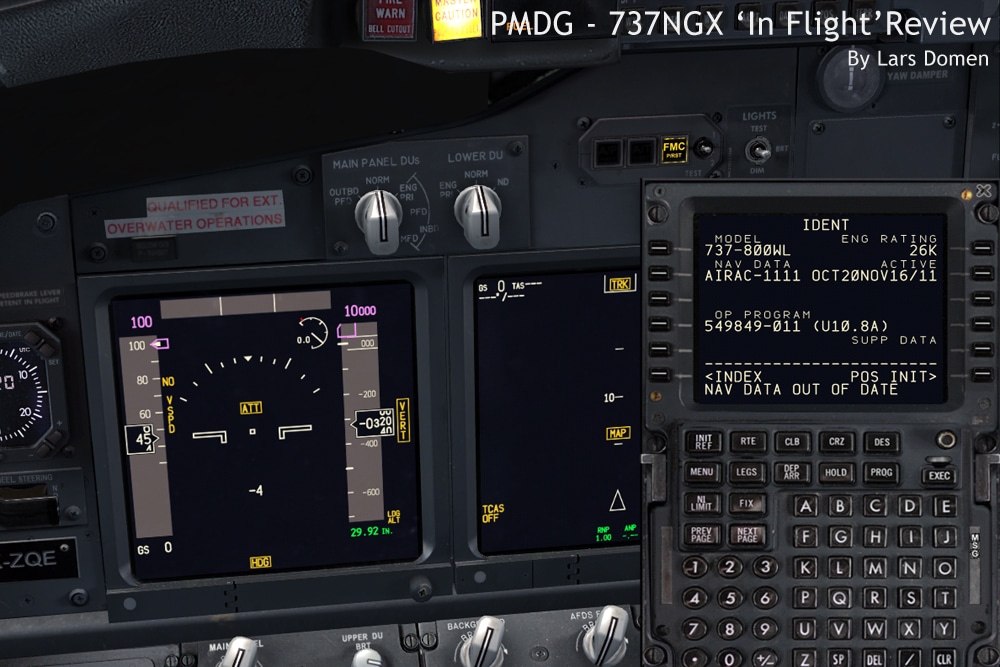 Pic3: The IDENT page in the CDU. Note the ‘Nav data out of date’ message in the scratchpad. I flew this flight on November 17th.
The final thing to decide before clicking ‘Fly Now’ in FSX, is the weather. My PC wasn’t connected to the internet at the time of this flight, so instead of using real world weather, I made something up myself. This is what I came up with:
| Temperature: | 10°C |
| Wind: | 162° at 10 kts gusting 20 kts |
| QNH: | 1025 hPa |
| Visibility: | 48 km |
| Clouds: | Broken at 5000 ft |
So, I know what aircraft I’m flying, where I’m flying from and to, and in what weather I’ll be flying. Next step: clicking ‘Fly Now’!
After the usual loading time, you end up in the cockpit of the NGX. However, you immediately bump into the first thing that makes the PMDG NGX stand out from most other add-ons: loading isn’t finished yet. When the flight is started in FSX, the NGX goes through a systems initialization process that takes 20 seconds, and is marked by a countdown timer on screen. When those 20 seconds are past, you can really start working. One downside to it though, is that the counter stops if you pause the sim. This makes it harder to use the panel state loading feature in flight, although it’s no problem when parked.
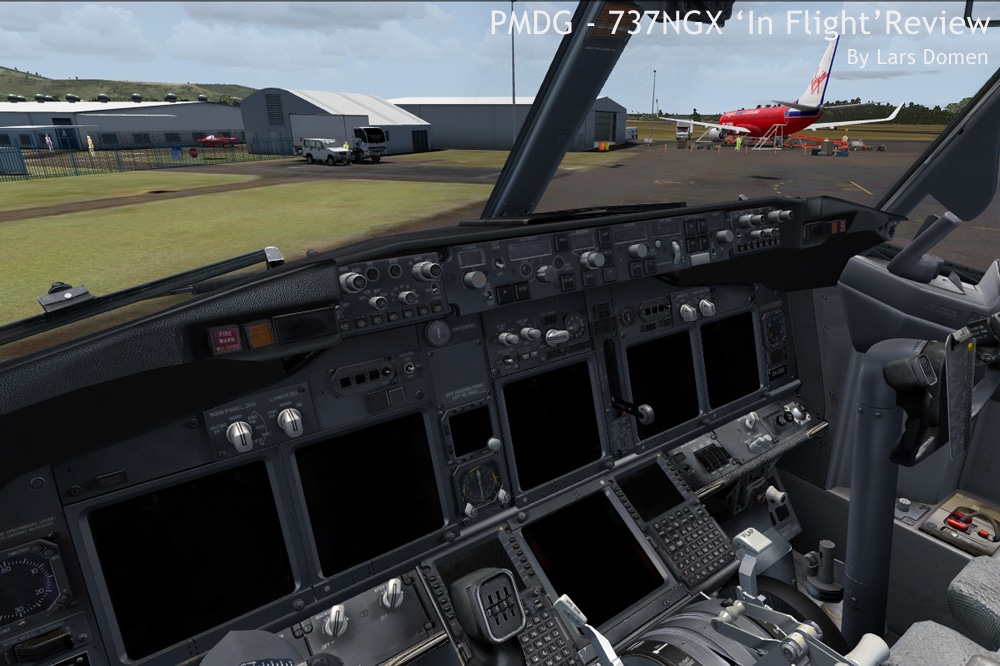 Pic4: This is where it all starts: a cold cockpit, sitting on the ramp at Coffs Harbor.
First, I set the aircraft options like I want them to. Second, I set fuel and payload to the correct values. This, once again, isn’t done through a menu (and certainly not the FSX menu either) but through CDU pages. A very easy-to-use system, that once again makes it unnecessary to pull up menus or reload the aircraft. For this flight, I’m taking 151 passengers, and 6600kg of cargo, evenly spread over the forward and aft cargo holds. The next thing I do, before actually getting power to the aircraft, is getting the performance data using Topcat. Topcat is a great program, in fact a performance calculator. It’s used to calculate appropriate derates (both fixed and assumed temperature), as well as autobrake setting on landing, and a couple of other performance related variables. After letting Topcat know I’ll be taking off from runway 21 and inputting the correct variables, it told me to takeoff with flaps set to 1, a fixed derate of TO2 and on top of that an assumed temperature of 35°C (and you immediately see I have double derate enabled). At this point, it went wrong, but the only cause of that is me, the weak human link in the chain. I use a paper chart for all relevant flight data, and I made the mistake of writing down 65°C instead of 35°C for the assumed temperature. It did have consequences, but it’s flightsim, so I got away with it (barely).
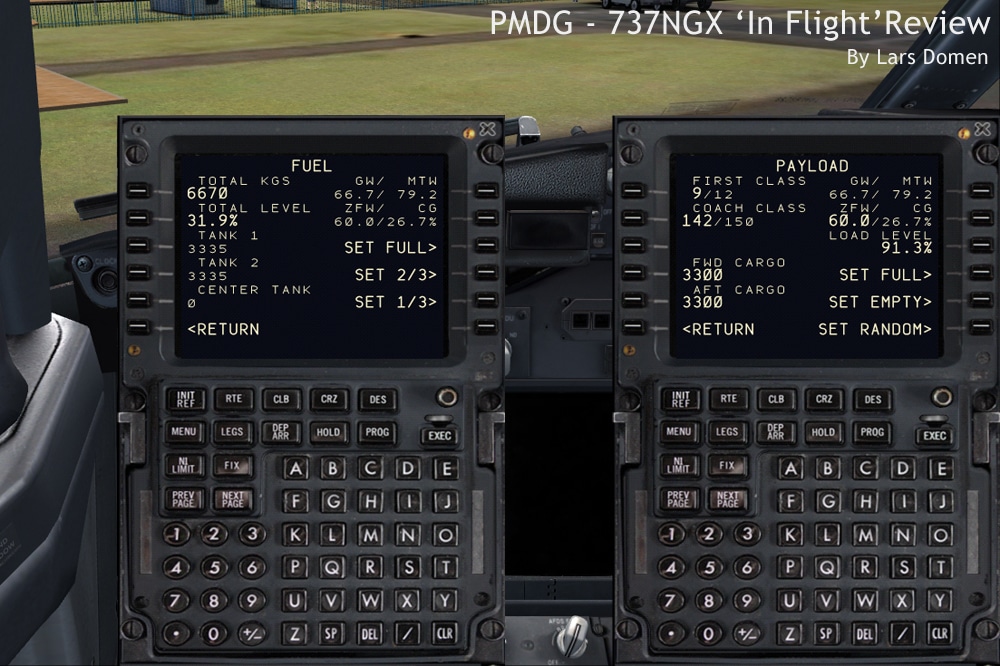 Pic5: Very user-friendly features: Fuel and Payload pages in the CDU.
With all the pervious stuff out of the way, and my mistake going unnoticed, it’s finally time to enter the cockpit for real. Everything you do in there from this point on is directly related to making the NGX fly. Needless to say, this is what this review really is about. And although this piece of text resembled a tutorial or walkthrough so far, it’s not, so I won’t be listing every little action or every switch I click. I will, however, take the time to talk about things that I find noteworthy or remarkable.
 Pic6: Sitting on the ramp at Coffs Harbor.
Preflight and startup:
Alright, planning is done, we have all the data, and we’re sitting in a completely cold cockpit. The PMDG NGX virtual cockpit looks great when it’s completely shut down, but as soon as you put some power in it, the magic starts working. If you indeed received the aircraft completely shut down, the so-called ‘Cold and Dark’ state in FS, the first thing you do is go through the electrical power up. Keep in mind though, that real world pilots will often enter the aircraft when it’s already (partly) powered up. Whatever you prefer, PMDG included panel states so you can choose whatever suits you.
Unless you have failures during your flight, you’ll have very little interaction with the electrical system in normal operations. The electrical power up, and standby power test if you did it, shows that the electrical system in the NGX is completely and accurately modeled though. You can even keep track of the load placed on a specified power source by using the AC and DC voltmeters on the overhead panel. After the power up, but before diving into the CDU, you set the IRS selectors to NAV, so they can start aligning. The real IRS takes around 10 minutes to align (depending on aircraft location, the farther from the equator the longer it takes), but because not everybody wants to spend 10 minutes waiting for it in FSX, PMDG included 3 alignment options for the IRS: instant, fast and realistic. The instant setting speaks for itself. The fast setting aligns the IRS’s in 30 seconds, and is the one I use. The realistic setting takes the full 10 minutes or so.
 Pic7: The look of the displays when the IRS is aligning.
The next step will be doing the CDU (computer display unit, the interface between the flight management computer and the pilots) preflight. I’m not going to take you through the full process, but what’s certainly worth mentioning is the realistic time delays you get. Making new inputs, changing pages and executing stuff doesn’t happen instantaneously in the real thing, and that delay is accurately represented in the PMDG 737NGX. Just inputting a small detail, like for example the V-speeds, happens just about instantaneous, but changing a speed or altitude constraint in the flight plan takes some time (a second or so), as the entire vertical and lateral flight plan has to be recalculated. I really like this, as it makes it feel much more realistic.
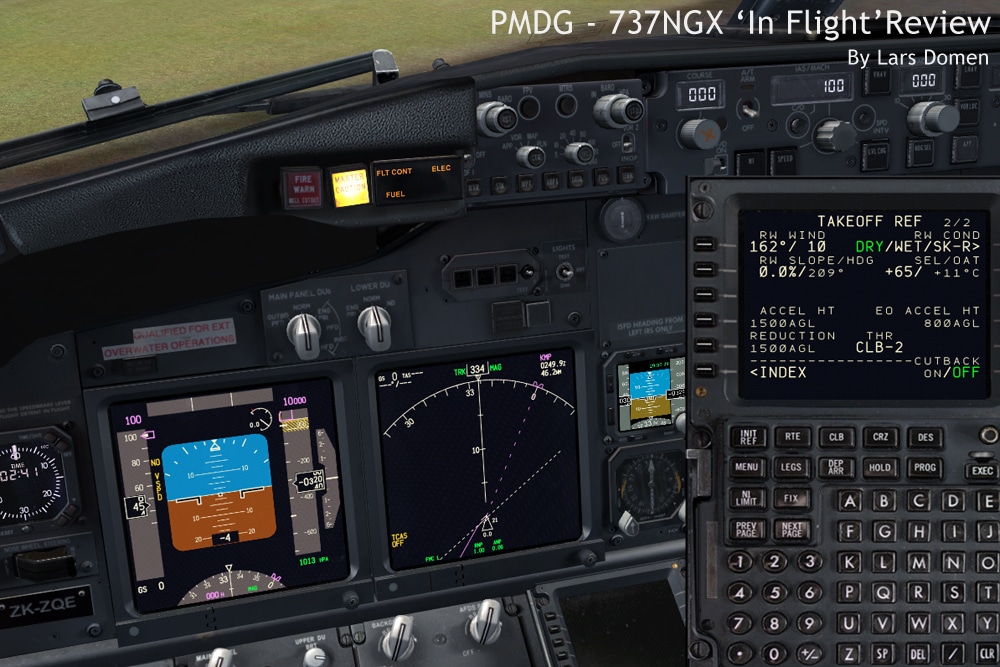 Pic8: The takeoff reference page in the CDU, and the PFD/ND as they look at this moment in the preflight. Note my 65°C assumed temperature.
When the IRS is aligned and the CDU preflight is done, we move on to the preflight procedure, checking everything on the overhead panel first, followed by the forward panel and center pedestal. There are again a couple of things worth mentioning here. First of all, there’s again that very realistic startup delay. The IRS alignment and APU startup are obvious examples, but the hydraulic pumps and anti-ice system experience the same. Also worth mentioning is that the air conditioning and pressurization system is fully functioning. Cabin pressure, cabin temperature, pneumatic air pressure, load on the engines with air conditioning running… It’s all there. Very impressive, in my opinion. The last thing I want to say here, although it’s not necessarily part of the preflight, is that not only normal operation is simulated, but most (if not all) abnormal situations and procedures are also simulated.
 Pic9: View of the overhead from the normal VC viewpoint. Very realistic, but not very useful for stuff on the F/O’s side of the panel. Luckily, there are other preset viewpoints available, one of which is a dedicated overhead view.
Once the preflight is done, we do the before start flow, followed by the before start checklist. Part of this, is setting the stabilizer trim. Now, this is worth mentioning because the stabilizer trim in the PMDG 737 NGX moves very slowly. This accurately represents the trim speed you get from operating the electrical trim in the real aircraft. It’s a lot slower compared to most other FSX aircraft. This also means that trimming the NGX is very easy, and you can trim the aircraft accurately. This might sound like a small detail, but it’s something that truly changes your flightsim experience in a positive way. If you need pushback, this is also the time for that, and once again, PMDG made it easy. The NGX includes a CDU menu that gives you quite a lot of flexibility for pushback. You can choose how far the aircraft is pushed back, the direction it’s turned in, and the angle in which it’s turned. A readout immediately predicts the total pushback distance. For ease of use, you can also switch between feet or meters for units of length. It’s a very practical tool that’s easy to use. The only difficulty is estimating the pushback distance in FSX. That’s the only reason that I revert to AES pushback at airports with AES compatibility.
During or after pushback, but before taxi, it’s time to start the engines. The usual PMDG amount of detail is poured into the engine simulation, and that clearly shows during engine start. First of all, you have to turn the packs off, or the engines won’t crank. Not very special, as many add-ons also do that. What is impressive, is that you have to add a little throttle to the turning engine if doing a crossbleed start, or you won’t have enough pneumatic pressure to start the second. But what’s noticeable the most, is the realistic (read: much longer than normal in FSX) startup times for the engines. Starting a jet engine is an enormous amount of metal that has to be spun up to high speeds. This is not done in mere seconds, like Microsoft wants us to believe. The NGX features more realistic startup times.
 Pic10: View from the First Officers seat. We’re all set, ready to taxi. Note the terrain display on the Captains navigation display.
Taxi and takeoff:
Ok, so we have started the engines, we’re pushed back from the gate. After we’ve done the after start – before taxi procedure and checklist, we’re ready to go. The first thing I notice during taxi, is that it takes very little power to get the NGX rolling, and even less to keep it going once it moving. This is accurate compared to what the manuals say. The second thing I notice is how smooth and easy the taxiing is. Aircraft behavior on the ground is not something FSX excels in, but the PMDG NGX is one of the smoothest and most pleasantly handling aircraft I’ve used in FSX so far. I actually have no idea why it’s so, but I like it. I have much less problems keeping the centerline, or making accurate turns, in the NGX than in any other aircraft in FSX, even those comparable in size.
 Pic11: Taxiing at Coffs Harbor!
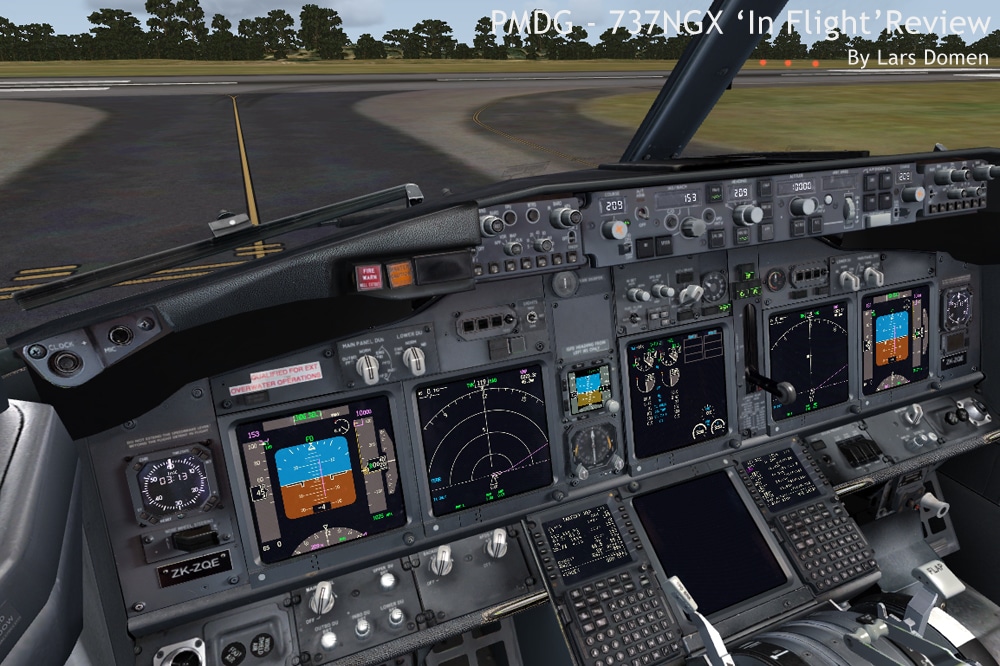 Pic12: Holding short, runway 21. We’re waiting for a small Cessna to land.
And this is as good a time as any to talk about exterior lights on the NGX, because during taxi you’ll notice the ‘Lotus-style’ landing and taxi lights for the first time. These landing lights, first, they look infinitely better than the ‘normal’ FSX landing lights. Second, they don’t just light up the ground, they also light up scenery. It’s a great addition to the aircraft. Obviously, since I’m flying during daytime in this flight, they’re not really noticeable. But they’re there none the less.
Once we’ve done the before takeoff flow and checklist, and we’ve got clearance, we’re ready to line up on the runway and go.
So, final checks done, auto throttle engaged, we release the brakes and throttle up the engines until they’re stabilized. Once stabilized at 40% N1, we hit the TOGA-switch, or the hidden clickspot PMDG provided on the MCP. And we’re going.
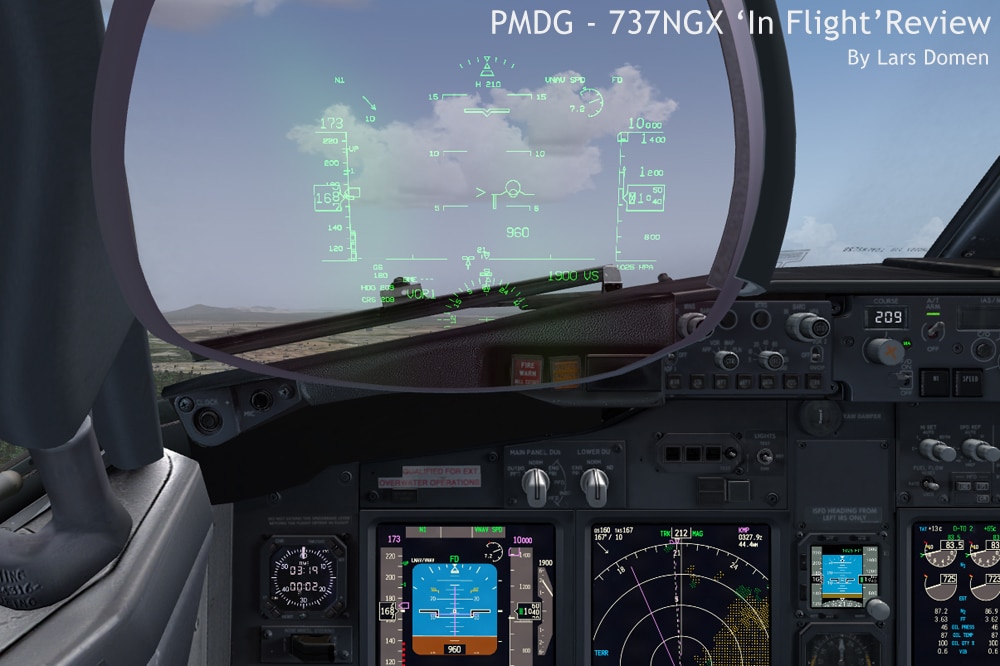
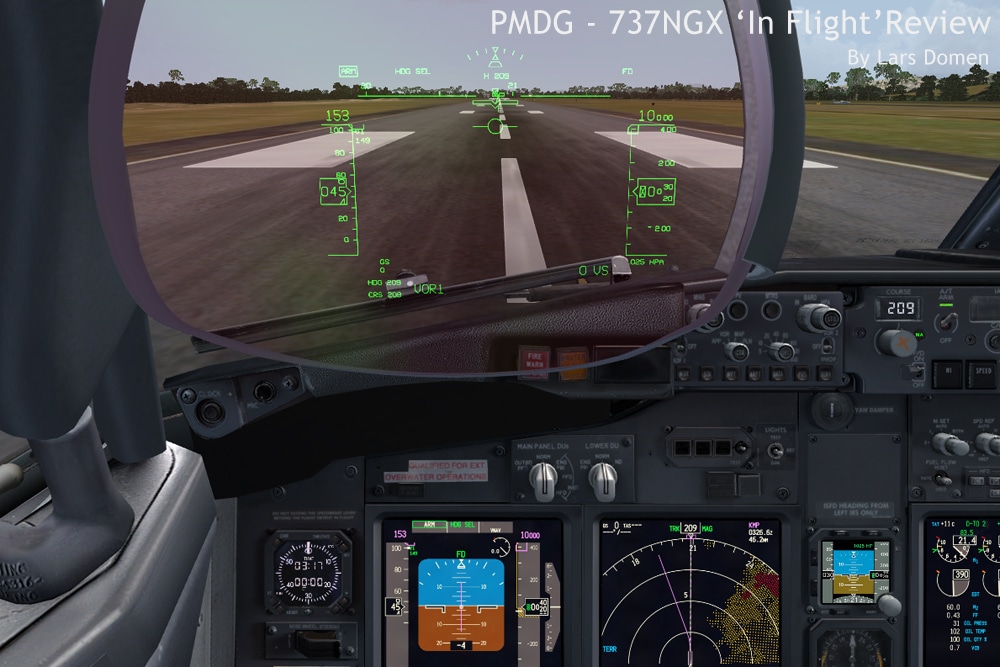 Pic13: We’re lined up, ready to go. Note the HUD here, as well as the terrain display once more.
Now, remember I inputted the wrong assumed temperature setting? This is where it went wrong. Acceleration was way too slow, and although I immediately noticed, I didn’t act on it, thinking it would straighten out. It didn’t. I almost didn’t make the takeoff. Well, honestly, I didn’t make it. Not at the end of the runway at least. Luckily, this is flightsim. I did make the trees though. So, in the end, two mistakes here: the wrong assumed temperature, and continuing the takeoff while noticing acceleration is too slow. The first is bad concentration, the second bad decision making. Both my mistakes, so I’m probably fired (or dead) by now were it real life. But that’s why we have sims in the first place: the only thing hurt right now, is my pride.
But back to the NGX experience. During the takeoff roll, there are a lot of things happening at once. Firstly, you have to monitor the engines, but you also have to keep your aircraft on the centerline. No problem in calm conditions, but this may become tricky in heavy crosswinds. After that, you have to keep an eye on the speed, and decide whether to takeoff, or abort if anything goes wrong, before reaching V1. If enabled, you get V1, rotate and V2 callouts in the NGX. Upon reaching VR, you pull back on the yoke. If you set your stabilizer trim correctly, you can achieve a very smooth rotation with very little control input, and moments later, your 737 is flying. Now keep paying attention, because the 737 achieves a remarkable acceleration shortly after takeoff. Your target speed is V2+20kts, but it’s very easy to overshoot that speed! So get that nose up and keep the speed in check. Upon achieving a positive speed of climb, retract the gear, and once you reach acceleration altitude, retract the flaps on schedule. Do the after takeoff checklist, and you’re good to go. What’s the most remarkable about the entire process I described above is that in the NGX it all goes so smooth. I’m not really talking about framerates here (although they’re also relatively good), but the controls are very smooth, rotation is very smooth if trim is set correctly, flight director commands are very smooth, and don’t give any unexpected jumps or commands that other some other add-ons do get sometimes. The only negative remark I have is that I often get a short but noticeable stutter when I push the TOGA-switch. Although I do have the impression that it’s much less after the update to SP1.
 Pic14: No shots from the takeoff roll or rotation, but here’s one taken shortly thereafter. We’re climbing out of Coffs Harbor, cleaning up the aircraft as we go.
Conclusion to part 1:
I’m not really going to write a conclusion about this part of the review. I’ll keep that for the end of part 2, and the entire review as a whole. That said, here’s a link to part 2:
And some more links:
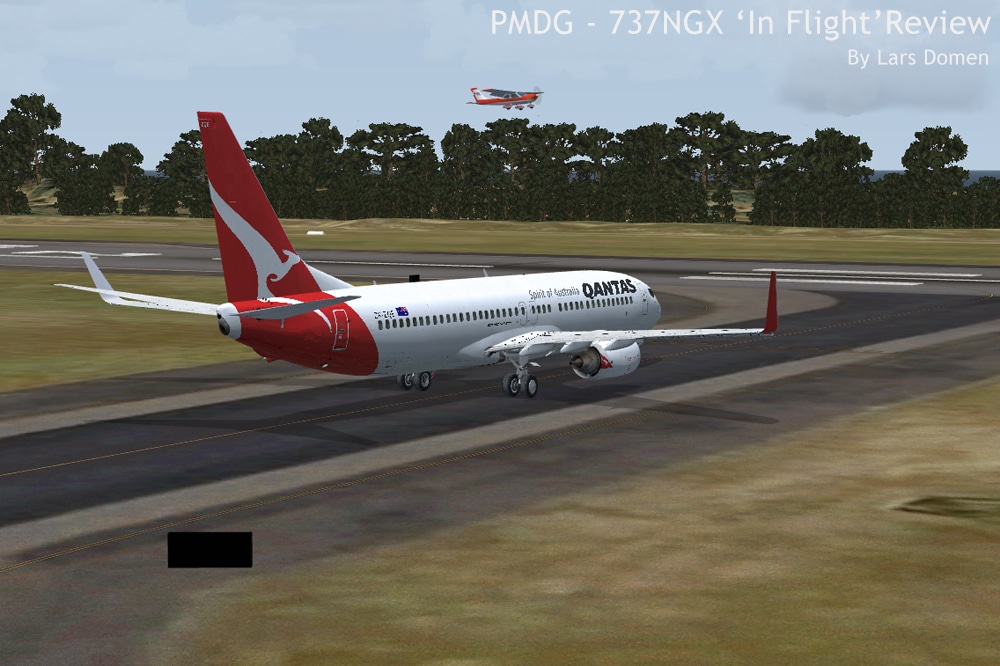 Pic12b: There’s that Cessna landing. We can go as soon as he’s clear of the runway.
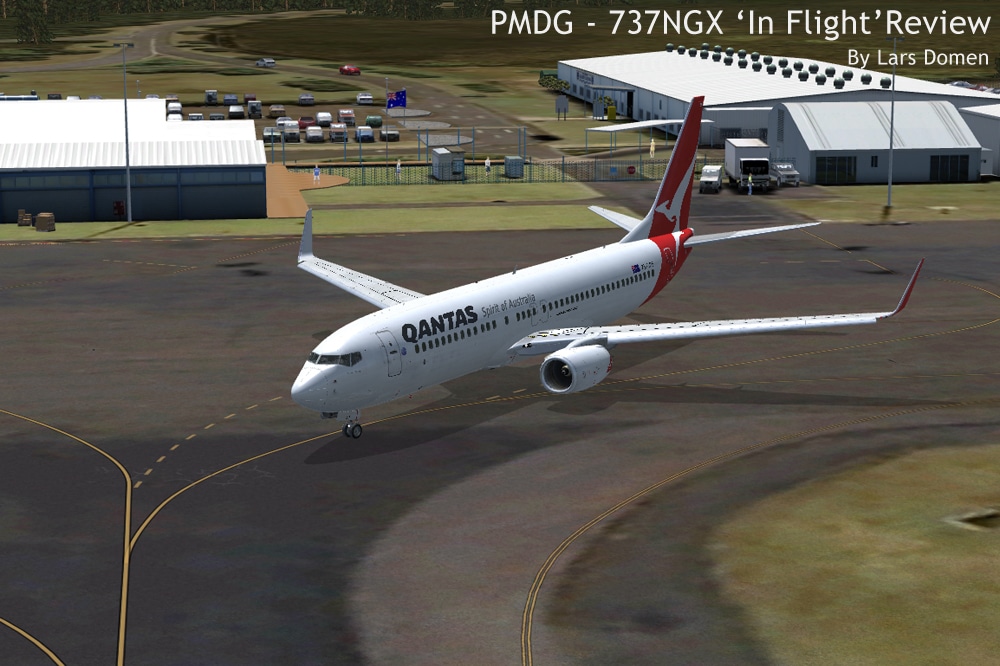
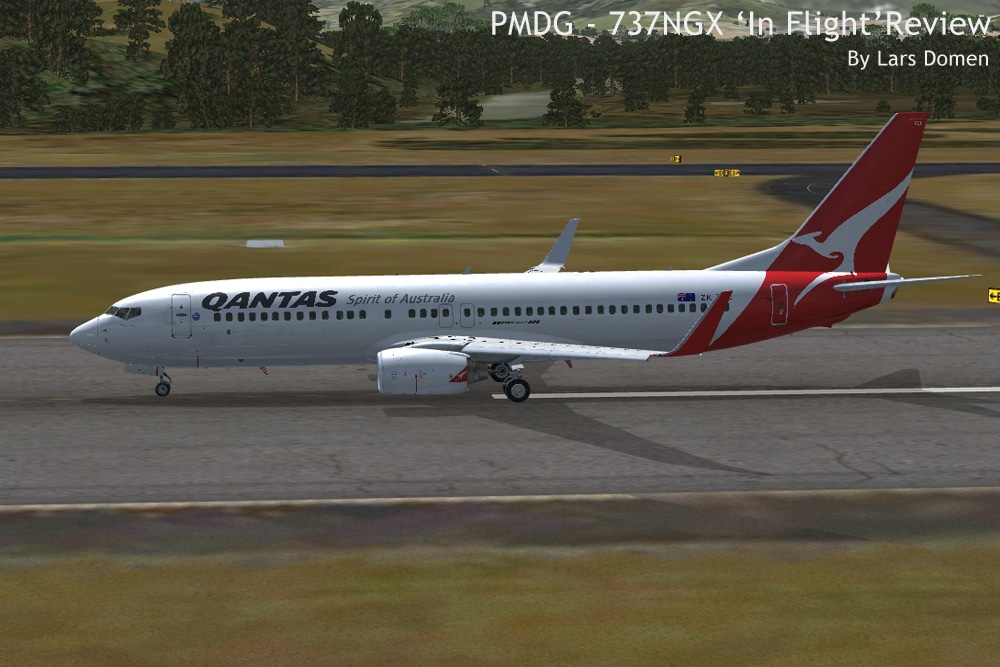 Pic13b: Lined up on the runway, this time in exterior view.