


Introduction
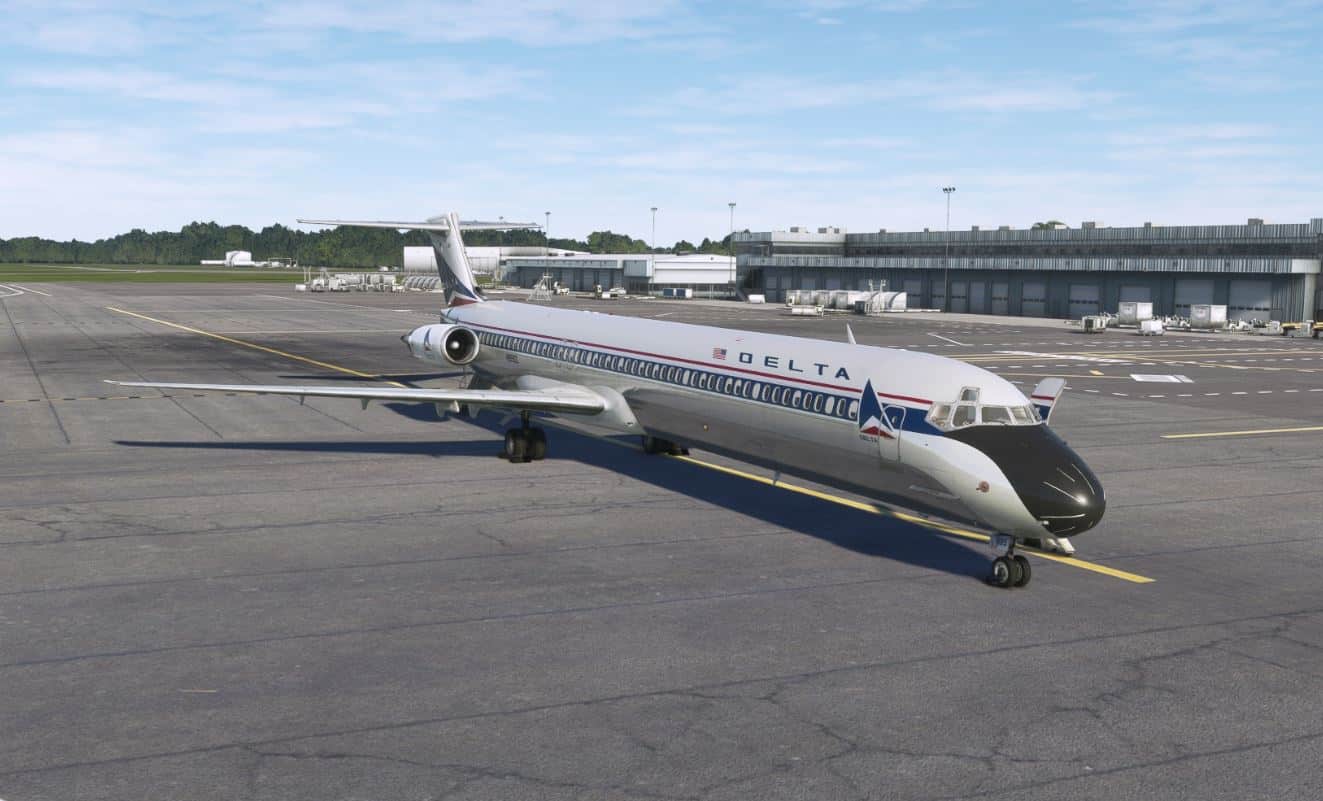
MD-82
The MD-82 (DC-9-82) is a mid size, medium range jet liner with two rear mounted engines and a T tail configuration. The first aircraft was delivered to Republic Airways in 1982. It was similar in design to its predecessors but had more powerful engines being equipped with the Pratt and Whitney JT8D-217 series. The aircraft also had a higher MTOW at 149,500lbs and typical range of 2,050nmi with 155 passengers. The last aircraft was delivered to U-Land Airlines in 1997. In total 539 aircraft were built and put into service.
MD-83
The MD-83 is a longer range version of the MD-82. It featured more powerful engines using the Pratt and Whitney JT8D-219s along with a greater fuel capacity. This resulted in a higher MTOW of 160,000lbs and a longer range of 2,504nmi with a typical passenger load of 155. The first aircraft was delivered to Alaskan Airlines in 1985 and the last aircraft to TWA in 1999. In total 265 aircraft were built.
MD-88
The MD-88 was the last variant of the MD-80 series of aircraft. The specifications were basically the same as the MD-82/83 except it had an EFIS cockpit. It had the same weight and range unless fitted with auxiliary fuel tanks to give it the extended range of 2,504nmi. The first aircraft was delivered to Delta Airlines in 1987 with the last commercial flight in 2020.
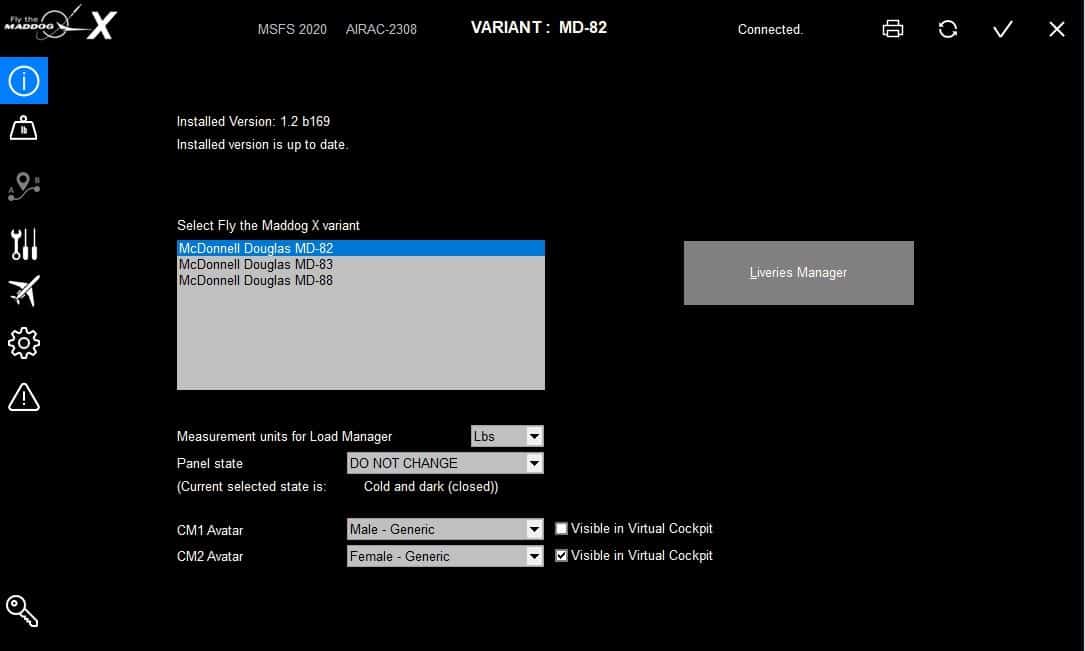
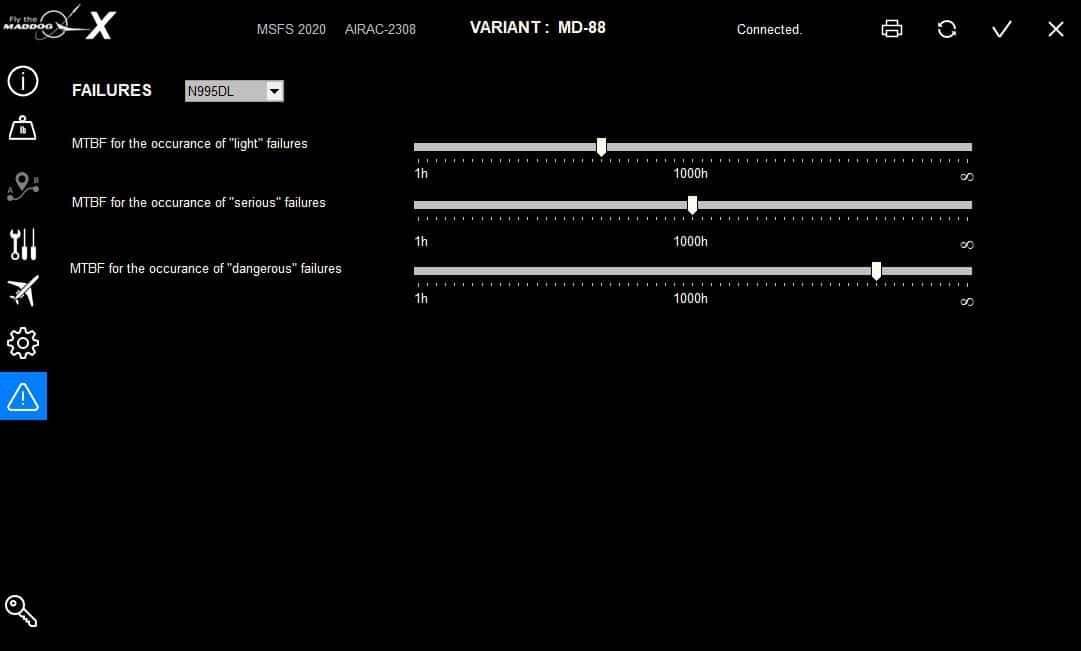
Installation and Load Manager
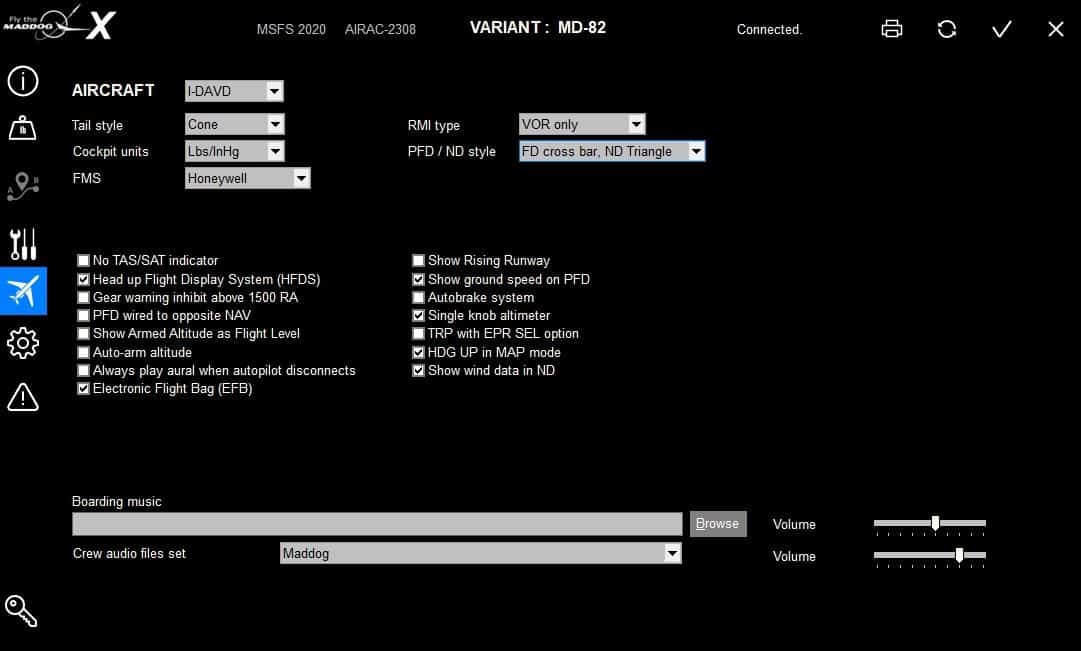
Installation of the product was straightforward. Upon completion the first thing you will need to do is register your product through the Load Manager. It is also via the Load Manager where you will select how you want to customize your aircraft experience and add liveries. There are six pages available whereby you can set your choices. The choices available are quite extensive allowing you to modify dozens of livery and aircraft specific options. Some of the choices are installing and enabling liveries, setting default panel states, a load manager, enabling the EFB, using PFPX/Simbrief for fuel and flight planning, enabling the Heads up flight display system, type of FMS installed, fine tuning cockpit lighting and a realism setting which if selected will introduce failures. This is just a short list of what is available to customize and personalize your experience.
One thing to keep in mind is that with the exception of the simulator options and registration pages your choices may be variant and/or livery specific so this is something to remember and keep an eye on when making your selections.
There is a distinct lack of liveries that come with the product which is unfortunate in my opinion as I feel more should be provided with the initial installation. You will need to go to the Leonardo site or freeware addon sites to get additional liveries.
Here are screenshots of the various load manager pages.

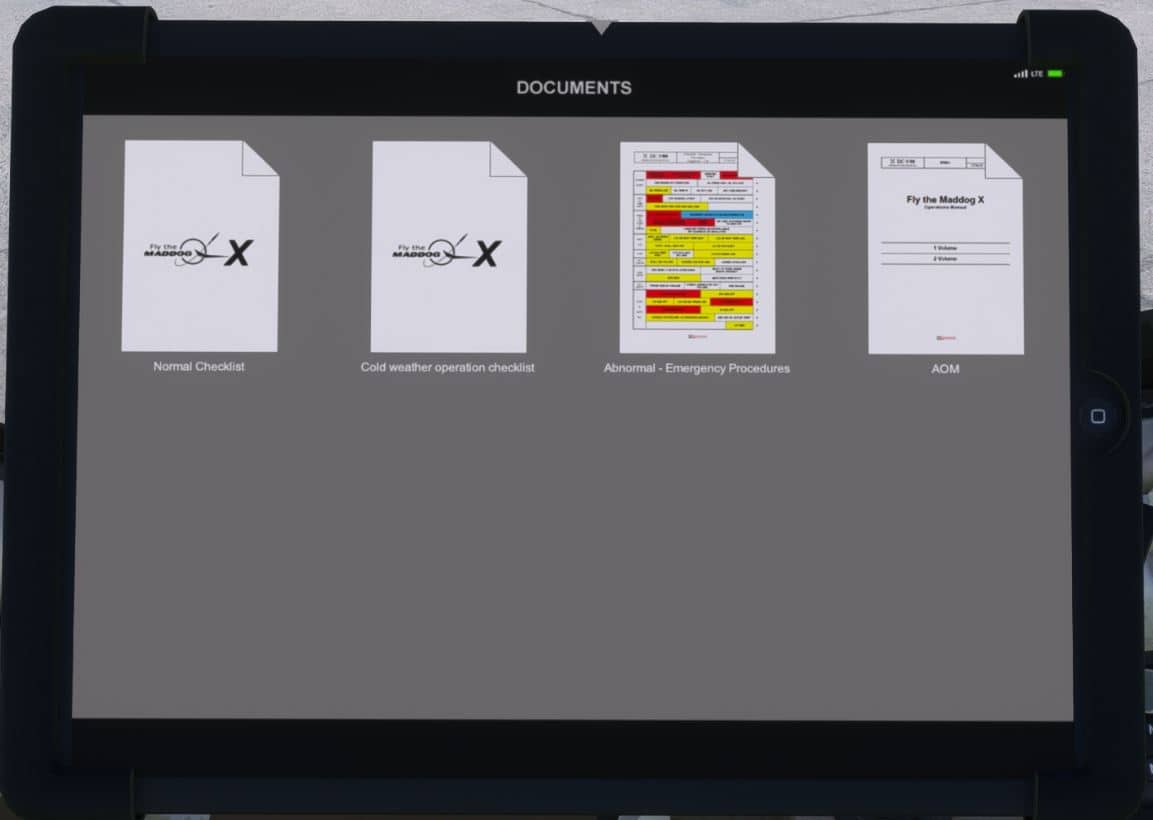
Documentation
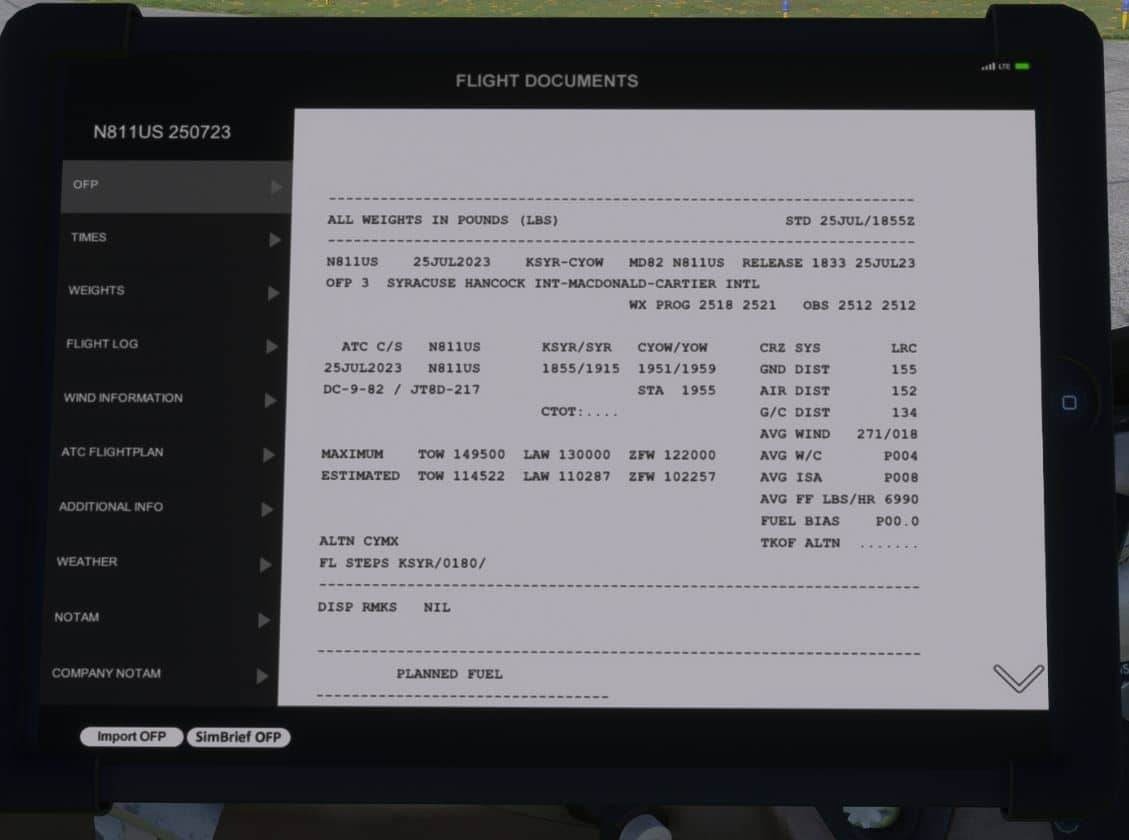
Included with the aircraft are a staggering set of 40 pdf documents which contain a treasure trove of useful information. If you are new to this aircraft as I was and have any hope of flying this aircraft successfully I highly recommend taking the time to read these documents.
They cover just about everything you need to familiarize yourself with the aircraft. However, as in depth and wide ranging the included documents were I felt they were also lacking in several instances especially for those new to this aircraft. I would have liked to see a better set of concise flow charts with diagrams and an included tutorial to tie everything together. I know doing a search on the internet could yield these items but including them would have been appreciated.
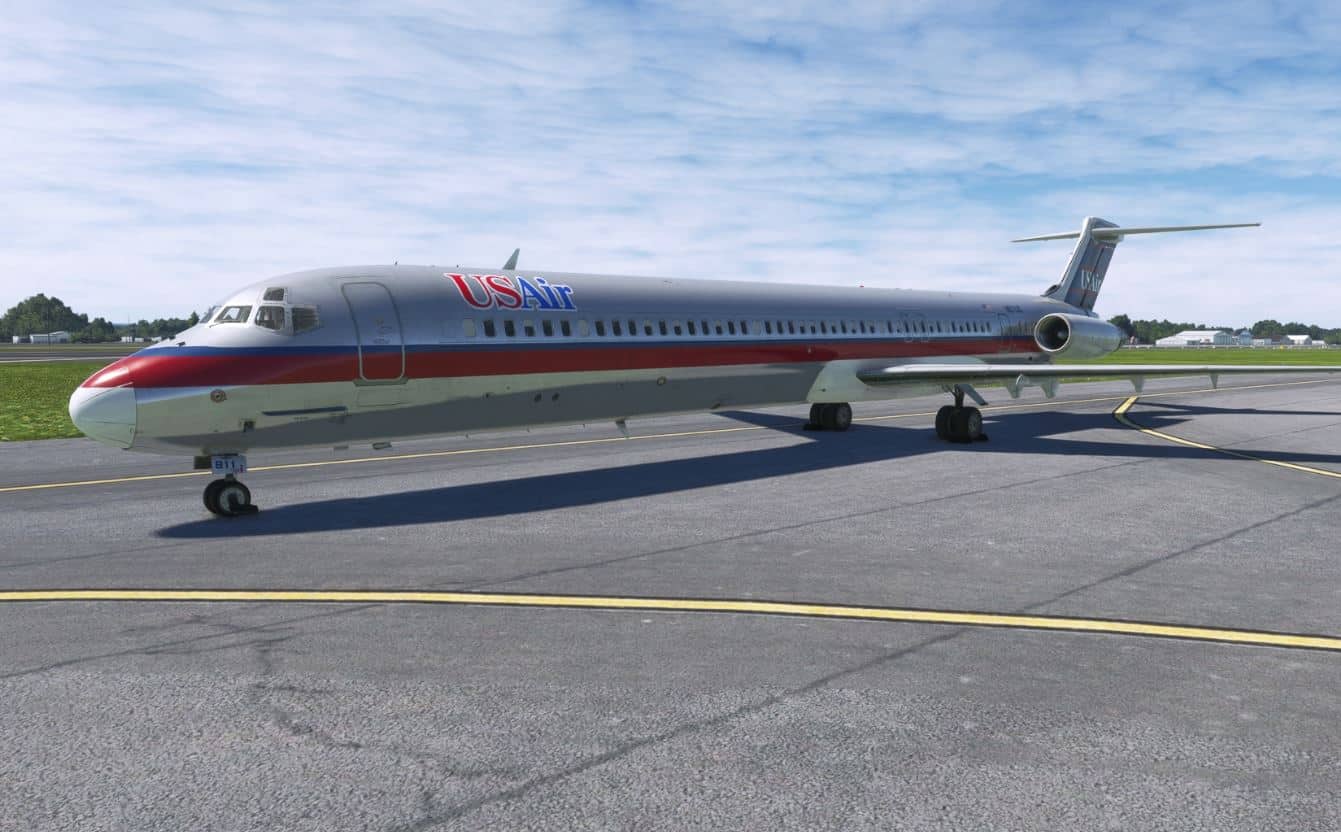
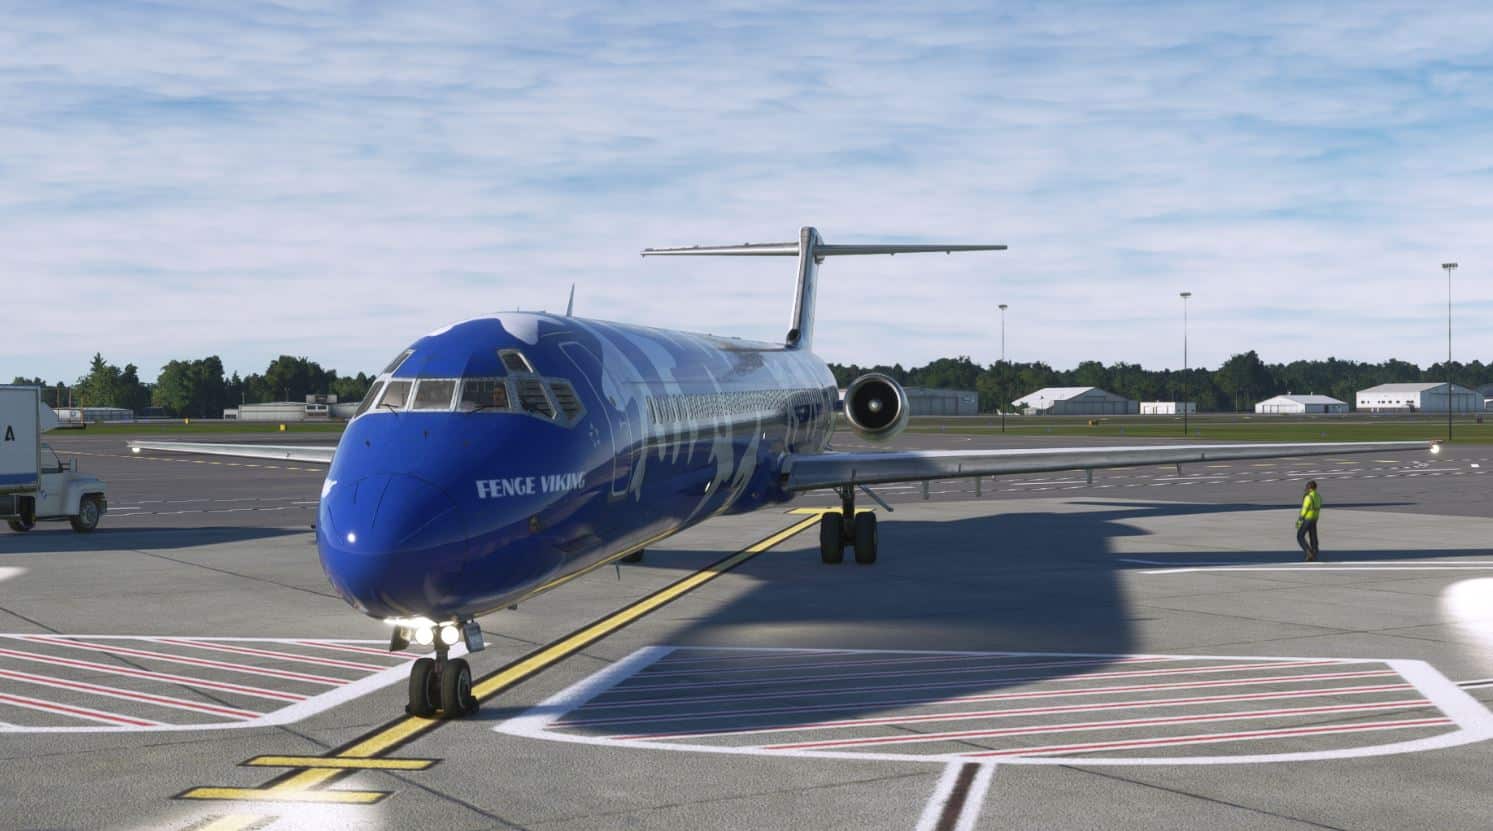
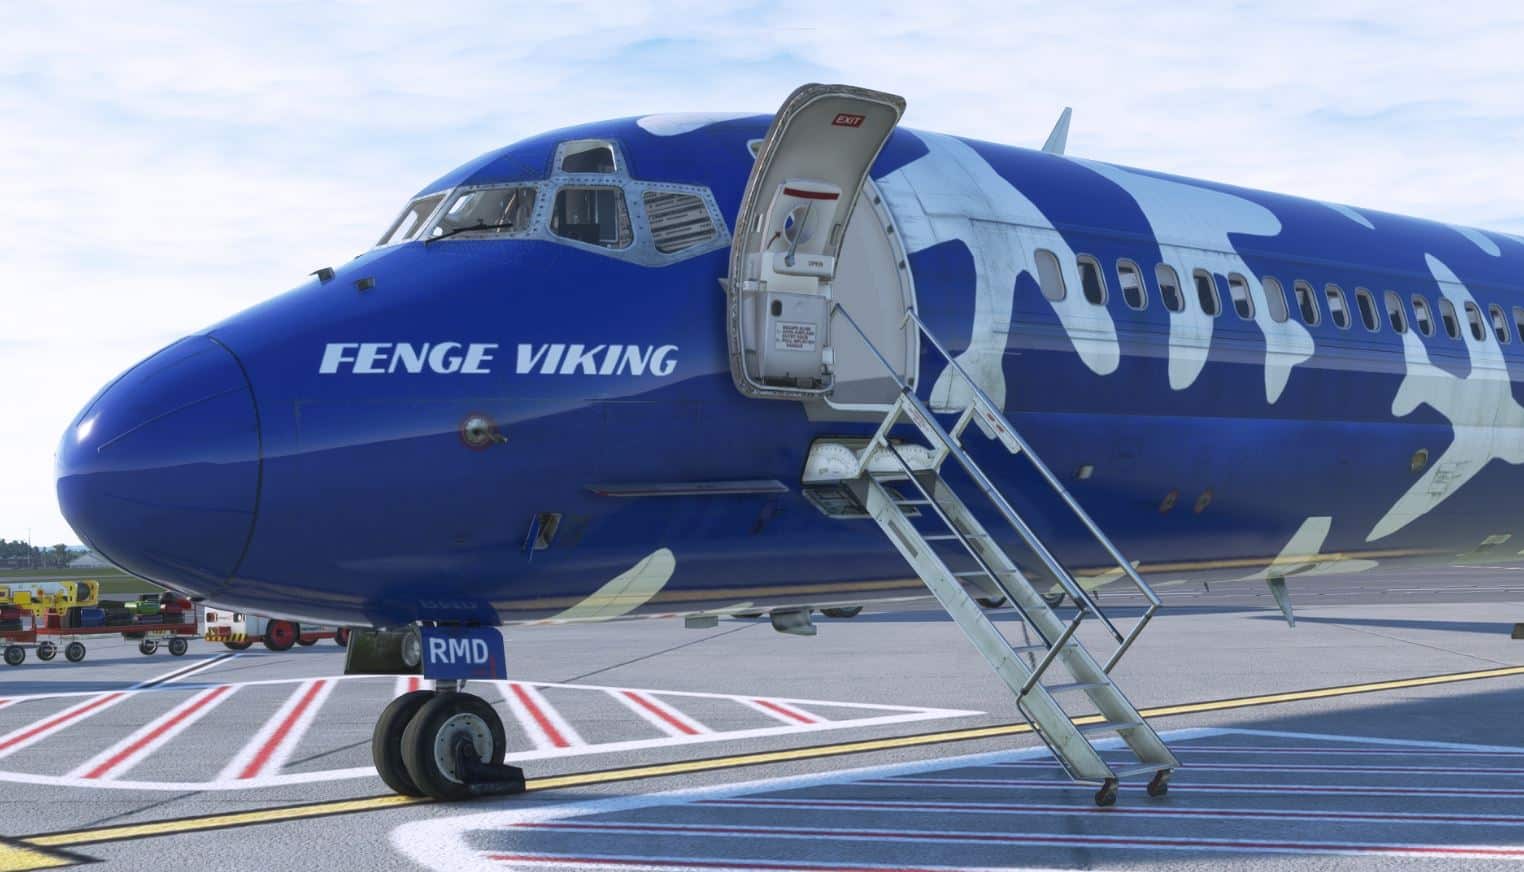
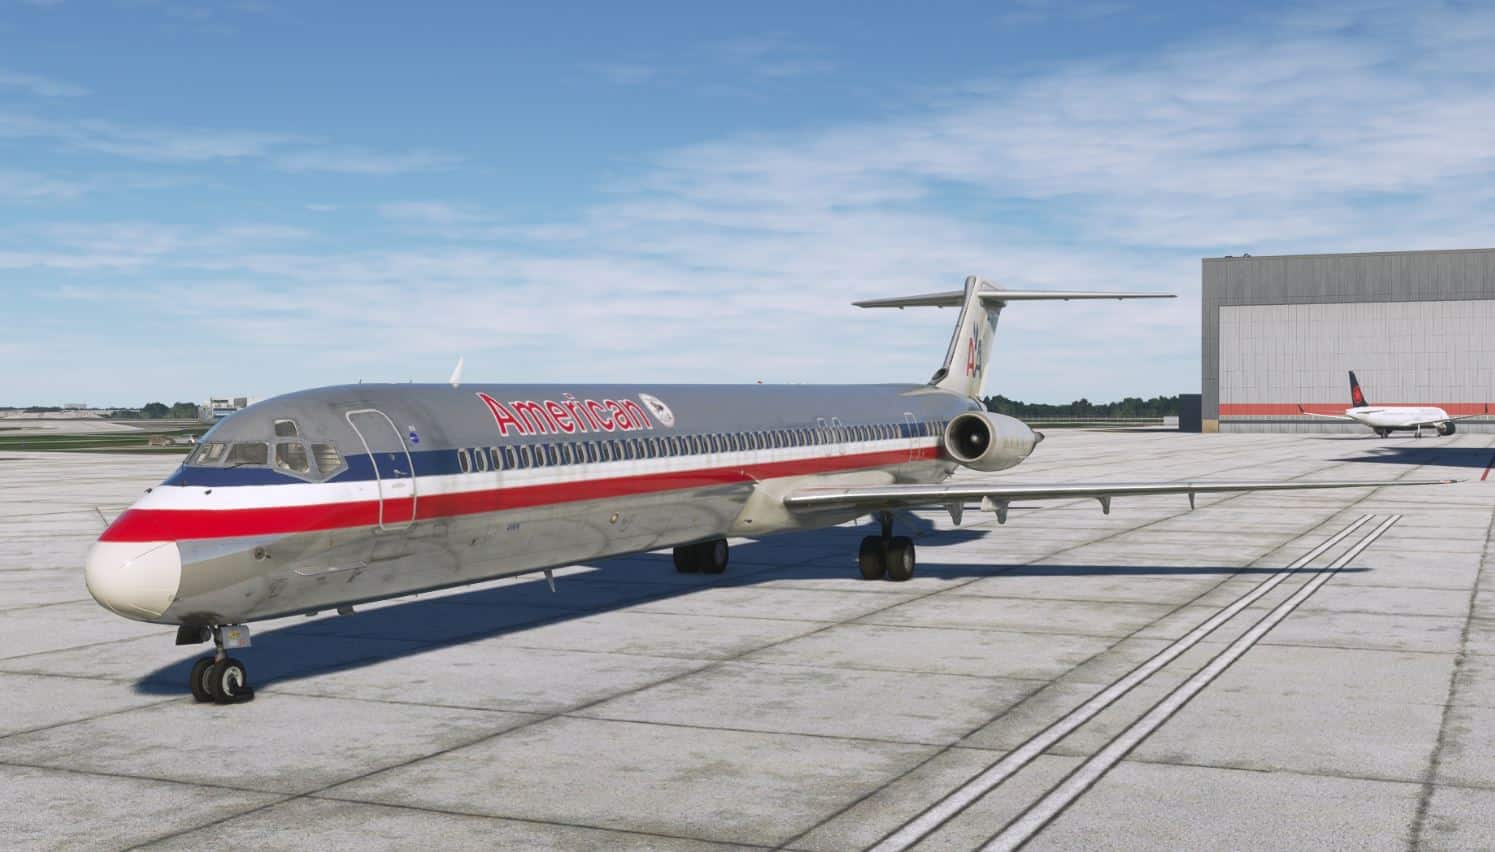
Exterior Visuals
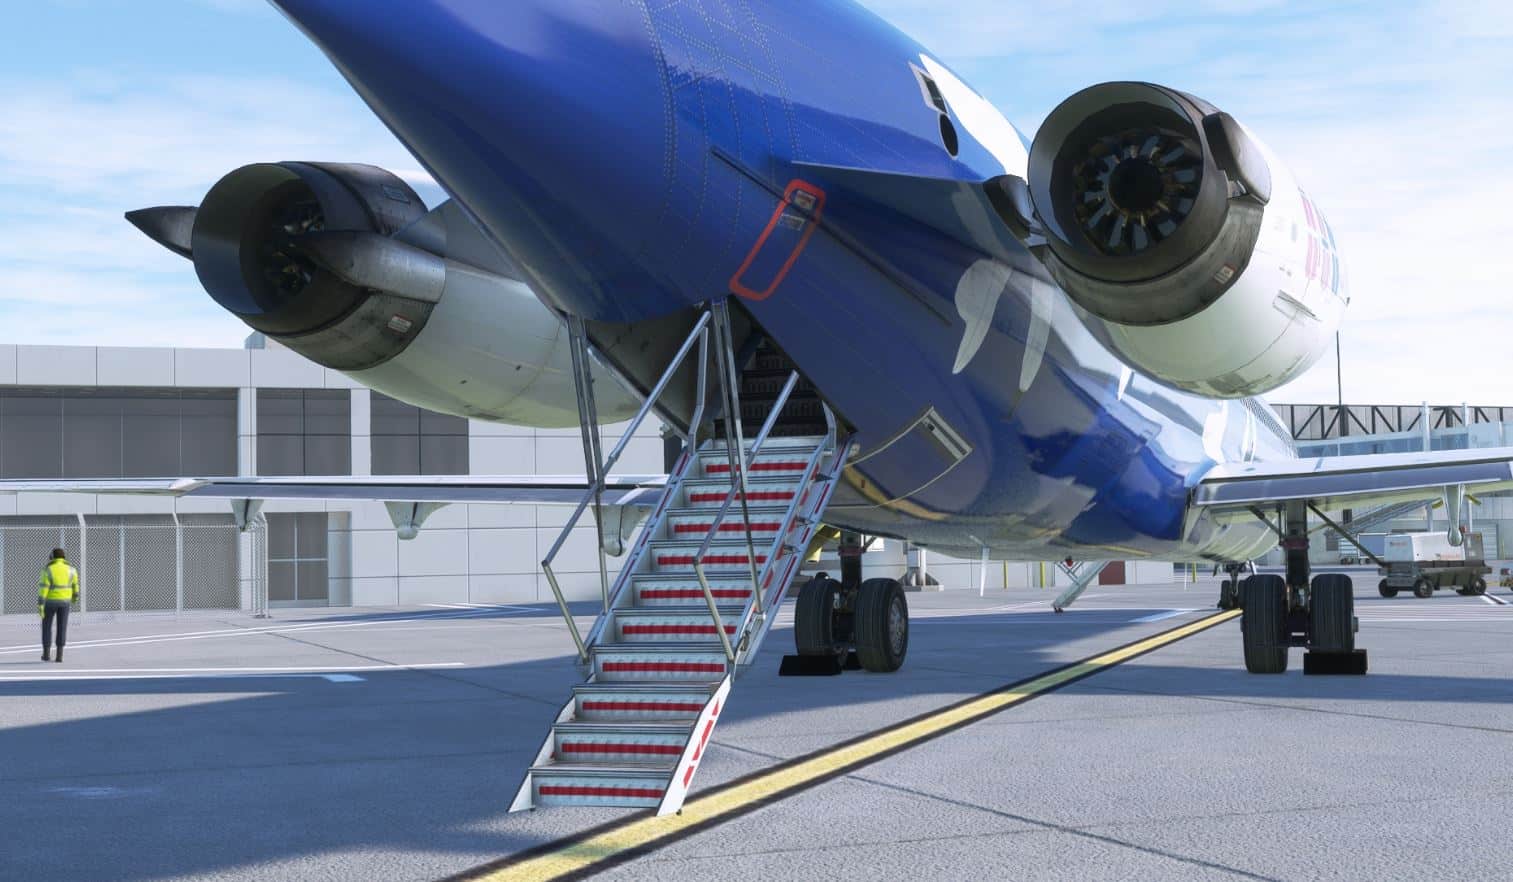
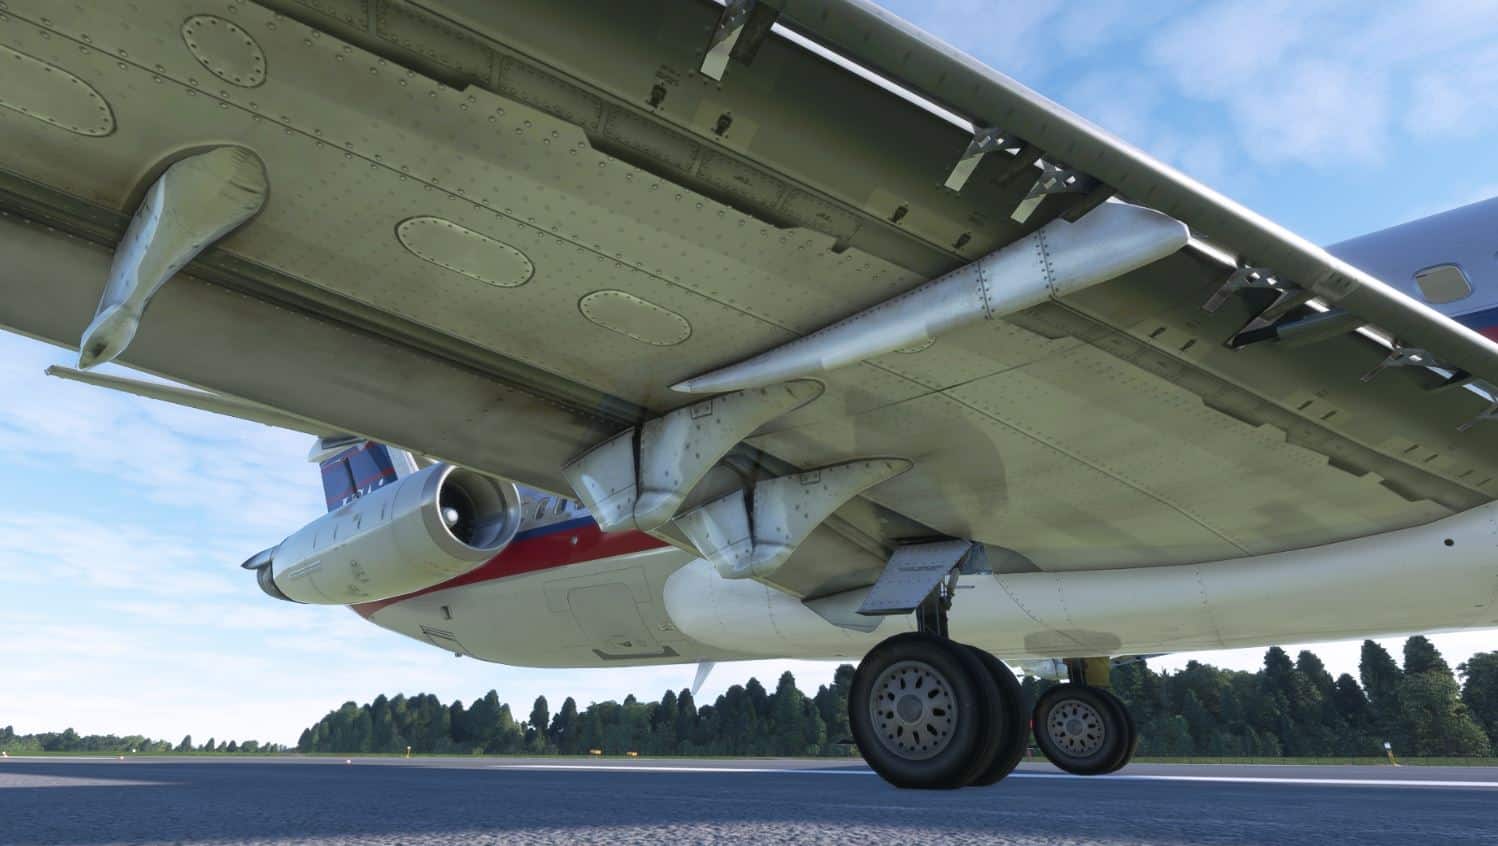
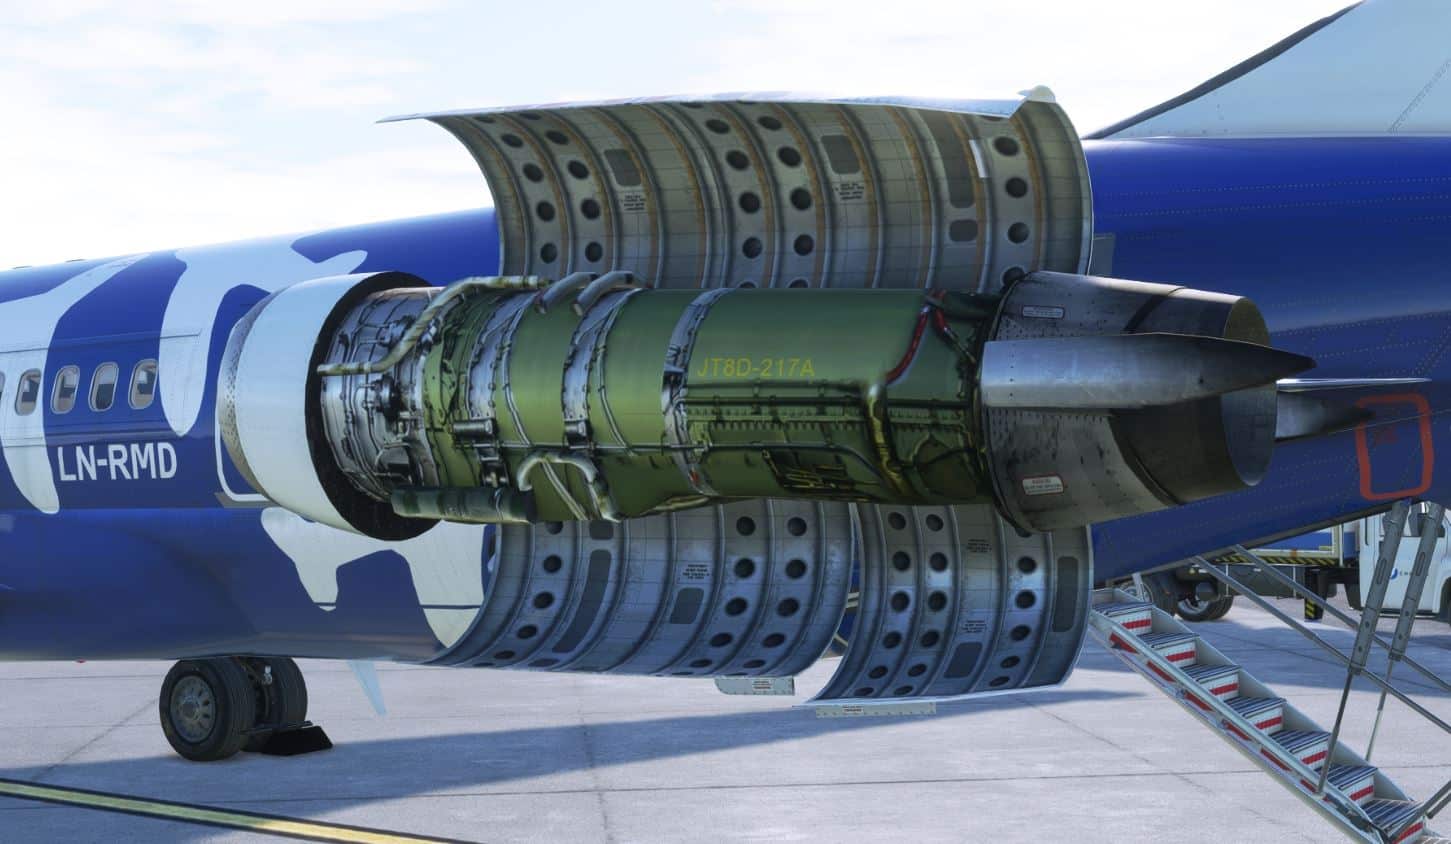
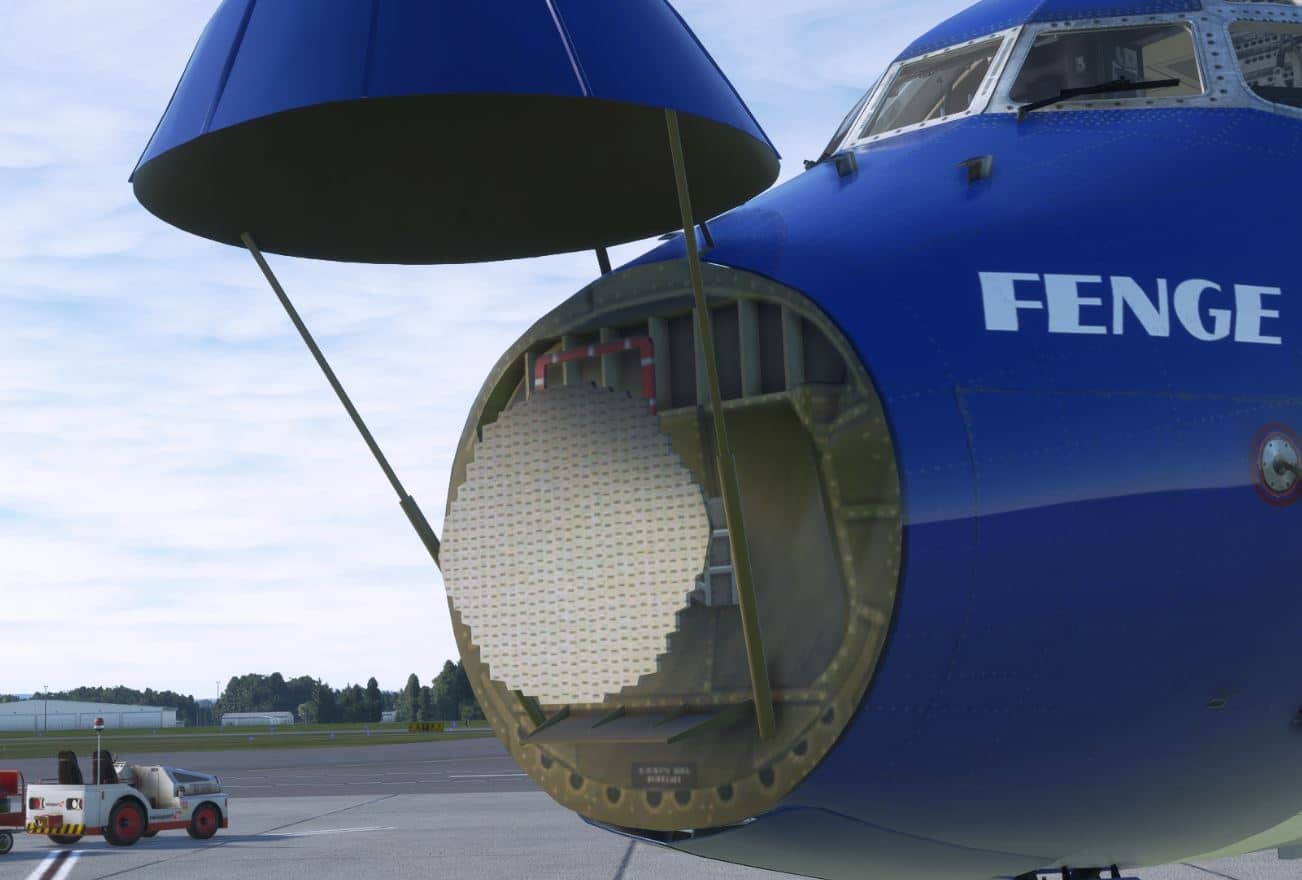
Scrutinizing the exterior at close range I felt that it was quite good with lots of details and weathering as appropriate. Items such as the landing gear, flaps, doors and extendable stairs both front and rear were all realistically rendered. As an added visual bonus they allow you to open the engine cowlings, radome and gear doors giving you access to some of the details normally hidden under normal operations, a nice bonus for those who might be interested. I was very satisfied with this aspect of the product; overall I felt it was top notch and did this aircraft justice.

Interior Visuals
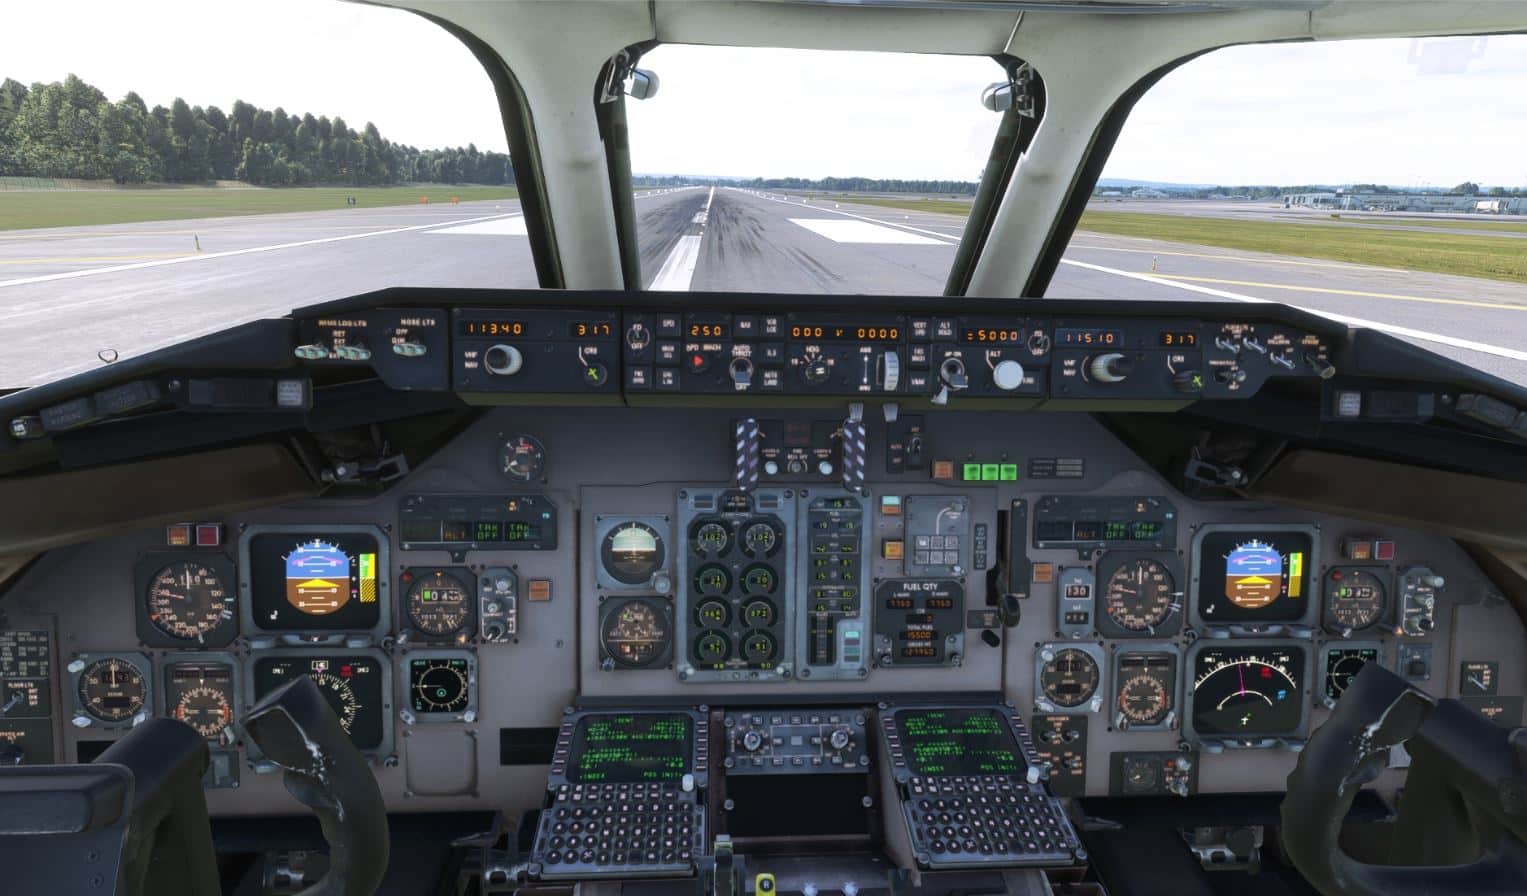
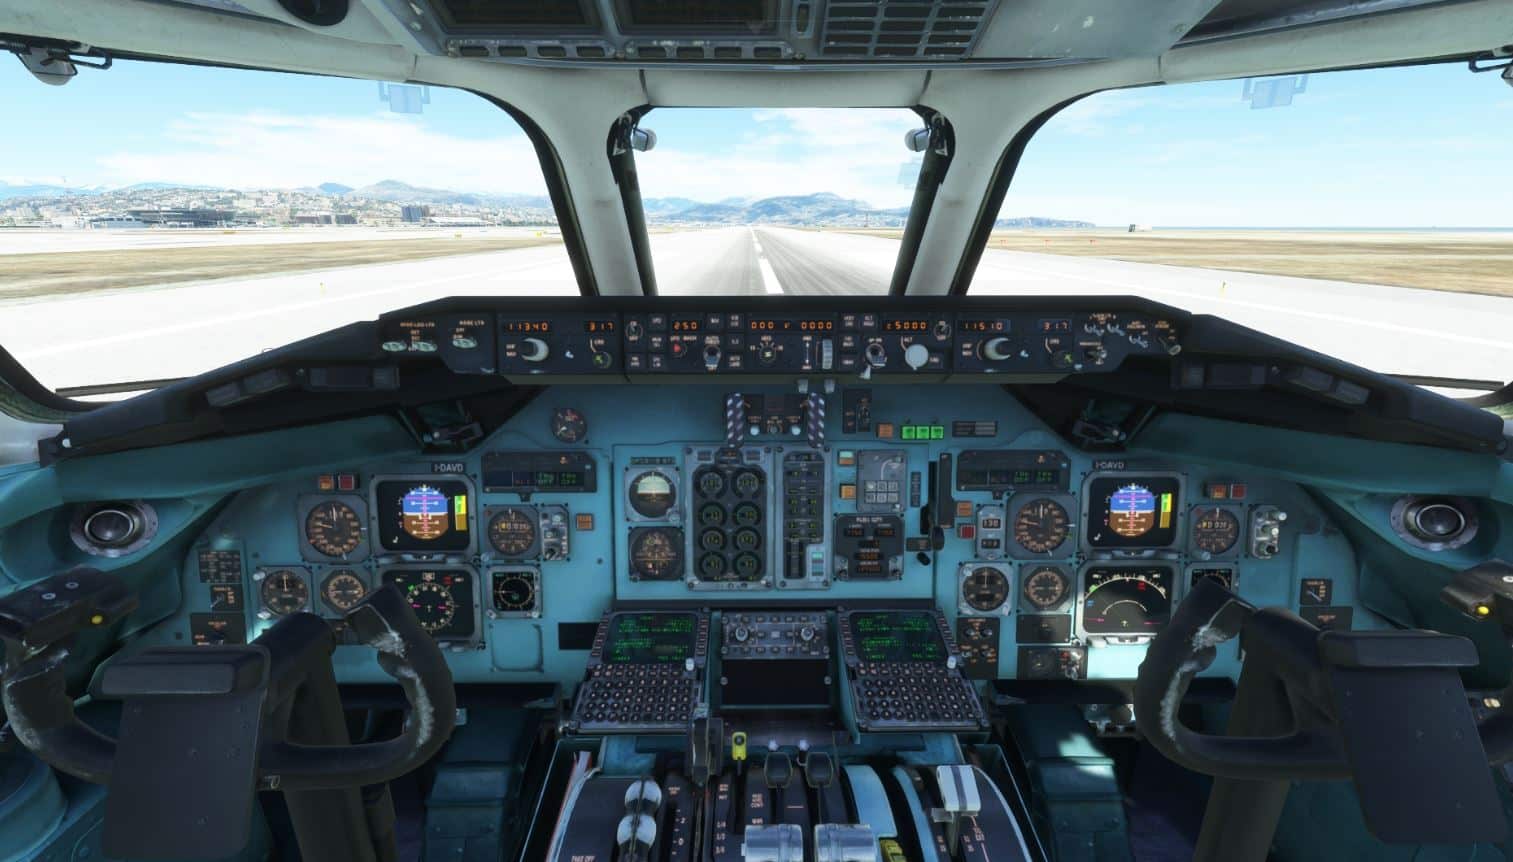
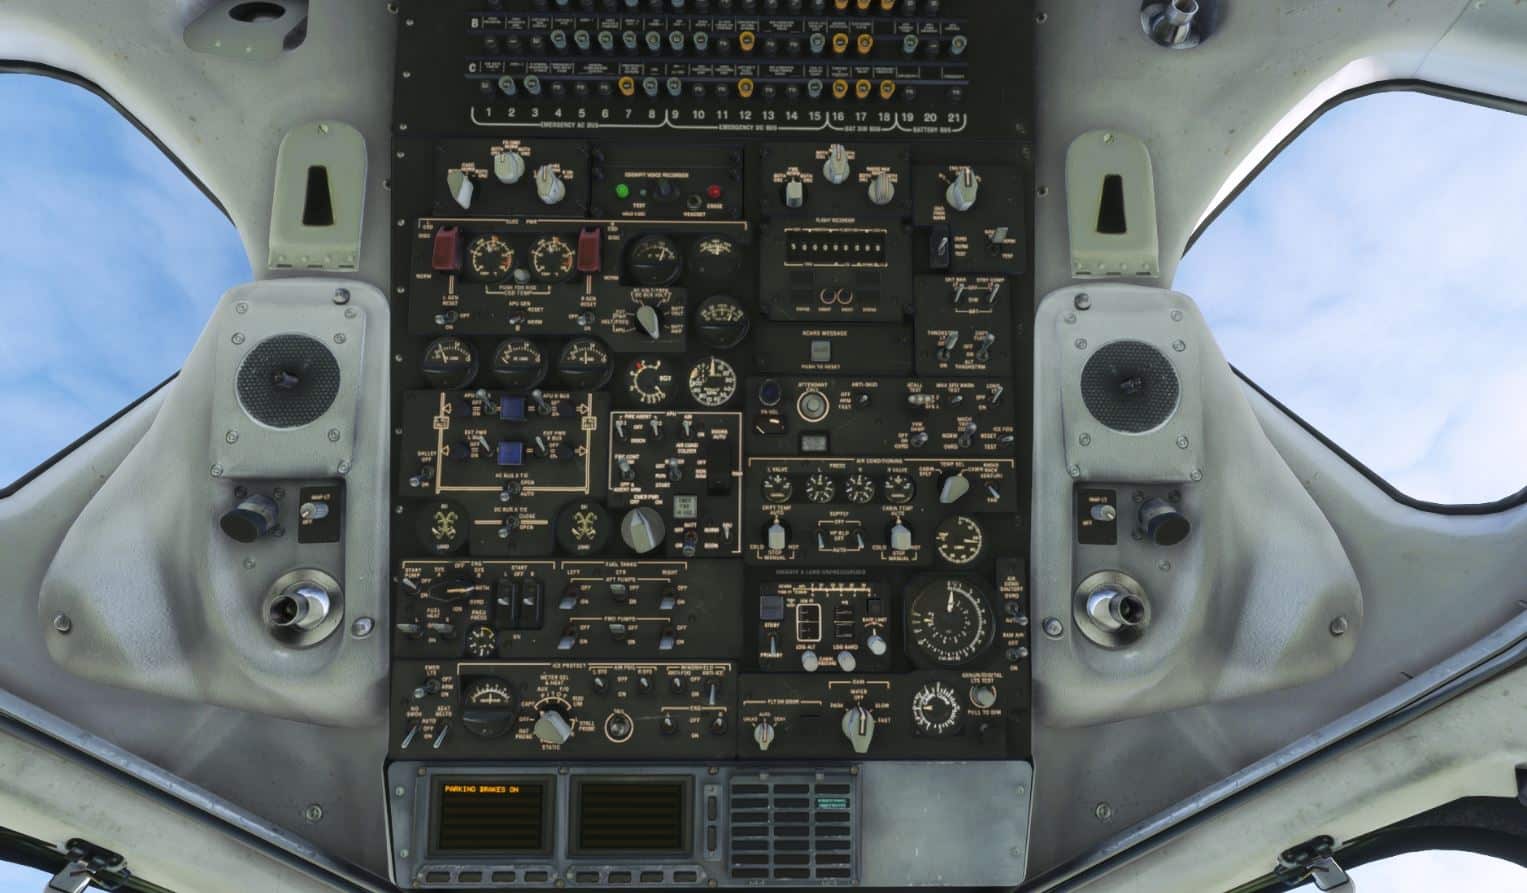
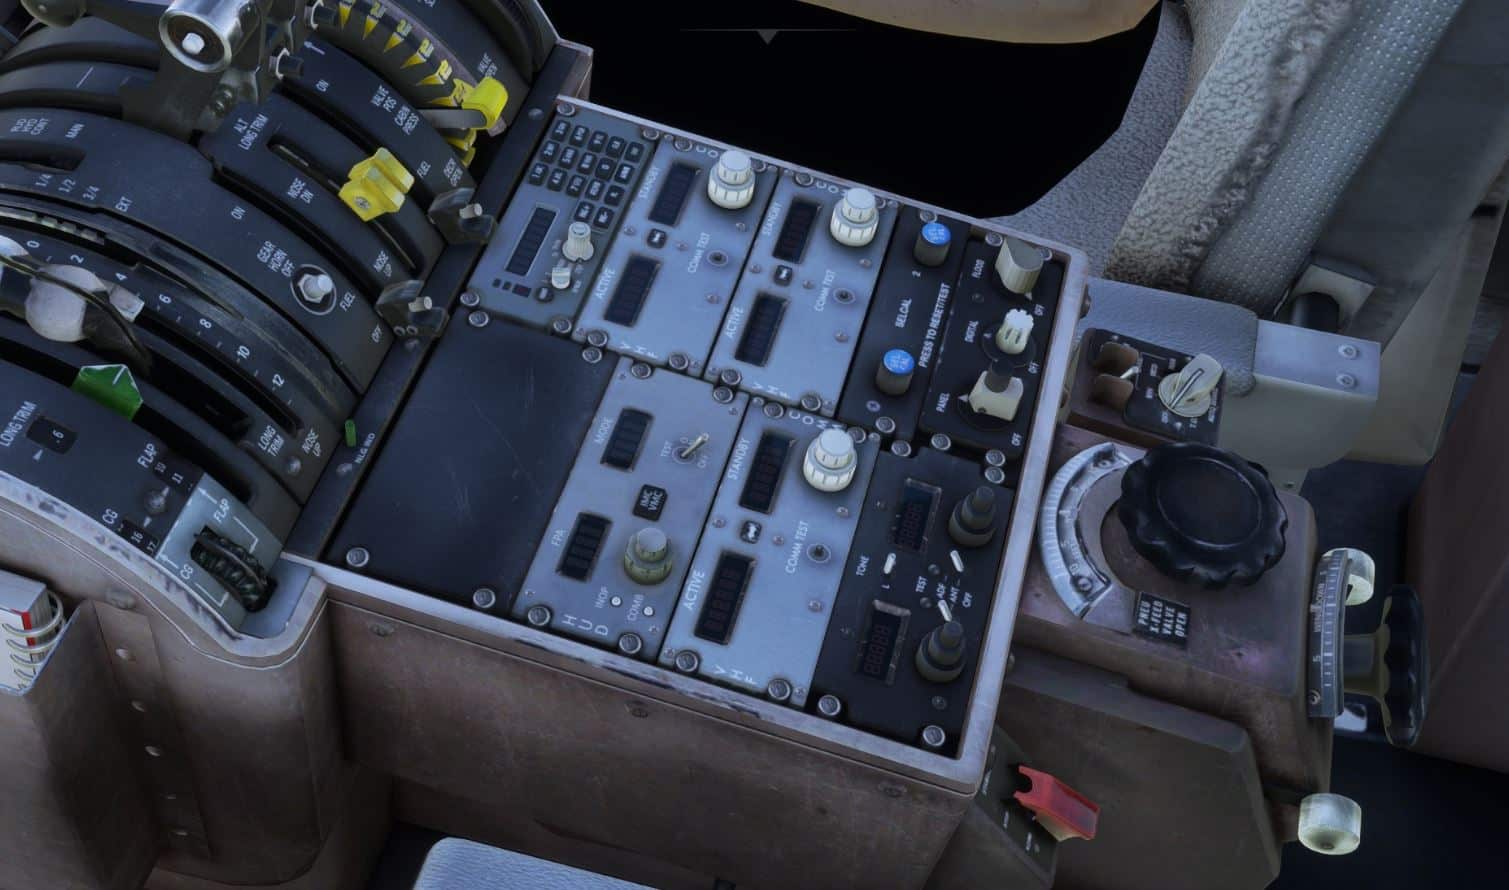
One of the first things you notice upon sitting in the cockpit is the wear and tear. This is a cockpit that has seen many hours of flight time and so you have metal rubbed bare, paint worn and slightly chipped and dirt on and around parts that are frequently touched. In this regard I was extremely pleased in the results. The rendering for the most part was high resolution however I got the impression that some components may have been ported over from earlier versions. With this aircraft there were some differences in the cockpit based on the carrier’s preferences and this was depicted.

For those interested, the passenger cabin is modelled but not to the same level of detail as the exterior or cockpit.

Electronic Flight Bag
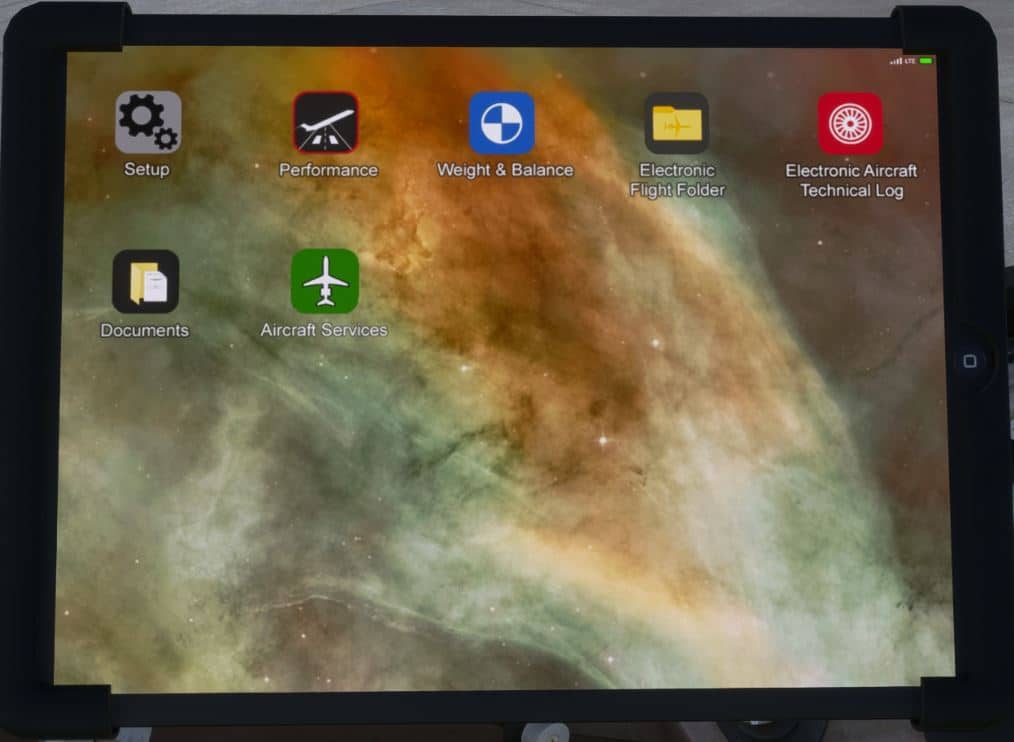
The EFB provided with the aircraft is a device which proved itself useful throughout all phases of my many flights. Essentially a tablet it gives you quick access to an array of valuable tools and functions. To power up the device you simply press the home button for a few seconds. From here you will normally see six icons; setup, performance, weight & balance, electronic flight folder, documents and aircraft services. In addition to the icons described above if you choose realistic mode under simulator options in the load manager program you will see an extra icon; Electronic aircraft technical log.
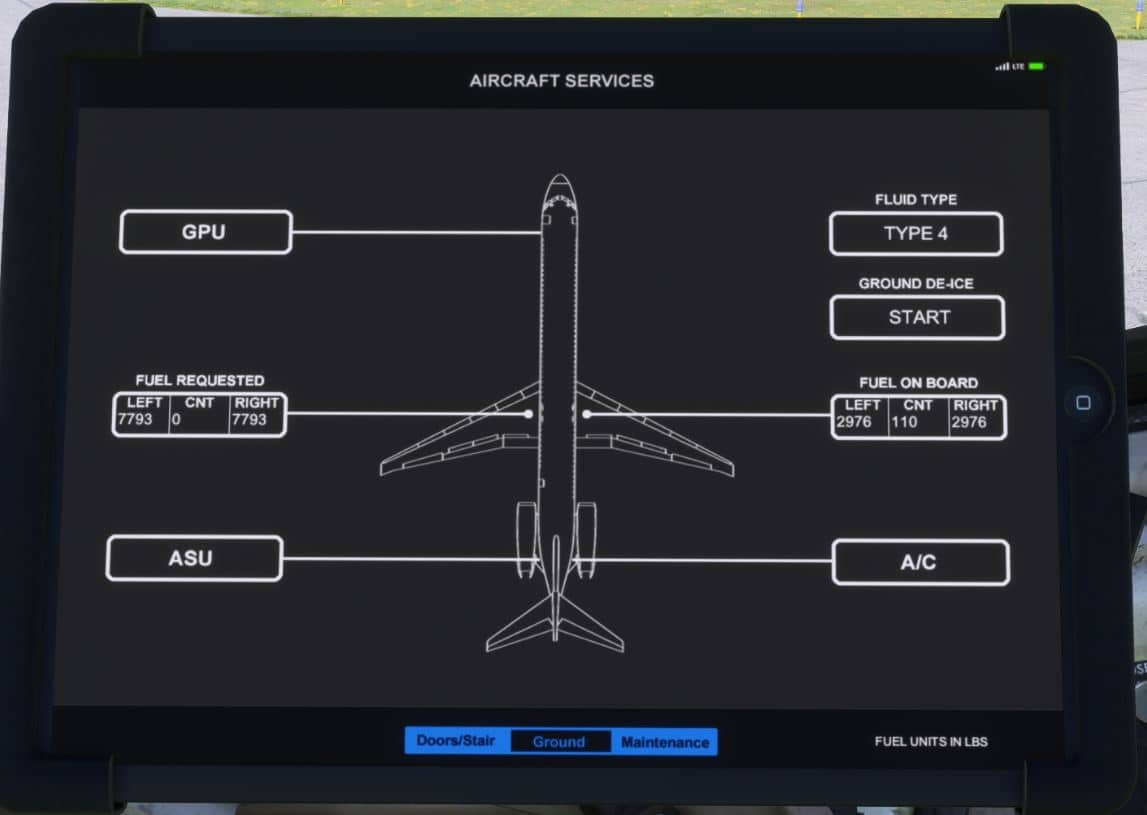
The aircraft does not need to be powered up for the EFB to work as it has its own internal battery that lasts approximately nine hours. One of the first things I normally did upon entering the aircraft was to select the Aircraft Services page to open the aircraft doors and request the GPU. Btw this can also be done from the FMS Services page.
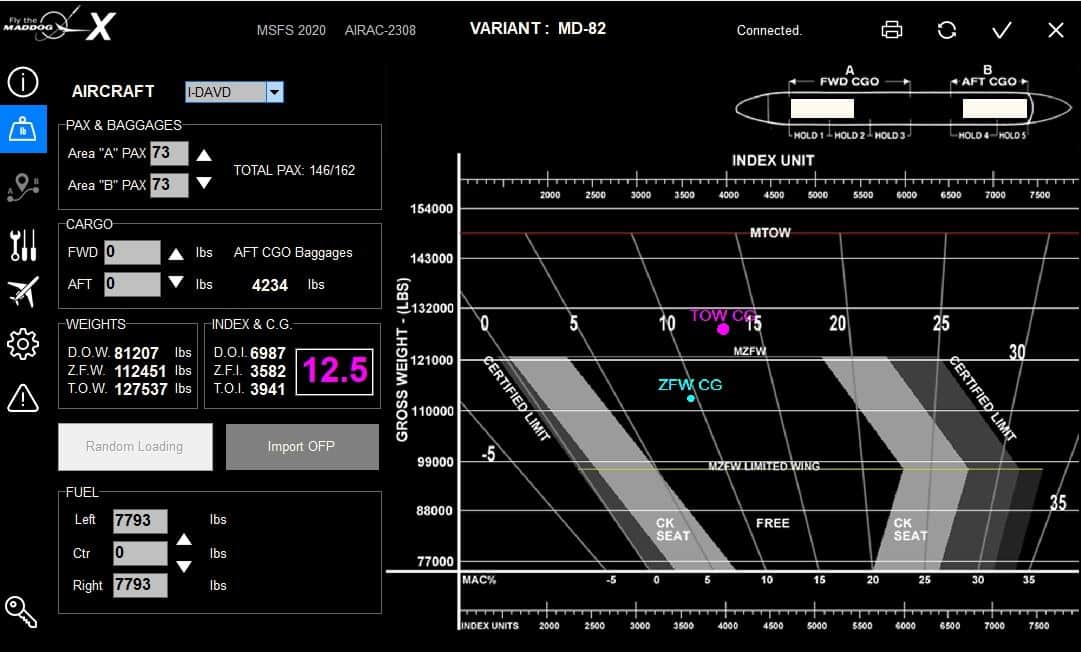
As I will mention later on it is through the EFB that you can set payload, import flight plans, set take off and landing speeds, etc.
My only negative comment is that it is not fully integrated with Navigraph charts allowing for the ability to access charts from the EFB. This would have been a nice additional feature.

Flying the Maddog X
To fully appreciate the depth of system implementation I chose to start this flight, CYOW to KEWR, in the cold and dark open state. You can change the aircraft start state at any time by simply opening the load manager and selecting any of the four states listed; cold and dark closed, cold and dark open, ready at gate and ready for takeoff. I would also mention that you have the ability to save your flight at any point and it will retain your current panel and aircraft state so you can continue where you left off without missing a beat, a great feature in my opinion especially for a complex aircraft.
The first time I went through the entire cockpit preparation and power up routines they did seem daunting as with any complex aircraft. However, with the exception of a few aircraft specific idiosyncrasies it was very similar to what you find in other jet liners. One thing that did stand out was that there is a definite a mix of old and new technologies in the cockpit. One example is the Thrust Rating Panel where you select the thrust rating based on the phase of your flight.
If you do not already use Simbrief I highly recommend getting an account as it is free and doing so will allow you to load fuel, passengers and cargo via the EFB and then load the flight plans you create directly into the FMS. There is a selection under simulator options whereby you can check to use Simbrief for fuel and flight planning. Using it was convenient and easy.
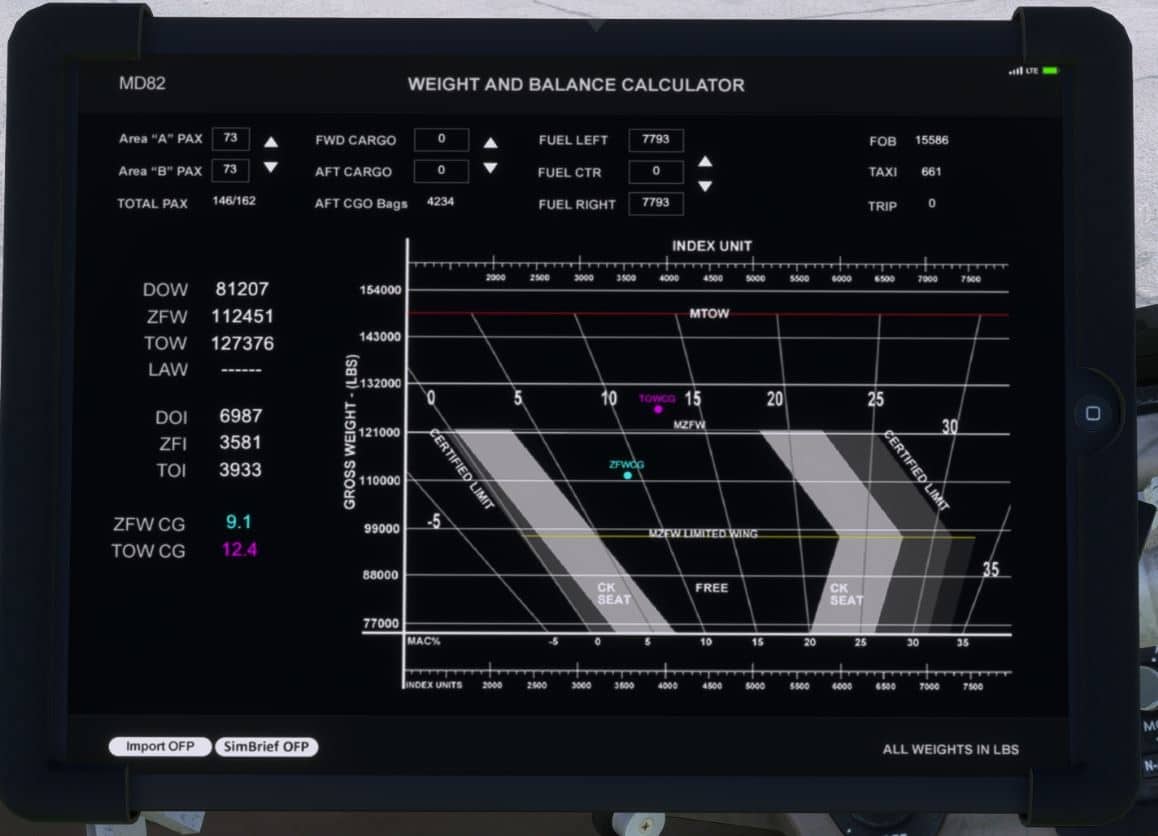
Going through the power up and testing routines and having the aircraft come to life one system at a time was very satisfying. All of the developer’s hard work with the audio and visual aspects of the cockpit made for a very immersive environment. With the aircraft now in a sufficient state of readiness I began loading fuel, passengers and cargo; a process greatly simplified using the EFB.
Next came inputting the flight plan and performance data into the FMS. If you are familiar with the Boeing FMS you will have little problem with the Honeywell system. Just as the EFB Simbrief combo made it a simple process to load the aircraft it also simplified the loading of the flight plan and performance initialization data into the FMS. For aircraft weights they are also attainable by observing the fuel quantity readouts on the centre instrument panel.
If you are up for a challenge you also have the ability to use the Canadian Marconi CMA-900 FMS instead. This also includes the PMS (Performance Management System). The system is more primitive than the Honeywell and does not have the same level of automation and control over the flight, especially VNAV. There is a section of the Conditional Procedures pdf devoted to programming these however after having read them I still had too many unanswered questions and so I felt that this system was better suited to those who were much more advanced than I.
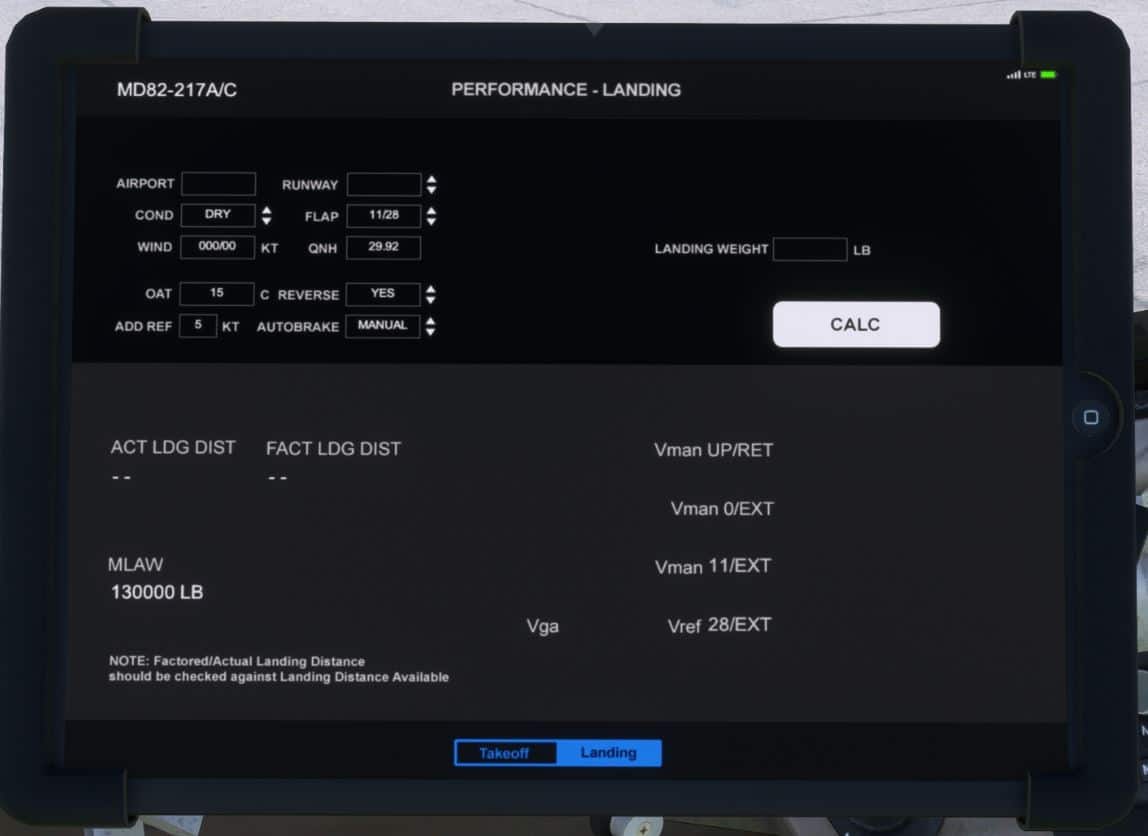
On to the settings for flaps, trim and takeoff speeds; this was done slightly different to what I was accustomed to with more modern aircraft. To simplify the process the EFB has two pages; weight & balance calculator and performance-takeoff or landing. The flap system on this aircraft allows for a variable flap setting between 0-13 and 15-24 or presets of 0, 11 and 15, you can enter one of the fixed values or “optimum” whereby it will make the determination of the best settings based on the inputs you provide. I chose to use flaps 11 as my hardware does not allow me the variable option.
For the take off speeds unlike newer aircraft where these speeds are determined from calculations made by the FMS you plug in the required data onto the performance-take off page and the speeds are calculated for you. With these determined you can then left click on the speed bugs on the airspeed indicator to set them.
Also different on this aircraft is how the trim, aka TOW CG, is set. The correct value is determined once again on the values you used on the weight & balance calculator page. Armed with this number you must manually set the longitudinal trim on the centre pedestal.
Pushing back and starting the engines I was now able to experience the underwhelming cockpit engine sounds I have read so much about. I came across one individual who stated that he believed the developer had made the conscious decision to set the sound level as if the pilot was wearing noise cancelling headsets thus significantly cutting engine noise to the level of being barely audible. I am not sure just how much louder they would be as the engines are mounted at the rear of the aircraft but from the comments I have read it does seem like it may have been the wrong decision. I to would have preferred them to be louder.
Getting past this sound issue the aircraft was very responsive, taxiing to the runway required little thrust to get underway or maintain a good ground speed. Taking off and climbing went very smoothly as it responded well to my manual inputs and then after engaging the autopilot had no problems following the flight plan. Cruise and descent went off without a hitch following both the LNAV and VNAV profiles programmed in the FMS.
Landing speed calculations were done via the EFB in a similar fashion to what was required for the take-off phase. Again once determined they had to be manually set on the airspeed indicator. Coming down into Newark I was able to bleed off airspeed with the speed brakes then with flaps deployed and gear down I captured the ILS for runway 22L. Hand flying the aircraft the final few miles to the runway I had to maintain my concentration as I guided the aircraft to touchdown. It definitely takes more effort than newer jet liners due to its older technology. Once on the ground it was quick to slow and easily taxi to the gate.
All in all a very pleasant flight however it did require a bit more of my attention during certain phases of the flight but nothing that wouldn’t be considered beyond the abilities of most sim pilots.
MD-83/88 Expansion
I installed the expansion pack to check out the differences between the variants. Note that you must have the MD-82 base pack installed prior to installing it.
As per the Simmarket sales page for the product here are the product highlights for the expansion pack.
Experience the higher loading capacity and the extended range operations of the MD-83 and MD-88 variants!
- JT8D-219 engines with specific and accurate flight dynamics.
- Additional fuel tanks and Aux Fuel Pump system for the MD-83, with accurate burning schedule.
- Automatic fuel balance system.
- Updated load manager tool for fuel/load and route planning.
- Updated MD-83 and MD-88 virtual cockpit, with specific MD-83 and MD-88 systems, instruments, and switches.
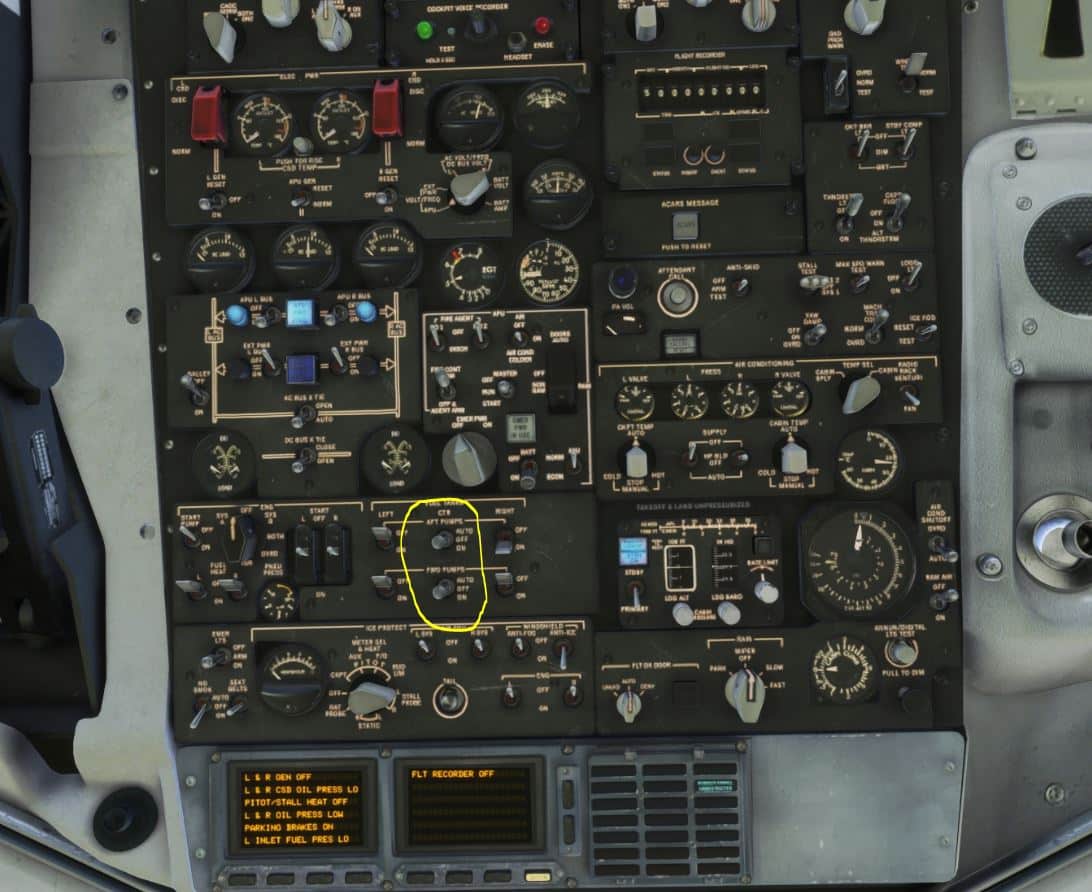
The majority of the differences between the base product MD-82 and this expansion MD-83/88 are subtle. There are a few minor visual changes in the cockpit that are required due to the additional fuel tanks and the aux fuel pump system but besides that the variants appear to be virtually identical. In the cockpit the only difference I saw was in the centre fuel tank switches as highlighted in the picture below. The big differences are under the hood so to speak. They come with the more powerful engines, larger fuel capacity, a higher MTOW and longer range. I made several flights with these variants taking full advantage of the longer range and increased capacity. Everything I said about the MD-82 series aircraft holds true for both the MD-83 and 88 variants. For anyone wondering why you might consider the expansion pack ask yourself why would you consider a 737-800 airframe over the 600?
Final Thoughts
Anyone who has flown in earlier versions of Microsoft Flight simulator or Lockheed Martin P3D you will undoubtedly be familiar with this developer and their history with this particular aircraft. I believe it is a labour of love for them and has become their niche aircraft. A great deal of effort has been put into the product and one can easily see that in every aspect of the aircraft. This is a complex simulation of a jet liner that does come with what seems to be a rather hefty price tag. That may make you think twice about hitting the purchase button but it is worth every penny and when you look at comparable products it is not that much more expensive considering the depth of system modelling.
| Pros | Cons |
| ➢ Very immersive product that will ensure many hours of enjoyable flying time ➢ Extremely customizable allowing it to meet the needs of every experience level | ➢ The addition of a tutorial would greatly assist with the learning curve for the novice pilot ➢ Cockpit engine sounds muted ➢ Price tag may seem high to some ➢ Could include more liveries as part of the base pack ➢ Integrating the EFB with Navigraph charts would be a nice feature |
| Purchase | Test System |
| simMarket.com Developer: Leonardo Software House SRL Price: Base product 75.00 EUR Expansion pack 25.00 EUR (+tax EU customers) | Ryzen 5 5600X, ASUS TUF X570-Plus MB, 1 TB NVMe SSD, 32Gb DDR4 RAM, ASUS RTX 3060 OC w/12Gb VRAM, Win 11, Track IR, FSLTL AI traffic, MSFS graphics settings to Ultra. |


[…] Original von Rick Desjardins auf simflight.com […]
[…] Original von Rick Desjardins auf simflight.com […]