Review by Sebastien B.
Introduction
In the ever-evolving world of aviation, advancements in technology continue to redefine the way pilots interact with and control aircraft. One such innovation that has caught the attention of aviation enthusiasts and professionals alike is the miniCockpit – miniFCU, a compact yet powerful hardware device designed to enhance flight control experiences. This review explores the features, capabilities, and overall performance of this remarkable device.
Unboxing
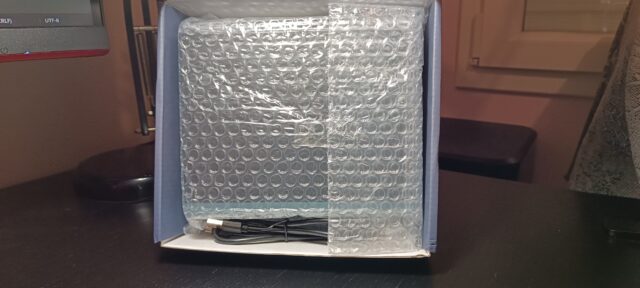
The miniFCU device box was shipping in a plastic bag, with an interior protection made with an additional layer of air bubbles.
In my case, the box was delivered with a slight damage on one side due to shipping hazards. The cardboard of the box was slightly dented by 5mm but the cardboard absorbed the shock well since almost no deformation is visible in the box. Fortunately, the device has one layer more of protection with a second air bubble layer wrapped around it, inside the box. Informed of this event, the manufacturer will evaluate a potential upgrade of the shipping protection for the customers of the retail and final version.
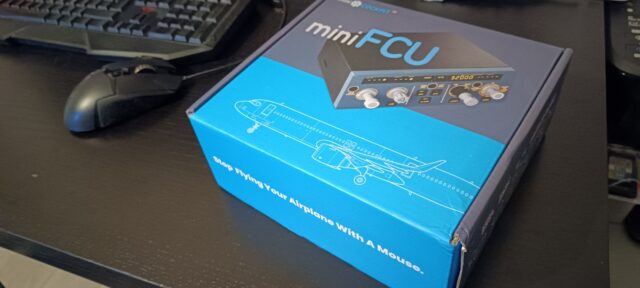
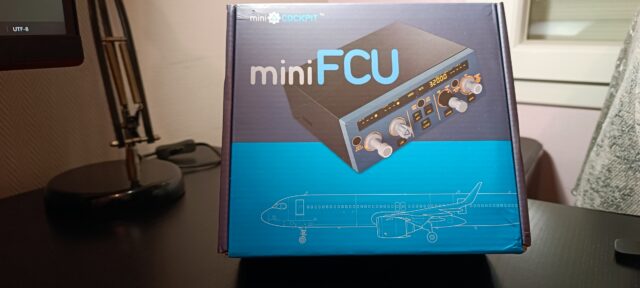
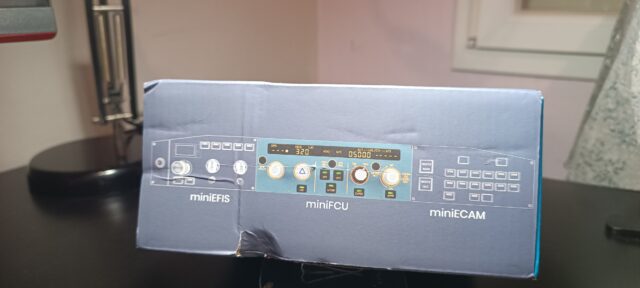

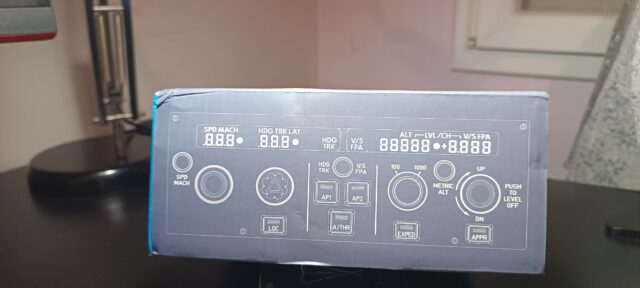
The side of the box reveals the future units that will be developed later: miniEFIS, and miniECAM which can connect for combined use with the miniFCU. The opposite side of the box displays the FCU button layout and LCD layout.
When the box is opened, the faceplate directly informs the user that it is suggested to download the required user guide and Data Link software. A QR code added next to it will easily direct you to the right page.
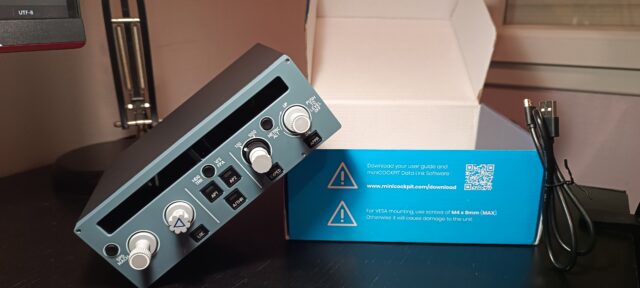

Second information here, about the compatibility for mounting the unit on a standard VESA support (100 x 100mm), you can use screws with a maximum size of M4 x 8mm.
Contents shipped in the box :
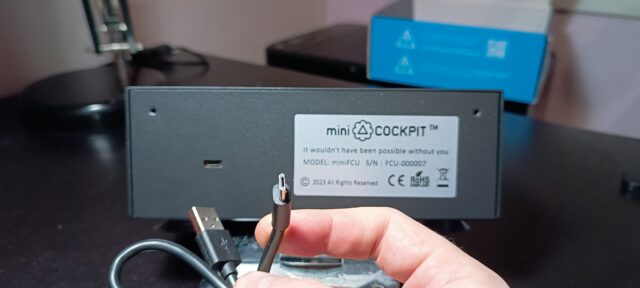
- miniFCU unit: 591g, 18.5 x 14.7 x 6.5 cm ( or weight :1 lb 4.8 oz, and size 7.28 x 5.79 x 2.56 in)
- USB cable: 1 male type A USB connector for the PC, 1 micro-USB male connector, to be plugged into the rear side of the FCU box. Total length: 53.5cm (21.0 in) in the initial Kickstarter wave of products. Next wave pre-ordered in 2024 will now have a micro-USB cable of 1.50m length (59.0 in).
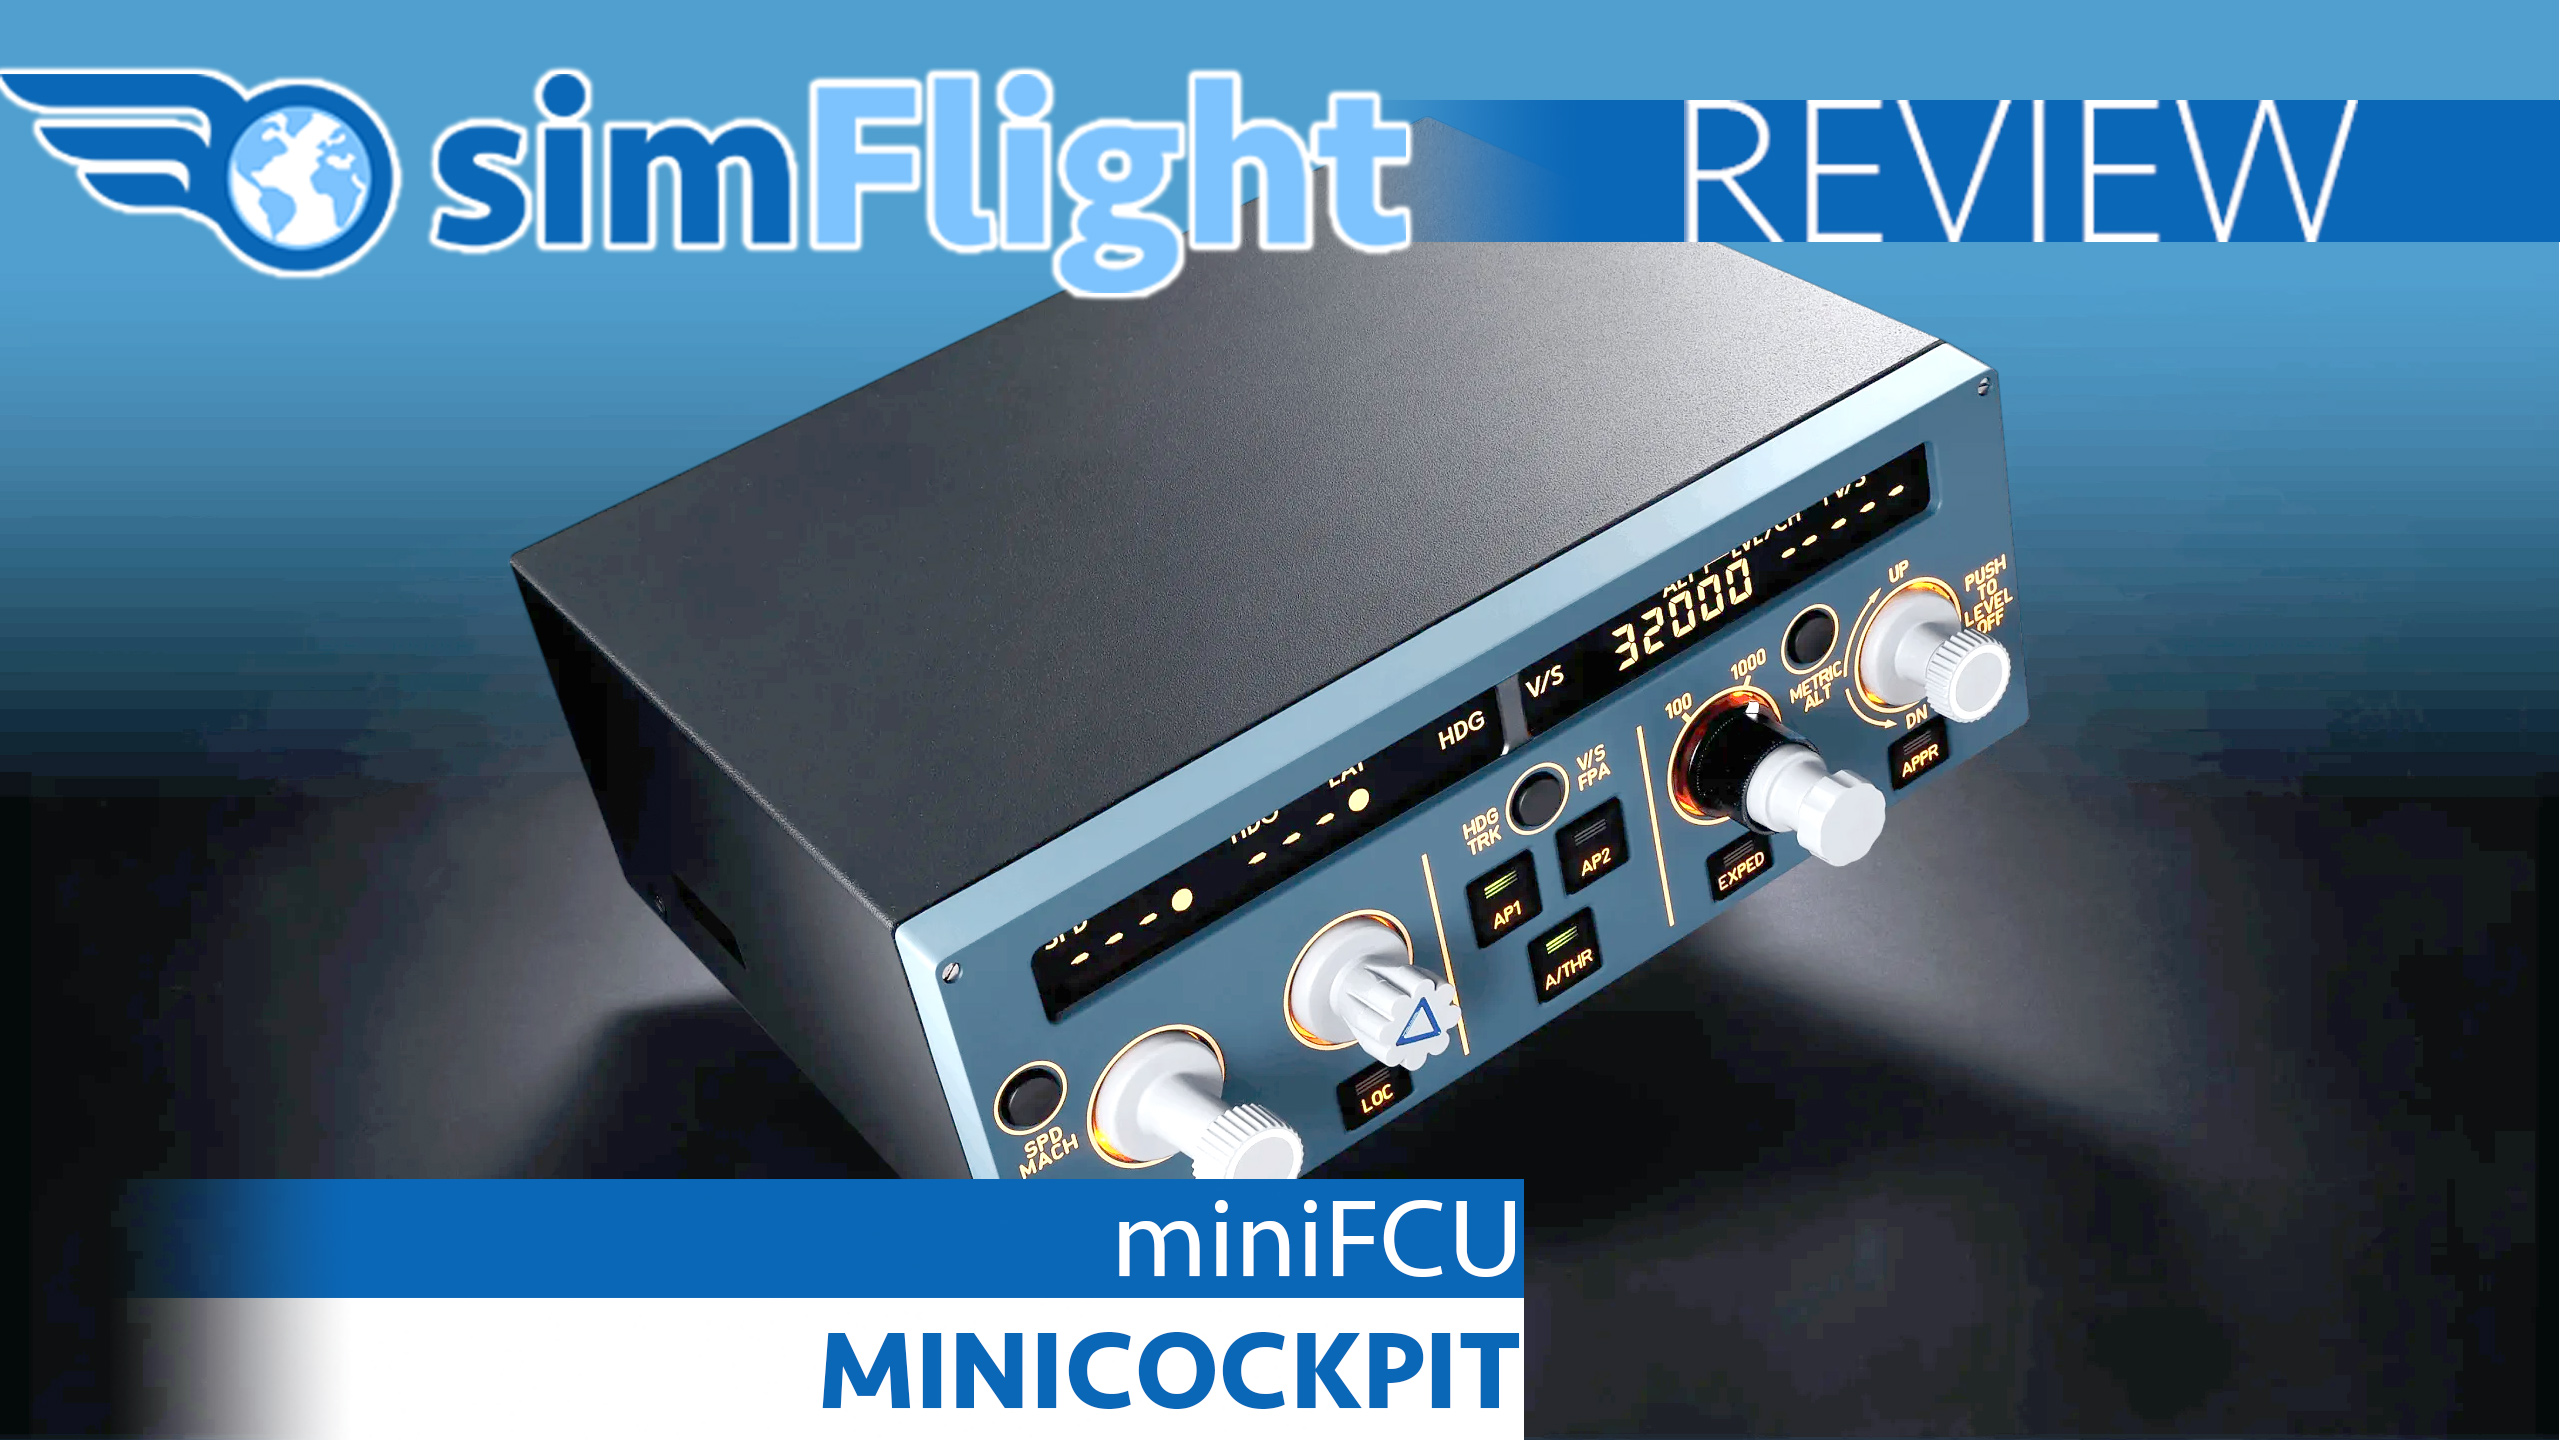
The device is built in a black painted metal case, with a blue plastic front panel.
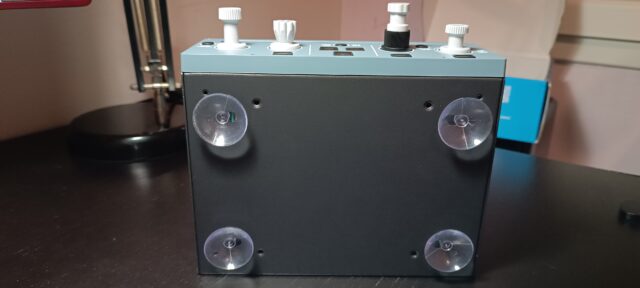
On the underside, we find 4 suction cups of 3cm in diameter, 4 screw holes following a square layout of 10cm x 10cm.
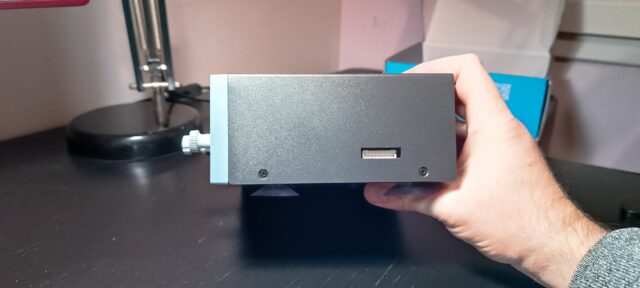
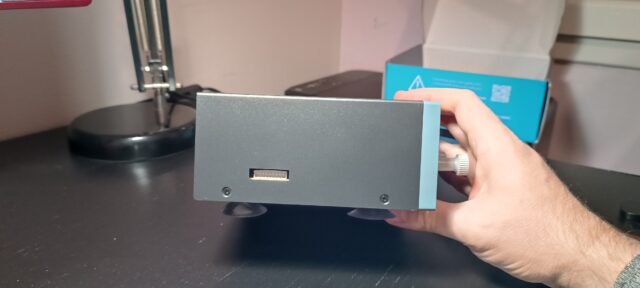
And on the face of the sides, we get: 1 connector on each side, for future miniEFIS on the left, and for miniECAM on the right.
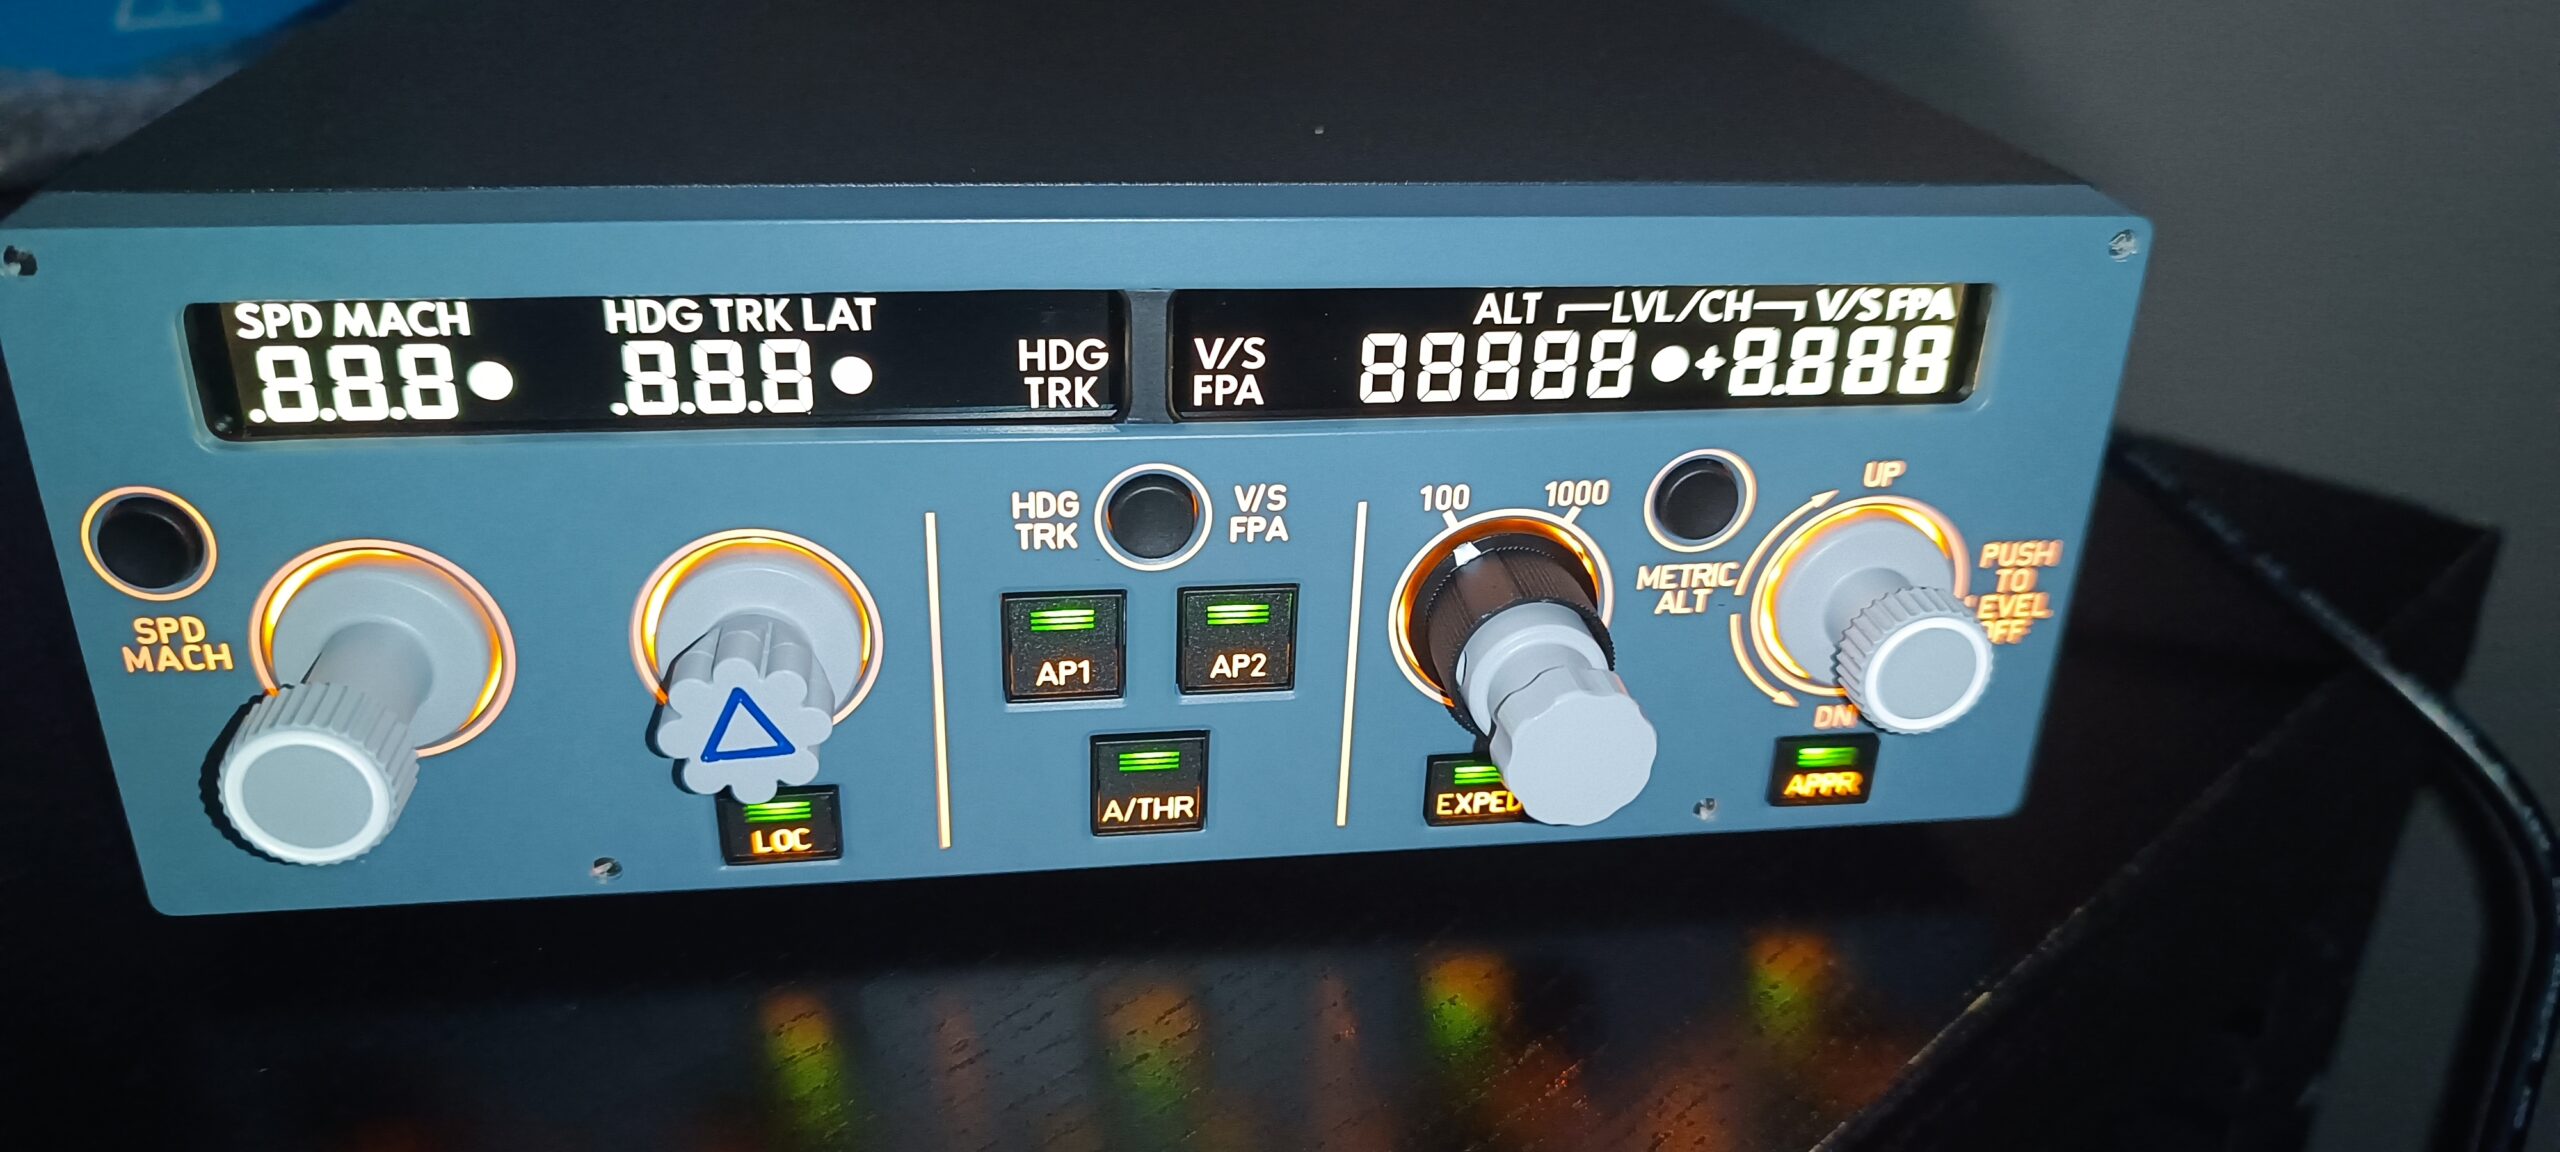
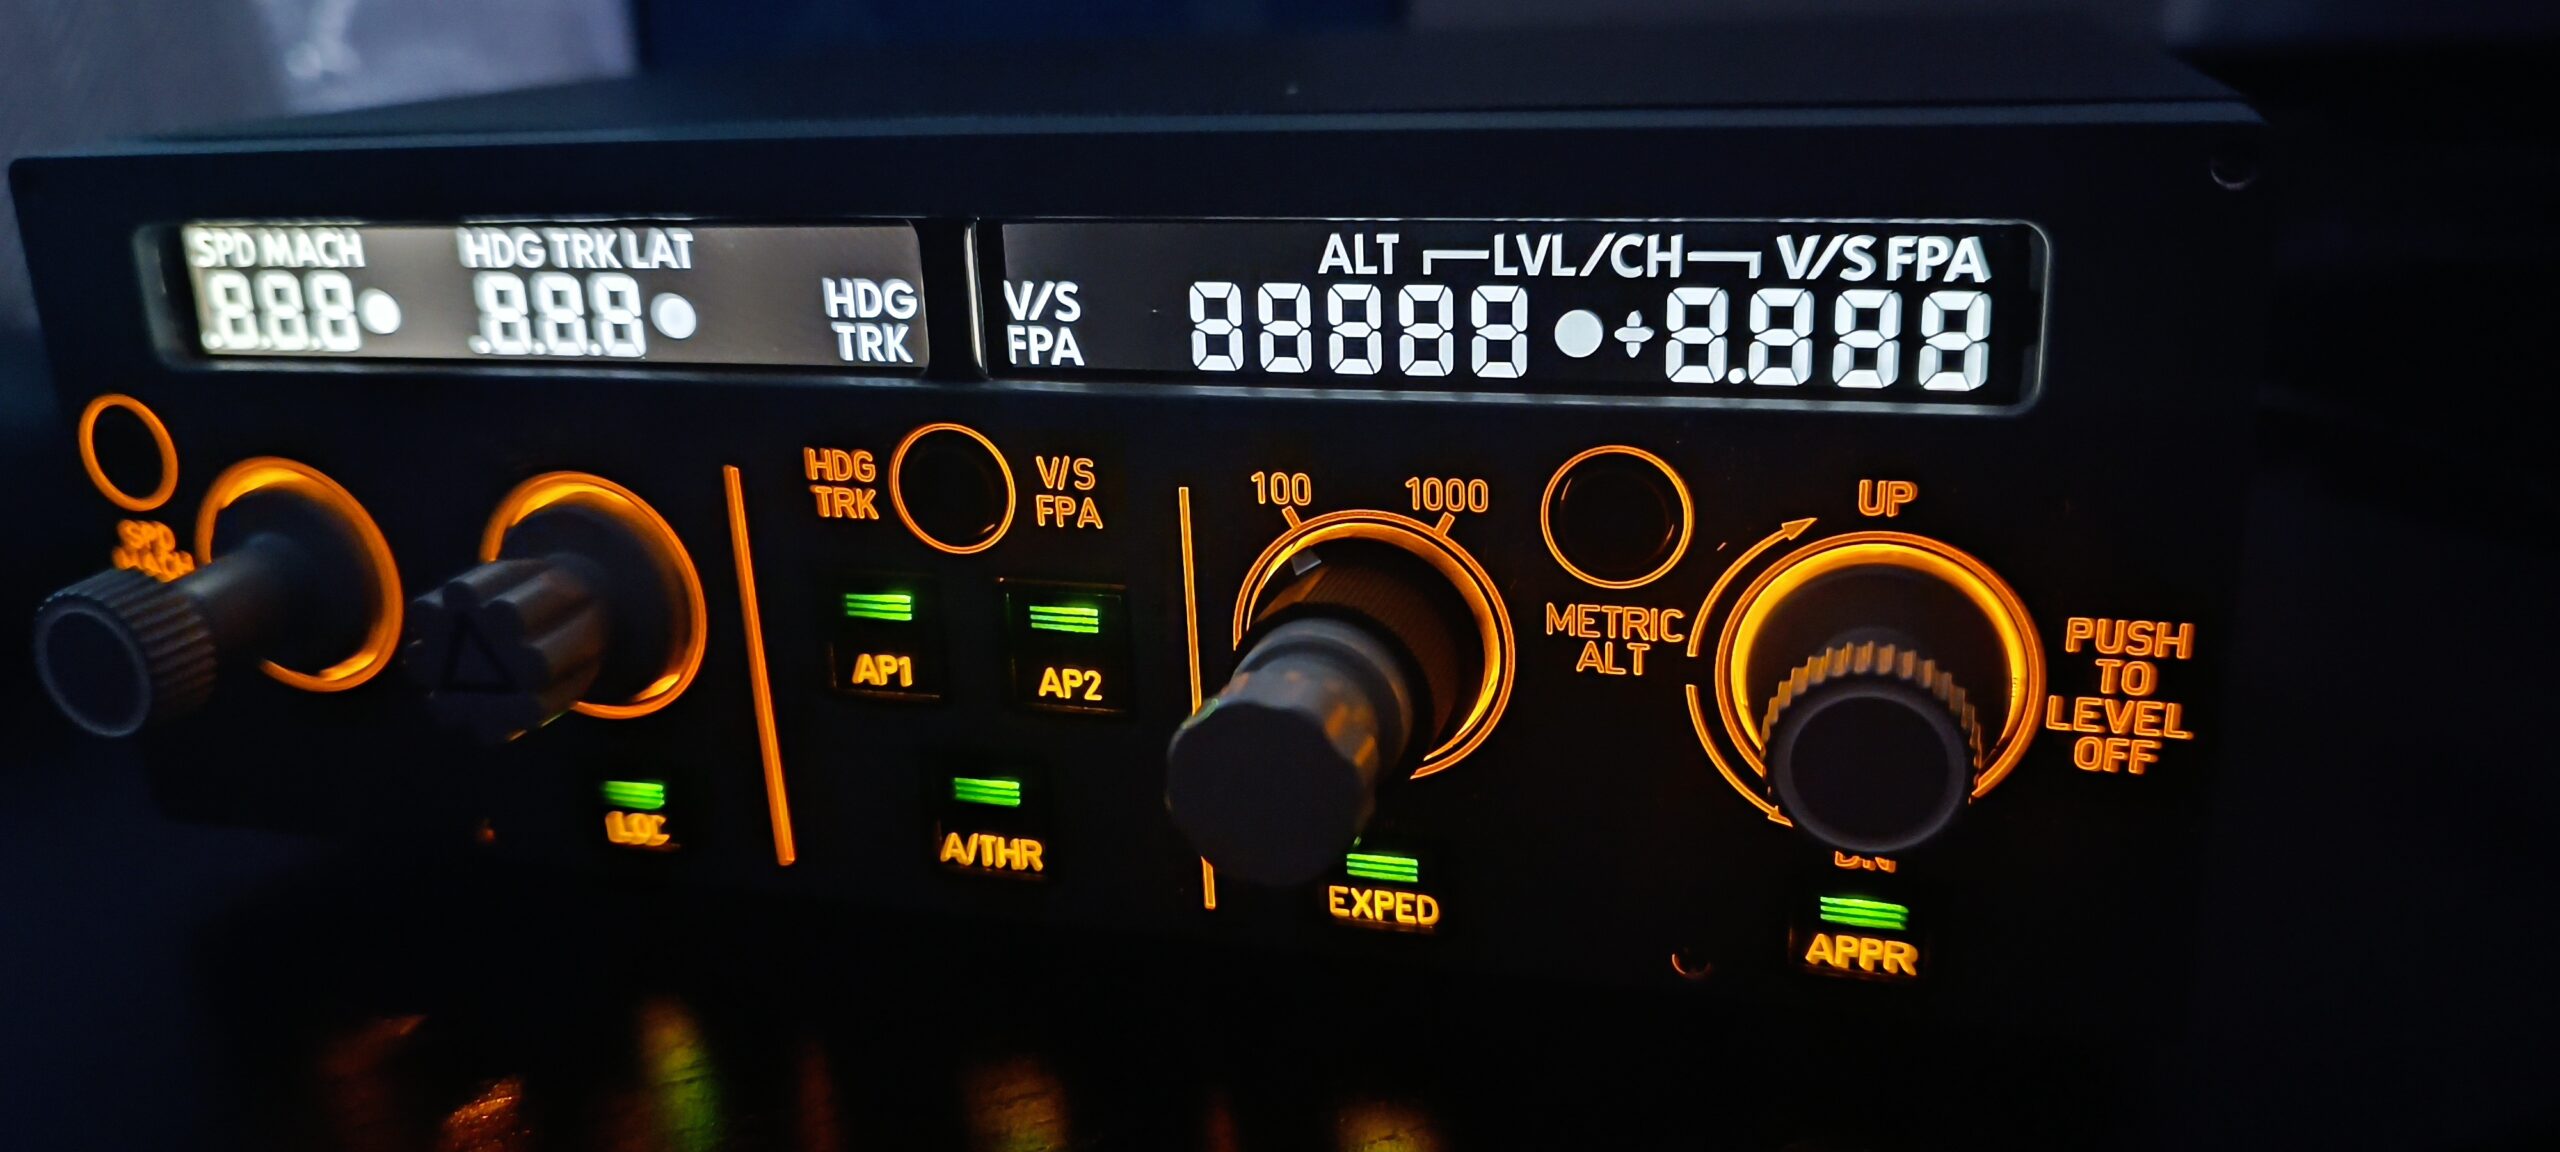
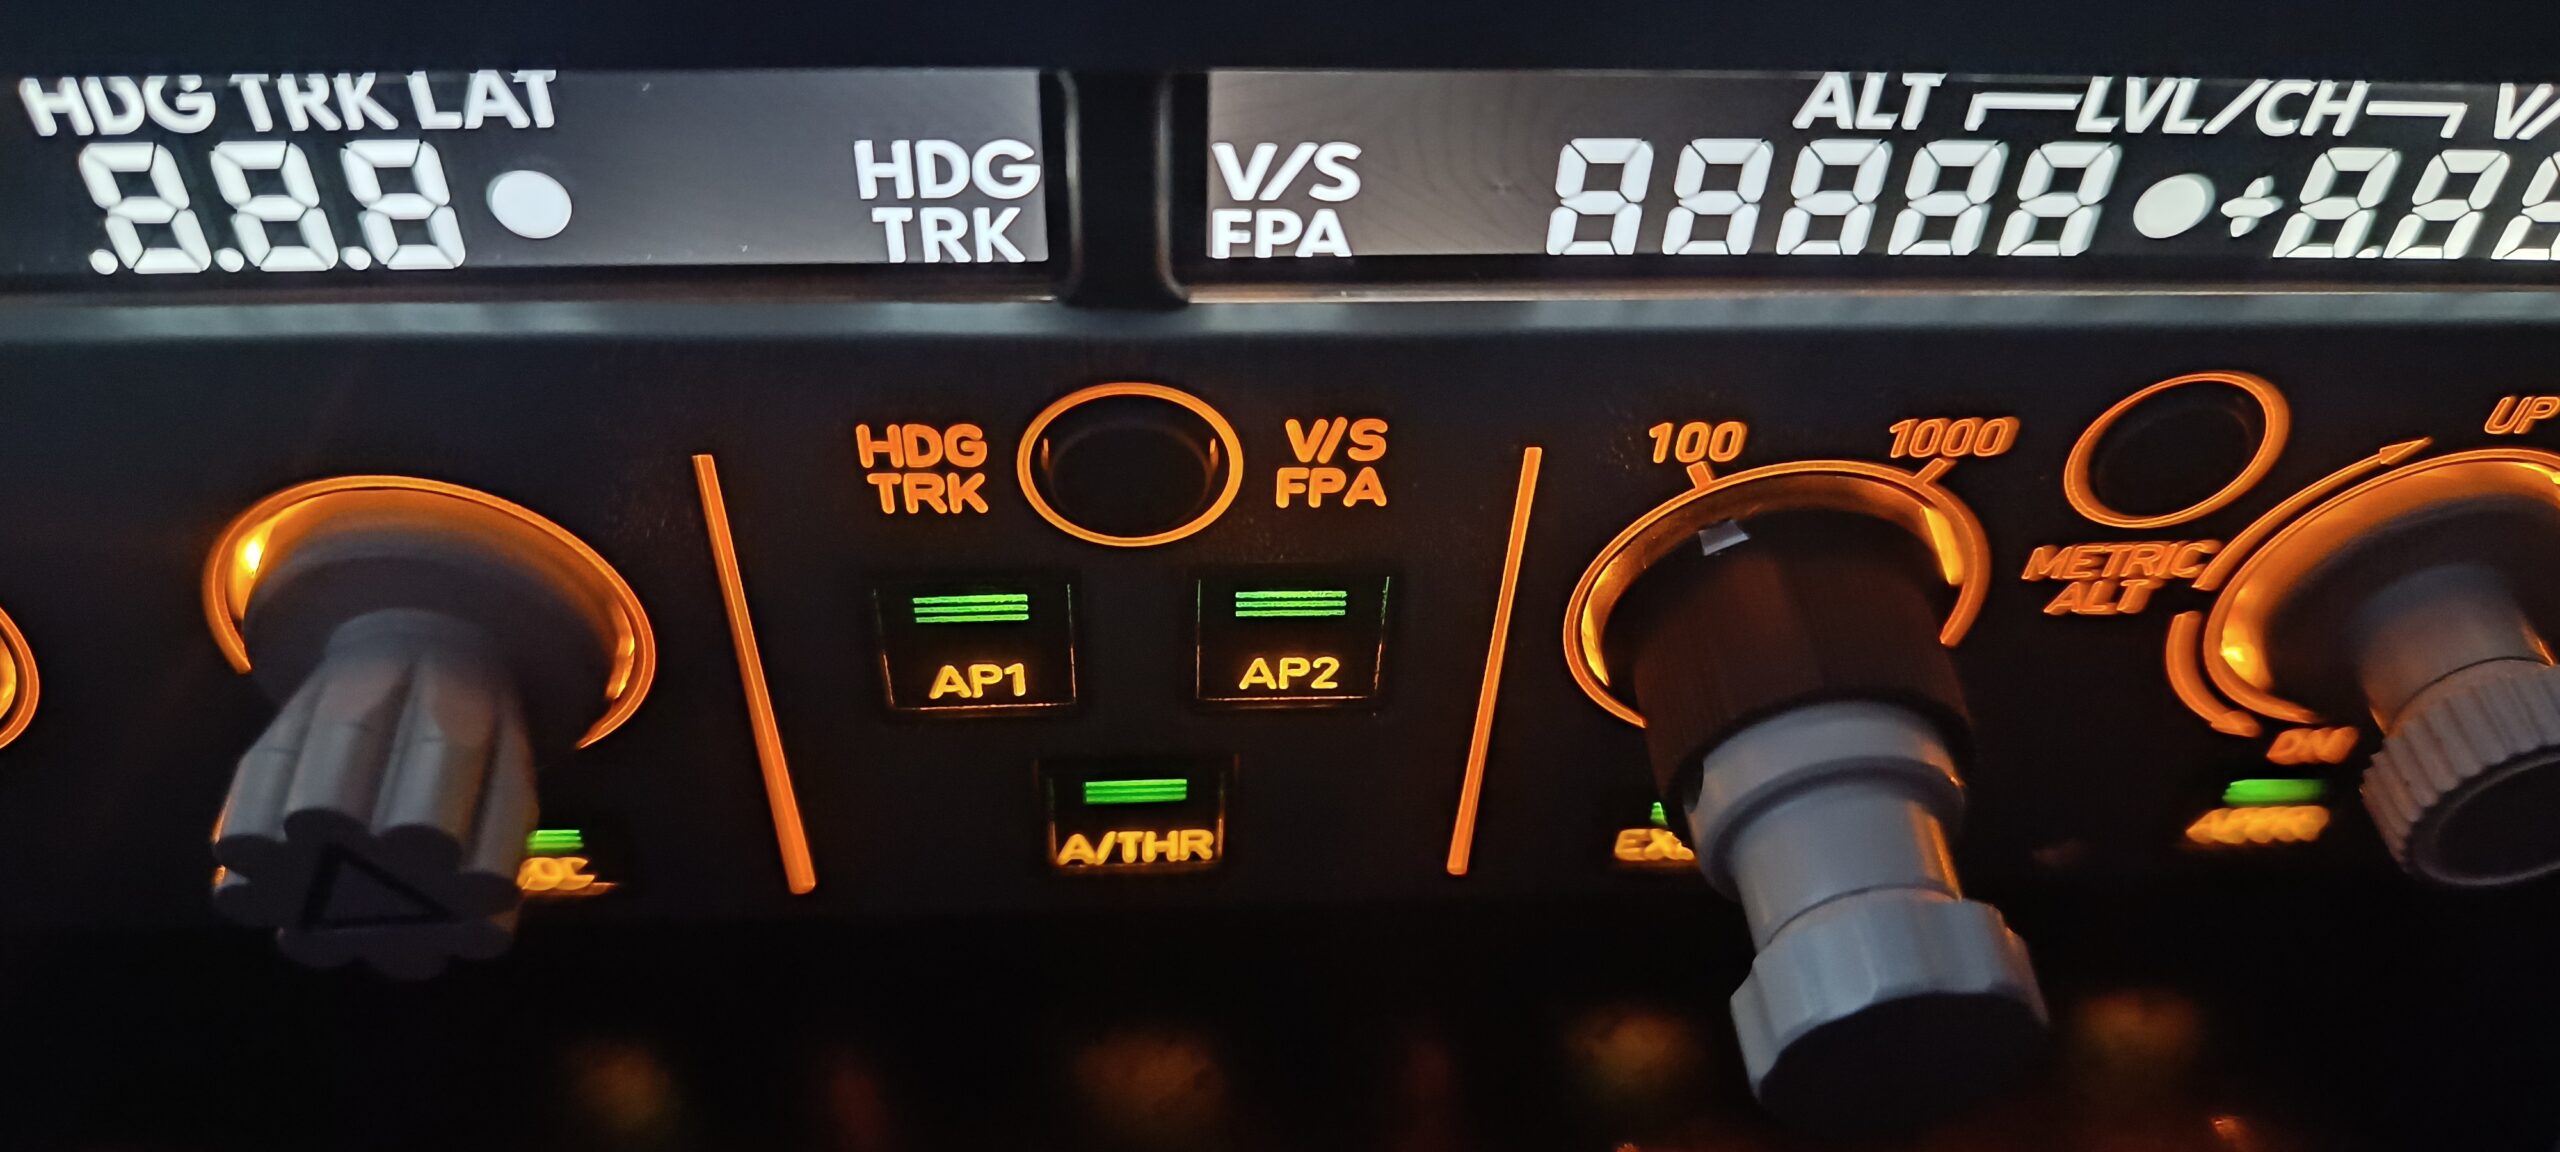
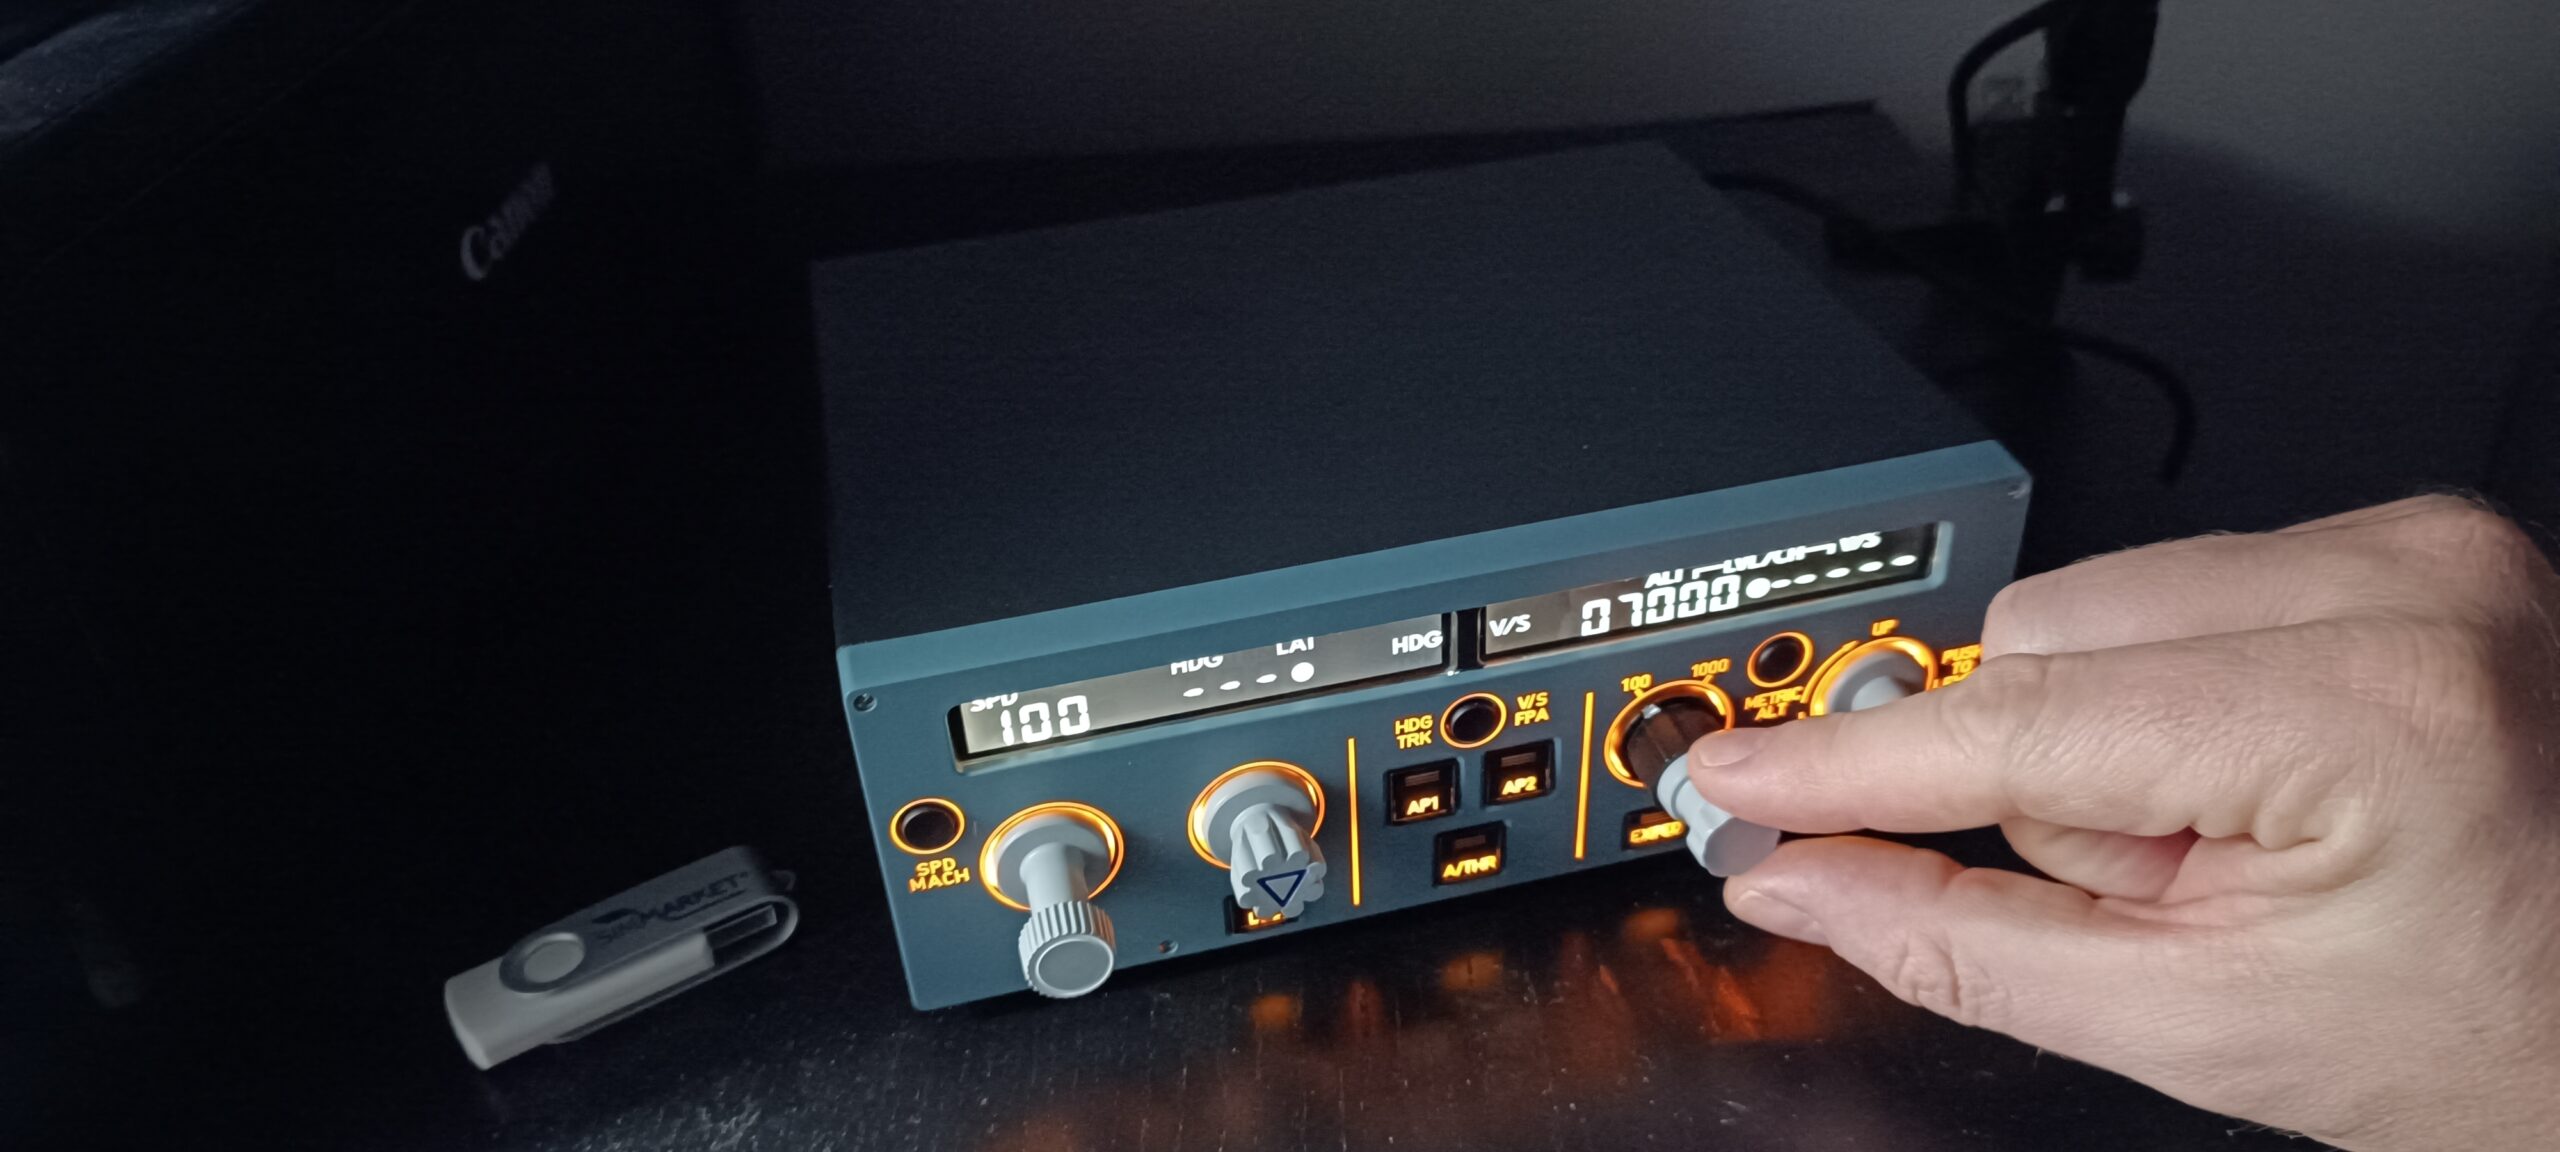
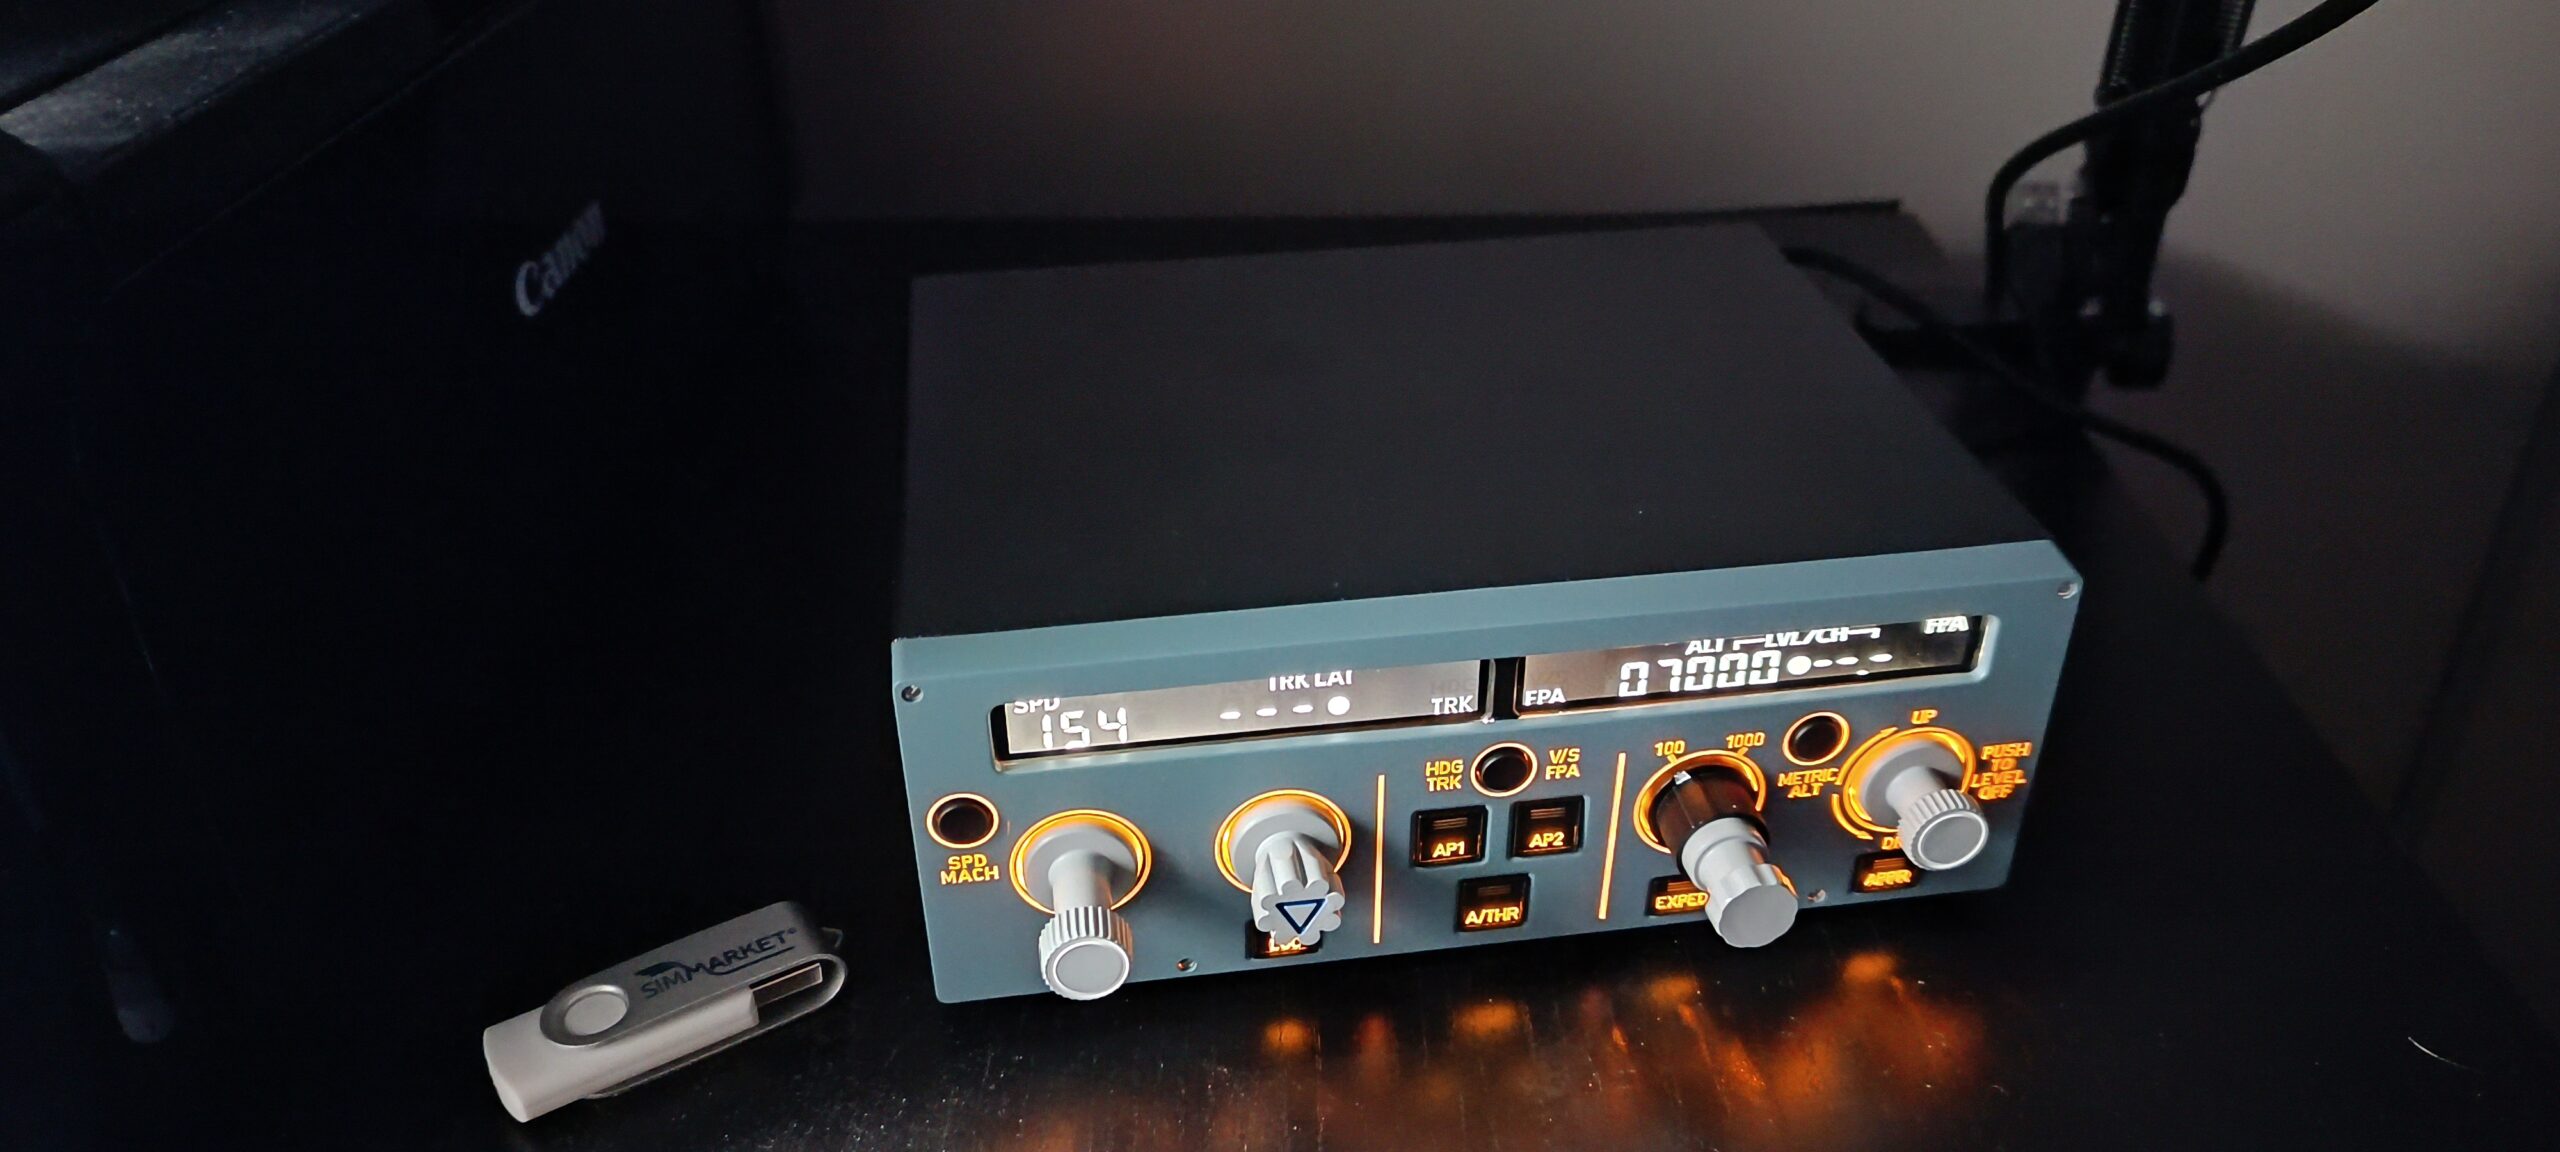
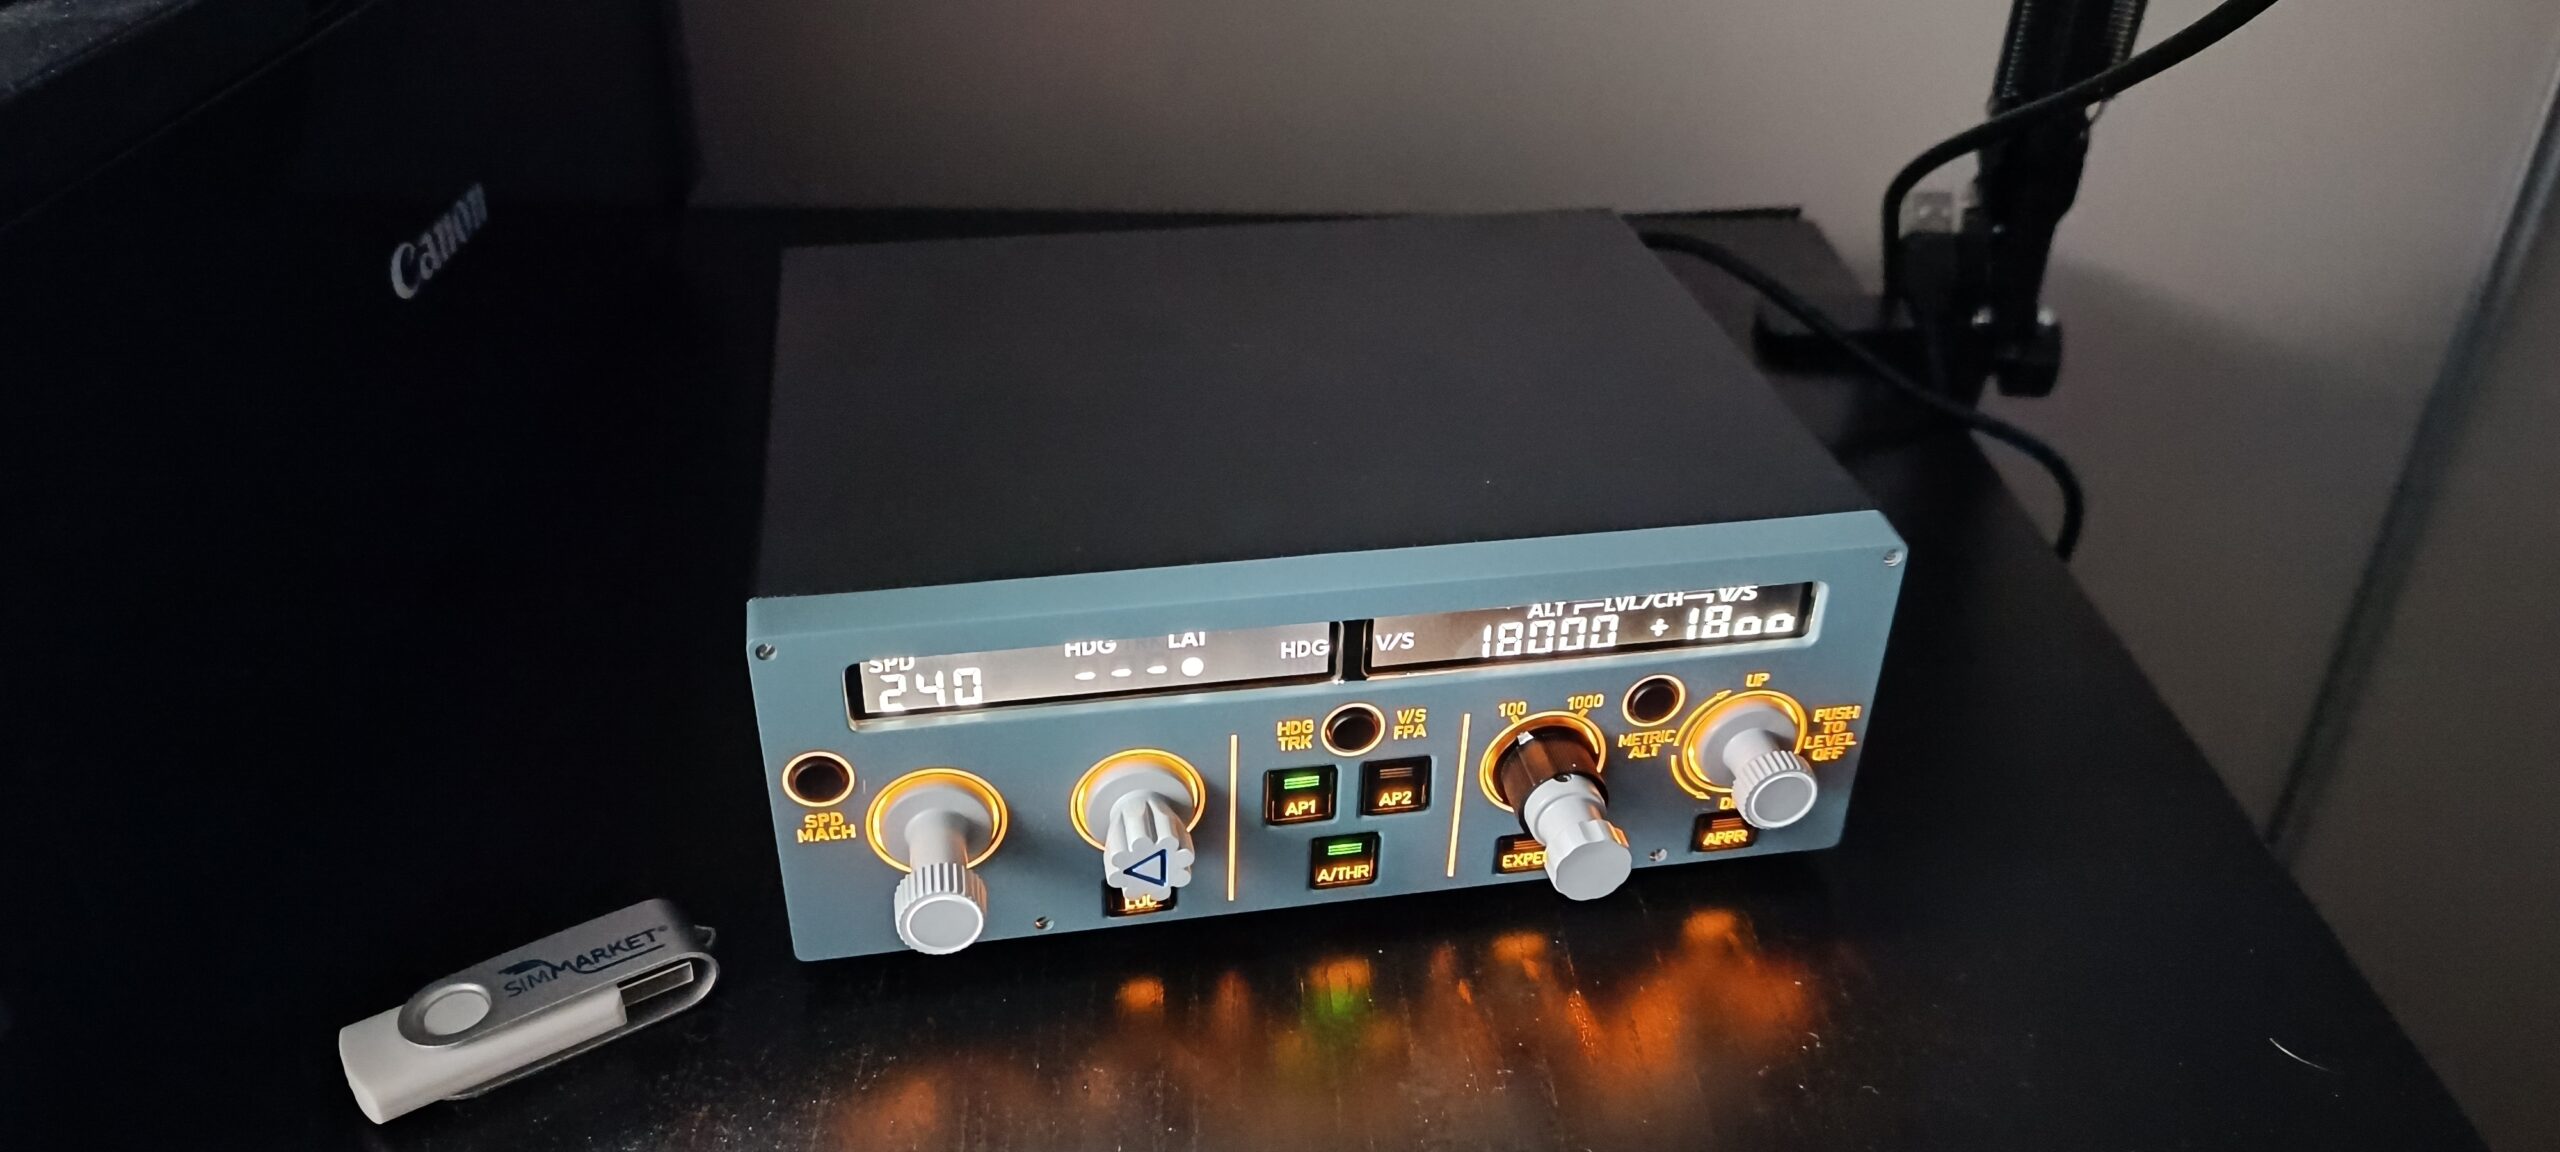
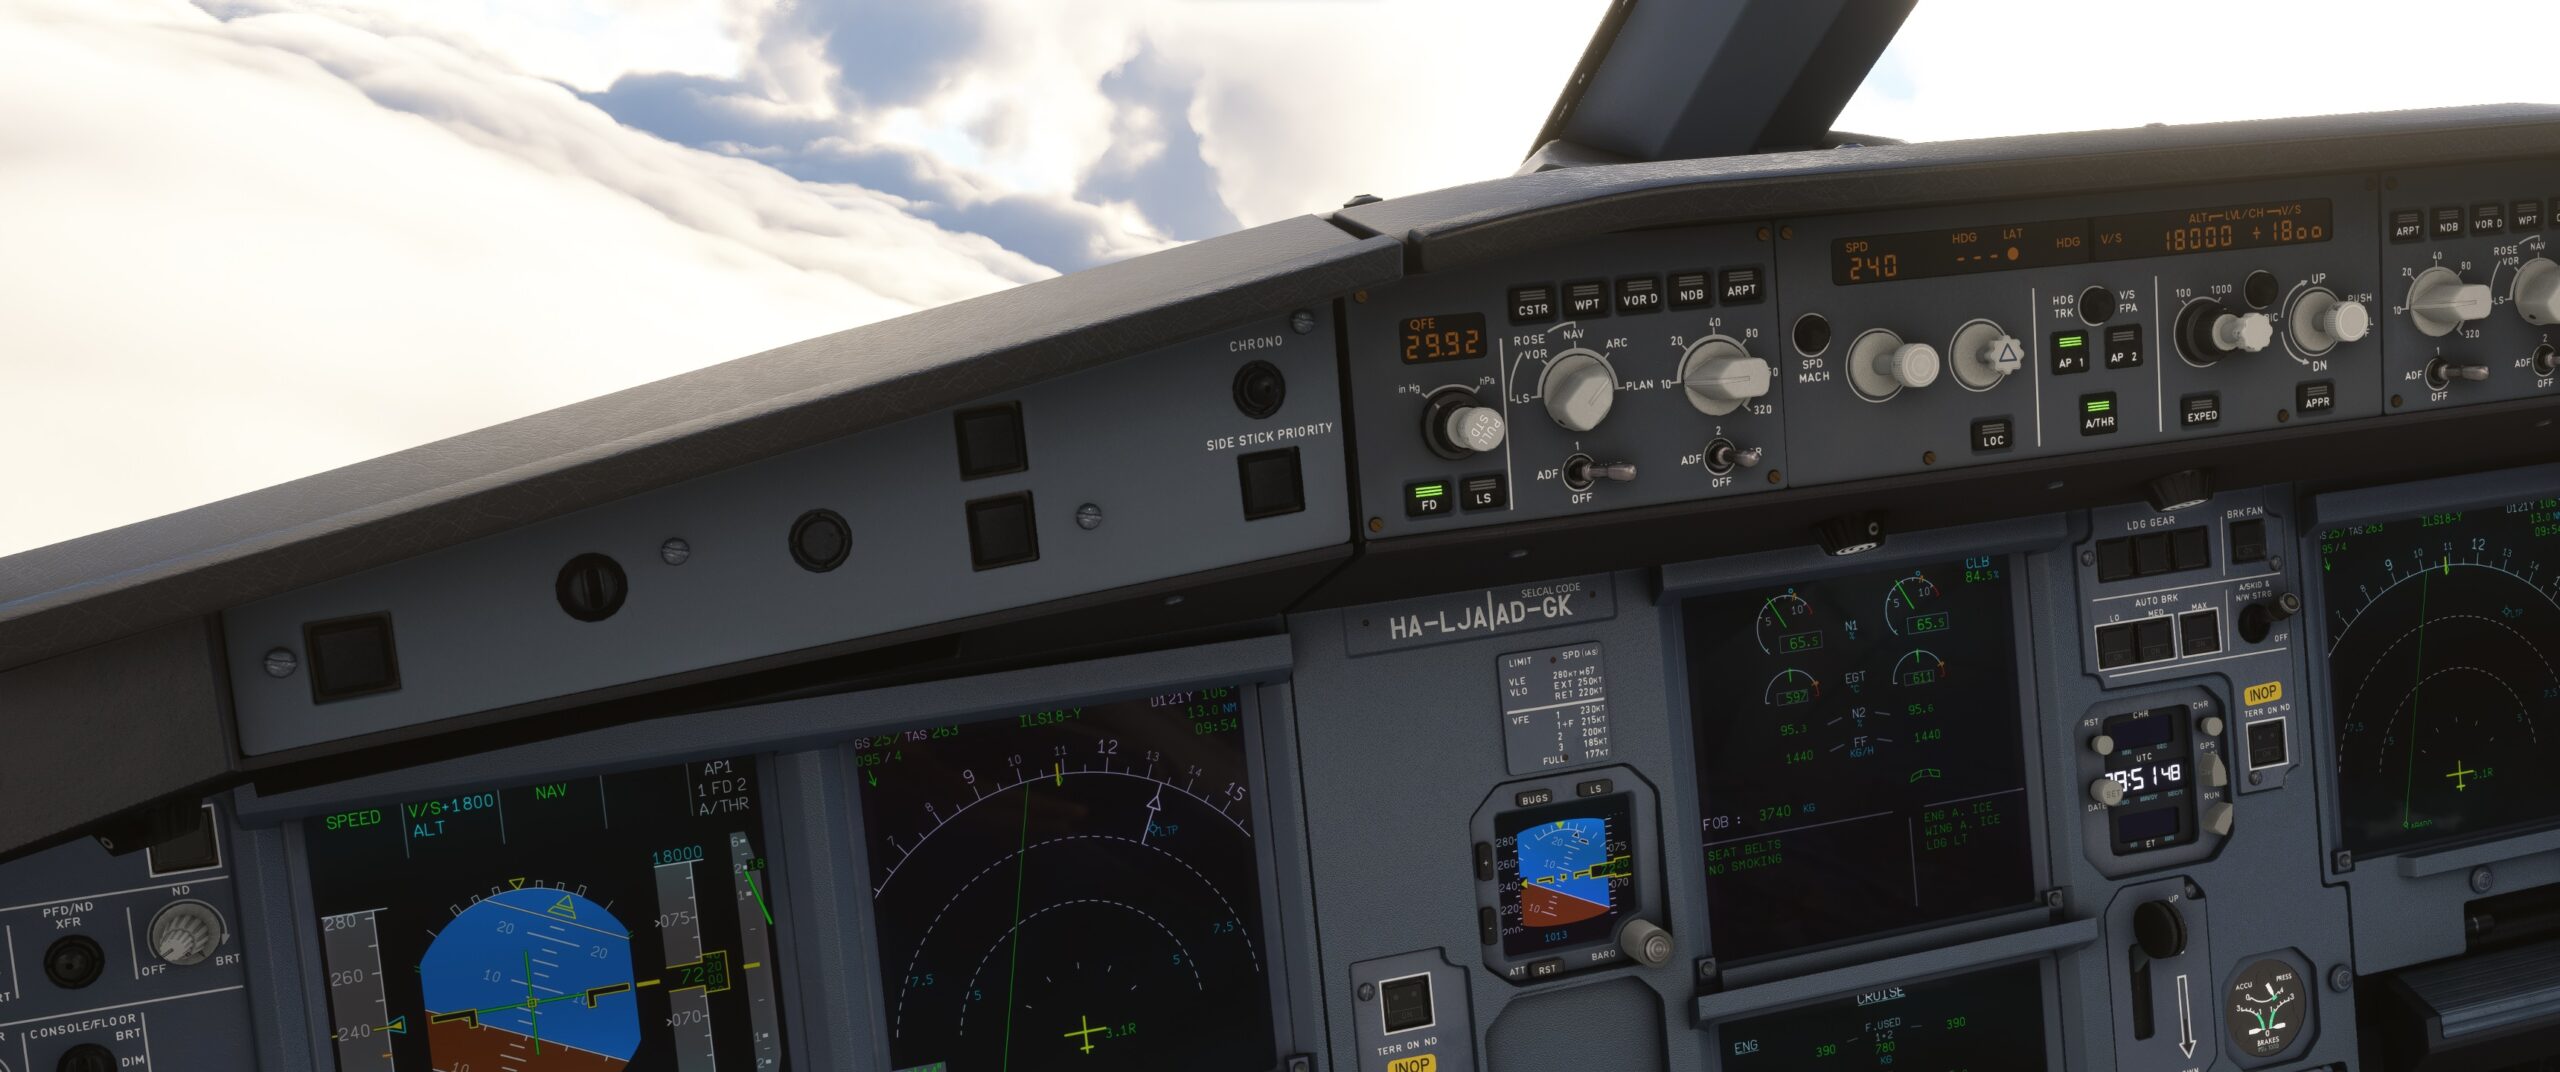
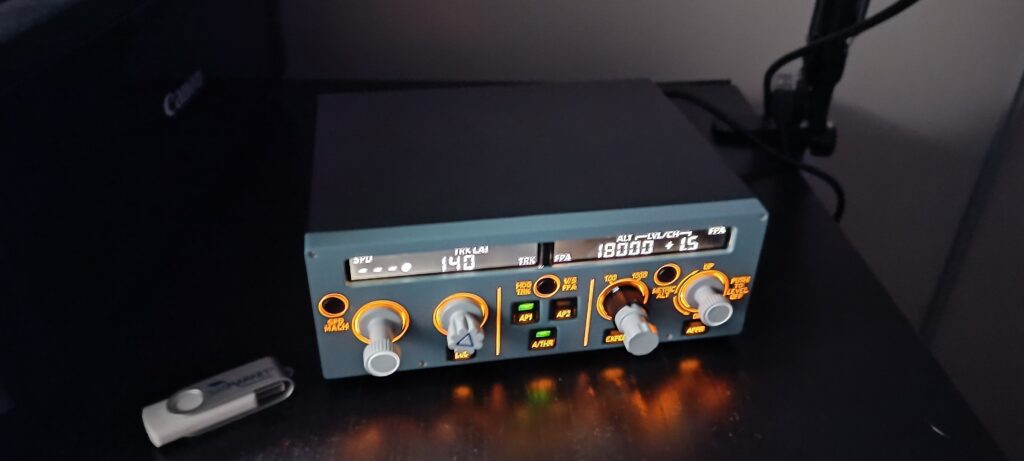
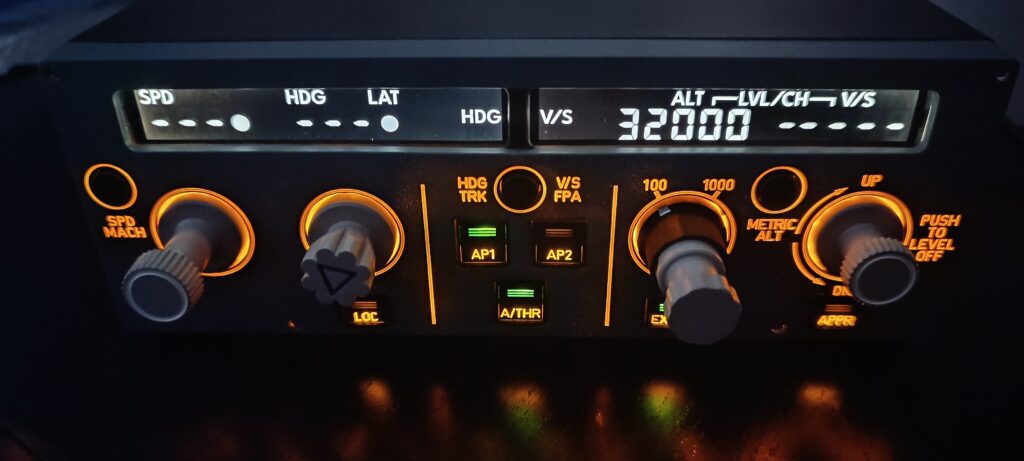
Front panel and plastic controls feature :
- 3 push button switches to select SPD or MACH, HRG/TRK or V/S FPA, and METRIC ALT or IMPERIAL ALT.
- 6 push buttons with backlit LEDs for LOC, AP1, AP2, A/THR, EXPED and APPR
- 4 rotary knobs, spring-loaded to activate the PUSH/PULL functions, with notched rotation for each, plus an additional 100/1000 rotary selector for the altitude rotary knob selector.
All push buttons have a short press stroke, and make a small confirmation clicking noise. Their physics to the touch is pleasant both at the flush where the buttons are held well in position giving this impression of quality of integration, well fixed, and of durability.
On the letters engraved directly on the front panel, you can feel their engraving in the thickness when passing your finger, which should also guarantee good durability over time. The inscriptions on the push buttons, on the other hand, feel smooth without relief.
Installing
Installing the miniCockpit – miniFCU is a straightforward process that begins with connecting the device using the USB cable provided in the box. However, the initial setup does come with a limitation – the USB cable’s length may pose challenges, particularly if your PC case is on the ground. Even utilizing the front panel USB slots on your PC won’t be sufficient to position the miniFCU conveniently in front of you. To overcome this hurdle, users may find it necessary to acquire a separate expansion cable. It’s important to note that the original USB cable features a micro-USB pin behind the device. Your existing USB-c cables will remain useless in this case. You need either a longer micro-USB cable, or another cable of this kind USB-A male / USB-A female. Here again, we have to remind that the manufacturer already took note of the first users feedback and will provide now a much longer cable (1.50m) for all pre-orders paid in 2024. Only the first users who participated in the initial Kickstarter launch campaign have received the short cable of 55cm long only.
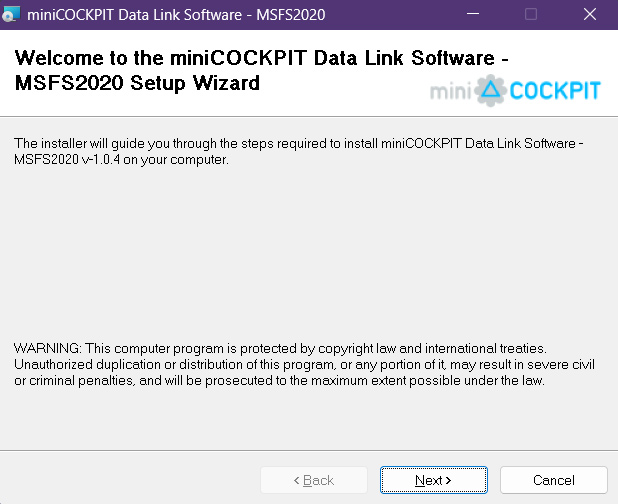
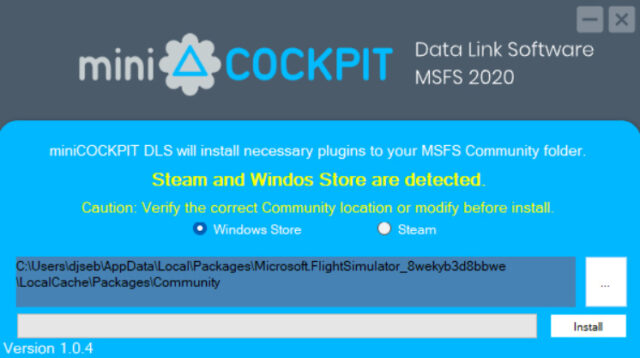
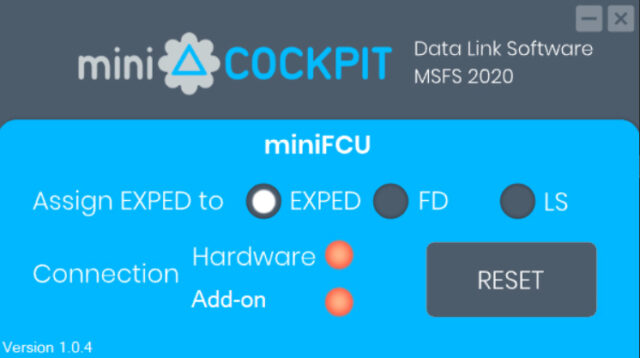
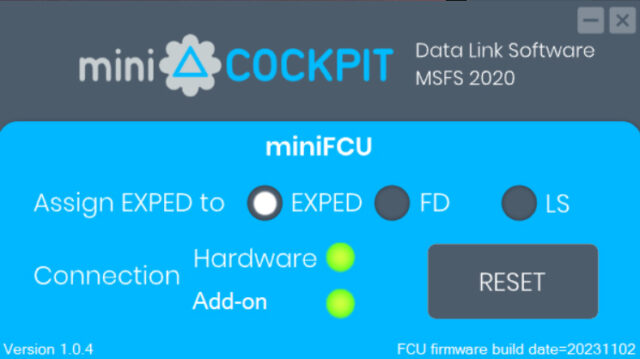
Once the hardware is appropriately positioned, the next step involves downloading the Data Link Software, a petite 770 Kb file, from the miniCockpit website. This software is tailored for use with Microsoft Flight Simulator and facilitates an automatic setup. It intuitively detects the installation directory of MSFS, eliminating the need for users to navigate through their file system manually. The software interface, upon startup, initially displays red icons, swiftly transitioning to green to indicate correct hardware connection and power. The second icon, labeled “Add-on,” turns green when a compatible aircraft is loaded in the simulator. This light software has already been updated several times by miniCockpit since November, we can already download the version 1.0.7 and that shows the particular attention to customer care and software updates that miniCockpit intends to deploy to support their new software. And that’s important to note about a new company landing in the flight simulation market. Last note about this Data Link Software, its window include a selection for “assigning EXPED to EXPED, FD and LS”. Under the altitude rotary knob on the miniFCU, there’s a physical button labelled EXPED. With this selection menu of the software, you can use this button for FD and LS buttons of your Airbus systems instead. This way, without navigating in 3D in your virtual cockpit or using a keyboard hot key, you can switch on/off the Flight Director, or Activate the Landing System during the final approach with just a click with a finger on your autopilot controls as a real flight crew would do.
If you have a setup with a fixed support for your miniFCU, including screws in the VESA format 100x100mm, you will have the best solution to avoid the unit to slide on your desk especially when you push or pull the knobs. Applying even a normal force of your hands could make move a bit the unit if you don’t pay attention to handle it with enough care. I guess that most users will go the easiest way : without fixed support. And in this case, the stability of your miniFCU will rely on the 4 suction cups located below so it can stay on the desk during the whole flight. If you manipulate it in normal conditions with a standard strength, the device should stay in its position without problem. There are standard suction cups though, not of the kind that you find on some GPS holder for car that have an additional control to get it sucked even stronger to the wind shield. So when you press the unit on the board of your desk, that’s the maximum of suction that you will get. Do not expect it to resist your movements if you impact it with more strength than necessary for the controls handling.
In essence, the installation process for the miniCockpit – miniFCU is user-friendly, complemented by the device’s lightweight and compact design. The only limitation arises from the cable length, which can be mitigated by incorporating a separate USB expansion cable, or a longer micro-USB cable that you may have already at home. The software installation is seamless, offering both novice and advanced users a hassle-free experience, with automatic detection of the MSFS directory saving time and effort. Overall, the installation process aligns with the device’s promise of simplicity and ease of use.
Once your unit is set up and powered, here is what you get : miniFCU displays and the buttons confirm they are working, and the backlit effects by night are already producing many excitement to the virtual pilot, particularly when it’s a first time to use a cockpit replica device for flight simulation ! It looks really awesome and so close to the real one, it’s just smaller. When you launch the flight simulator and you are ready to fly, the miniCockpit Data Link Software will turn all icons to green if both hardware and software are ready for use.
Compatibility with aircraft and modules
As of today, the compatible aircraft list for Microsoft Flight Simulator 2020 includes :
- FlyByWire A32NX, the most recommended by the manufacturer
- the MSFS Default A320,
- Headwind A338X/A339X
- and with limitations the Fenix A320ceo. Controls are working but no digits will display accurately due to the lack of access to the add-on code and the communication with Fenix team has not been successful.
The virtual pilots flying with X-Plane 11/12, will be able to use their miniFCU to control the following airliners : - Toliss A319/320/321/340 series,
- FlightFactor A320,
- Default A330 (X-Plane 12),
- and Jardesign A320.
More recently, miniCockpit team announced that they support now “customisable controller applications” with Mobiflight and SPAD.neXt.
Mobiflight is an open-source software designed for flight simulator enthusiasts and home cockpit builders. It is specifically developed to work with Microsoft Flight Simulator (MSFS), X-Plane, and other popular flight simulation platforms. Mobiflight allows users to interface physical hardware, such as buttons, switches, encoders, and LEDs, with their flight simulator software. It enables the configuration of input and output devices, allowing users to create custom control panels or cockpit setups that closely resemble those found in real aircraft. Mobiflight supports various input/output boards, including Arduino-based boards, for connecting and controlling the physical components.
SPAD.neXt is a software similar to Mobiflight, designed for flight simulator enthusiasts and home cockpit builders. SPAD.neXt allows users to interface physical hardware with their flight simulation software. However, SPAD.neXt is known for its extensive features and capabilities, providing a comprehensive solution for creating custom cockpit configurations. Advanced scripting capabilities and an extensive library of predefined profiles for various aircraft, allow both kind of users, either to create complex and dynamic interactions between hardware and software or to make it easier for users to set up their hardware for specific planes without extensive manual configuration.
More aircraft add-ons are in the watchlist of miniCockpit team but their actual implementation is subject to demand and workload:
- FSLabs A320 P3D
- Latin VFR A320/A330 MSFS
- Aerosoft A330 MSFS
Managed / Selected Modes support
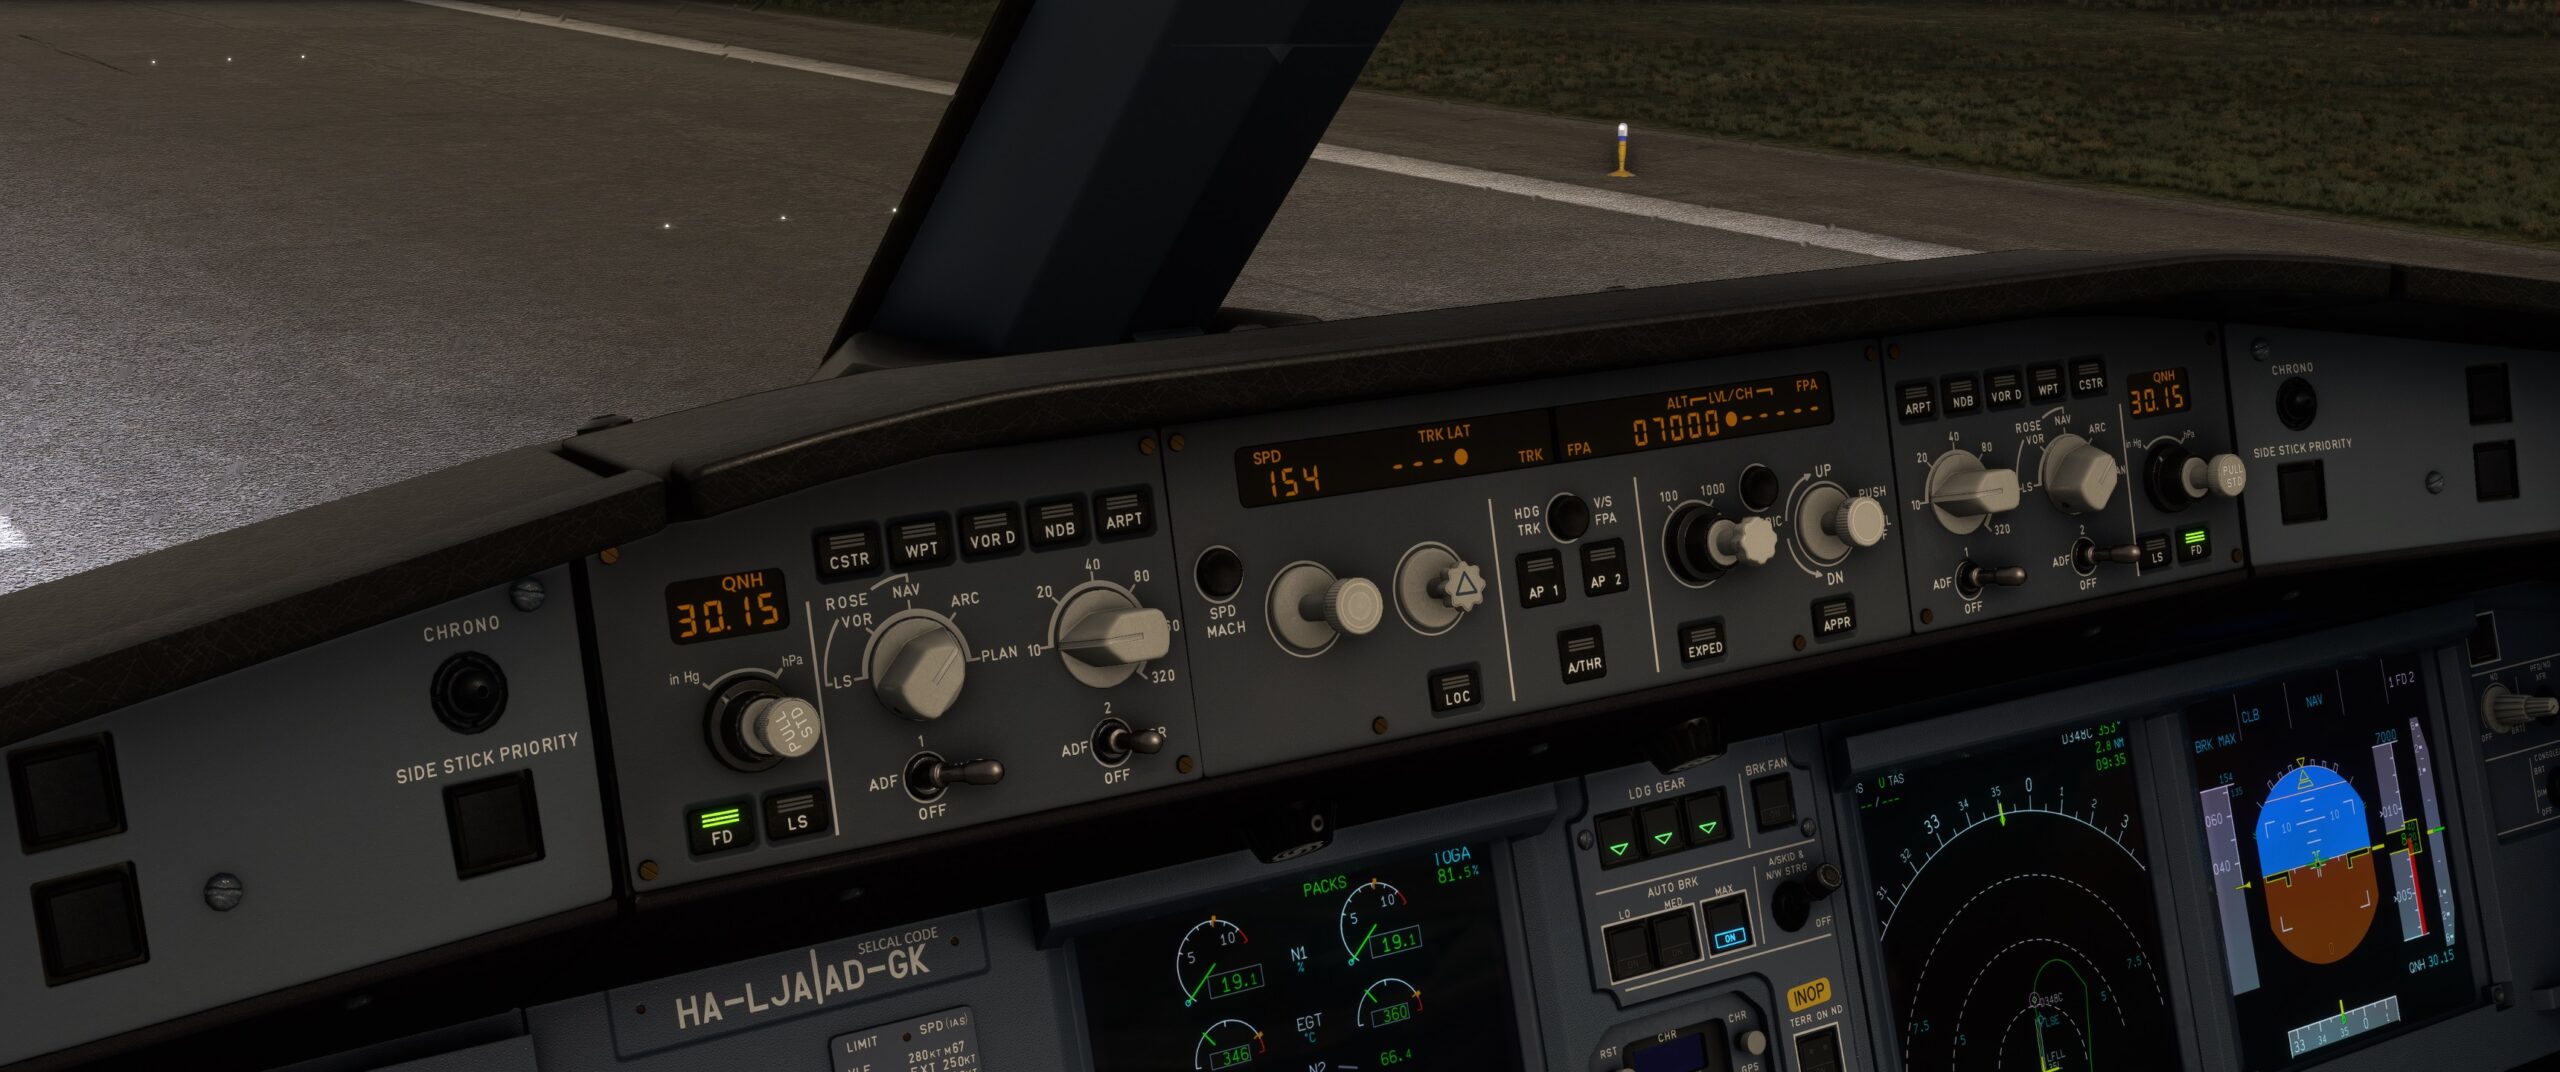
Most of virtual pilots interested in such piece of hardware for the autopilot of an Airbus A320/330/340 like this miniFCU should already now about the specific handling of the AIrbus controls. On the actual FCU of a real life airliner, pulling a knob of the FCU will switch the autopilot in “Selected” mode, while pushing the knob switches the autopilot in “Managed mode”.
In selected mode, the flight crew applies the precise setting that they decide, when they decide.. and the autopilot applies the flight crew decisions if they remain in the normal flight envelope. This means that the autopilot obeys these instructions if the selected settings comply with the safe conditions of flight.
In managed mode, the flight crew lets the aircraft computer decide, apply and follow the flight plan in both lateral and vertical navigation according to the waypoints, altitude constraints, flight condition, and performance settings that were preset before the flight.
So if you wonder right now if you can simulate these different operations of the miniFCU knobs, the answer is yes with no exception, when the aircraft addon that you selected can actually handle them on the software side of course. That’s why the manufacturer highly recommends the most to use FlyByWire A32NX in MSFS, and ToLiss Airbus series in X-Plane. On their hardware side, the knobs have spring-loaded knobs, with precise rotation functions (with the accurate number of cranks) to give you a very realistic and precise experience in flight. We have mainly tested the miniFCU with the FBW A32NX model in Microsoft Flight Simulator, and we also tested it with Fenix A320 in MSFS.
Flying
During the preflight preparation phase, you will already – but quickly – start to use your miniFCU to setup the initial climb altitude authorized by ATC in your IFR clearance. Pull the altitude knob, and rotate it to display the desired altitude, you can already feel the clicks around the clock. Great, you feel it like you are the Captain in Command ! It’s directly synchronized with the 3D display of the FCU in the flight simulator, the delay is really short. As the numbers scroll up on your unit, you can check how the same happens in the virtual cockpit.
At this stage, you will already think that you miss their upcoming miniECAM or miniEFIS units, because interacting with the physical miniFCU is great, and you would like to expand the same experience to the whole panels, when you need to set the barometer setting, review your flight plan on the navigation display, or when you review the different ECAM pages for the APU start procedure, the flight surfaces control check, etc.
Aligned on the runway, authorized for take-off by the ATC, arm A/THR on the miniFCU and push your engines throttle further than the CL crank. You won’t fail and the managed thrust of your Airbus will be automatically triggered for a safe and successful take-off. If any change of your speed, heading, altitude target, or vertical speed becomes necessary, then you have all the functional and direct features available to you on the miniFCU. Raise or lower the climb speed, push its knob to level off, adjust the altitude target by hundreds or thousands, speed up the climbing process by using the EXPED buttons, etc. Everything have worked flawlessly during my tests, I used mainly the FlyByWire A32NX in Microsoft Flight Simulator.
You even have the ability to switch between the HDG-/VS and FRK-FPA modes with its respective button in the center of the miniFCU. The first one stands for Heading – Vertical Speed. In this mode, the setting you select will automatically compute the correct aircraft nose direction to make you follow the selected heading taking in account the current wind forces that could make you deviate from the desired heading, inducing a drift off the expected flight path. Your vertical speed will be also maintained, at the same rate. If you switch to the alternative mode, TRK-FPA, you will order the flight director to follow a track (TRK), instead of a heading. And for the vertical navigation, you will set an angle of climb/descent (FPA : Flight Path Angle), instead of a constant vertical speed. These different modes will affect and command the attitude and drift indicators on the primary flight display. For example, during a landing phase with crosswind, using the TRK-FPA mode will help the pilot in following the actual runway heading with a drift indicator centered in the display to see at a glimpse the needed correction he needs to set to compensate in order to stay in the runway alignment.
You can get this same and high level of immersion, accurate and direct control on your autopilot in all phases of flight with the miniFCU. Despite of its compact format, and reasonsable price, this device is not a cheap one with basic and unreliable controls. At the contrary, it works like a charm with the supported aircraft add-ons that are listed by the manufacturer miniCockpit. We’ll meet also here the limitations of miniFCU. This high level of accuracy requires a minimum of communication between hardware and software. And if both parties, the aircraft developer in one hand, and in the other hand the hardware manufacturer cannot work or communicate fully, you will have some limitations in the features or it will even be uncompatible. The popular Fenix A320 for MSFS is not giving full access to miniFCU device for example. Although all features and controls seem to respond from the miniFCU input, its digit displays will remain dashed and you can only rely on the 3D virtual cockpit to read the airspeed, heading, altitude and vertical speed. That’s annoying of course when you are in selected mode. If you can accept that, you can at least keep on controlling your autopilot with the miniFCU on your desk, and just check the digit displays in your flight simulator window.
During the cruise, I’ve been used to switch windows between the flight sim to go into the Data Link Software window of miniCockpit. There I switch the EXPED button feature to LS, the landing system activation. During the final approach, I can easily activate all necessary buttons by a few pushes on the miniFCU controls: LS to initiate the Landing System, APPR to capture the ILS localizer and glideslope, and then test the full autoland feature by activating both autopilot AP1 and AP2. Here again, miniFCU didn’t fail and could control perfectly the aircraft systems until the flare and safe landing automatically handled by the Airbus systems.
Conclusion
The miniFCU stands out as a commendable addition to flight simulation hardware, offering an accurately replicated Airbus style that adds a touch of authenticity to the flying experience. The inclusion of rotary knobs with distinct push and pull functions enhances the versatility of the device, providing users with a nuanced control interface. Its seamless compatibility with several default and popular add-on aircraft across both MSFS and X-Plane ensures a broad range of options for users. The miniFCU’s excellent value for money and hassle-free, plug-and-play installation further contribute to its appeal. Only P3D users will feel a bit set aside due to the non-supported FSlabs A320 though, and that’s a pity at this stage. The manufacturer declared that there’s a still an hypothetic option on this one but it will depend on the users demand, their workload, and their results with the already available features.
However, it’s essential to consider a few drawbacks. The USB cable length may pose challenges for the users with specific setup requirements, for those who purchased the device through the initial Kickstarter campaign. All new orders confirmed in 2024 will ship a much longer cable, of 1,50m long instead. That’s much better. The other flaw of the manufacturer choice is to use a micro-USB pin on the backside of the device. You will have to be careful at inserting the pin as you must respect the correct up/down sides. If miniCockpit had chosen a USB-C connector, it would have been easier. You could just connect it no matter the up/down sides, you could replace the original cable with an even longer cable USB-A/USB-C that you may if your setup requires this extra length. But, this change would have also affected the final price, I guess, since USB-C implies several changes : more expensive connector, different chips and more complicated in-house tests before shipping due to the numerous pins in USB-C standard.
The limited support for certain aircraft, such as the Fenix A320 in MSFS and a few other Airbus add-ons, might disappoint users who seek comprehensive coverage across different simulations. Notably, the absence of digit support in the Fenix A320 MSFS adds a limitation to an otherwise well-rounded device.
In the grand scheme, the miniFCU offers an attractive balance of features, functionality, and affordability, making it a compelling choice for flight simulation enthusiasts. As the manufacturer continues to address and expand its compatibility with additional aircraft, the miniFCU has the potential to become an even more integral component in the virtual cockpit of aviation enthusiasts flying with Airbus. And the future looks bright and exciting with the announcements of the other two modules, miniEFIS and miniECAM.
Review by Sebastien B.
| PROs | CONs |
| ➢ Accurately replicated Airbus style ➢ Rotary knobs functions (Push for Managed mode, Pull for Selected mode) ➢ Several default and popular addons aircraft fully supported in both MSFS and X-Plane ➢ Good value for money ➢ Flawless and fast install, plug-and-play ➢ Attention to customer care, regular software updates, and new features added already since initial launch | ➢ USB cable length too short (for initial orders via Kickstarter, new 2024 customers will receive a much longer cable, total length 1.50m). ➢ micro-USB connector of the original cable (on the device side, USB type C would have been better) ➢ Fenix A320 MSFS limited support at this time (controls ok but no digits) ➢ A few other Airbus addons are not supported yet (Aerosoft A330 P3D, FSlabs A320 P3D, LatinVFR A320/A330 series MSFS) |
| Purchase | Test System |
| miniCockpit Manufacturer: miniCockpit Price: retail USD 269.00 (+ shipping/tax depending on country of delivery) 10% OFF for SIMFLIGHT readers by using the link above. Price for early adopters Kickstarter (campaign ended) was a minimum USD 99.00 (+shipping) | Intel i7 10700k 32Gb DDR4 RAM Nvidia RTX 2070 Super 8 Gb VRAM Windows 11 Microsoft Flight Simulator (2020), FBW A32NX (freeware), Fenix A320 (payware) |