

 Anyone who has ever been in the market for a new joystick, knows there’s an amazing range of products out there. From cheap and simple €20 pieces, to professional looking pieces of hardware costing €200 and more. Recently, Mad Catz has expanded our choices in the higher-end segment even more with the newest product from their Saitek brand: the Saitek X-55 Rhino H.O.T.A.S. System. Slotted just above their very popular X-52 Pro, the X-55 Rhino replaces the revolutionary X-65F as the top-of-the-line pro flight stick in the Saitek range. Unfortunately, I never had the chance to test the non-moving, force-sensing X-65F. Therefore, I’m not well suited to compare the X-55 to the product it replaces. But apparently, the force-sensing technology was as revolutionary and controversial in the flightsim market as it was when first introduced in the real world aviation market, and didn’t catch on with the crowds as much as hoped. Anyway, with the X-55 Rhino H.O.T.A.S. system Saitek took a step back to a classic, spring loaded moving stick. But with a twist! Let’s take a look…
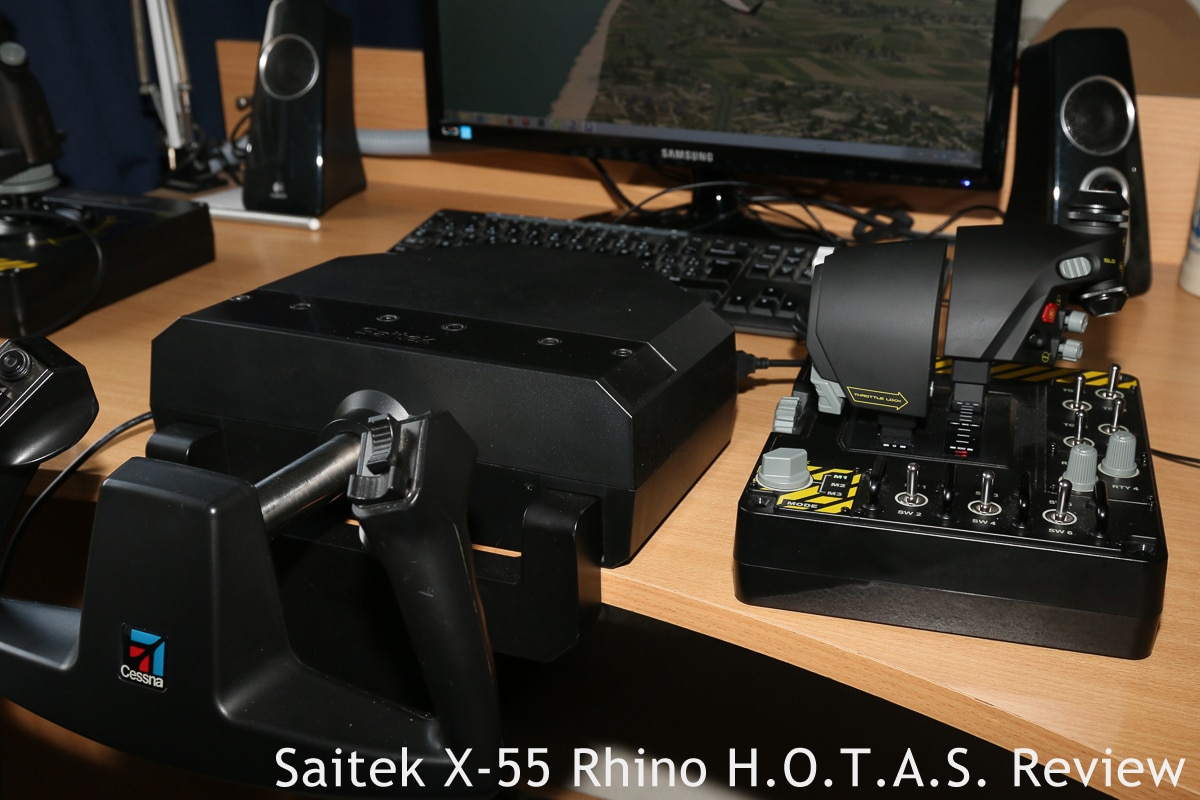
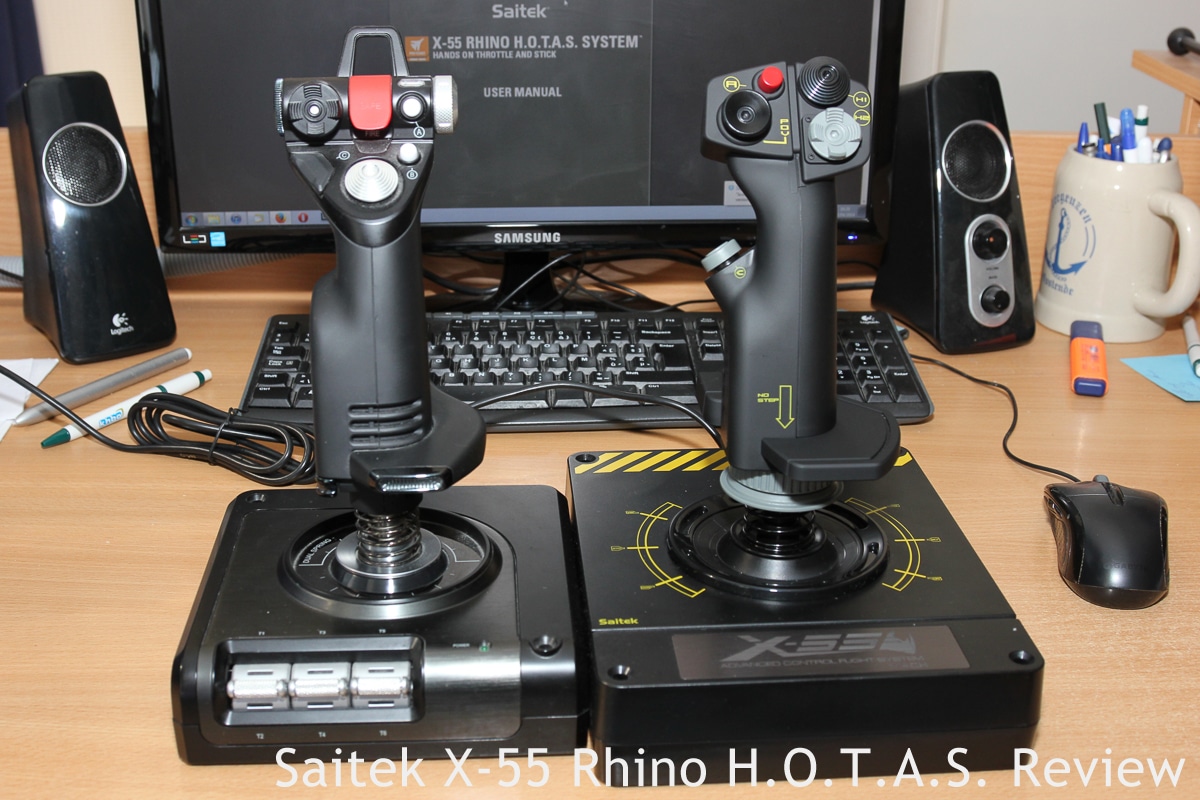
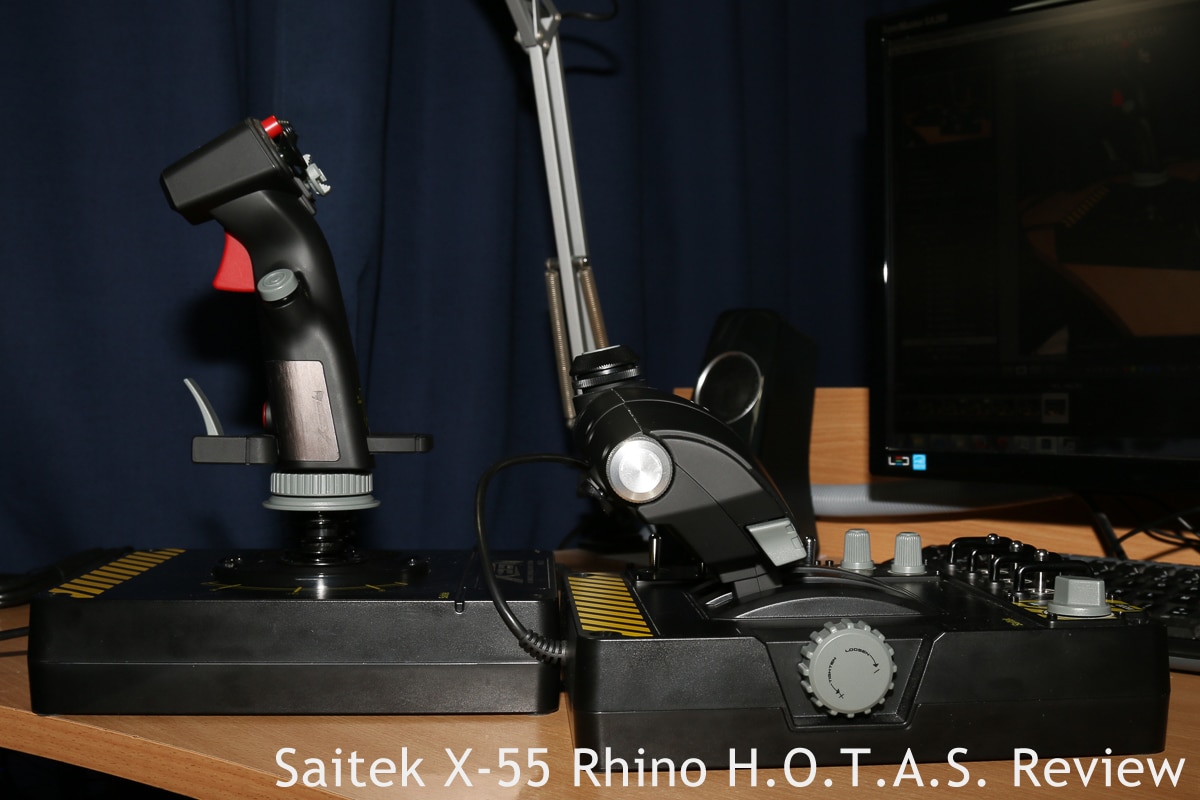
  Overview: Like most products in the high-end range, both from Saitek and other manufacturers, the X-55 Rhino is a 2-part system, consisting of separate stick and throttle units. But unlike the X-52 and X-65F, the 2 units of the X-55 are truly separate, each with its own independent USB-connection. Both stick and throttle are mounted on big, sturdy bases with predrilled mounting holes. The biggest difference in the bases is that the base of the throttle is literally covered in switches and knobs, while the one for the stick is devoid of any, in keeping with the HOTAS philosophy. The handles themselves borrow heavily in shape and function from the X-65F, but they’re not identical to those of their predecessor. The X-55 stick hosts 4 push buttons, a single-stage trigger, and pinkie button and 3 8-way hat switches. As said before, the base of the stick is devoid of any buttons. The most unique feature of the stick is that you can easily and quickly change springs to get a different feel in centring force. More details on this cool feature later in the review.
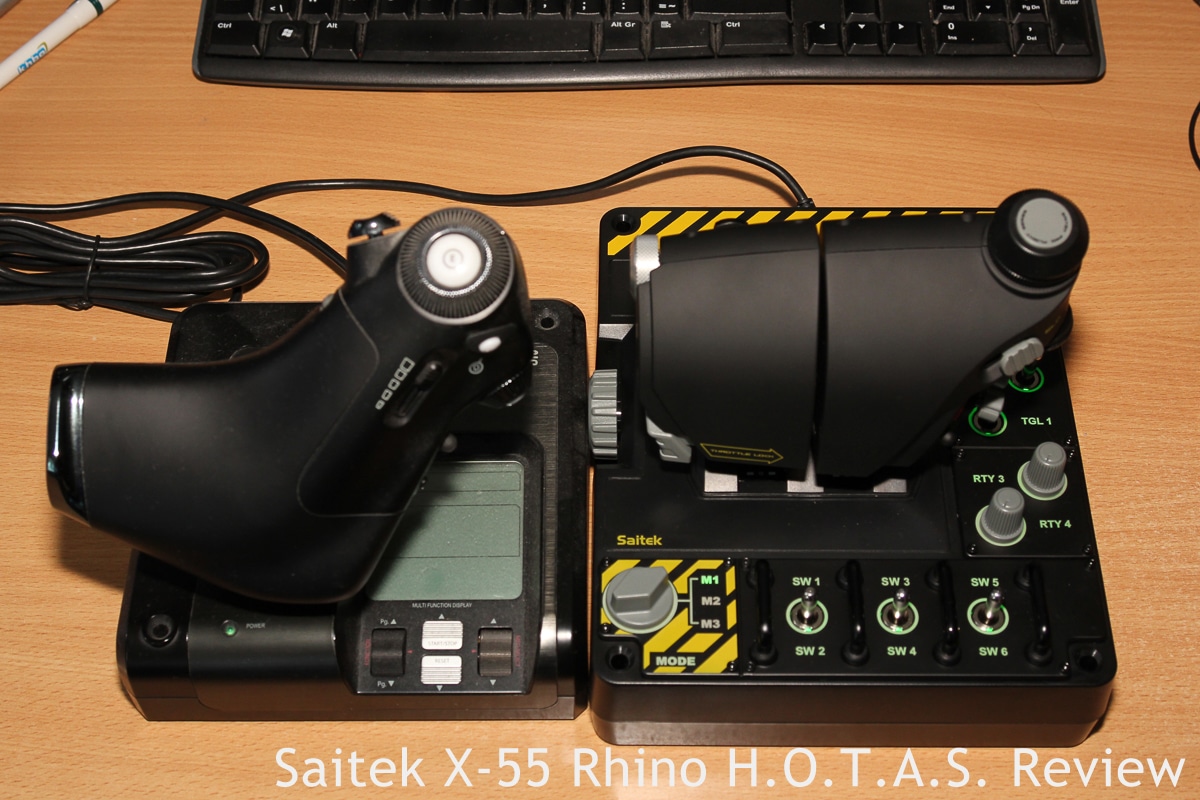
 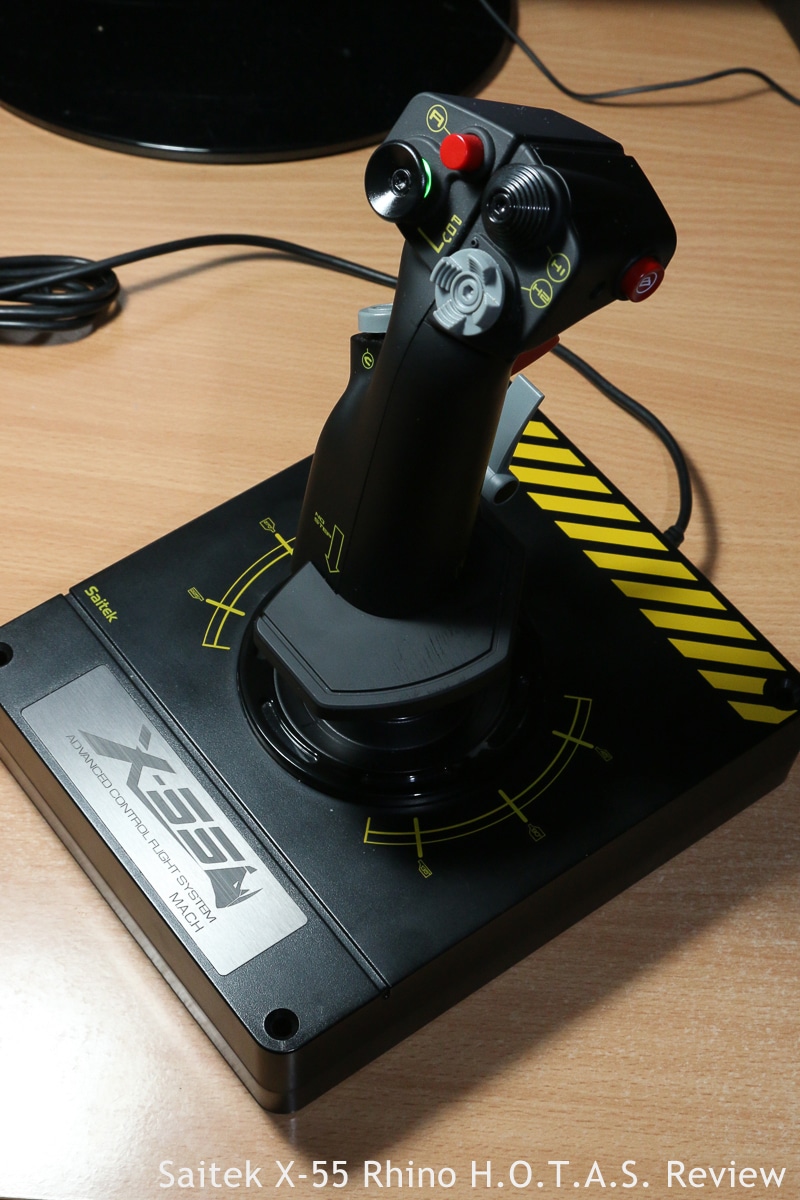 The throttle unit features 2 independent throttles which can be connected with a throttle lock to get a single moving handle. On the throttle handles you get 3 push buttons, 2 8-way hat switches, a mouse nipple, a 2-position slider, a 3-position button, a rotary wheel and last but not least: 2 rotating dials with another 2 integrated push buttons. On the base of the throttle unit, you get 7 spring loaded 3-position switches, 2 dials, the 3-way mode button, and the friction knob for the throttles. A quick count gives you a possible 70 functions and 11 axes you can assign. If you use all 3 modes to their fullest potential in the software, this grows to no less than 210 discreet and 11 analogue functions! This sounds mightily incredible in advertising, although I doubt anybody will use all those unique functions. But the potential is there.
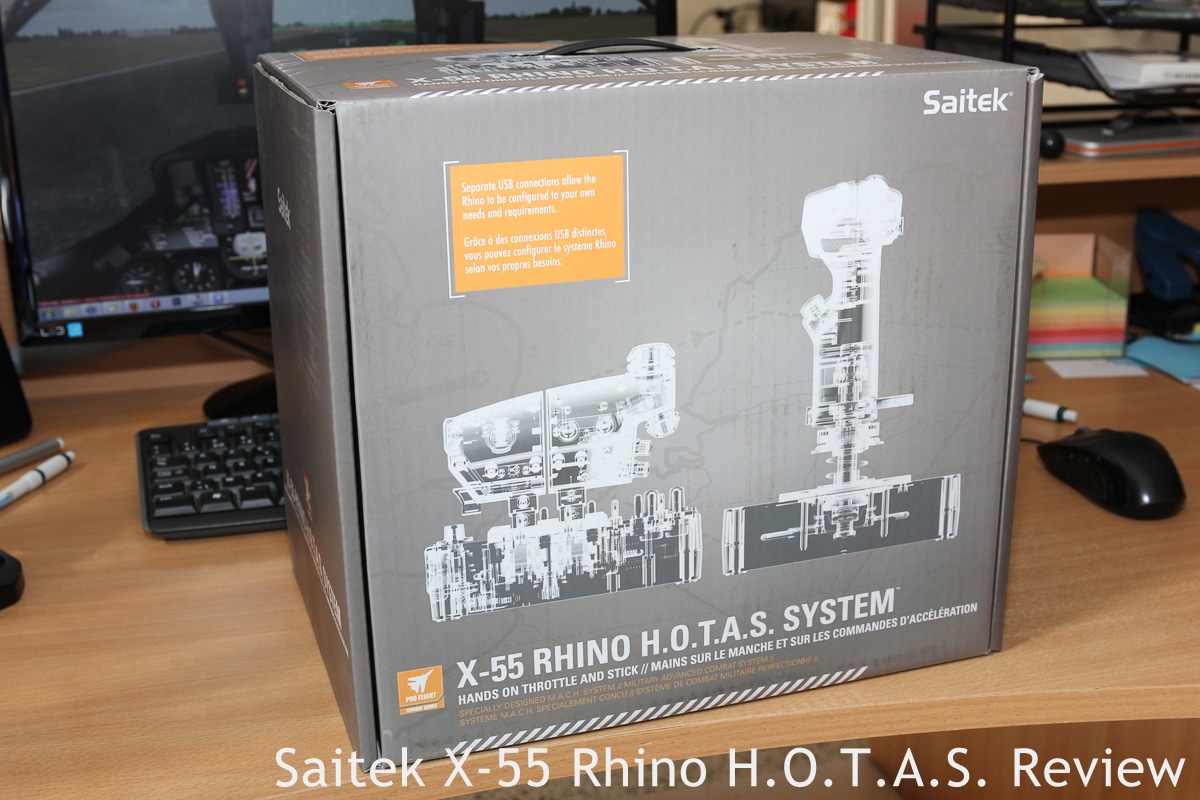
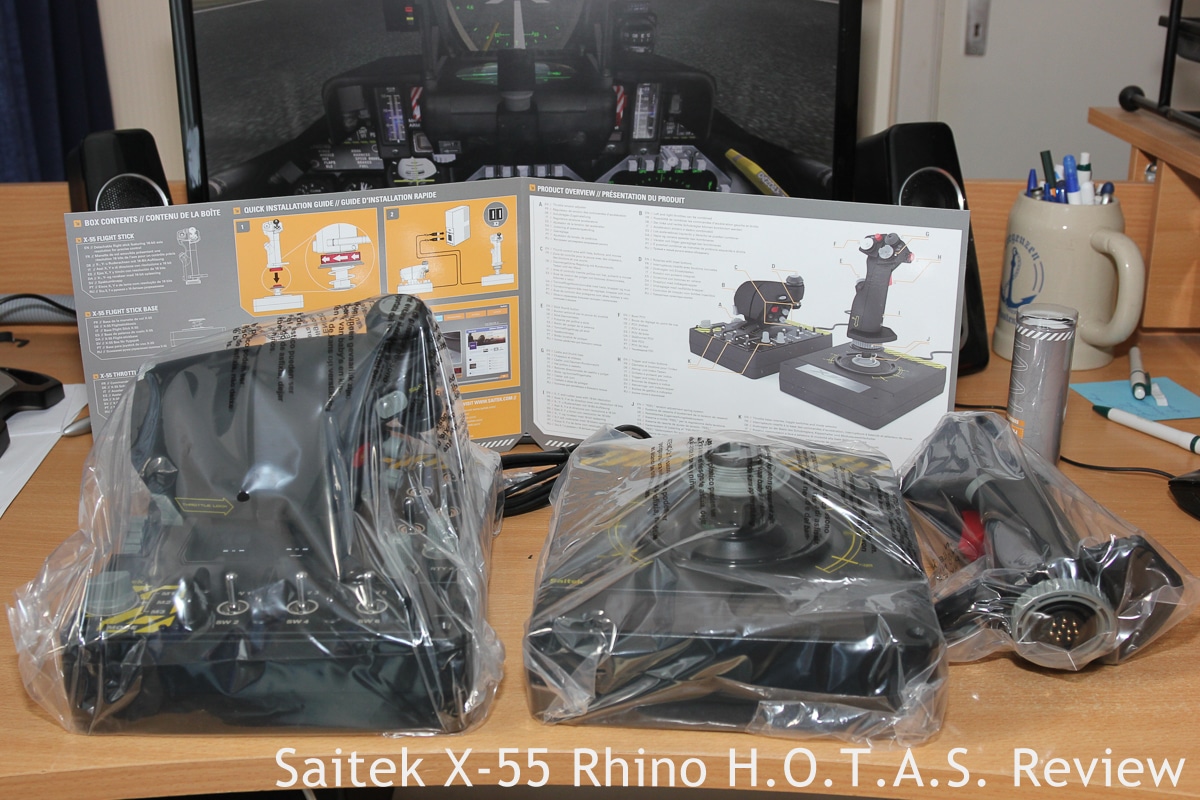
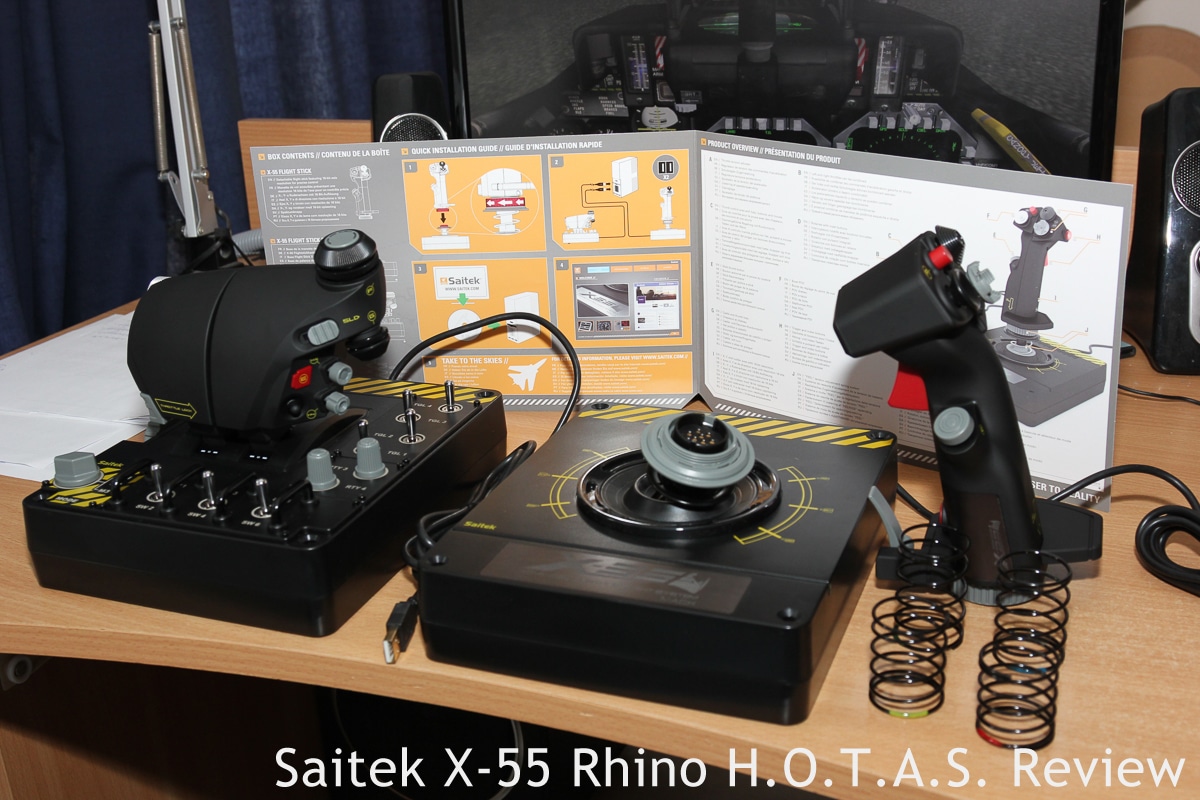
 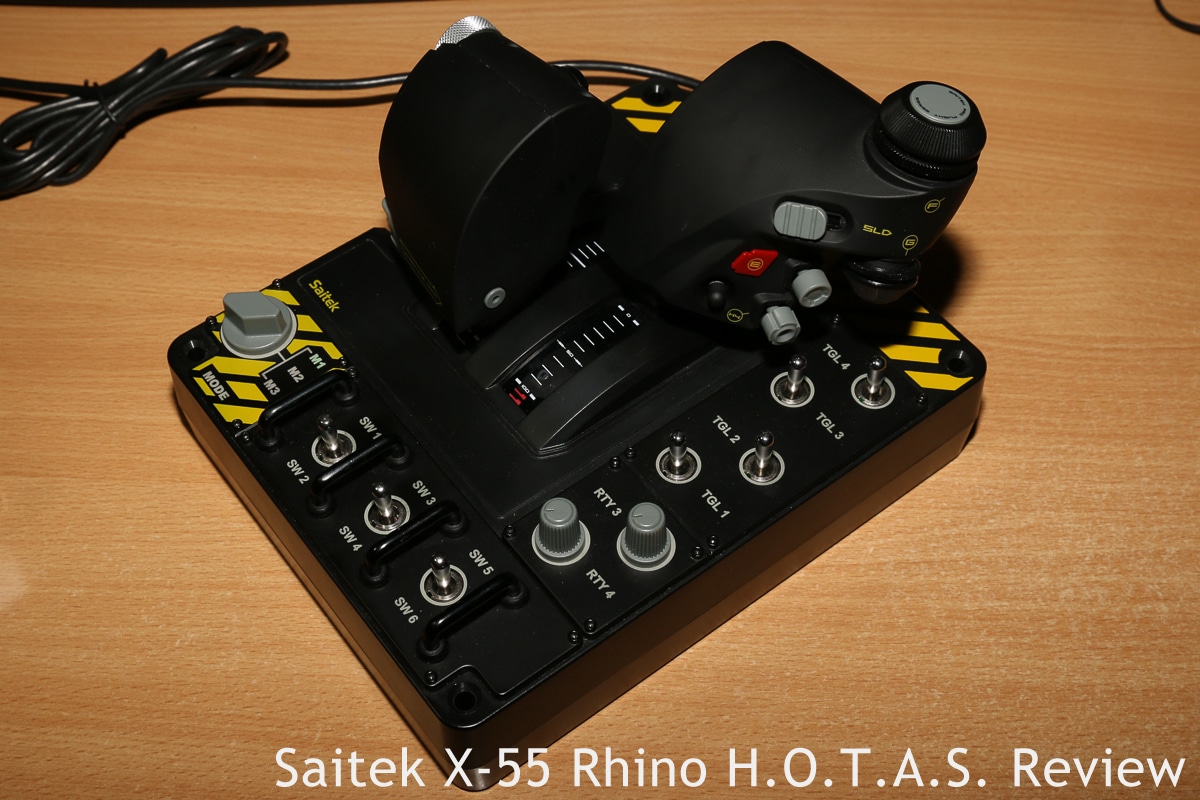 Unboxing: Let’s take a look at how this piece of hardware is delivered to you. The pictures will tell the true story in this section, but I’ll provide some text nonetheless. My X-55 Rhino was delivered to me by parcel service. It came in a big cardboard box. Inside this box was the actual X-55 Rhino box: a very nice box with a carrying handle, and covered in artwork, visuals and text. Inside that box, you’ll find the X-55 Rhino in 3 pieces: throttle unit, stick base and stick handle. As well as a plastic tube with 3 colour coded springs, a flyer with a quick start guide, a product overview and a list of the box’s contents. Finally, you’ll find a letter telling you why there’s no disk with drivers and software, and where you can get those. Everything in the box is packed in sturdy cardboard moulds that keep everything from shifting and bumping into each other during transport. Every piece is also packed in a clear plastic bag to keep it clean and scratch free. This is my fourth Saitek product, and I really like the quality of their packaging. It’s reusable, sturdy, good-looking (for a box), and most importantly, keeps the product safe during transport.
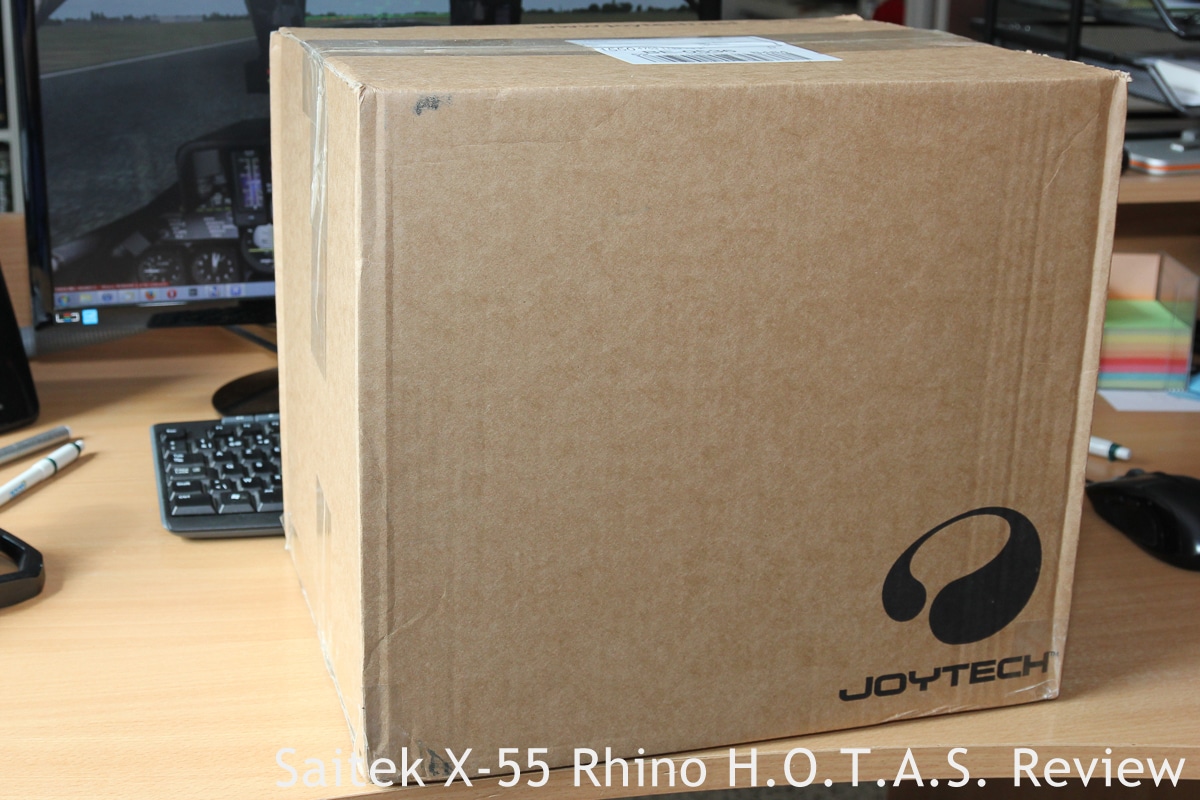

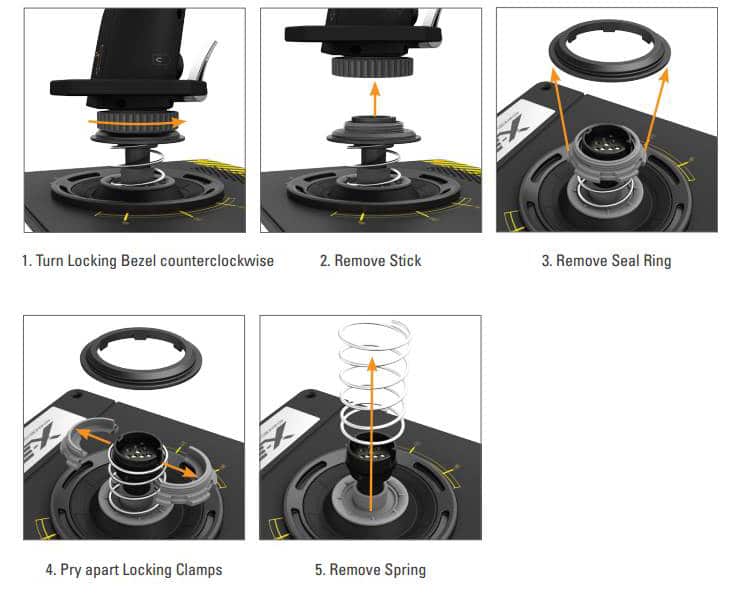
 Hardware: Let’s talk about 2 defining features: the interchangeable springs and the separate USB-connections. Let’s take the springs first. If you ever have unpacked a new joystick before, seeing that the X-55’s stick is not attached to the base when you open the box, is surprising. But not to worry, attaching it is as simple as positioning it right, and tightening a single screw. Making the stick detachable is of course not done without reason. It is needed to be able to change the springs. The X-55 Rhino comes with 4 different springs, and can also be used without. This gives you 5 different levels of centring force in the stick, from none at all (no spring) to quite stiff (longest spring). Despite looking very good in marketing, this system actually is quite useful, and more importantly: easy to use. You can change the force required to move the stick to match the aircraft you are flying. Helicopter pilots, for example, will generally choose a softer spring, while fighter pilots and people flying Airbus aircraft will tend to choose a stiffer spring. And of course, you could just adjust it to personal taste as well. Changing the spring is quite easy. With some practice, one can do it smooth and quick, easily within 45 seconds or less. Out or curiosity, I timed myself changing springs. From ready-to-fly, to ready-to-fly with a different spring, I once managed to do the change in 28 seconds. To store the unused springs, you get a plastic container that will fit 3 springs (although just barely if you install one of the 2 shortest springs on the stick).
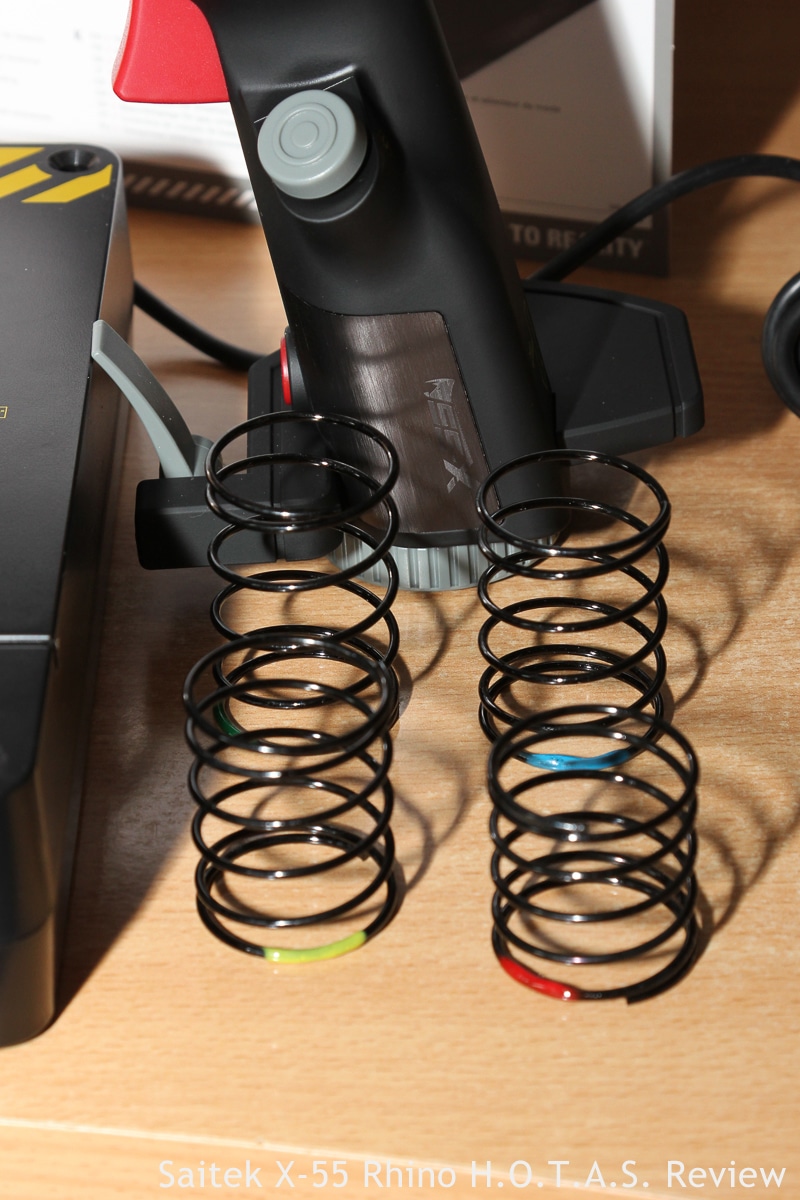
The second special feature of the X-55 Rhino H.O.T.A.S. system is the fact that the stick and throttle units are not connected. They both have a separate USB-connection. A consequence of this, is that your pc will see them as separate units as well, and treat them like that. Now, I have slightly mixed feelings with these separate connections. There certainly are overwhelming positive sides to this. There is no cable running between the 2 units, so you are not limited in how you position them in relation to each other. Another big positive is that you get the possibility of using one of the 2 units without the other. Using another throttle quadrant with the X-55 stick, or using the X-55 throttle unit with a control yoke instead of the stick, are possible scenarios that spring to mind. The one negative point of the separate USB-connections I can think of, is that free USB-ports can be a valuable commodity sometimes. Using 2 instead of one might be an inconvenience for some. Especially laptop users will know what I’m talking about. A nice hypothetical feature that would have solved this problem, is the installation of a USB-hub in the base of the throttle unit, like Saitek did with their yokes. But that would of course raise the price of the unit, and it can be discussed whether it would be worth it or not.
When we look at the hardware of this HOTAS system in general, the sheer size really springs out. It is almost as tall as its older stable mate, the (very tall) X-52 Pro. But especially the width and depth of the bases is impressive. At just over 18cm wide and 22cm deep, both the throttle unit and the stick take up a considerable amount of space on your desk. On the other hand, despite their size, they’re not very heavy. This is not really a down- or up-side in itself, but it does mean you’ll want to keep some of the weight of your hand/arm pressing down on the throttle and stick to keep them from moving around if they’re not bolted down when in use, especially when using a stiffer spring or more tension on the throttles. Most people do this unconsciously, but still…
If you’re wondering about the quality of the switches, I can say I’m very pleased with those. All switches feel solid, and all respond very well to inputs. I don’t have any problems with inputs not recognized, or other stuff like that. There’s also a clear feedback from all buttons, telling you you indeed pushed it. When talking about buttons, I especially want to mention the all-metal rocker switches on the base of the throttle unit. They look the part, they feel the part, and you’ve got lots of them. I really love these switches. Let’s talk about the real essence of a joystick: the axes! I already said you get 11 of these: 2 stick axes and a stick twist, 2 throttles, 2 mouse axes, and 4 rotaries. Generally, I’m very pleased here. All axes are smooth, and all commands are cleanly transmitted to the pc. Although one should expect no less from a brand-new, high-quality piece of hardware. Of course, I can’t say anything about how they will handle the passage of time and the stresses of years of usage. I do have 3 remarks I want to bring up about the axes. First, I sometimes experience some ‘stickiness’ in the movement of the stick. I narrowed this down to the centring mechanism not moving smoothly over the central column it’s mounted on. This is a known ‘maintenance issue’. Cleaning and lubricating the offending part pretty much solves this. Especially under heavy use and in dusty environments, you might have to do this semi-regularly. There are of course several different lubricants you can use, but I used graphite powder, and am quite pleased with the result. A second remark is that the throttles of the unit I was sent, moved very stiffly when right out of the box. I turned the tension knob all the way down, but still found them way to stiff for my taste. My next step was to violently move them back and forth several times. Apparently, this scraped of the newness, because they moved noticeably smoother after that. The amount of pressure required to move them hasn’t changed since either, so I’m not worried about this being a problem. They’re still quite heavy to move, but I’m perfectly happy with them now in everyday use. I still have the tension dialled all the way down, but this is primarily personal taste. My third and final remark here, is that I think the rotaries on the right throttle handle, and the mouse nipple, move to loosely. On those rotaries, that’s just personal taste, and doesn’t really affect use. The mouse nipple though, I find impossible to use, loose as it is. The one I find on my X-52 Pro is way better in this regards, and even there it’s not easy to use. That said, in everyday use, I’m very pleased with the axes on the X-55 Rhino.

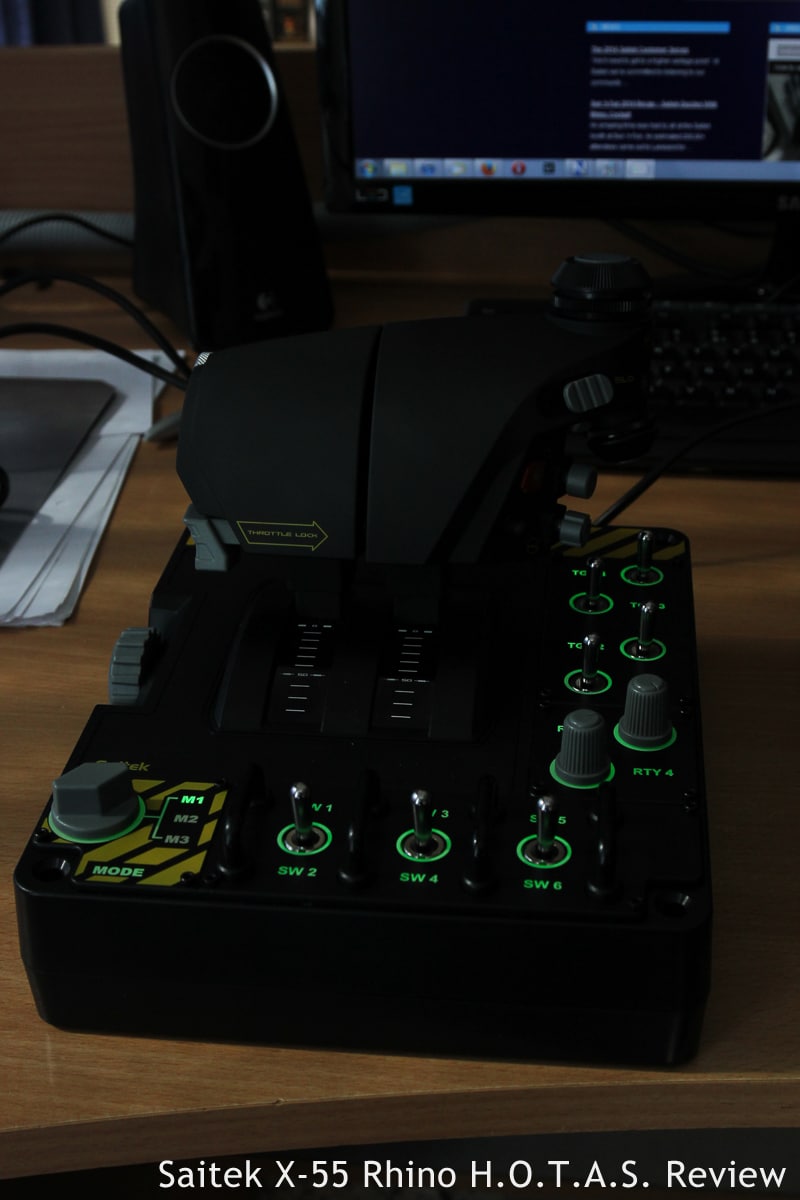
The final features of the Rhino I want to talk about in this hardware section are features very noticeably present on the X-52 and X-52 Pro: lighting and the LCD-screen. On the LCD-screen I can be short: the Rhino doesn’t have one, and I haven’t missed it so far either. The only thing I used it for on the X-52 Pro was the chronometer anyway. When looking at the lighting, a feature that was very ‘in-your-face’ on both version of the X-52, I can happily say it’s been toned down a lot on the X-55 Rhino. The only items on the stick that are lighted are the 3 hat switches, and those lights are only visible if you look at them from the side. In keeping with the HOTAS philosophy, as soon as you’ve built some muscle-memory with the X-55, you’ll not miss the lights even in the dark, because there’s no reason to move your hand away from the stick (no buttons on the base or stuff like that). The base of the throttle features more lighting, and here it is useful, as you need to move your hands away from the controls to use them. All knobs and buttons on the base are placed into a green lighted circle, and the name of the button or function is lighted in the same colour. The buttons on the throttle handles themselves are not lighted, but again, as with the stick, they’re placed in reach of your fingers when gripping the throttle, so you’ll just need to develop the right muscle-memory to use them in the dark. One small thing I do miss is that, in contrast to the X-52, the scales on the throttles are not lighted on the X-55. Not a critical item, but if would have been nice to have. In case you’re wondering: there’s only one colour for the lighting (the aforementioned green), and it can be dimmed or turned off with the software.
Software: To get both the software and drivers for the X-55 Rhino, you’ll have to download them from the Saitek website. As mentioned before: no disk in the box. The drivers come in as a 4,7MB .exe-file. The software is a 10MB file. You install the drivers first, the software last. Installation is easy, and with the usual steps for installing new software. One thing I found a bit uncomfortable is that the driver installation wizard didn’t have instructions in text. It did have graphics that told you to connect or disconnect the devices, but no written text to go along with that. Apart from that, installation was trouble free for me. The software that comes with the X-55 Rhino is a 2-part package. The ‘X-55_Rhino_Profiler.exe’ is a small process that runs in the background, almost transparent to the user. It automatically runs if you connect the X-55. The only thing you, as a user, can do with this program is choose which profile to run. (More on profiles in a bit) I also created a shortcut to the programs location since it sometimes crashes and refuses to restart automatically on my PC. In case you’re wondering: the cause of the crashes is a display driver crash, a problem I can’t seem to get rid of on my pc. So, not really a problem in the Saitek software, although I think it’s a bit strange the profiler also goes down with the display driver.
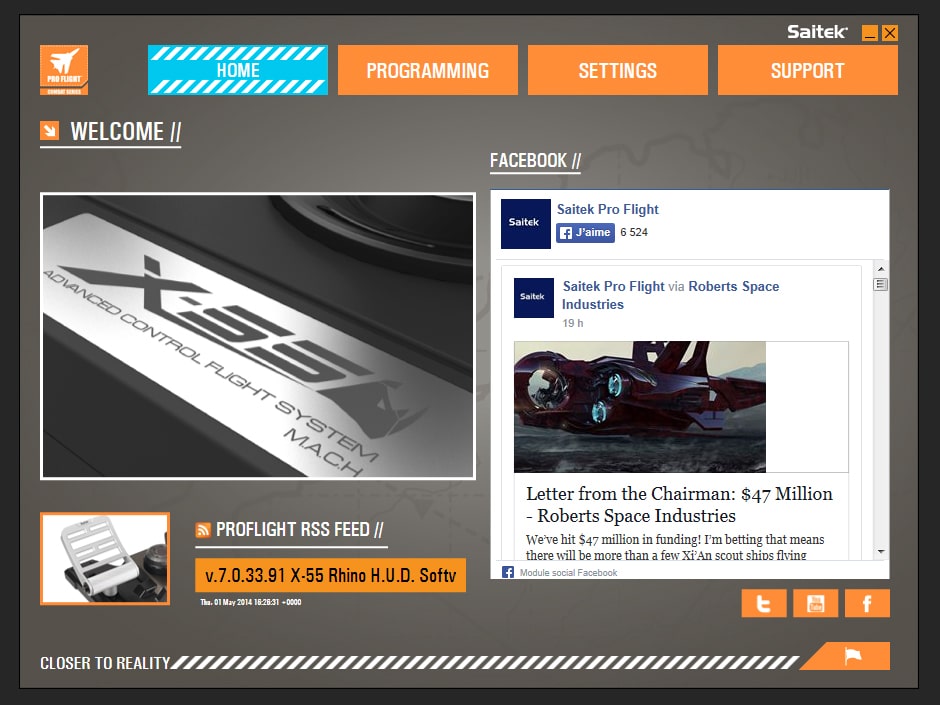
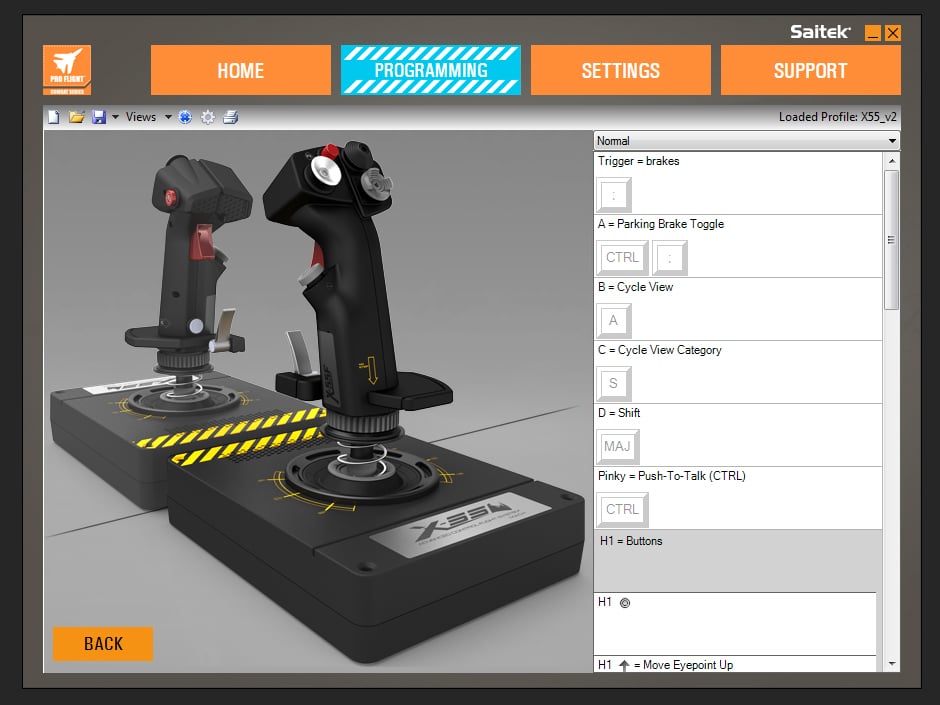
The second piece of software is the one the user will actually interact with. The ‘X-55 Rhino Configuration and Programming’ manager can be accessed through a desktop shortcut, through the Profiler icon in the notifications area of the Windows Taskbar, or by navigating to the installation location. There doesn’t appear to be a start menu entry for it. The software offers the user a whole lot of possibilities. First of all, it has links to the Saitek social media pages on its ‘Home’ tab. In the ‘Support’ tab, it also has links to the (online) manual, software and drivers download, a knowledge base and a Mad Catz contact form. 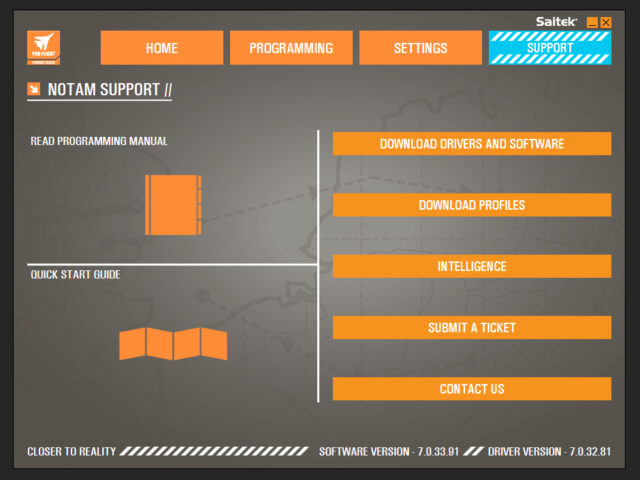 The ‘Programming’ tab, after choosing between stick or throttle, shows a layout previous Saitek owners will be familiar with from the SST software. It lets you create profiles where the X-55 will send a keyboard button press to the pc, instead of a simple joystick button press. The big, big upside here is that you’re not limited to single key presses. You can program macros, timed button presses and other complicated stuff like that that gives you great possibilities. You can create different profiles, for example, a profile for FSX, another for X-plane, yet another for DCS, and so on… Switching profiles is done through the profiler icon on the taskbar notifications area. The software also gives you the option to create different commands for every mode, so at the simple switch of the mode dial on the throttle unit, you can change the behaviour of your system. The X-55 Rhino has 3 modes available, one less than the X-65F. It also doesn’t have the ‘pinkie modifier’ that gave the X-52 a total of 6 modes. Still, with the sheer amount of buttons on the X-55 system, most users will be more than satisfied with 3 modes.
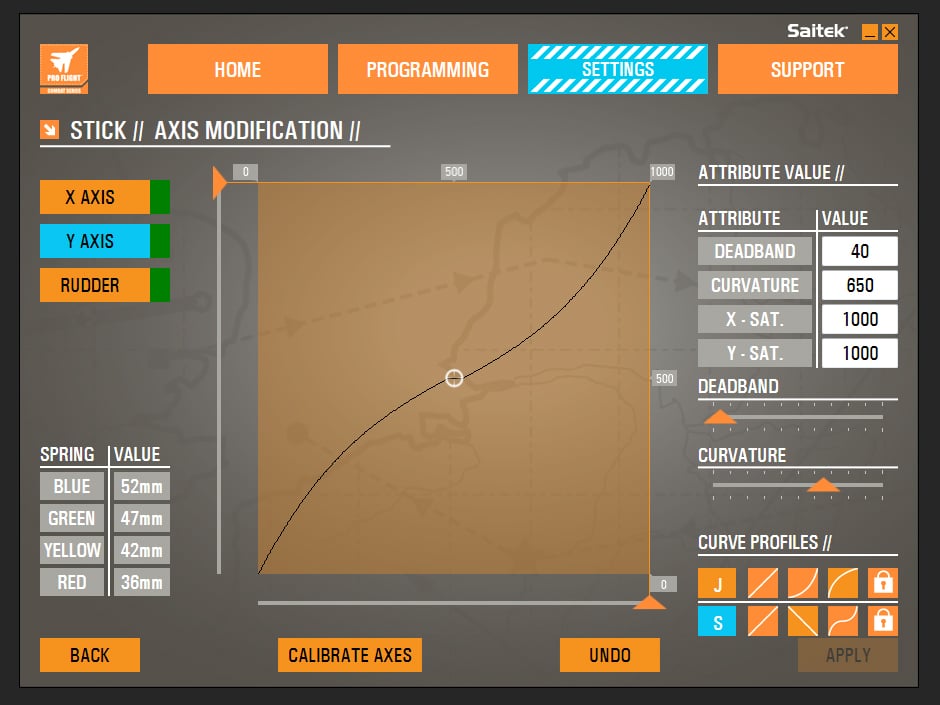
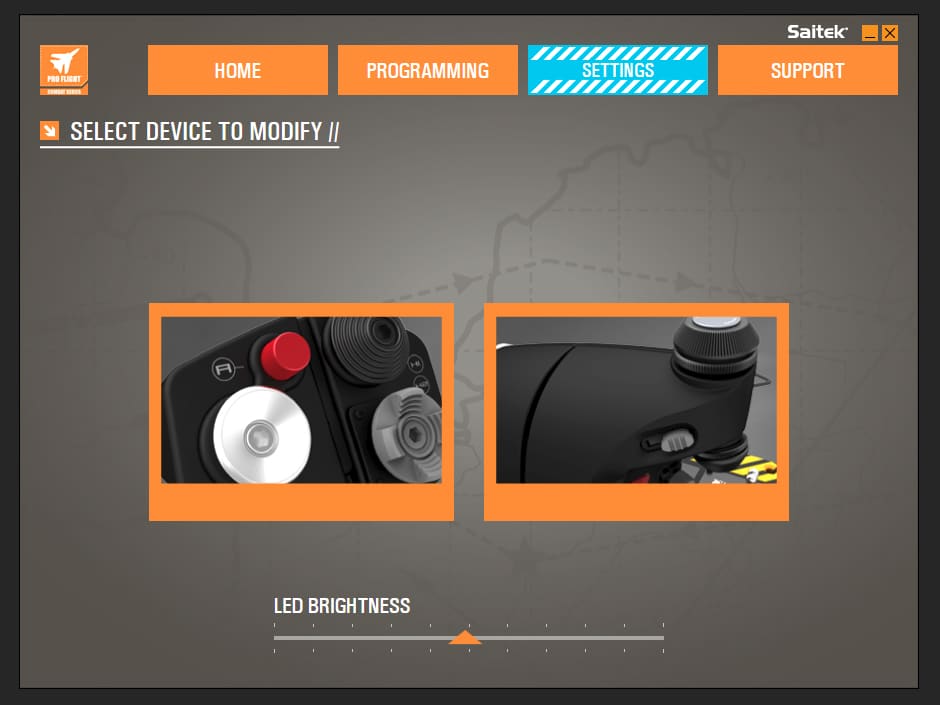
The final tab in the software is the ‘Settings’ tab. This tab lets you adjust the LED brightness of both throttle and stick (together, not separately). Once you choose between stick and throttle, you can calibrate the axes, and adjust their settings. You can add curves and dead zones to axes and adjust their saturation. And this for all axes separately. The possibility to do this is a huge feature. It means you’re no longer limited to the possibilities that are programmed into the game or sim you’re using. FSX, just to give an example, doesn’t give you all these possibilities. It lets you change the dead zones and sensitivity of axes. But it doesn’t let you change the curves, something DCS does. With the X-55, you can now change the curves of the stick on a firmware level, bypassing whatever limitations are in your preferred game or sim.
When I compare to my other Saitek products, all of which use the SST software, I experience the X-55’s software as a huge improvement, and a joy to use. It improves the areas that needed improvement, and keeps the useful functionality Saitek users are used to. Conclusion: I’ve been using the X-55 for some time now. And even after the initial ‘new-toy-giddiness’ wore off, I still very much like the entire system. It looks great, but more importantly, it works just as well as it looks. Maybe the best aspect of the entire system is the huge amount of possibilities it gives the user. This is a result of some nice hardware features like the large amount of buttons, switches and axes and the separate USB-connections. But the software is also partly responsible in creating these possibilities, with the use of different profiles, modes, and also axis calibration on a firmware level. The only thing that every really threatened my enjoyment of using it was the stickiness in the throttle axes, but lubrication reduced this to very manageable levels. I’ve already said I can’t comment on the X-65F, but in my mind, the X-55 Rhino seems like a worthy successor to any joystick. A big improvement compared to the X-65F that I can comment on, is that the X-55 is much cheaper (or should I say: ‘less expensive’) than its predecessor. The price of the X-55 Rhino at the time of writing is €199,99, $199,99 (USD) or £169,99. Like:
- ‘Professional’ appearance
- Lots and lots of buttons, knobs and switches
- Good build quality
- Interchangeable spring system
Don’t like:
- Stickiness in the stick, requiring lubrication
- No text instruction on the driver installation wizard
Useful links: Saitek Product Page 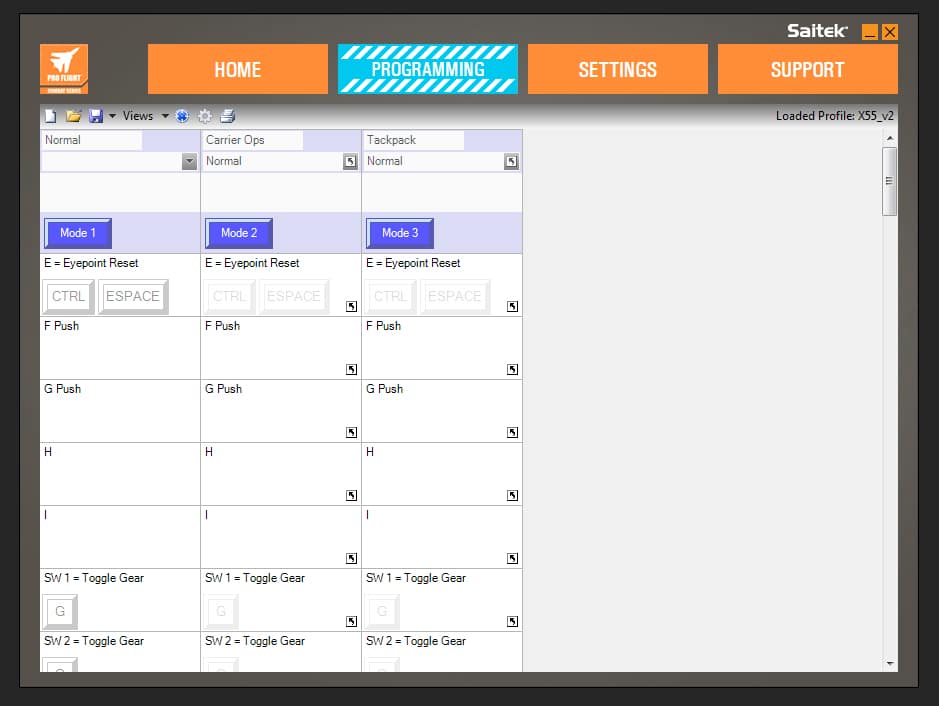


0 Responses
I’m in the market for a new joystick, but do you need a Ph.D. to operate that thing or what?
Great review BTW – still, I think I’ll go for something simpler,
Well, you need to take your time to configure and optimize all settings. This is not a stick for a weekend/casual flight simmer but for the hardcore fans. It’s like a PMDG plane: expensive, hard to learn but you’ll have the greatest time once you figured out how to use it properly 🙂
Coming from an X52 Pro, should I get this or a Saitek yolk?
Mike, that are 2 very different products, and different types of flying. A stick gives you a bit more flexibility. You’re unlikely to fly helicopters or fighter jets with a yoke… Keep in mind that with a yoke, you’ll also need rudder pedals if you don’t already have those.
Apart from that, it’s a hard decision to make. I have both, and use both all the time.
Thanks, Lars. I already have rudder pedals, so that would make the transition easier I suppose. I am leaning toward a yoke to bring some variety in. I also have trouble dialing in bank angle on certain planes like the NGX without altering pitch. I think a yolk might help with that issue. A beefier stick would be really really nice though, wish I had a bigger budget for this hobby sometimes.